


Gents
Not really an Etype question but certainly pertinent to Jaguar restoration...
I am currently in the process of buying another XJR as my daily runabout... and the drivers seat has a number of cracks in the colour layer. Being me - I cant really live with an untidy looking seat so I will be looking to fix it.
Has anyone tried one of the many kits that enable you to restore leather seats? Im also wondering what the life of such a repair is...
I would be interested in whether people have been successful / have disaster stories etc.
restoring leather seats having cracked colour
#1 restoring leather seats having cracked colour
1964 FHC 4.2
Etype restoration blog http://connor.org.uk
Etype restoration blog http://connor.org.uk
| Link: | |
| BBcode: | |
| HTML: | |
| Hide post links |
-
christopher storey
- Posts: 5698
- Joined: Sun Mar 09, 2008 3:07 pm
- Location: cheshire , england

#2
Chris : I went on the JECs leather restoration course last March, and it was as good a ?65 as I've spent with lots of hands on experience during the day on each stage of a restoration . I then bought about ?50 worth of the products ( mainly flexible fillers etc ) which the tutors brought , and had a go at restoring one of my Mark 2 seats, which had some very deep fissures in them . I was rather too impatient , and therefore did not get quite as good a result as the professionals, but with more practice - and patience - I think I could achieve it. Even with my less than perfect effort, the seats now look quite acceptable and I shall have another go over the winter on the next seat. There is another course coming up next March
| Link: | |
| BBcode: | |
| HTML: | |
| Hide post links |
#3
Chris,
I would e very interested in the March course as I have a tear to fix in my seat. where do I apply?
Tony
I would e very interested in the March course as I have a tear to fix in my seat. where do I apply?
Tony
Tony (E typed)
1962 E Type Series 1 Roadster (OTS)
Tony
1962 E Type Series 1 Roadster (OTS)
Tony
| Link: | |
| BBcode: | |
| HTML: | |
| Hide post links |

#4
IF you would consider buying in germany there is a company called "Lederzentrum" nearby who sell kits to repair this damage, AND they also can mix ANY leather colour and so on.
Highly recommended in germany, so if there?s no local solution I can help with these guys.
Carsten
Highly recommended in germany, so if there?s no local solution I can help with these guys.
Carsten
| Link: | |
| BBcode: | |
| HTML: | |
| Hide post links |
-
christopher storey
- Posts: 5698
- Joined: Sun Mar 09, 2008 3:07 pm
- Location: cheshire , england
#5
Tony : have a look on the Jaguar Enthusiasts' Club website . You do not have to be a member to go on these courses but you get about a ?15 discount if you are a member . I remember the tear in your seat - you can take it along on the day and they will show you how to do it
| Link: | |
| BBcode: | |
| HTML: | |
| Hide post links |
#6
Okay. I see the seminar and note that it is run by furniture clinic. Pretty impressive work. I look forward to trying it.
Any feel for how long it takes? As it's my daily driver I would need to factor in how long it would be off the road...
Any feel for how long it takes? As it's my daily driver I would need to factor in how long it would be off the road...
1964 FHC 4.2
Etype restoration blog http://connor.org.uk
Etype restoration blog http://connor.org.uk
| Link: | |
| BBcode: | |
| HTML: | |
| Hide post links |
-
christopher storey
- Posts: 5698
- Joined: Sun Mar 09, 2008 3:07 pm
- Location: cheshire , england
#7
I did one seat cushion in a day. As I say, I was impatient and cut a few corners, but a seat that was not torn I would say you could make a good job of in a weekend . You don't have to do it all in one go anyway - IIRC the tutors recommended leaving everything to harden for 7 days before putting the final lacquer on . The only thing to bear in mind with a modern car is that removing the seat is not always straightforward - airbag sensors etc have to be dealt with very carefully
| Link: | |
| BBcode: | |
| HTML: | |
| Hide post links |
-
christopher storey
- Posts: 5698
- Joined: Sun Mar 09, 2008 3:07 pm
- Location: cheshire , england
#8
Chris C : my PM to you should read " I will send you some pics"
| Link: | |
| BBcode: | |
| HTML: | |
| Hide post links |
#9
:) thanks chris. Duly replied. The XJR arrives this week so I will get a better look at it. I know there are no big problems just natural wear..
1964 FHC 4.2
Etype restoration blog http://connor.org.uk
Etype restoration blog http://connor.org.uk
| Link: | |
| BBcode: | |
| HTML: | |
| Hide post links |
#10
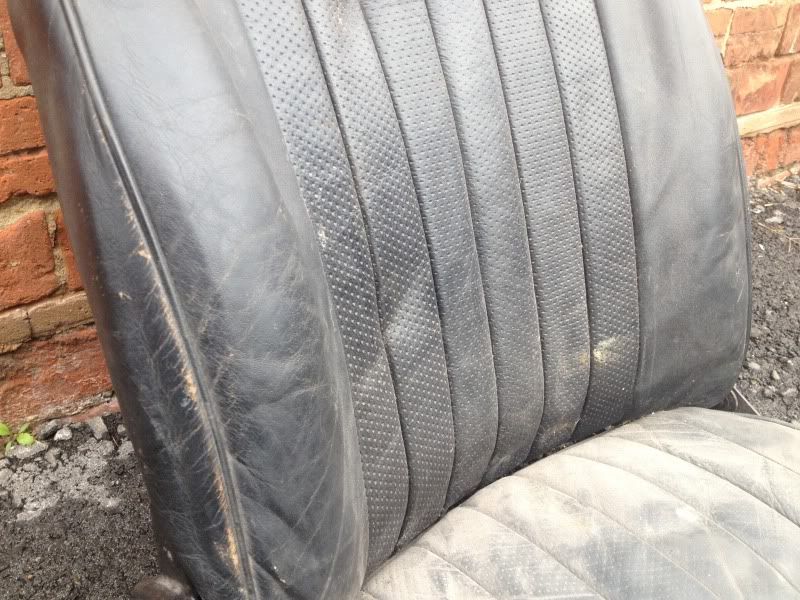
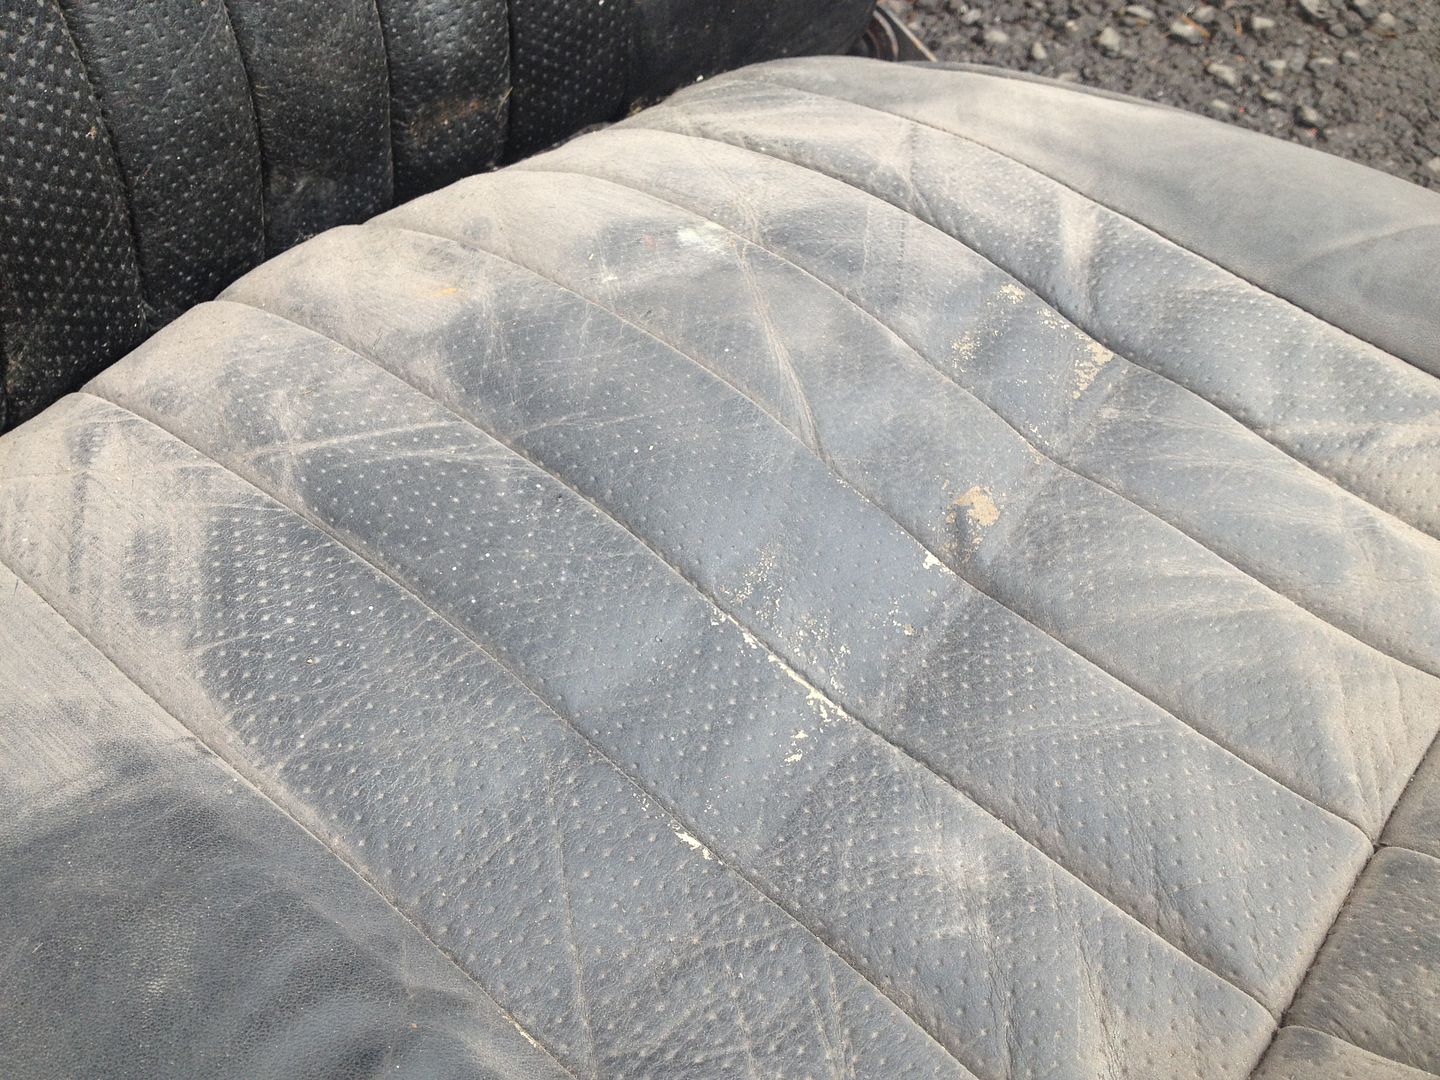
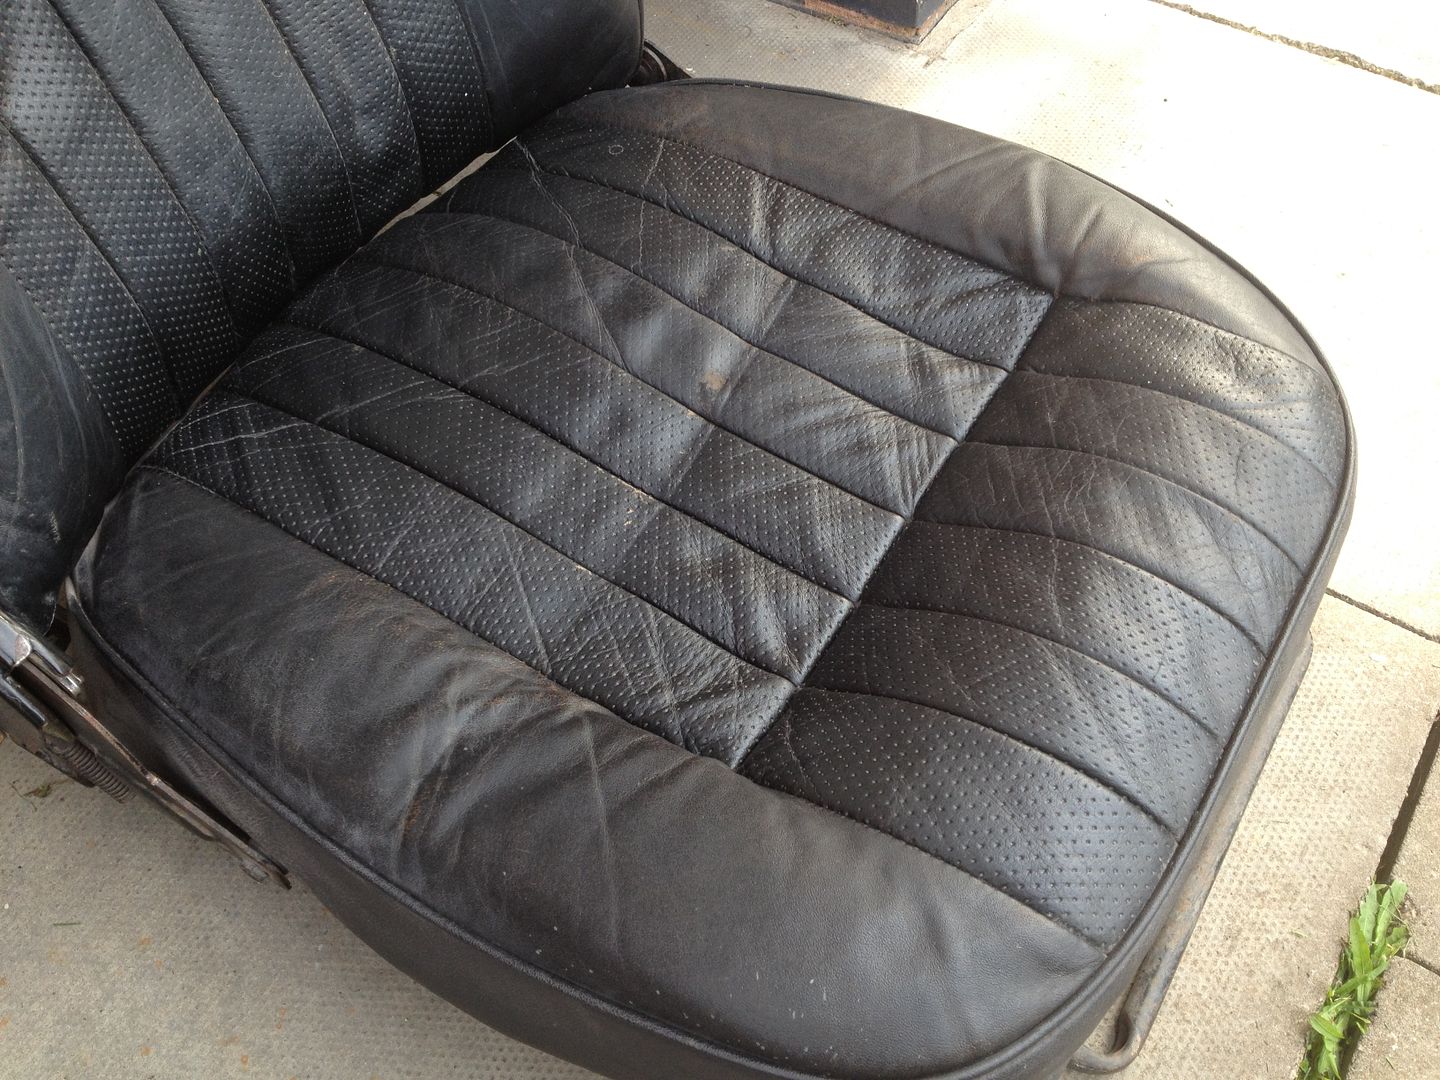
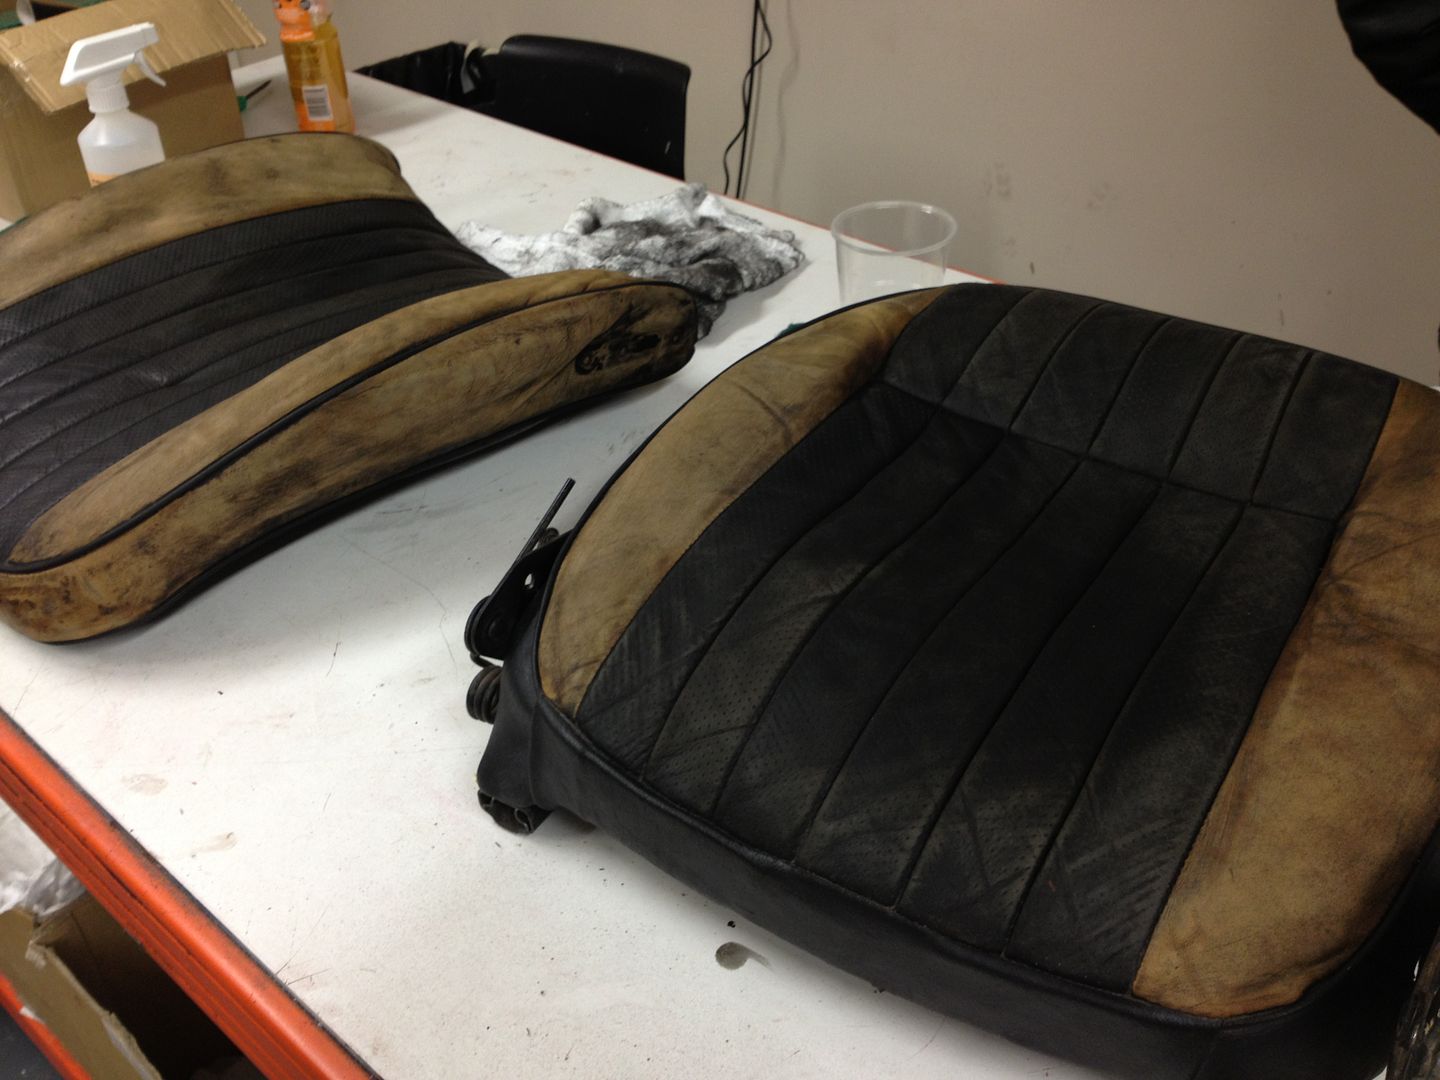
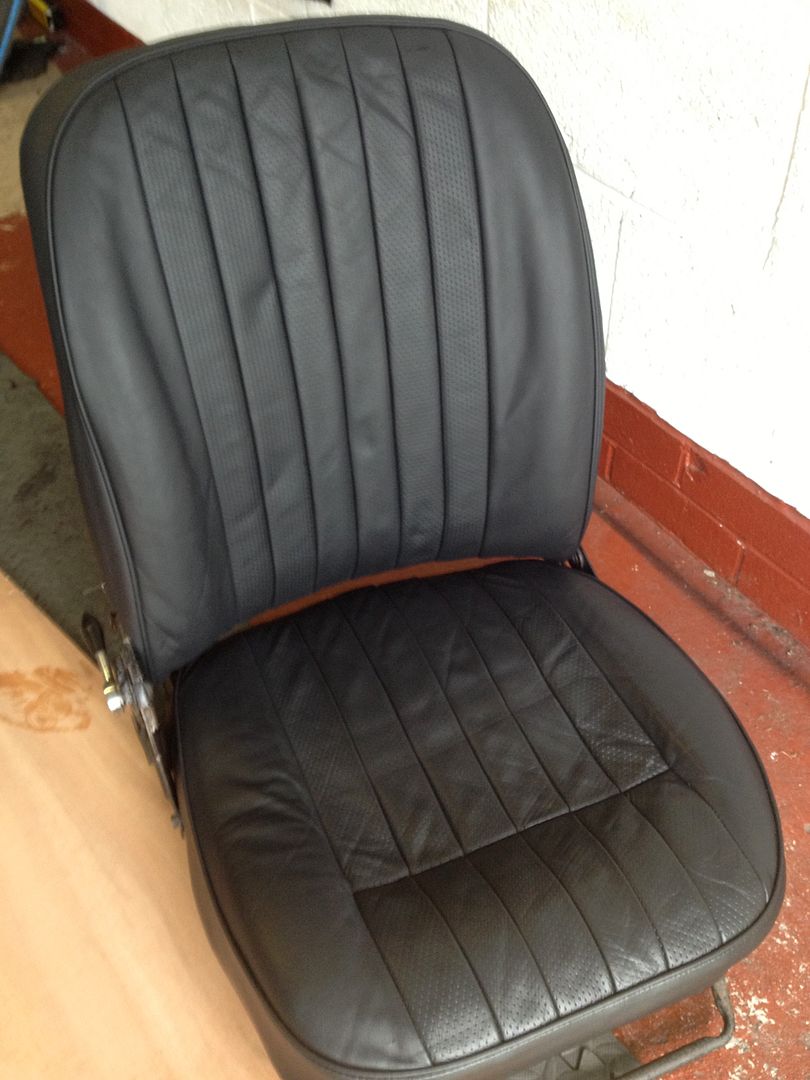
i attended a furniture clinic open day, this is what i achieved :D
befores
after a good scrub
during (on the day of the course, only the base of the seat was done)
finished it off at home
befores
after a good scrub
during (on the day of the course, only the base of the seat was done)
finished it off at home
| Link: | |
| BBcode: | |
| HTML: | |
| Hide post links |
#11
Thanks all - pretty impressive results so clearly this is worth doing. Looks pretty scary stripping the colour like that but I understand the reasons and I have the equipment to spray the colour.
Maybe I will do this job before I sell my other car so that I can take my time in the garage...
Much appreciated
Cheers
Maybe I will do this job before I sell my other car so that I can take my time in the garage...
Much appreciated
Cheers
1964 FHC 4.2
Etype restoration blog http://connor.org.uk
Etype restoration blog http://connor.org.uk
| Link: | |
| BBcode: | |
| HTML: | |
| Hide post links |


#13
I have booked the course so it will be interesting to see if I can repair the tear in my seat. I am presuming I will be able to fix it as part of the course?
Tony (E typed)
1962 E Type Series 1 Roadster (OTS)
Tony
1962 E Type Series 1 Roadster (OTS)
Tony
| Link: | |
| BBcode: | |
| HTML: | |
| Hide post links |
-
christopher storey
- Posts: 5698
- Joined: Sun Mar 09, 2008 3:07 pm
- Location: cheshire , england
#14
Tony : you can take your seat along and ask them for advice, and if you really wanted to , by pre-arrangement you could have a go at fixing it there and then. Of about 50 on our course, probably 40 or so brought their own specific seats along . However, we found we got better value by being one of a group of about 8 who had effectively 1 to 1 tuition on complete refurbishment of a rear seat cushion, from start to finish , so that one saw everything that was involved and could ask questions about dealing with particular faults e.g. tears, at the same time. We all had a go at hands on execution of every stage of repairs and this was the advantage to me
Repairing a tear involves making an aperture large enough to be able to infiltrate a square of textile backing under the tear, and then glue it to the underside of the torn leather , and glue the edges together. Thus the tear becomes effectively a crack which you then fill with the relevant flexi fillers, rub down with eg wet and dry, refill with finer filler , rub down etc until it is imperceptible and ready for colour and final lacquering
Repairing a tear involves making an aperture large enough to be able to infiltrate a square of textile backing under the tear, and then glue it to the underside of the torn leather , and glue the edges together. Thus the tear becomes effectively a crack which you then fill with the relevant flexi fillers, rub down with eg wet and dry, refill with finer filler , rub down etc until it is imperceptible and ready for colour and final lacquering
| Link: | |
| BBcode: | |
| HTML: | |
| Hide post links |
#15
Thanks Chris, a comprehensive instruction list. Maybe I can now cancel the course.
Tony (E typed)
1962 E Type Series 1 Roadster (OTS)
Tony
1962 E Type Series 1 Roadster (OTS)
Tony
| Link: | |
| BBcode: | |
| HTML: | |
| Hide post links |
#16
Most important question is:
How long does it look good, if you use this car ?
In the beginning the leather looks very good. But after 30 days of using ?
Regards Wolfgang Gatza
How long does it look good, if you use this car ?
In the beginning the leather looks very good. But after 30 days of using ?
Regards Wolfgang Gatza
| Link: | |
| BBcode: | |
| HTML: | |
| Hide post links |
#17
The guys at FurnitureClinic advise that all modern leather is painted this way and the restoration techniques match the original way of coloring leather so it will last as long as it did the first time around. So if due to high use the painted leather wore out after 5 years.... the restoration will last for 5 years...
Possibly sales speak... but I suspect if care is taken with achieving good preparation then the finish will last a few years.
Not sure I would do this on an Etype but an XJR is fair game :)
Possibly sales speak... but I suspect if care is taken with achieving good preparation then the finish will last a few years.
Not sure I would do this on an Etype but an XJR is fair game :)
1964 FHC 4.2
Etype restoration blog http://connor.org.uk
Etype restoration blog http://connor.org.uk
| Link: | |
| BBcode: | |
| HTML: | |
| Hide post links |

#18
As far as I am aware all modern leather is through dyed whereas Vaumol was 'painted' on top of the hide, hence the reason cracks and rubs show through to the base material. Don't think you can use the same restoration techniques on new (typically post 1998) leather and modern leathers are resistant to absorption so hide foods are useless. All you can do is clean them and follow up with a hide protector. From our Knowledge Base on Vaumol ( http://etypeuk.com/forum/viewtopic.php?t=1384 ):
Looking after modern leather - the facts!
Fatliquoring
Starting with the wet-end softening process. Known in the industry as fatliquoring, specific oils are added during the tanning or retanning process to make the leather soft, supple and flexible. Years ago, during the old style of processing, the leather was simply 'stuffed' with oils and fats and they were simply left to just sit in the fibre structure. But over time the oils migrated out of the leather, whether through use or heat (such as automotive leathers exposed to the sun which resulted in the fogging haze on the windows). Consequently, these oils needed to be replaced at regular intervals and so the term of 'feeding leather' grew. And rightly so, because back then the leather really did need to be replenished, otherwise it would become hard, shrink and crack. However, leather manufacturing and the development of chemicals used has come a long way. Nowadays, modern fatliquors are technically advanced using high quality, specially processed natural and synthetic oils that meet very high specifications. These are typically fully reacted to the fibre structure, and as a consequence only minimal amounts can migrate out of the leather. Because of this low migration continually adding creams and lotions to replace lost oils is therefore no longer necessary (for modern leathers).
Finishing
The finishing process (where a coating is applied to the leather surface for reasons of colour consistency and technical performance) has also changed dramatically. Colour is applied using pigments. Pigments require a binding system to improve flexibility, fastness and adhesion to the leather. In the past this was achieved by using casein and resins, and these products have poorer physical properties like flexibility and colour fastness. Consequently the finish would open up and form small cracks over time. Also products such as nitrocellulose would be used, and their unstable plasticizers would easily migrate in the heat from sun exposure and again create 'fogging' on the internal surfaces of the windows. As a result of this plasticizer migration the use of leather creams, waxes and oils were needed in aftercare products to try and bring the suppleness back into the leather.
However, once again today?s leathers are finished using sophisticated binder systems that incorporate high performance acrylic and polyurethane resins. These modern systems give the leather an enhanced resistance and as a consequence the leather finish should not crack. After two or three base coat applications the clear top coat is applied. The top coat is the final stage of the finishing process, and is designed to make the leather more resistant to wear and tear and improve general properties. Modern top coats are also heavily crosslinked to add even further durability characteristics. The film is of medium hardness allowing the leather extra flexibility and increased physical properties like colour rub fastness, which in turn improves the overall finish. A wide range of additives can also be added to modify the feel and appearance. The light and heat sensitivity is also much improved.
As modern leathers use a completely different finishing system consequently they do not need to be treated with aftercare products containing oils. The majority of renovation creams marketed today will remain on the leather surface, and simply attract dirt and dust.
Recommended treatment for modern leather appears to be Dr Leather wipes: https://www.envyvaleting.com/products_info.asp?id=257
And here is an excellent article on leather renovation: http://dl.dropbox.com/u/8496016/leather.pdf
_________________
David Jones
S1 OTS OSB; S1 FHC ODB
1997 Porsche 911 Guards Red
Add your E-Type to our World Map: http://forum.etypeuk.com/viewtopic.php?f=1&t=1810
S1 OTS OSB; S1 FHC ODB
1997 Porsche 911 Guards Red
Add your E-Type to our World Map: http://forum.etypeuk.com/viewtopic.php?f=1&t=1810
| Link: | |
| BBcode: | |
| HTML: | |
| Hide post links |