


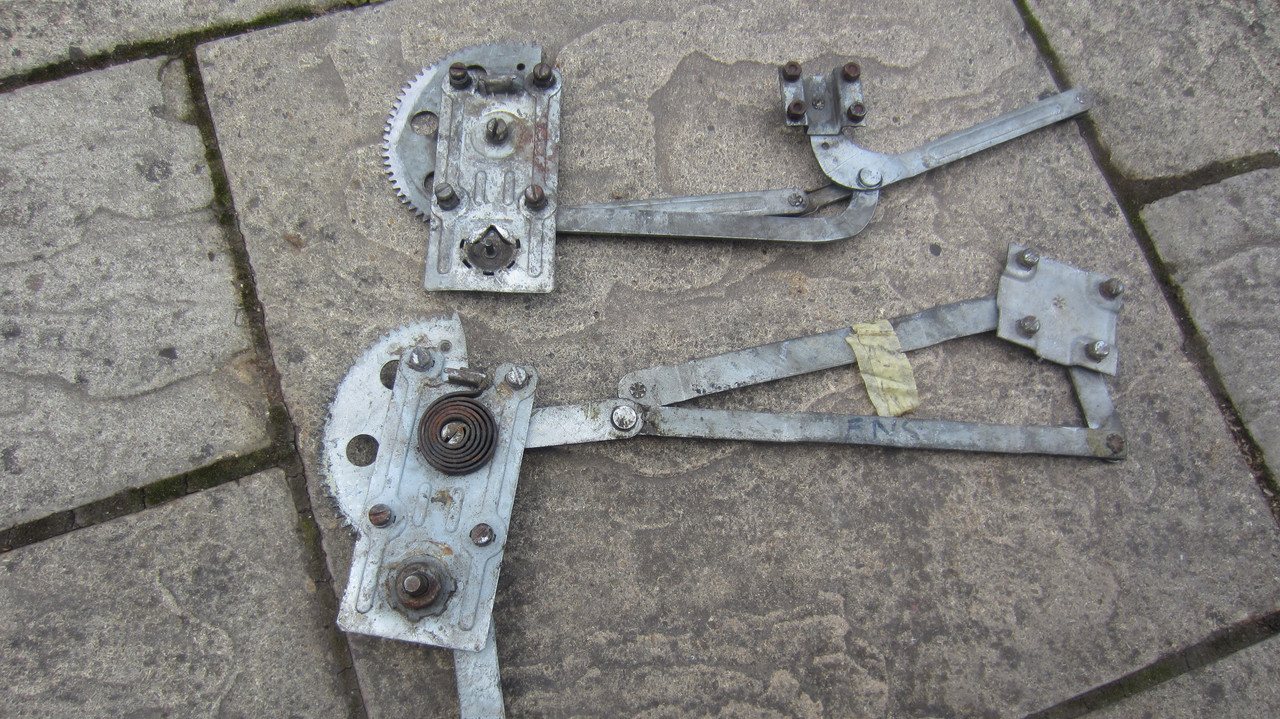
I recently discovered that XKs offer replacement gears for the window winder. These are the small gear 16-2498 and 16-2500 the large semicircular gear. They can be purchased for about 1/4 of the price of a new winder.
I decided to repair a broken winder on my current restoration rather than buying a new unit which is what I have done in the past. This turned out to be a lot more complex than I anticipated although the final outcome has been good.
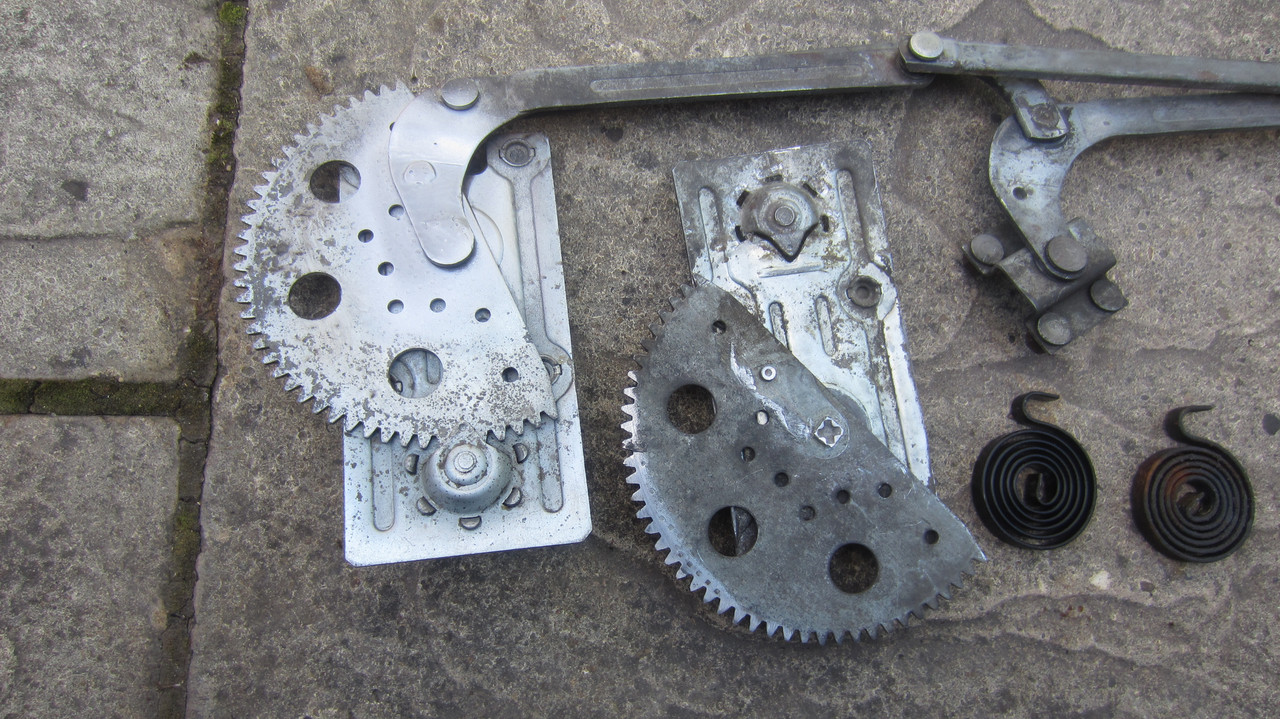
The small gear is held in a pressed steel housing that is fixed to the rectangular backplate by peened tabs. I got this off with care and a couple of cold chisels without breaking any tabs. The finish on the replacement gear was fairly rough and I had to smooth out the wear surfaces and the spindle hole with a bit of filing.
Removing the large gear turned out to be quite difficult. The gear is held onto the actuator arm by a 1/4" peened rivet which I ground off with an angle grinder. The gear pivots on a short shaft that goes through the backplate and holds the counterbalance spring on the other side. This seemed to be simply peened in place as well. It turns out though that the hole in the the actuator arm is actually cruciform which is not obvious at all when you look at it. The peening of the shaft fills the cross holes and is wider than the hole in the gear which is underneath it. So when I ground off the peening, no amount of hammering with a drift would move it. I eventually needed a grinder, oxy acetylene and a lot of leverage to get it out.
The amount of force and heat needed to do all of this coupled with the fact that the whole thing is hard to hold well in a vice resulted in a bit of bending of arms and backplate which I then had to tap true with a hammer.
Once I had the shaft out I had to machine it in the lathe to get the peened end back into usable shape and to get a good fit on the hole in the gear which is smaller on the replacement than the original for some reason.
Because I was a bit gun shy by this point I replaced the original rivet with a 1/4" countersunk setscrew so that I could get it apart easily again if I needed to. The holes for the rivets are not countersunk on the replacement as they are on the original so that needs to be done as well. I then cut a 1/4" thread in the hole in the actuator arm and screwed it together. Later once I was happy I cut off the rest of the setscrew and peened it to stop it coming apart.
Finally when I was satisfied that I had it all straight and properly assembled I MIGed the shaft and the actuator arm back together as there was not enough left of the shaft to peen it. I considered turning up another shaft on the lathe but in the end the old one sufficed.
The repaired winder works well although it is a little stiff.
I'd never done this before, and it was a lot more difficult that I expected and would be beyond someone without a lot of complex tools. It would be easy to ruin the winder mechanism beyond repair pulling it apart . It took me about 3 hours over a couple of days to do it. Now that I know how to do it I'd be quicker next time.
Window winder repairs
#1 Window winder repairs
Last edited by abowie on Sat May 04, 2019 5:56 am, edited 1 time in total.
Andrew.
881824, 1E21538. 889457. 1961 4.3l Mk2. 1975 XJS. 1962 MGB
http://www.projectetype.com/index.php/the-blog.html
Adelaide, Australia
881824, 1E21538. 889457. 1961 4.3l Mk2. 1975 XJS. 1962 MGB
http://www.projectetype.com/index.php/the-blog.html
Adelaide, Australia
| Link: | |
| BBcode: | |
| HTML: | |
| Hide post links |

#2 Re: Window winder repairs
If you look at how these wear then it is likely that only the middle few teeth of the large semi-circular gear are significantly worn - the teeth at either end of the semi-circle are usually still perfectly good. If this is the case, then a quicker alternative is to then take a replacement large semi-circle (new or used from any Jaguar car of that vintage, not necessarily an etype) and Dremel out a patch containing a row of the needed teeth and tack weld them in, in place of the removed worn teeth.
If it weren't for the fact that there are lots of circular cut outs in that large gear, then one semi-circular gear would be good for several repairs. It also means there is less to to assemble or disassemble and the main assembly will not be stiff to operate - logic says you needed to take off a little bit more metal from off of the new gears.
kind regards
Marek
| Link: | |
| BBcode: | |
| HTML: | |
| Hide post links |
#3 Re: Window winder repairs
Actually a bloody good idea and a lot easier than what I've just done.
As you say it's only the teeth from about 10 to 2 o'clock that wear. Then all you'd need is the little gear and you're good to go.
As you say it's only the teeth from about 10 to 2 o'clock that wear. Then all you'd need is the little gear and you're good to go.
Andrew.
881824, 1E21538. 889457. 1961 4.3l Mk2. 1975 XJS. 1962 MGB
http://www.projectetype.com/index.php/the-blog.html
Adelaide, Australia
881824, 1E21538. 889457. 1961 4.3l Mk2. 1975 XJS. 1962 MGB
http://www.projectetype.com/index.php/the-blog.html
Adelaide, Australia
| Link: | |
| BBcode: | |
| HTML: | |
| Hide post links |
#4 Re: Window winder repairs
I modified a winder mechanism from a Mk2 Jaguar (front I think) Got it on E-bay; much cheaper than an E-type.
The winder box is identical,
It just required swapping the arms. It needed a slightly different orientation on the square rivet, so I welded it on with the corners in the middle of the flat sides of the square, but no real problems.
Paul
The winder box is identical,
It just required swapping the arms. It needed a slightly different orientation on the square rivet, so I welded it on with the corners in the middle of the flat sides of the square, but no real problems.
Paul
65 Series 1 FHC, 68 Jaguar 340
| Link: | |
| BBcode: | |
| HTML: | |
| Hide post links |