


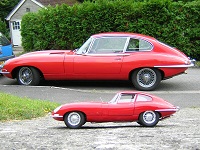
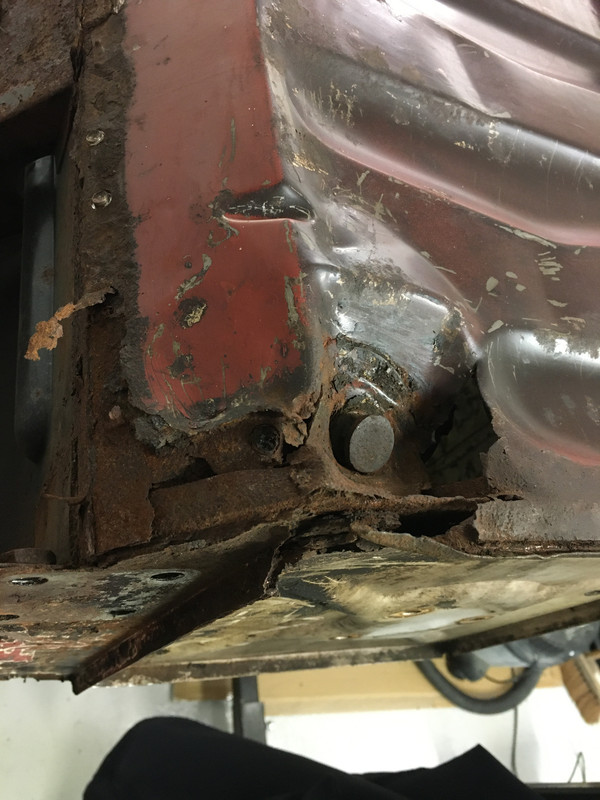
I’m just starting to strip all the old waxoyl from the chassis as part of the cars restoration. The car is mounted front and rear (at the IRS points) on a rotisserie. The chassis, a S2 2+2, is out of alignment. The chassis stiffener rails are best described as to be sagging. With a straight edge held against the two parallel stiffener rails under the car, there is a gap of 19-21mm. The straight edge rocks on the rails as there is a high spot is in the middle. I measured with the car inverted as well as sitting the corrrect side up. Both doors need aligning too. The car has rotten B posts, some dents to the flooring, RH toe panel and both outer sills are removed. The engine frame was also snapped on the RH side. The damage looks to be a result of the car being banged up a curb at speed and having bumped the RH floor and sill (now removed) on the top of the curb.
My question is, from peoples experience, how easy is the frame to bend back?
My plan is to remount the chassis on the rottiserrie, using two large parallel beams and allow the stiffener rails to sit on the beams. I’ll then use some force (pullers/jacks/friends) to get the rails to sit flat before securing the chassis down again. I can then cut away all the rot, fix the dents and rebuild the chassis and double check the door alignments. Hopefully the car will maintain its new position with the stress of the damage and rot being removed.
I still need to check other dimensions for twisting and distortion too.
Have people experienced similar? Is the chassis quite forgiving or do I have a fight on my hands??
Thanks in advance.
Chassis straightening
-
Jack the lad
- Posts: 115
- Joined: Mon Aug 18, 2014 5:44 pm
- Location: Newton Abbot, Devon

#2 Re: Chassis straightening
Hi Richard,
the job that you have described used to be my bread and butter for 25 years, I have recently replaced the box section rails on my roadster Series 2 as they were looking a little untidy. For your job I would just drill out the welds and replace the rails with new ones from Robey. I remember that they were quite cheap and it was an easy job with no awkward bits to overcome. You will need a good spot weld drill (not the drill bit but the tool) and the hire/borrow of a spot welder to do a proper job, it is all much easier if you are changing the floor pans too as you can get in easier with the drill and welder. It really is a simple and pleasant job with the roll-over. Cut out all damaged area and re-assemble using measurements from a known good car. Any problems just message me, good luck, cheers John.
the job that you have described used to be my bread and butter for 25 years, I have recently replaced the box section rails on my roadster Series 2 as they were looking a little untidy. For your job I would just drill out the welds and replace the rails with new ones from Robey. I remember that they were quite cheap and it was an easy job with no awkward bits to overcome. You will need a good spot weld drill (not the drill bit but the tool) and the hire/borrow of a spot welder to do a proper job, it is all much easier if you are changing the floor pans too as you can get in easier with the drill and welder. It really is a simple and pleasant job with the roll-over. Cut out all damaged area and re-assemble using measurements from a known good car. Any problems just message me, good luck, cheers John.
| Link: | |
| BBcode: | |
| HTML: | |
| Hide post links |

#3 Re: Chassis straightening
Hi Rich...just to note the chassis rails arnt parallel..they taper in towards the rear....possibly worth you contacting Andy Raynor at Hutsons they do a lot of this work and hes a very helpefull guy......Steve
Steve
69 S2 2+2 (just sold) ..Realm C type replica, 1960 xk150fhc
69 S2 2+2 (just sold) ..Realm C type replica, 1960 xk150fhc
| Link: | |
| BBcode: | |
| HTML: | |
| Hide post links |

#4 Re: Chassis straightening
Just saying, not giving advice....
If I had a rotten 2+2 (and having no skills as a welder) I'd buy a Robey shell and build a roadster. I'd use as many parts and panels as I could, but I'd prefer a roadster. Just think, the world's only long wheelbase S2 roadster.
If I had a rotten 2+2 (and having no skills as a welder) I'd buy a Robey shell and build a roadster. I'd use as many parts and panels as I could, but I'd prefer a roadster. Just think, the world's only long wheelbase S2 roadster.
Chris '67 S1 2+2
| Link: | |
| BBcode: | |
| HTML: | |
| Hide post links |
#5 Re: Chassis straightening
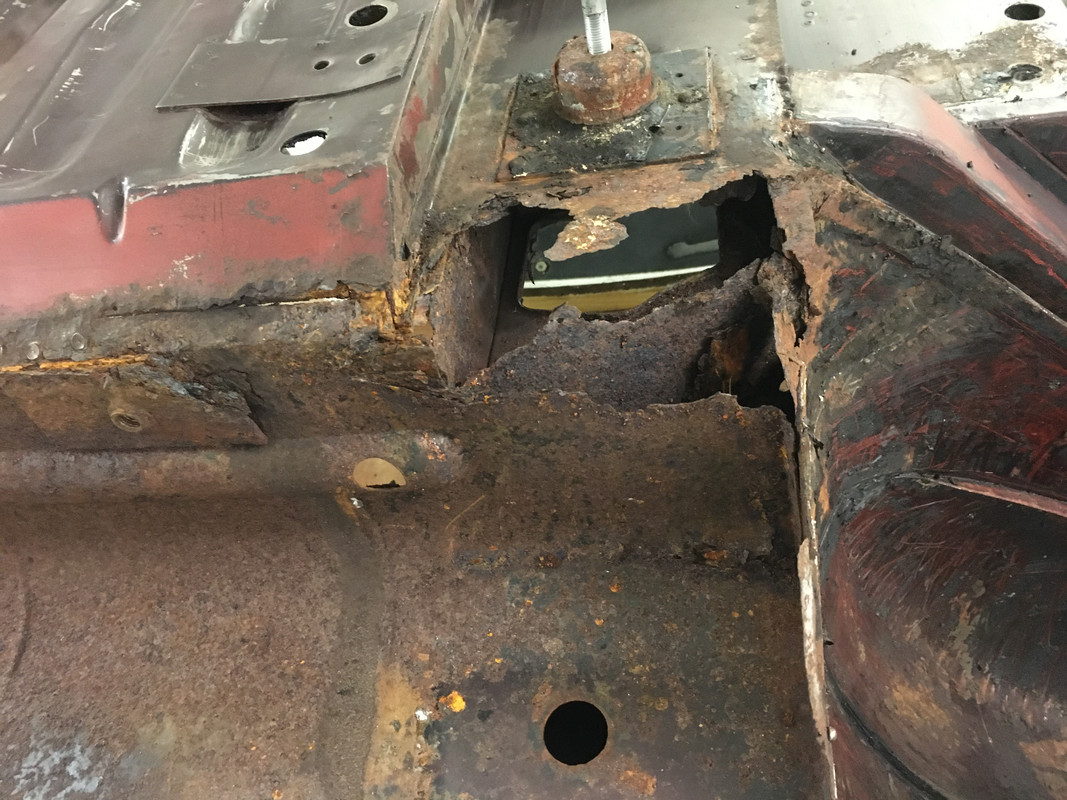
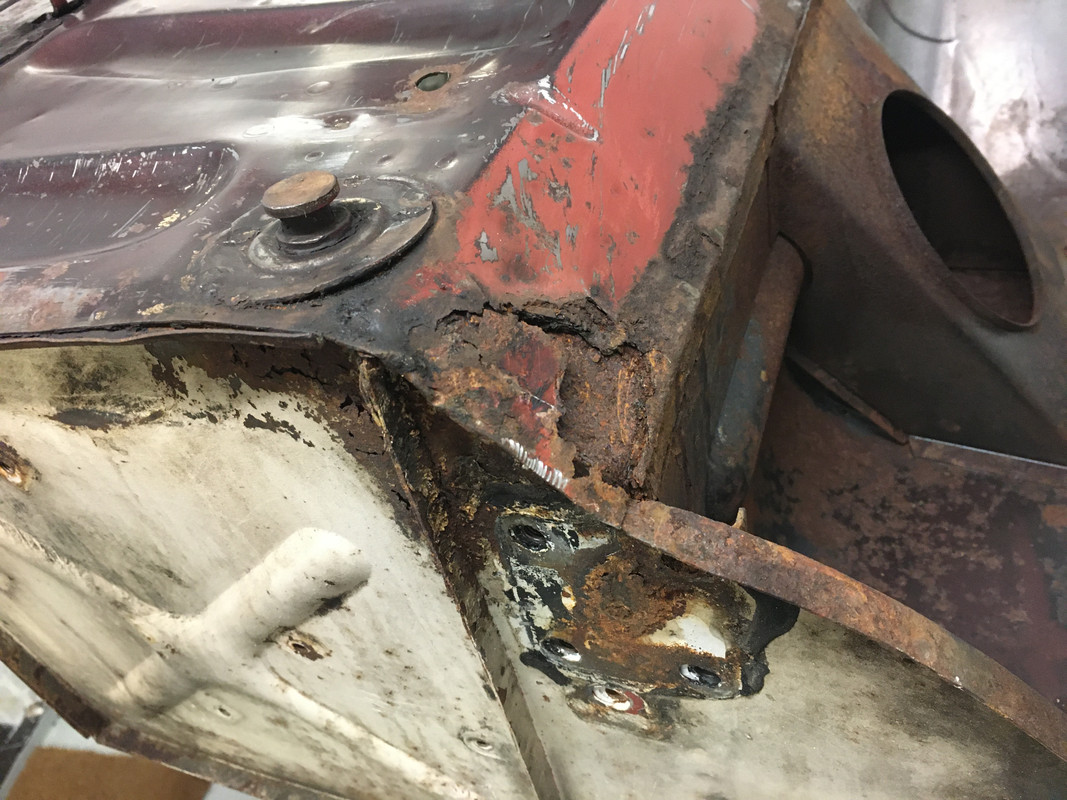
Thanks gents. Just finished the first round of cleaning the waxoyl form the car. A little over 6kg of muck in the waste bag! The floors are surprisingly good! Only a small area of rust and damage at the front jacking points, but the B posts will be fun!!
The frame rails are almost corrosion free, just one tiny patch of surface rust on the end.
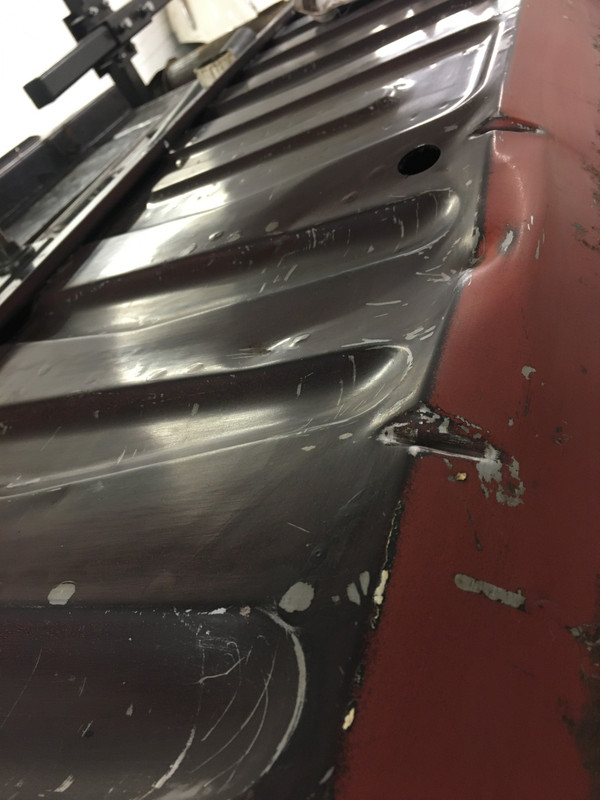
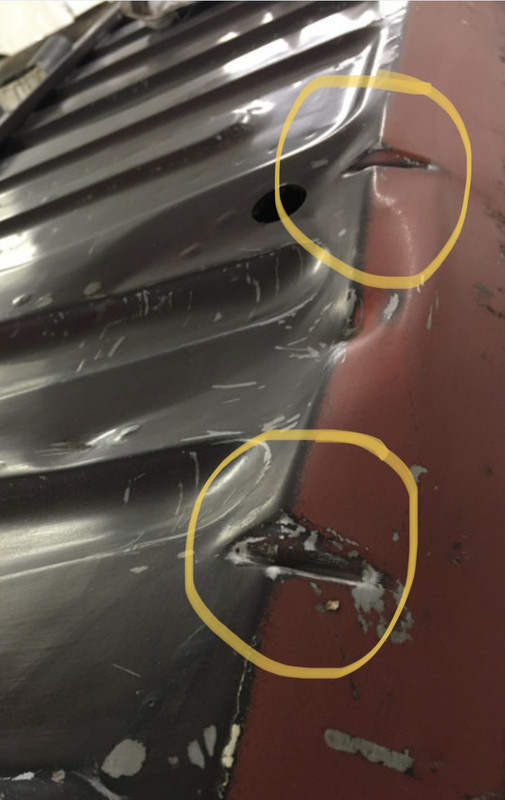
Jack - I’m going to try straightening the chassis first as I have nothing to lose in doing so. However, I will give a local welding shop a call to see what the hire charges will be. I’ll keep you posted. I’ve added a pic of the dent too.
I’ve repaired aircraft frames in the past but that was a lot of alloy work and riveting. I’ve got a few years of welding experience, mostly TIG but I have never used a spot welder. Previously I have just plug welded.
I’m conscious about the car turning into a money pit and I’m trying to keep to a budget as it’s a non numbers matching 2+2. I do like an engineering challenge though!
The frame rails are almost corrosion free, just one tiny patch of surface rust on the end.
Jack - I’m going to try straightening the chassis first as I have nothing to lose in doing so. However, I will give a local welding shop a call to see what the hire charges will be. I’ll keep you posted. I’ve added a pic of the dent too.
I’ve repaired aircraft frames in the past but that was a lot of alloy work and riveting. I’ve got a few years of welding experience, mostly TIG but I have never used a spot welder. Previously I have just plug welded.
I’m conscious about the car turning into a money pit and I’m trying to keep to a budget as it’s a non numbers matching 2+2. I do like an engineering challenge though!
Richard. UK RHD 1970 S2 2+2 Auto.
| Link: | |
| BBcode: | |
| HTML: | |
| Hide post links |


#6 Re: Chassis straightening
Andrew.
881824, 1E21538. 889457. 1961 4.3l Mk2. 1975 XJS. 1962 MGB
http://www.projectetype.com/index.php/the-blog.html
Adelaide, Australia
881824, 1E21538. 889457. 1961 4.3l Mk2. 1975 XJS. 1962 MGB
http://www.projectetype.com/index.php/the-blog.html
Adelaide, Australia
| Link: | |
| BBcode: | |
| HTML: | |
| Hide post links |
-
 politeperson
- Posts: 1296
- Joined: Tue Jun 07, 2016 8:26 pm
- Location: Boston UK
#7 Re: Chassis straightening
I would go along with Jack the Lad John.
Just cut it all out and bin it.
Then build the body off a new Robey floor section. You will save loads of time.
The problem is that I am not sure if they offer the complete 2+2 floor structure. They do all the SWB ones.
Looking at the parts they are advertising, I dont see why they couldn't just make one up for you.
It would, in effect, arrive jigged and square, so you can pull the remains of your body around to make it fit on.
You will have to ask what they can do for you.
Its true, but Enzo never said it
Too many E types
XK120 SUs
Too many E types
XK120 SUs
| Link: | |
| BBcode: | |
| HTML: | |
| Hide post links |
-
Jack the lad
- Posts: 115
- Joined: Mon Aug 18, 2014 5:44 pm
- Location: Newton Abbot, Devon
#8 Re: Chassis straightening
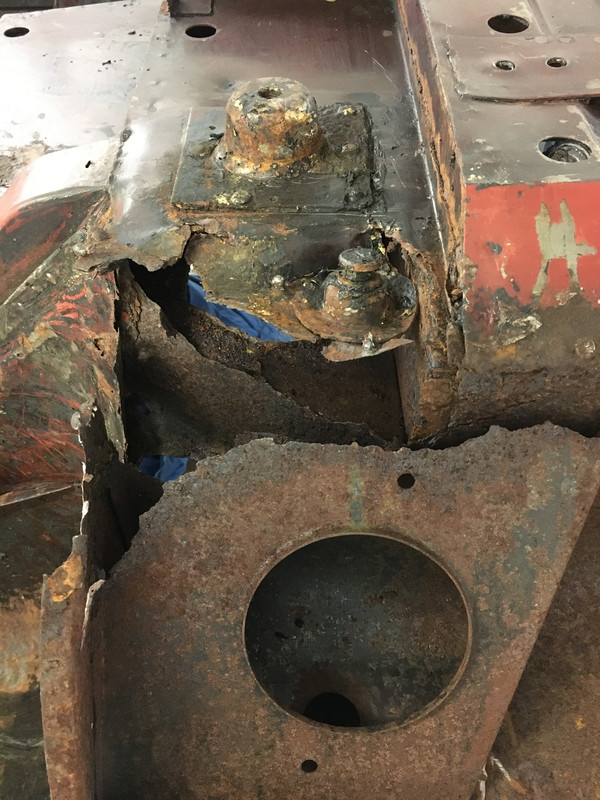
Hi Rich,
thanks for the photos, it looks worse than it is really, not too much to do. You could buy one of the cheap invertor TIG machines, they are DC only so you cannot weld ali but will be adequate for most of this job. If you are experienced with TIG you are half-way there, plug welds done with finesse with the TIG will be perfect too. Its best to cut out and replace than try to straighten 16 gauge steel, but I'm certain that you have the skills to do a great job on this car, good luck with it, cheers John. PS view marketplace on Facebook for your area you often see MIG, TIG and plasma cutters at really good prices close to your home.
thanks for the photos, it looks worse than it is really, not too much to do. You could buy one of the cheap invertor TIG machines, they are DC only so you cannot weld ali but will be adequate for most of this job. If you are experienced with TIG you are half-way there, plug welds done with finesse with the TIG will be perfect too. Its best to cut out and replace than try to straighten 16 gauge steel, but I'm certain that you have the skills to do a great job on this car, good luck with it, cheers John. PS view marketplace on Facebook for your area you often see MIG, TIG and plasma cutters at really good prices close to your home.
| Link: | |
| BBcode: | |
| HTML: | |
| Hide post links |
#9 Re: Chassis straightening
Hi.. without a shadow of a doubt cut out the complete floor front to back and replace with a robey item chassis rail complete, it’s an easy job you’ll prob find the lower inner sill will be rotten as it meets the floor but that’s easy to fix especially with the floor out..
If you don’t remove the inner and outer sills, you won’t need a jig to hold it all in place but obviously support the car in the air under its suspension points ie lower wishbone arm on the front and on the rear splined hub (don’t forget to wrap that in some old carpet etc, save damaging it))
As for spot welder forget it.. the metal all around has to be squeaky clean or you will just blow holes or frustration as welds don’t take, imo just mig weld it nice and neat little beads, it will never break free outlive the car and you can be sure it’s taken hold.
If you want to make it look authentic afterwards with spot welder marks just spin a 5mm drill bit over the panel lightly every 3” and there you have it..
panel beater for over 30years.. hope that helps good luck my friend

Previously...S1 OTS E type (sold)
S1 2+2 manual. (Sold)
S2 rhd OTS full resto finished 8/23
S1 3.8 coupe (full restoration yet to start!)
S1 2+2 manual. (Sold)
S2 rhd OTS full resto finished 8/23
S1 3.8 coupe (full restoration yet to start!)
| Link: | |
| BBcode: | |
| HTML: | |
| Hide post links |
#10 Re: Chassis straightening
A quick update, but firstly thank you for the support on this!
So, while plan B is to just replace the floors and rails… I couldn’t help going back to my military roots and seeing what I can do with what I have to hand… with a little yea-ha thrown into the mix!
The picture below will explain it all but I have managed, after the first round of redneck spannering, to take the bend in the near-side rail from 19mm to 3mm!
I’ve stopped here until I do the datum checks again. I’ll then do the off-side rail before repeating the process.
I’ll aim to get both sides within 5mm, then tackle the dents in the floors (to relieve some stresses) before putting my cowboy hat back on and repeating the process above.
It’s looking positive so far!.. famous last words!!
Richard. UK RHD 1970 S2 2+2 Auto.
| Link: | |
| BBcode: | |
| HTML: | |
| Hide post links |

#11 Re: Chassis straightening
Quiet an amazing contraption you got there but as long as it does the job.......I am astonished those straps are able to effortlessly absorb the tension.
Danny
1962 S1 3.8 FHC (1012/1798)
2015 Range Rover Sport SVR
"Experience is something you don't get until just after you need it."
1962 S1 3.8 FHC (1012/1798)
2015 Range Rover Sport SVR
"Experience is something you don't get until just after you need it."
| Link: | |
| BBcode: | |
| HTML: | |
| Hide post links |


#12 Re: Chassis straightening
Really inventive solution, well done.
Randall Botha
'64 3.8 fhc & '51 Mk 7
'64 3.8 fhc & '51 Mk 7
| Link: | |
| BBcode: | |
| HTML: | |
| Hide post links |
-
 Nick V12 e type
- Posts: 116
- Joined: Mon Dec 11, 2017 9:21 pm
- Location: Midlands UK
#13 Re: Chassis straightening
Hi Richard,
Your photos reminded of a question I have regarding replacement Martin Robey floors.
On the original floors there are 6 indents spaced along the length of the floor. These are missing from the replacement floors.
Has anyone made a tool to replicate the indents? Or come up with a different solution?
Thanks
Nick
Last edited by Nick V12 e type on Sun Oct 01, 2023 8:10 pm, edited 1 time in total.
e type series 3 V12 2+2 1972, BMW iX 2023
| Link: | |
| BBcode: | |
| HTML: | |
| Hide post links |
-
Nick V12 e type
- Posts: 116
- Joined: Mon Dec 11, 2017 9:21 pm
- Location: Midlands UK
#14 Re: Chassis straightening
Hi I thought a photo ( one of Richard’s) would be helpful to support my question above.
Many thanks
Nick
Many thanks
Nick
e type series 3 V12 2+2 1972, BMW iX 2023
| Link: | |
| BBcode: | |
| HTML: | |
| Hide post links |
#15 Re: Chassis straightening
Nick Wrote:
I have two methods.
1. When no helper is available, I use a template of the outside shape of the gusset, to mark out an area to cut out. The preformed gusset is TIG welded in place.
2. With a helper, I use a hand held Punch and Die Set to form the gusset without any cutting and welding. The Die Block is held in place on the inside of the floor, and the gusset formed with a punch from the outside of the floor.
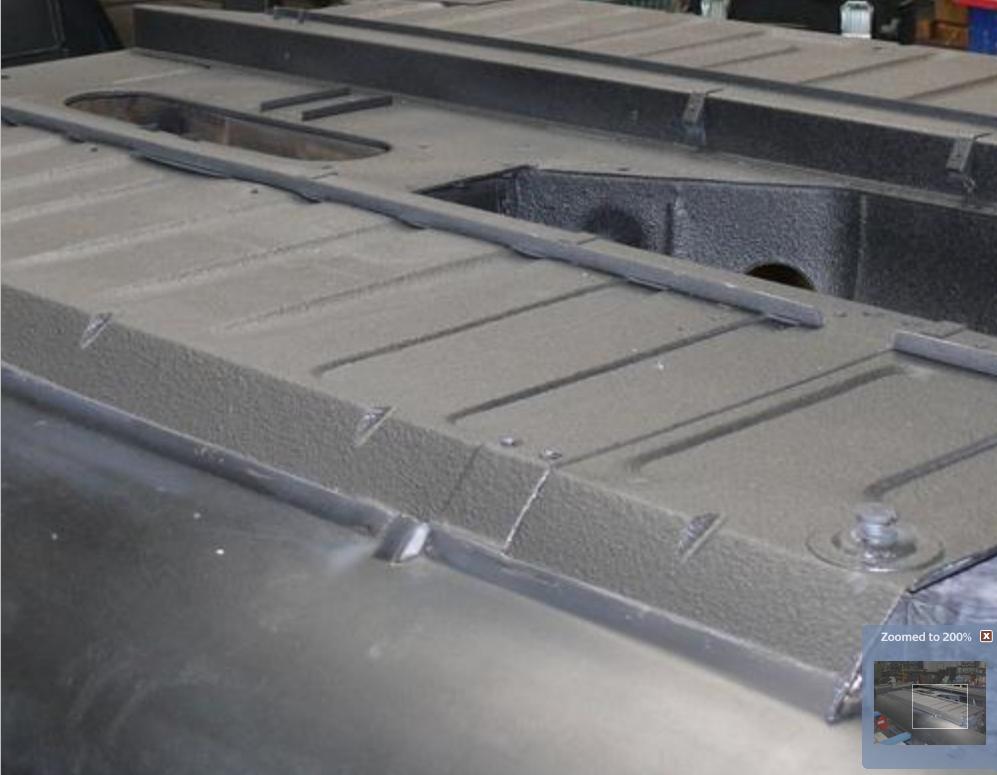
The gussets shown in the following picture were formed by welding in the gusset form.
Regards,
Bill
Hello Nick.Has anyone made a tool to replicate the indents? Or come up with a different solution?
I have two methods.
1. When no helper is available, I use a template of the outside shape of the gusset, to mark out an area to cut out. The preformed gusset is TIG welded in place.
2. With a helper, I use a hand held Punch and Die Set to form the gusset without any cutting and welding. The Die Block is held in place on the inside of the floor, and the gusset formed with a punch from the outside of the floor.
The gussets shown in the following picture were formed by welding in the gusset form.
Regards,
Bill
| Link: | |
| BBcode: | |
| HTML: | |
| Hide post links |
#16 Re: Chassis straightening
Hi Nick,
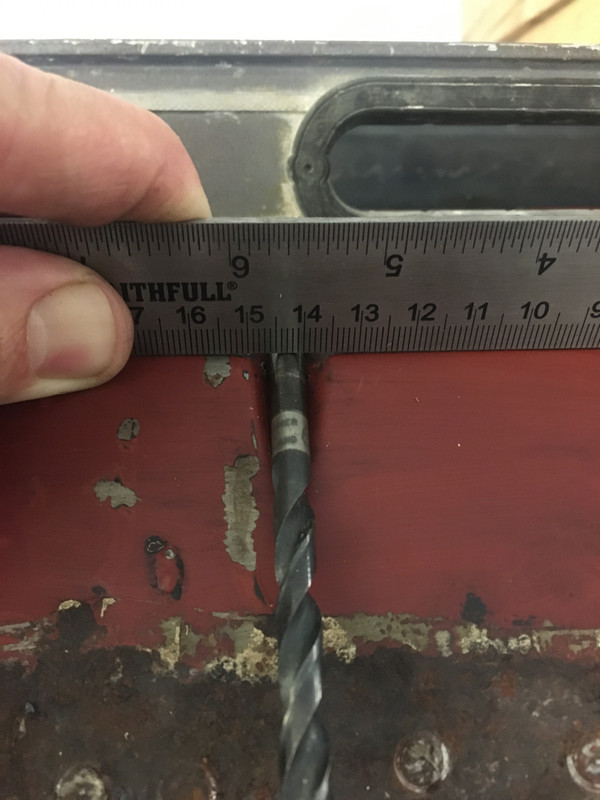
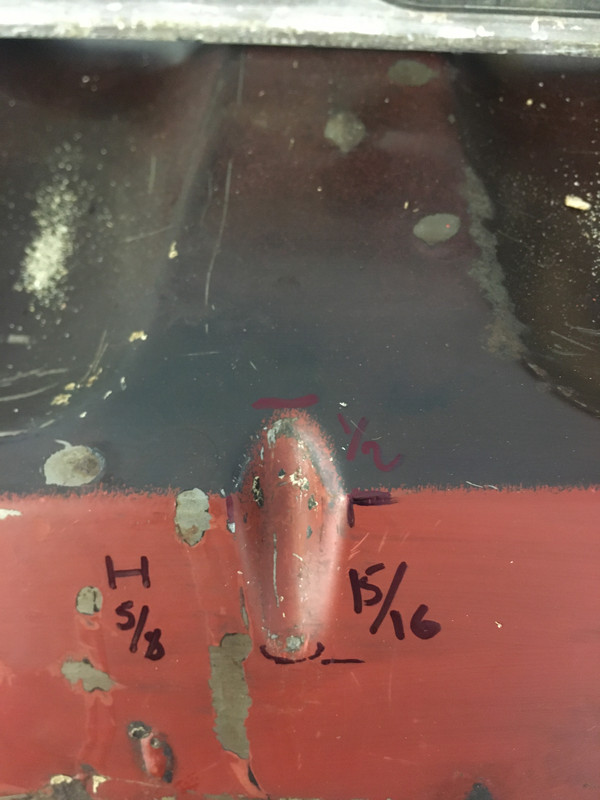
If it helps I have taken some measurements for you. The drill bit is 6.3mm. I have 6 of these on each side.
I’ve been playing with the chassis again. I knocked out a lot of the floor pan dents and a 100mm by 5mm deep dent from the inner sill. The offside is now only 3mm out in the aft 33cm of floor. I have not applied pressure to this rail yet. However, a rear floor pan repair section, which I need anyway, should cover this rear section well.
The near side is cooling and still under pressure. I got it down to 2mm at each end and heated the rail for 20mins with a plumbers torch. After a lot of creaking and popping the front went to zero gap and the rear is a little over 1mm. However, the car needs to cool and the tension releasing.
Richard. UK RHD 1970 S2 2+2 Auto.
| Link: | |
| BBcode: | |
| HTML: | |
| Hide post links |
-
Nick V12 e type
- Posts: 116
- Joined: Mon Dec 11, 2017 9:21 pm
- Location: Midlands UK
#17 Re: Chassis straightening
Hi Bill & Richard,
Thank you for your very helpful replies.
I wanted to add the gussets to ensure the correct appearance.
Seems strange to me that Mr Robey has omitted this feature from the repro panels.
Excellent that I now have a solution.
Thanks again
Nick
Thank you for your very helpful replies.
I wanted to add the gussets to ensure the correct appearance.
Seems strange to me that Mr Robey has omitted this feature from the repro panels.
Excellent that I now have a solution.
Thanks again
Nick
e type series 3 V12 2+2 1972, BMW iX 2023
| Link: | |
| BBcode: | |
| HTML: | |
| Hide post links |
#18 Re: Chassis straightening
Nick Wrote:
You will note that although the plan detail of the forms across the floor are correct in the Robey Floor Panel, their cross section is not. The shape of the bottom of the features in the Robey panel is flat, while the shape of the original is curved.
This indicates to me that the Punch and Die set is a cheap arrangement where the male punch component has flat forms, way less costly to program and machine than the correct curved cross section, and the die plate component probably just a thick plate with cutouts the outside profile of the features cut all the way through, which can be produced fairly cheaply by a number of methods.
I suspect that the angled side edge of the floor, are merely folded and therefore, circumvents creating the gussets unless done so as a further operation. In the original production of the floor panels, the punch and die set would have been solid tools carrying the correct cross section profile of all the features in the floor.
Regards,
Bill
Hello Nick,Seems strange to me that Mr Robey has omitted this feature from the repro panels.
You will note that although the plan detail of the forms across the floor are correct in the Robey Floor Panel, their cross section is not. The shape of the bottom of the features in the Robey panel is flat, while the shape of the original is curved.
This indicates to me that the Punch and Die set is a cheap arrangement where the male punch component has flat forms, way less costly to program and machine than the correct curved cross section, and the die plate component probably just a thick plate with cutouts the outside profile of the features cut all the way through, which can be produced fairly cheaply by a number of methods.
I suspect that the angled side edge of the floor, are merely folded and therefore, circumvents creating the gussets unless done so as a further operation. In the original production of the floor panels, the punch and die set would have been solid tools carrying the correct cross section profile of all the features in the floor.
Regards,
Bill
| Link: | |
| BBcode: | |
| HTML: | |
| Hide post links |