


I'm in the process of replacing the bottoms of my doors but I don't know the positions of the 2 studs which hold the 'L' shaped brackets for fixing the bottoms of the door frame. Does anybody happen to have taken the measurements?
Thanks, Paul.
Door frame fixings
-
PaulColeman
Topic author - Posts: 247
- Joined: Fri May 25, 2012 12:32 pm


#2 Re: Door frame fixings
No, Paul, can't help you with the positions BUT I would say that having just done my doors - and that's not rust but new paint, new sound-deadening, new galvanising, and new Waxoyl ! -
viewtopic.php?f=3&t=10260&p=82049&hilit=door#p82049
- I would be inclined to fit the studs where your chrome frame rails dictate that they be rather than where they are notionally "meant" to be in terms of dimensions.
(I will re-load the pictures on the above thread shortly to reverse the actions of our friends at Photobucket)
I say this because I ended up making new L-brackets as the chrome rails were slightly offset in relation to the studs, and even with the oversized holes in the brackets I could not fit them.

In this way you will not only get the fore-and-aft alignment optimised, but also the critical side-to-side position which is so important for glass-to-rubber sealing around the door tops, be it to-roof on the OTS or to-door on the Coupé.
PS : If you still want the sizes, say so and I'll go and measure them - the stud bases are visible from underneath the door, I now see from looking at the pictures, so it would be quite easy to make a sketch.
viewtopic.php?f=3&t=10260&p=82049&hilit=door#p82049
- I would be inclined to fit the studs where your chrome frame rails dictate that they be rather than where they are notionally "meant" to be in terms of dimensions.
(I will re-load the pictures on the above thread shortly to reverse the actions of our friends at Photobucket)
I say this because I ended up making new L-brackets as the chrome rails were slightly offset in relation to the studs, and even with the oversized holes in the brackets I could not fit them.
In this way you will not only get the fore-and-aft alignment optimised, but also the critical side-to-side position which is so important for glass-to-rubber sealing around the door tops, be it to-roof on the OTS or to-door on the Coupé.
PS : If you still want the sizes, say so and I'll go and measure them - the stud bases are visible from underneath the door, I now see from looking at the pictures, so it would be quite easy to make a sketch.
Last edited by rfs1957 on Sat Apr 21, 2018 7:24 pm, edited 3 times in total.
Rory
3.8 OTS S1 Opalescent Silver Grey - built May 28th 1962
3.8 OTS S1 Opalescent Silver Grey - built May 28th 1962
| Link: | |
| BBcode: | |
| HTML: | |
| Hide post links |


#3 Re: Door frame fixings
What Rory says makes good sense. I often end up ovalling holes in the brackets to get the frame to fit the body properly.
Obviously this needs to be done with the doors on the car.
Obviously this needs to be done with the doors on the car.
Andrew.
881824, 1E21538. 889457. 1961 4.3l Mk2. 1975 XJS. 1962 MGB
http://www.projectetype.com/index.php/the-blog.html
Adelaide, Australia
881824, 1E21538. 889457. 1961 4.3l Mk2. 1975 XJS. 1962 MGB
http://www.projectetype.com/index.php/the-blog.html
Adelaide, Australia
| Link: | |
| BBcode: | |
| HTML: | |
| Hide post links |
#4 Re: Door frame fixings
Free bits for any door-lovers, left over from my door refurb :
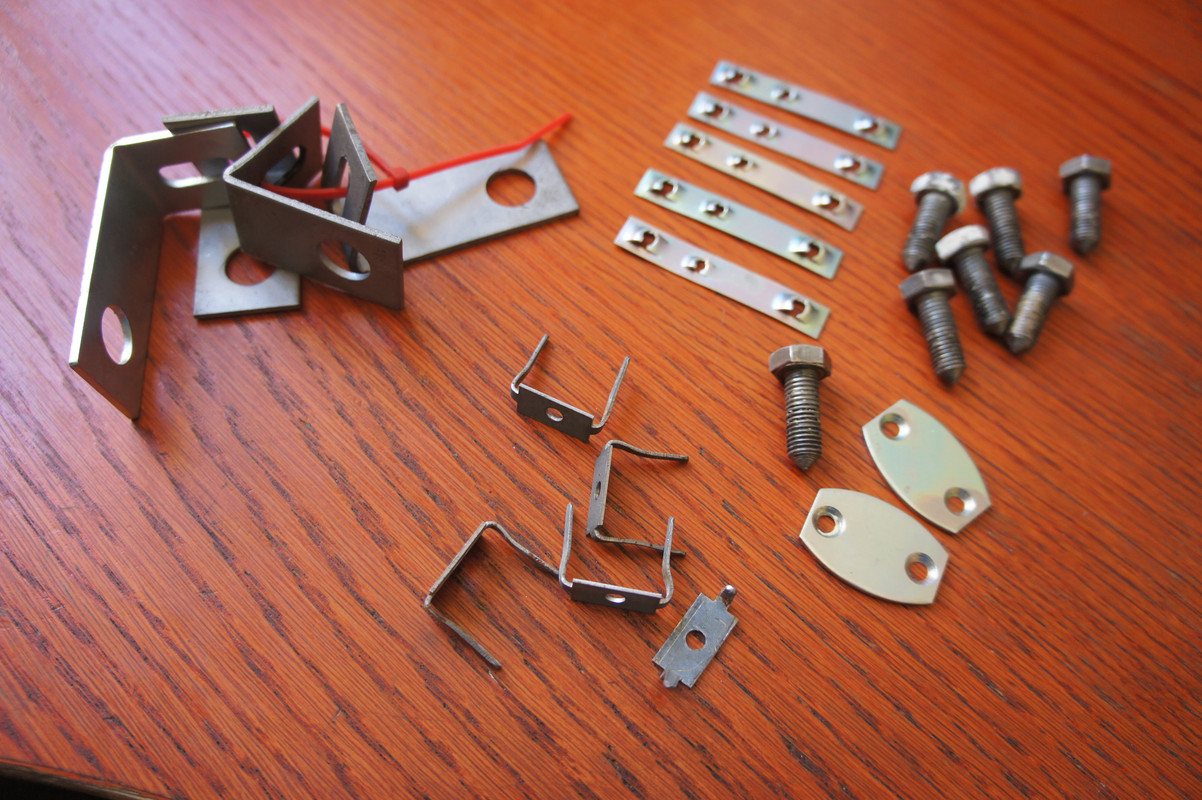
7 pointed door-hinge bolts - originals
5 triple-spire plates - originals, replated
5 door trim clips - originals
4 L-brackets, 3 originals, 1 SNGB
PM me with address.
7 pointed door-hinge bolts - originals
5 triple-spire plates - originals, replated
5 door trim clips - originals
4 L-brackets, 3 originals, 1 SNGB
PM me with address.
Last edited by rfs1957 on Sat Apr 21, 2018 7:24 pm, edited 1 time in total.
Rory
3.8 OTS S1 Opalescent Silver Grey - built May 28th 1962
3.8 OTS S1 Opalescent Silver Grey - built May 28th 1962
| Link: | |
| BBcode: | |
| HTML: | |
| Hide post links |
#5 Re: Door frame fixings
Sent you a pm Rory
1963 3.8 FHC ..now finished …………….
1974 2.7 Carrera now as an RS Touring
1974 2.7 Carrera now as an RS Touring
| Link: | |
| BBcode: | |
| HTML: | |
| Hide post links |
-
PaulColeman
Topic author - Posts: 247
- Joined: Fri May 25, 2012 12:32 pm
#6 Re: Door frame fixings
Okay, thanks for the reply. I'll do as you suggest - don't want to do it twice!rfs1957 wrote:Free bits for any door-lovers, left over from my door refurb :
7 pointed door-hinge bolts - originals
5 triple-spire plates - originals, replated
5 door trim clips - originals
4 L-brackets, 3 originals, 1 SNGB
PM me with address.

Where do the 5 door trim clips and spire plates go? Don't remember seeing those when I took my car apart. Not that that means a great deal as it was owned by a bodger :)
1965 Series 1 FHC
1976 Lotus Esprit
1976 Lotus Esprit
| Link: | |
| BBcode: | |
| HTML: | |
| Hide post links |
#7 Re: Door frame fixings
Those clips went under the lower chrome trim but were included in the BSI door cards so I didn't need them.
I misunderstood how the upper rail was held on and Jack re-did that fitting for me when the car was there with them, BAS don't use the original chrome-trim retainers there but opt for a certain type of self-tapper with a suitable head that they say does a much better job such that the chrome trim never moves, and you can't of course see the difference.
I misunderstood how the upper rail was held on and Jack re-did that fitting for me when the car was there with them, BAS don't use the original chrome-trim retainers there but opt for a certain type of self-tapper with a suitable head that they say does a much better job such that the chrome trim never moves, and you can't of course see the difference.
Rory
3.8 OTS S1 Opalescent Silver Grey - built May 28th 1962
3.8 OTS S1 Opalescent Silver Grey - built May 28th 1962
| Link: | |
| BBcode: | |
| HTML: | |
| Hide post links |
#8 Re: Door frame fixings
Still have 4 brackets and 5 x triple-spire nuts going free, no takers ?
Rory
3.8 OTS S1 Opalescent Silver Grey - built May 28th 1962
3.8 OTS S1 Opalescent Silver Grey - built May 28th 1962
| Link: | |
| BBcode: | |
| HTML: | |
| Hide post links |
-
Gfhug
- Posts: 3308
- Joined: Thu Jun 19, 2014 3:08 pm
- Location: Near Andover, Hampshire,in D.O. Blighty
#9 Re: Door frame fixings
Hi Rory, at some point in my project I'm sure to need some, just can't be certain until I get to that stage.
But, if no-one else is interested can I have them, please?
Regards
Geoff
But, if no-one else is interested can I have them, please?
Regards
Geoff
S2 FHC Light Blue
S2 OTS LHD - RHD full restoration
S2 OTS LHD - RHD full restoration
| Link: | |
| BBcode: | |
| HTML: | |
| Hide post links |
#10 Re: Door frame fixings
On their way, Geoff, great pleasure of 1) seeing parts get recycled and 2) them no longer being on my desk.
It will be short on stamps, it's my way of recognising the contribution the CGT union (that runs the post-office) has made to the welfare of the French economy.
R
It will be short on stamps, it's my way of recognising the contribution the CGT union (that runs the post-office) has made to the welfare of the French economy.
R
Rory
3.8 OTS S1 Opalescent Silver Grey - built May 28th 1962
3.8 OTS S1 Opalescent Silver Grey - built May 28th 1962
| Link: | |
| BBcode: | |
| HTML: | |
| Hide post links |
-
Gfhug
- Posts: 3308
- Joined: Thu Jun 19, 2014 3:08 pm
- Location: Near Andover, Hampshire,in D.O. Blighty
#11 Re: Door frame fixings
Thank you Rory
Geoff
Geoff
S2 FHC Light Blue
S2 OTS LHD - RHD full restoration
S2 OTS LHD - RHD full restoration
| Link: | |
| BBcode: | |
| HTML: | |
| Hide post links |
#12 Re: Door frame fixings
Hello Rory
First up I would like to thank you for your well written, informative posts. I particularly like the one about the under dash panels. I'm guilty of pinching that idea. Thanks also for taking the trouble to replace the photobucket images.
I am wondering if you might have a photo of the special self tappers that hold the upper chrome strip to the door panel. My car never had these strips and I'm wondering how to attach the ones I received as part of a trim kit. I made a clip of sorts but I must say it's not totally successful.
Thanks again.
Garry
| Link: | |
| BBcode: | |
| HTML: | |
| Hide post links |
#13 Re: Door frame fixings
Hi Garry,
Will dig out the pictures within the next week as I got the intersection of the upper door trim section and lower door panel quite wrong the first time, even though it looked fine and seemed to make sense to me, and BAS put it right when they had the car.
So I ought to have pictures of getting it wrong, and what it ought to look like.
I had looked on the Forum but didn't find the detail required to get it right, so this info would have been useful to me anyway.
Rory
3.8 OTS S1 Opalescent Silver Grey - built May 28th 1962
3.8 OTS S1 Opalescent Silver Grey - built May 28th 1962
| Link: | |
| BBcode: | |
| HTML: | |
| Hide post links |
#14 Re: Door frame fixings
Hi Rory
Any luck with those photos?
Thanks
Garry
Any luck with those photos?
Thanks
Garry
| Link: | |
| BBcode: | |
| HTML: | |
| Hide post links |
#15 Re: Door frame fixings
G'day - I've been hopeless ! Will dig them out now.
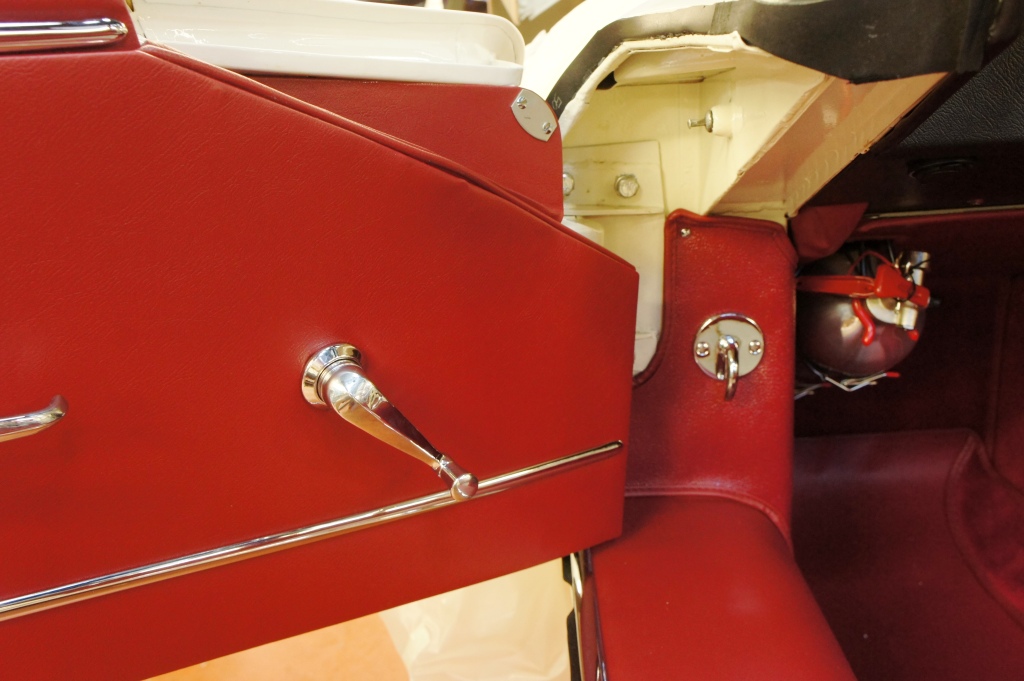
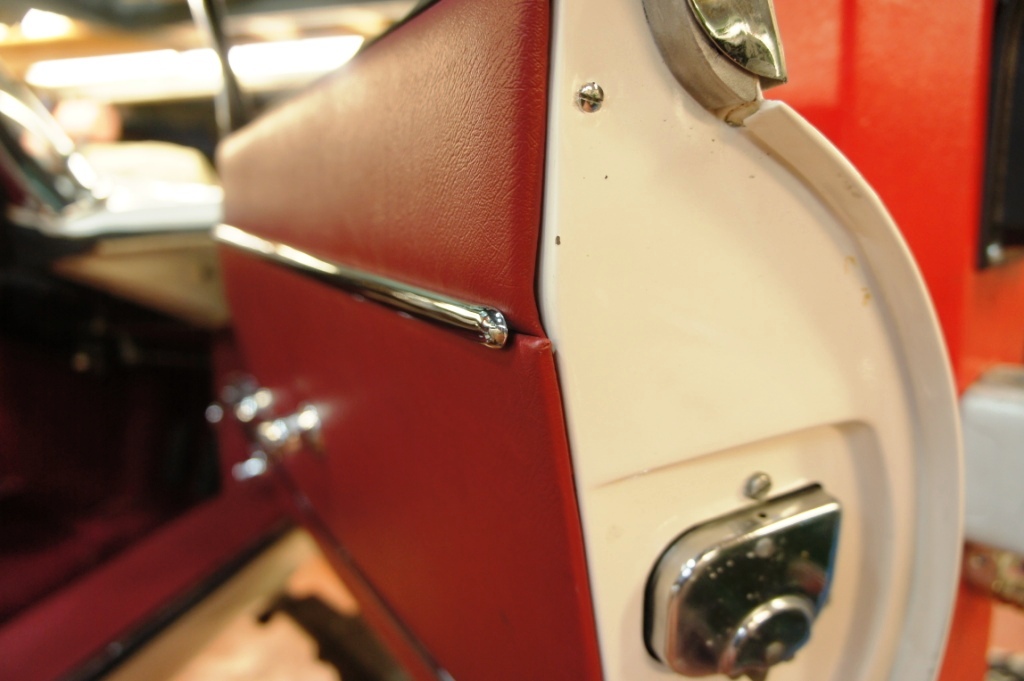
This shows the screws that BAS use instead of the clips. The trick is to screw them in far enough so they pull the rail hard enough against the vinyl, without being so tight that you can't slide the rail along.
The heads, then, are what locates inside the rail - the clips aren't used.
It requires a deft touch and gentle encouragement of the rail - I used a softwood drift towards the end ; the advantage is that the grip is good enough to stop the rail sliding in use, which is what BAS don't like about the original clips if I understood correctly.
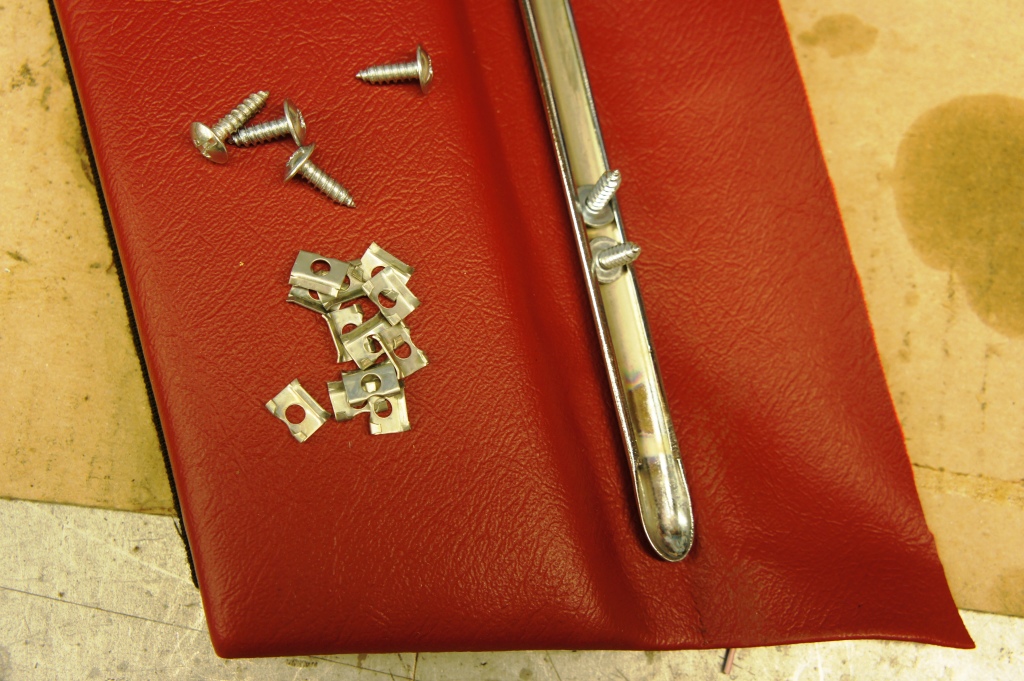
The screws are 16mm under head, 9mm head, and just under 4mm shank.
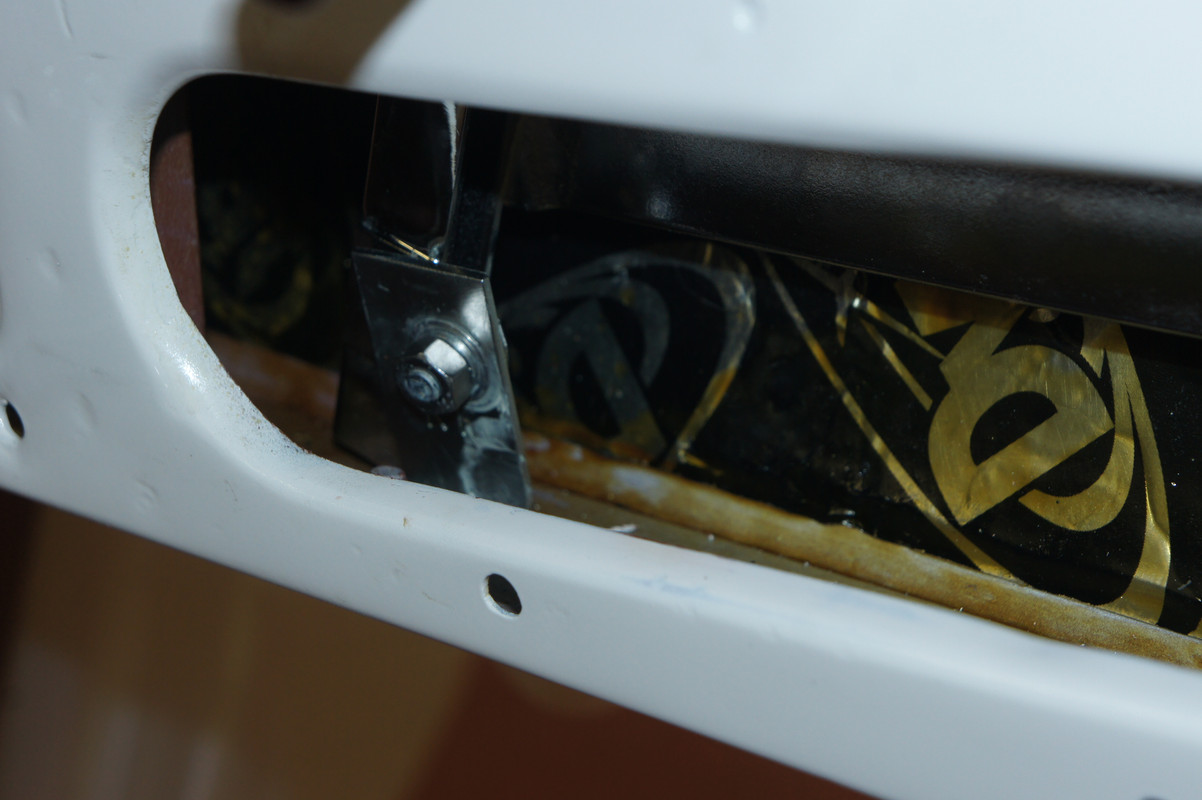
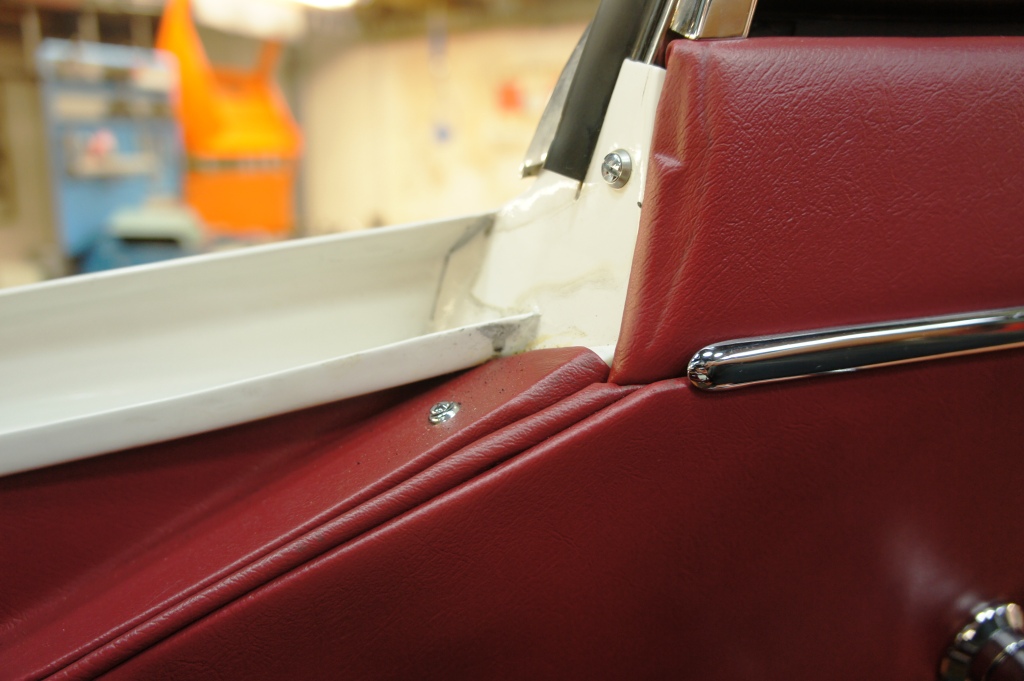
These shots show how not to do it - this was my attempt and I had understood that the chrome rail sat recessed below the top cheek element, and immediately above the door card.
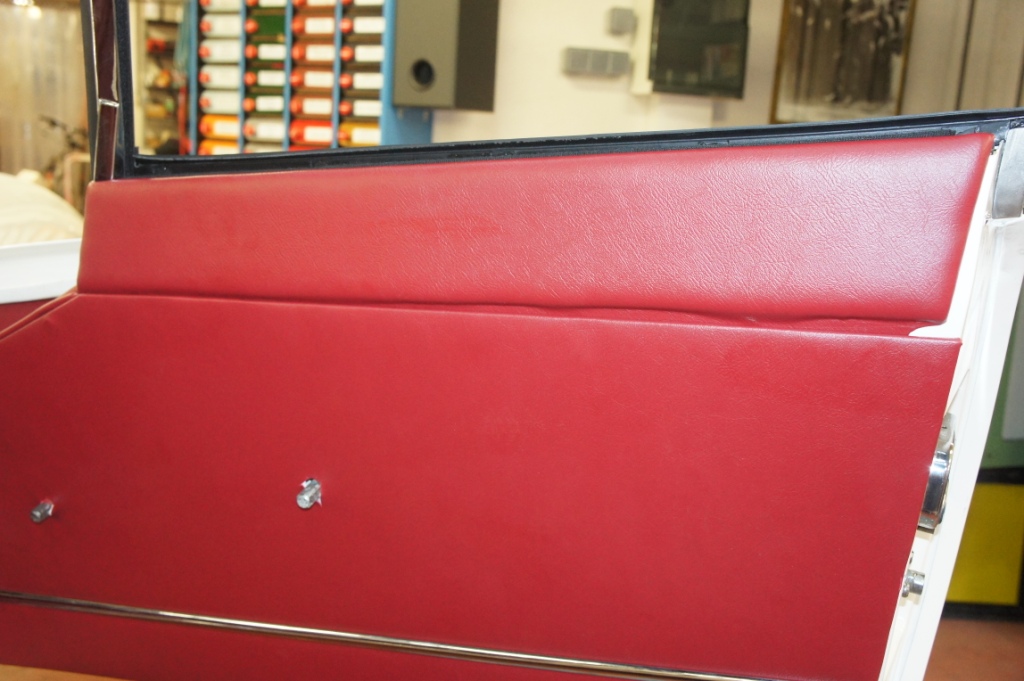
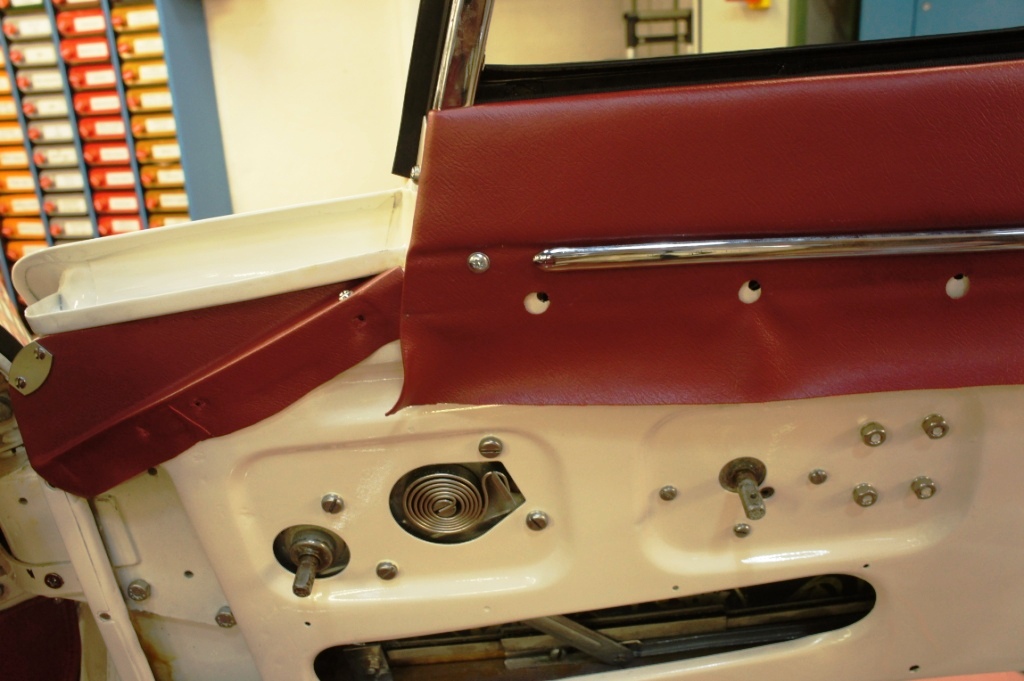
It turned out that my use of the screws was right but I'd not understood that the chrome rail was meant to sit over the junction between the two boards, so BAS re-did the doors, bless them, when they had the car for the hood.
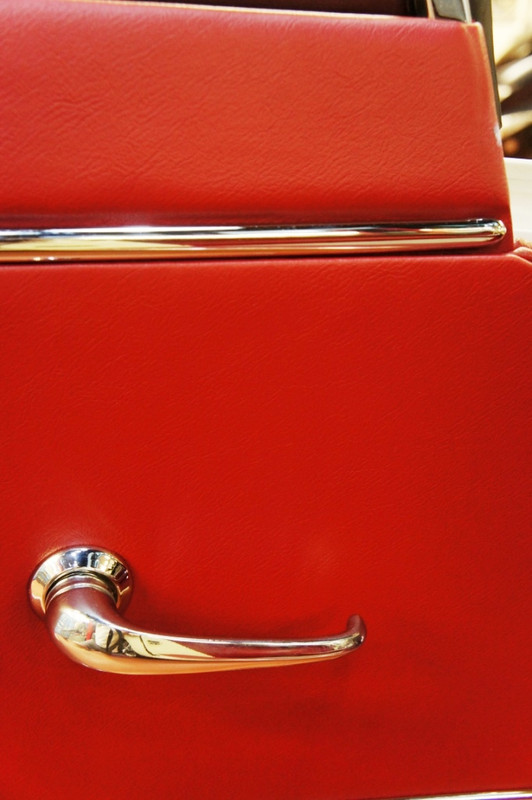
This is what it should look like.
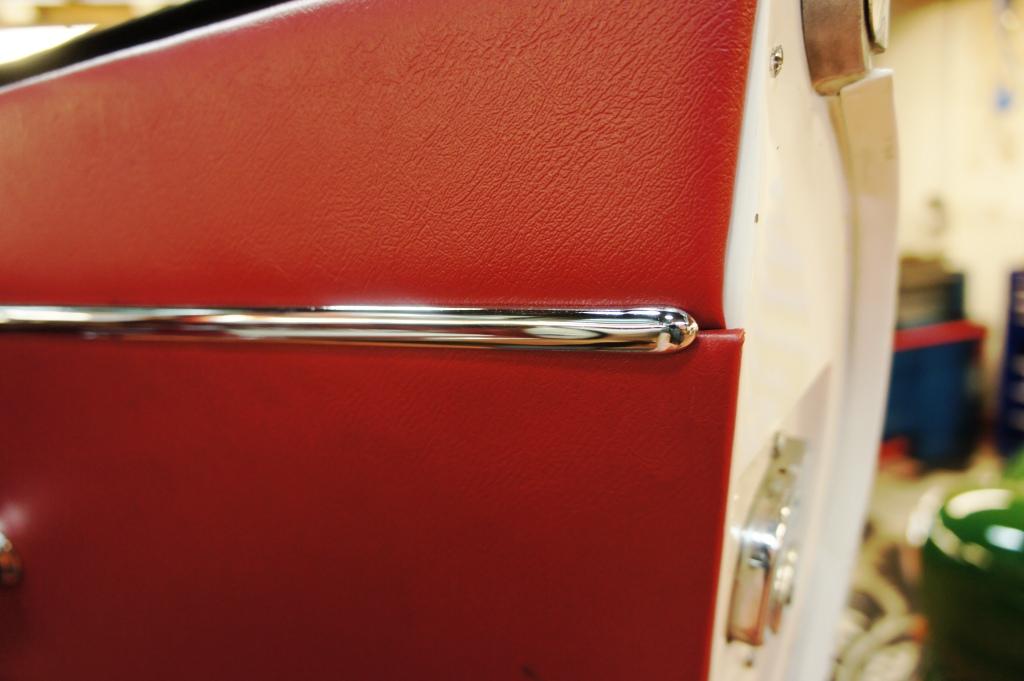
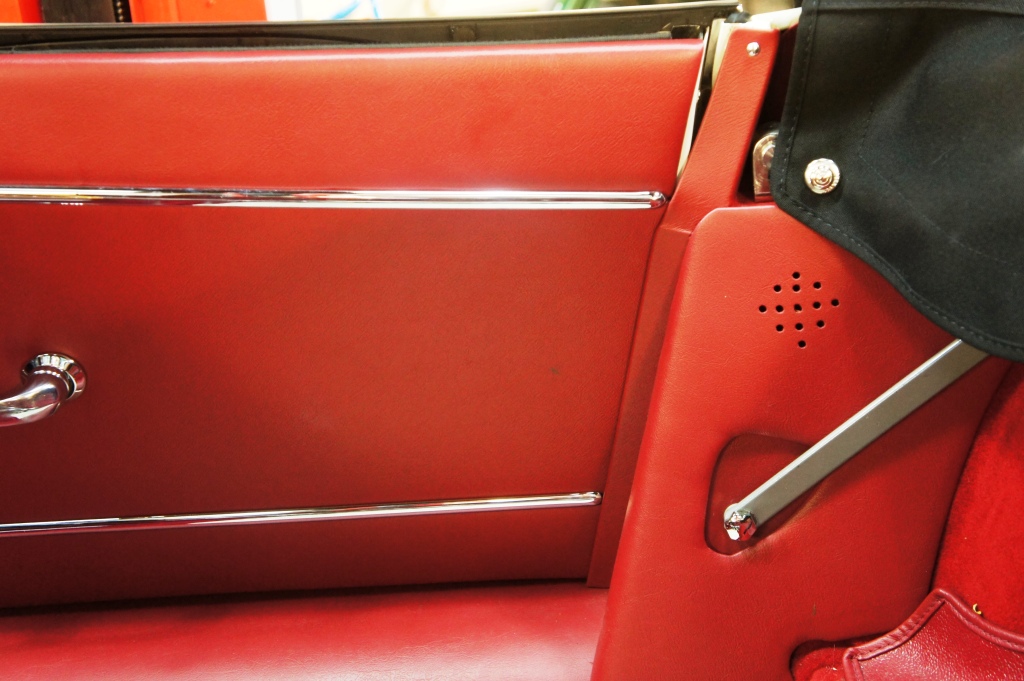
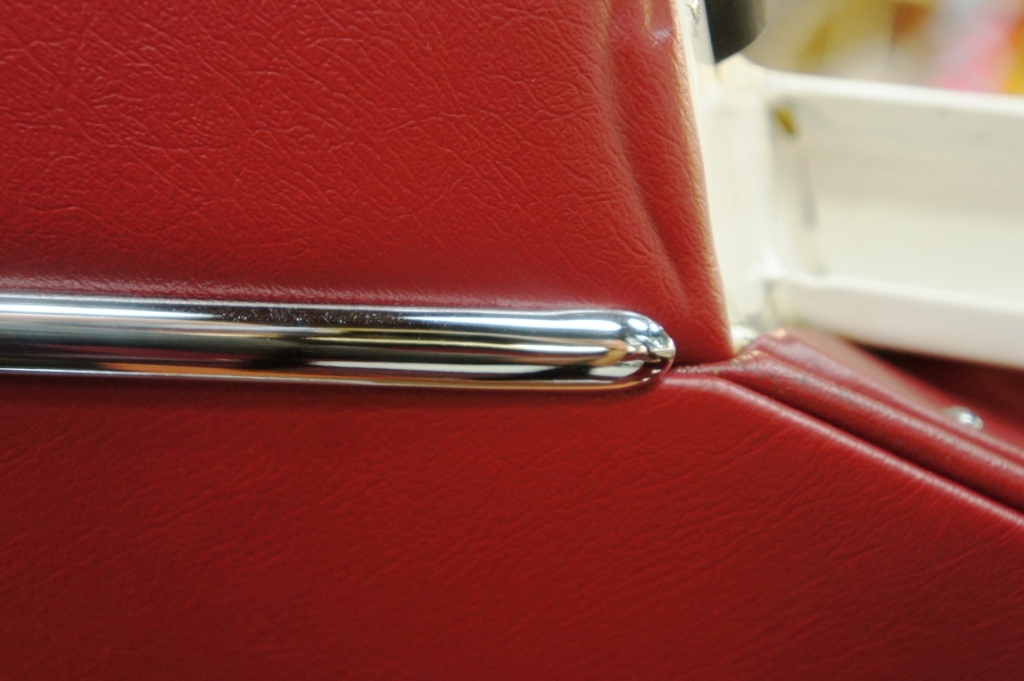
Hope this helps - it sure would have helped me !
This shows the screws that BAS use instead of the clips. The trick is to screw them in far enough so they pull the rail hard enough against the vinyl, without being so tight that you can't slide the rail along.
The heads, then, are what locates inside the rail - the clips aren't used.
It requires a deft touch and gentle encouragement of the rail - I used a softwood drift towards the end ; the advantage is that the grip is good enough to stop the rail sliding in use, which is what BAS don't like about the original clips if I understood correctly.
The screws are 16mm under head, 9mm head, and just under 4mm shank.
These shots show how not to do it - this was my attempt and I had understood that the chrome rail sat recessed below the top cheek element, and immediately above the door card.
It turned out that my use of the screws was right but I'd not understood that the chrome rail was meant to sit over the junction between the two boards, so BAS re-did the doors, bless them, when they had the car for the hood.
This is what it should look like.
Hope this helps - it sure would have helped me !
Last edited by rfs1957 on Sat Apr 21, 2018 7:25 pm, edited 1 time in total.
Rory
3.8 OTS S1 Opalescent Silver Grey - built May 28th 1962
3.8 OTS S1 Opalescent Silver Grey - built May 28th 1962
| Link: | |
| BBcode: | |
| HTML: | |
| Hide post links |
#16 Re: Door frame fixings
Thanks, looks like I have a bit more to do!
| Link: | |
| BBcode: | |
| HTML: | |
| Hide post links |
#17 Re: Door frame fixings
I forgot - do you know how many screws per door?
Thanks again.
Thanks again.
| Link: | |
| BBcode: | |
| HTML: | |
| Hide post links |
#18 Re: Door frame fixings
Hi Rory,
after having said that I always enjoy your very interesting posts, I'd like to get from you an short explanation about the screws used by BAS for holding the upper chrome rails (joncs chromés in French) on the door trim cards. With 16mm under head as you said, do they go through the metal in the door itself, or do you have to shorten them, so they are only fixed in the trim panel, like the clips they are a substitue of?
Because the slightly different dimensions in the two trim panels by BAS (and maybe of the two doors) the screws would sometimes get in front of door metal or sometimes be located on a place where there is no metal in contact...
Many thanks to you!
Best wishes
Marc 1963 3.8 FHC
| Link: | |
| BBcode: | |
| HTML: | |
| Hide post links |
#19 Re: Door frame fixings
Hello Marc,
The screws definitely go into the metal of the door skin, and not just into the door card.
I may strip the doors again as I'm going to change the window glasses (reprofiling the top edge so that the seal against the hood rubbers is a better fit).
I'll take some more pictures in that case to show what it looks like with the screws in place but without the chrome trim.
Rory
3.8 OTS S1 Opalescent Silver Grey - built May 28th 1962
3.8 OTS S1 Opalescent Silver Grey - built May 28th 1962
| Link: | |
| BBcode: | |
| HTML: | |
| Hide post links |
#20 Re: Door frame fixings
Every time I look at my previous posts I see that the pictures have been rendered inaccessible again, this time by "postimg" moving - unannounced - from postimg.org to postimg.cc.
From now on I'll give up posting pictures until I "own" my own picture hosting facility - madness the hours necessary to move away from PhotoBucket, first, and now discover that Postimg have done the same thing.
However, this post
viewtopic.php?f=3&t=10260&p=94810#p94810
is highly relevant to anyone working on door-skins and I've resurrected the pictures for the occasion.
Rory
3.8 OTS S1 Opalescent Silver Grey - built May 28th 1962
3.8 OTS S1 Opalescent Silver Grey - built May 28th 1962
| Link: | |
| BBcode: | |
| HTML: | |
| Hide post links |