Hello Rich,
Given your current predicament, I can't say I'd describe the help as being invaluable.
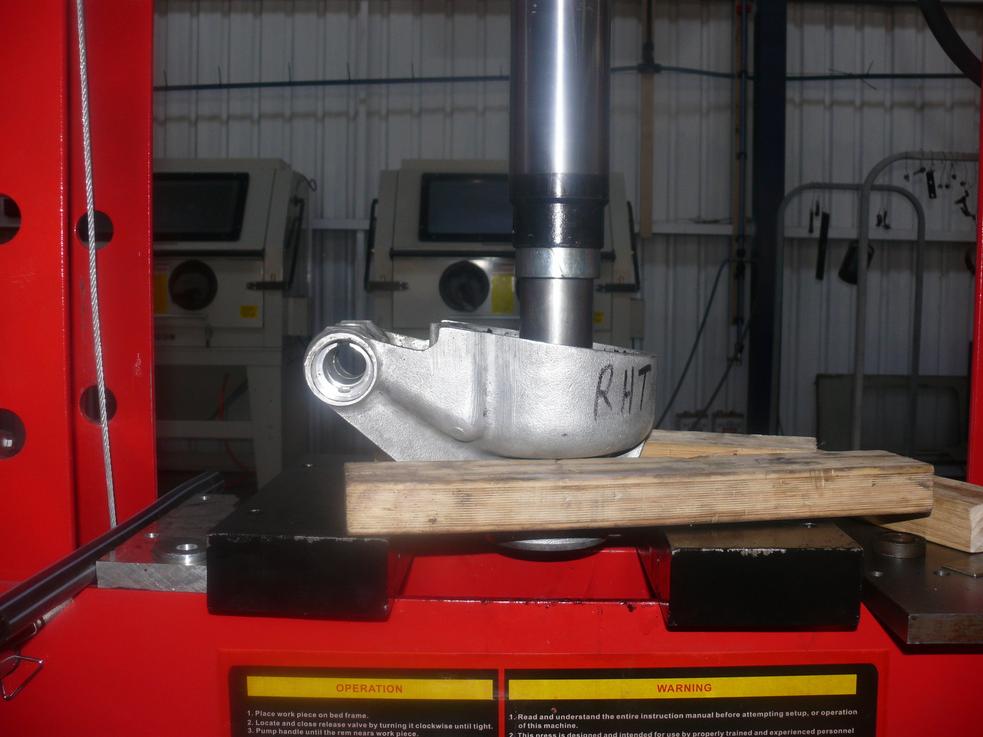
On S3 and other late Hub Carriers, the lugs shown enclosed in Red in the following picture (Hub 1) are included. For these hubs I have a fixture for the press that supports the hub carrier on these points and the outside of the Fulcrum Shaft housing shown in the picture Hub2.
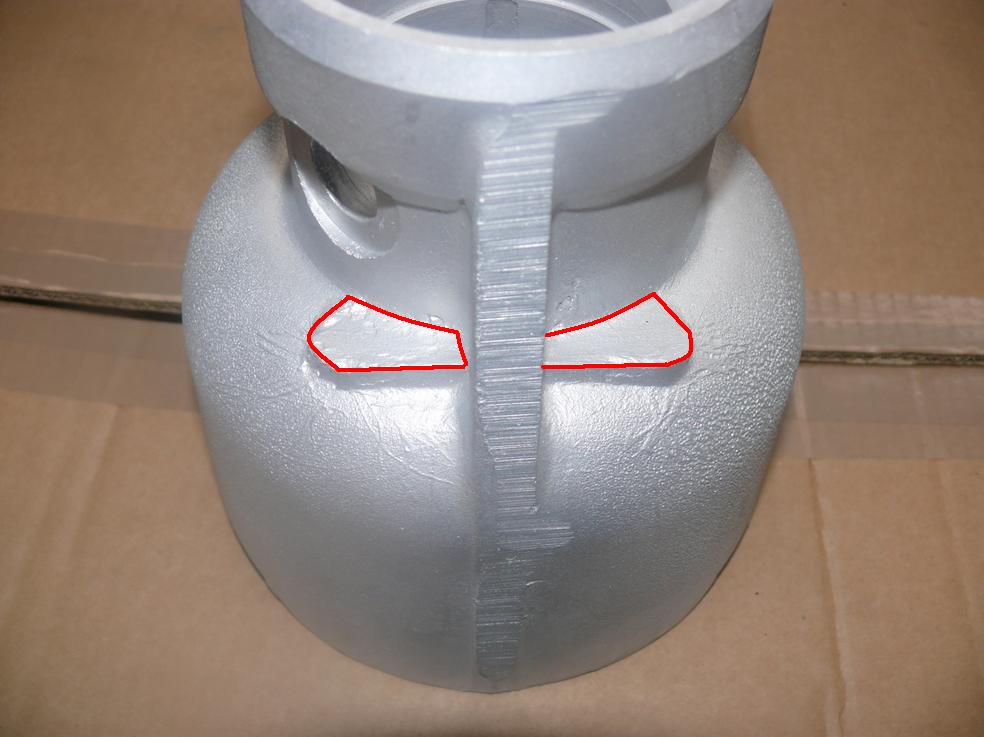 Hub 1
Hub 1
 Hub 2
Hub 2
For all other Hub Carriers (missing the above features), they are setup as shown in the following picture (Hub3).
 Hub 3
Hub 3
The interference fit of the bearing and the hub is not that great, therefore the hubs press out relatively easily. However, to give the hub every opportunity to move:
1. after removing the inner seal, I put the assembly in the freezer for a couple of hours
2. the press is made ready, with all required tools to hand
3. when the assembly comes out of the freezer, its quickly set up in the press and heat from an oxy-actylene frame is focused on the outside of the inner race of the bearing. Notwithstanding that the inner race and the OD of the hub are in close contact, they each move independent of the other sufficient to lessen the interference between the two. This results in less force required to press the hub from the inner bearing.
Occasionally we have liquid Nitrogen available from other work going on. On these occasions, the bearing is heated until uncomfortable to touch and after the bottom of the internal spline has been plugged and the hub secured in a large 3 jar chuck on the floor, the internal spline is filled with liquid Nitrogen. After a minute, or so, the Hub Carrier, with the inner bearing, is lifted from the hub.
I've also removed many rear hubs from their inner bearings without using a press, by using a brass, top hat shaped component that locates in the bore of the hub, with a thick flange to protect the end of the hub.
After carrying out the step 1 above and supporting the hub carrier as shown in picture Hub3 (except without the press), the inner race is quickly heated as in step 3, before drifting the hub from the bearing using a suitable arbor and "dead blow hammer".
In all cases, the Water Thrower is not touched.
Regards,
Bill


