Talk about the E-Type Series 2
-
Topic author
mach2andy
- Posts: 298
- Joined: Wed Jun 21, 2017 9:31 am

Post
by mach2andy » Wed Nov 06, 2019 6:25 pm
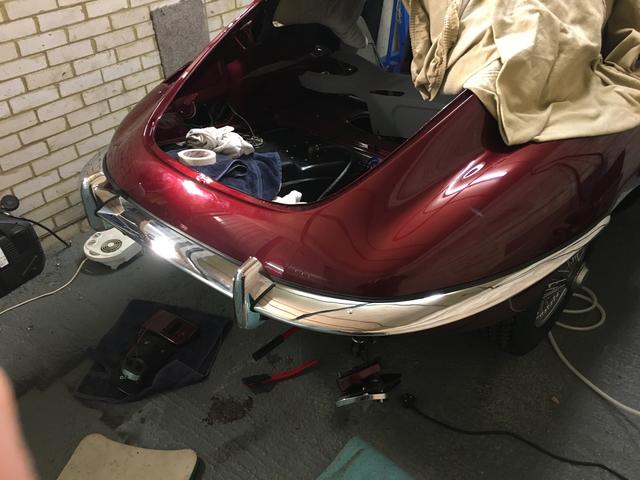
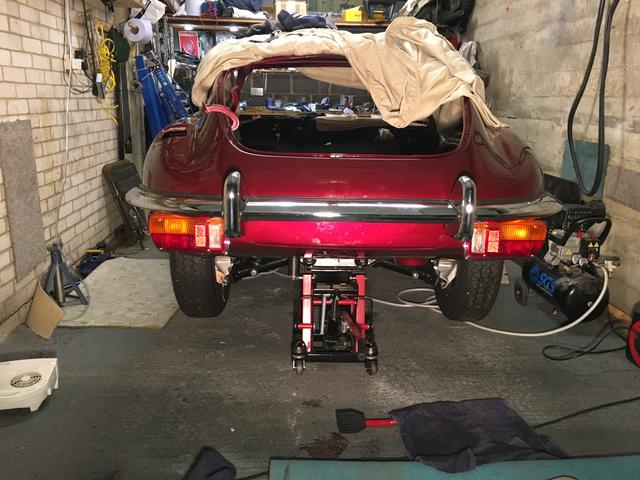
Having partially refitted my rear lights, I then had a Homer Simpson dohhh moment and realised that I really should have fitted my rear bumper first. So, how do I go about this? Do I loosely assemble the 3 bits plus the overriders and then fit it to the car? Or is there an easier way? And I'm thinking that the long side of the bumper to body seal sits uppermost?
As ever, your thoughts and suggestions most welcome.
Andy
Andy
1970 S2 FHC
1965 SB Corvette Ragtop
-
Jeff Cecil
- Posts: 67
- Joined: Tue Sep 30, 2014 2:47 am

Post
by Jeff Cecil » Fri Nov 08, 2019 3:04 am
Andy, I can tell you how I went about it, but it may not help you much. I bolted my bumper together and bolted it to the car when I was doing the bodywork to the rear of the car ( not really necessary to mount the over riders). At this point, I leveled the bumper by installing extra washers in the rear bolt areas. The left side is usually high on series 2 cars, so adding washers will level the bumper. The bumper inner edge was not consistent to the curves of the body ( keep in mind these cars were hand built and parts were not produced with the same accuracy of cars today and most of the cars varied somewhat). I marked the furthest distance from the inner edge to the body with tape. I then ground the inner edge to have the same distance from the body from sides to rear. Clear as mud, right? In other words, I made the gap the same between the body and the bumper from the forward most point to the rear bumper bar continuing on to the other side. Having the same distance gap all around makes the rubber strip straight when installed. I then sent my bumpers to be chromed. After paint, I installed the bumper and then the rubber with 3M weatherstrip adhesive and all was well. If your bumpers are already re-chromed and the car is painted, you can still grind the gaps, being careful to grind DOWN on the bumpers as to not "peel" the chrome up at the edge. I would then coat the edge with silver paint to prevent rust. This edge is coated with the adhesive when the rubber is installed, so the adhesive will help prevent rust too. I mounted the bumper by myself after paint and re-chroming but an extra hand would help. I used tape on the edges of the bumper and the body while installing the bumper to keep from scratching the paint. Hope this helps.
-
johnetype
- Posts: 474
- Joined: Sun Feb 26, 2012 11:54 pm
- Location: Worcestershire
Post
by johnetype » Sat Nov 09, 2019 11:30 pm
On my car I fitted the lights first for easy access and iirc I had no problems fitting the bumper afterwards with the lights in place.
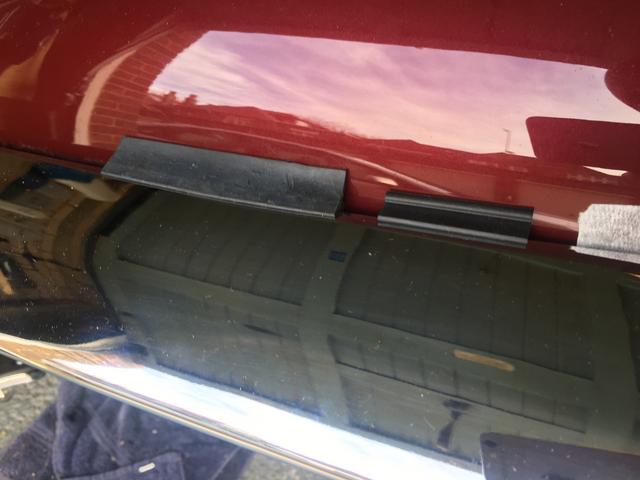
The long side of the bumper seal does sit uppermost. If you use the Series 2 seal it's a very long side to sit anywhere and looks ugly in my opinion so I used the Series 1 seal which is much narrower. With the Series 1 seal you need the three sections of the bumper together off the car (after a trial fit and with the overriders still off for now) to superglue the seal to the top edge of the bumper blade.
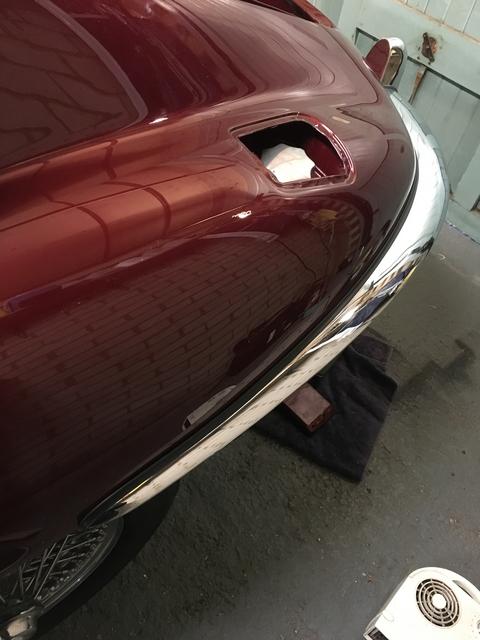
During my restoration the holes in the rear wheel arch for the front edge of the bumpers had been lost and I wasn't keen to recreate them as it creates a rust trap. I found that I could mount the bumper to the car quite satisfactorily with out using the very foremost bolt.
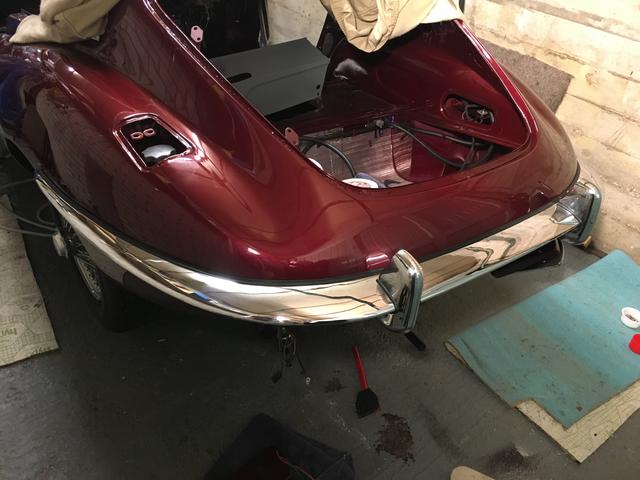
I then fitted the overriders last.
John
1969 Series 2 FHC
-
Topic author
mach2andy
- Posts: 298
- Joined: Wed Jun 21, 2017 9:31 am
Post
by mach2andy » Tue Nov 19, 2019 9:34 am
Last edited by
mach2andy on Wed Nov 20, 2019 8:39 am, edited 1 time in total.
Andy
1970 S2 FHC
1965 SB Corvette Ragtop
-
Richardhealey
- Posts: 218
- Joined: Sun Apr 09, 2017 6:31 pm
- Location: Berkhamsted
Post
by Richardhealey » Tue Nov 19, 2019 7:01 pm
Very interesting technique Andy, for those of us working alone in cold workshops! I am sure your method will be very useful for me when the time comes. Page bookmarked

Rich
1969 series 2, 2+2... going for a full rebuild.. Gulp...
-
Topic author
mach2andy
- Posts: 298
- Joined: Wed Jun 21, 2017 9:31 am
Post
by mach2andy » Wed Nov 20, 2019 8:30 am
Hi Richard
Can't lay claim to the ratchet strap idea. Read it on here!! Very useful when working alone as I usually am. Have you got your car back yet? How's it going?
ATB
Andy
Andy
1970 S2 FHC
1965 SB Corvette Ragtop
-
Richardhealey
- Posts: 218
- Joined: Sun Apr 09, 2017 6:31 pm
- Location: Berkhamsted
Post
by Richardhealey » Wed Nov 20, 2019 9:06 pm
Hi Andy,
Next week! Can’t bloody wait!!
Already staring to lay out the new wiring harness and labelling etc and comparing to the old...

For me the real, actual fun, is about to start!

1969 series 2, 2+2... going for a full rebuild.. Gulp...
-
288gto
- Posts: 1417
- Joined: Wed Nov 14, 2012 8:59 pm
- Location: United Kingdom

Post
by 288gto » Thu Nov 21, 2019 8:36 am
Very helpful Andy, I’m doing mine on my own at the moment, fitting, grinding and mocking up prior to sending off for chrome.
The only thing I can add that worked for me was to screw a stud into the pointy end of the bumper rather than keep trying to get a bolt in. This way I could slide the slotted brackets at the over rider ends onto the loose bolts and washers where the lights are and then push the stud through the hole in the wheel arch and put a nut and washer on.
Obviously for final fit I will swap the studs for bolts to avoid them hitting the tyre.
Your car is coming along nicely by the way. Always nice to see posts and activity in the S2 section!
Simon
Simon
1969 S2 OTS
-
AshM
- Posts: 455
- Joined: Wed Dec 14, 2016 4:59 pm
- Location: Edinburgh, Scotland
Post
by AshM » Fri Nov 22, 2019 3:17 pm
Nice job Andy.
Car is looking great.

Cheers
Ash
Series 2 FHC 1970
1R 20607
-
Gfhug
- Posts: 3313
- Joined: Thu Jun 19, 2014 3:08 pm
- Location: Near Andover, Hampshire,in D.O. Blighty
Post
by Gfhug » Fri Mar 31, 2023 4:51 pm
This topic has helped with my fitting of the rear bumpers to my cars, so thank you all.
I’d add that thick washers can also be added to create a greater gap between bumper and car, especially at the front of the blade where there might not be enough material to grind down to get an even gap to the car. So long as you check there’s no unsightly gap created at the join with the centre section then this can save a bit of cutting or grinding. (Apologies to anyone who has suggested this idea before.)
Geoff
S2 FHC Light Blue
S2 OTS LHD - RHD full restoration