Series 2 clutch

Talk about the E-Type Series 2

Topic author
JC
Posts: 56
Joined: Tue Sep 25, 2012 9:13 pm
Location: Worcester
Great Britain

#1 Series 2 clutch

Post by JC » Mon Jan 13, 2020 11:47 pm

I've taken the plunge to replace the clutch on my SII, after putting up with grating for some time and explored other possible causes of the problem!!

I'm not at the engine out stage (yet!!) but already have a few queries!!!!! Any advice will be gratefully received!!

1. I've got the bonnet off - it is standing on its (well used) front bumpers leaning against the wall - see image at end of post. Is there a preferred way of temporarily storing a bonnet - flat/upright etc?

2. Should I disconnect the manifold at its top or bottom?

3. I've read that the back of the car needs be jacked up to remove engine/gearbox - is this sensible advice? If so, by how much?

4. I'm guessing that the engine removal will be easier with the radiator removed?

Cheers, JC
Image
Cheers, John

Link:
BBcode:
HTML:
Hide post links
Show post links

User avatar

mgcjag
Moderator
Posts: 8091
Joined: Fri Jul 09, 2010 6:15 pm
Location: Ludlow Shropshire
Great Britain

#2 Re: Series 2 clutch

Post by mgcjag » Tue Jan 14, 2020 8:45 am

Hi JC its usual to stand the bonnet the other way on some old carpet its more stable... are you taking it out the top or bottom.....have a look below not my photo..Steve
Image
Image
Steve
69 S2 2+2 (just sold) ..Realm C type replica, 1960 xk150fhc

Link:
BBcode:
HTML:
Hide post links
Show post links

User avatar

politeperson
Posts: 1293
Joined: Tue Jun 07, 2016 8:26 pm
Location: Boston UK
Great Britain

#3 Re: Series 2 clutch

Post by politeperson » Tue Jan 14, 2020 7:07 pm

JC,

I have done 2 e type clutches in the the last 2 weeks! I must be mad.

Your questions!

1. I've got the bonnet off - it is standing on its (well used) front bumpers leaning against the wall - see image at end of post. Is there a preferred way of temporarily storing a bonnet - flat/upright etc?

Preferably, like Steve says, the other way up, but if it is stable I would leave it alone.

2. Should I disconnect the manifold at its top or bottom?

Take off both manifolds- intake and exhaust. Reach right in from underneath with a half inch spanner, like birthing a cow for the intake with the carbs still attached. One manifold stud on the exhaust can be a pain on the bottom row. You will probably have to split the exhaust at the middle box. Remove it completely from the car.

3. I've read that the back of the car needs be jacked up to remove engine/gearbox - is this sensible advice? If so, by how much?

Depends what lifting gear you have. Steve has the right idea it you are using an engine hoist.

4. I'm guessing that the engine removal will be easier with the radiator removed?

I have just done both with the radiators in place.

The really important thing is to check the prop and the clutch release is spot on before you put it all back together.

The prop may need new uj's and balancing.

If the flywheel has been shaved more than 3mm, the whole lot wont work. The clutch will not release.

You must check there is sufficient travel left to operate the clutch when the release bearing comes into contact with the pressure plate. Otherwise the whole lot will have to come out again. You can only check this after the gearbox has been bolted back onto the engine. A worn flywheel will affect this measurement.
Its true, but Enzo never said it
Too many E types
XK120 SUs

Link:
BBcode:
HTML:
Hide post links
Show post links

User avatar

MarkRado
Posts: 339
Joined: Fri Jan 26, 2018 9:13 am
Location: Graz
Austria

#4 Re: Series 2 clutch

Post by MarkRado » Wed Jan 15, 2020 5:16 am

Hi James,
my clutch is due for replacement as well - a pity you are so far away :bigrin:
What is the min flywheel thickness? I guess that my car had at least 2 new clutches in the past maybe with scimmed flywheel, so I have to be careful,
thank you
Mark
1963 OTS 880436

Link:
BBcode:
HTML:
Hide post links
Show post links

User avatar

mgcjag
Moderator
Posts: 8091
Joined: Fri Jul 09, 2010 6:15 pm
Location: Ludlow Shropshire
Great Britain

#5 Re: Series 2 clutch

Post by mgcjag » Wed Jan 15, 2020 8:51 am

Also ensure you fit the correct release bearing there are several different types..the photo shows just 2 types the one on the left has well worn carbon but note the different body shape....Steve
Image
Steve
69 S2 2+2 (just sold) ..Realm C type replica, 1960 xk150fhc

Link:
BBcode:
HTML:
Hide post links
Show post links

User avatar

politeperson
Posts: 1293
Joined: Tue Jun 07, 2016 8:26 pm
Location: Boston UK
Great Britain

#6 Re: Series 2 clutch

Post by politeperson » Wed Jan 15, 2020 10:51 am

Hello Mark,

I dont know.

The standard one that was 36.5mm thick worked. The standard one that was 33mm didnt. That was with a new bearing C235752.

The other flywheel I had was a lightweight Fidenza with 9.5 inch finger spring clutch. I checked that and the whole clutch assembly-even after 10,000 enthusiastic-miles had no measurable wear in anything, (Even with my 2.88:1 diff). So I refitted it.

As Steve said, the design of the thrust bearing will have a lot to do with the release clearance to the bellhousing.

By the way, the S2 flywheel should have dowel positions for both types of clutch pressure plate, so the dowels can be swapped easily.

James
Its true, but Enzo never said it
Too many E types
XK120 SUs

Link:
BBcode:
HTML:
Hide post links
Show post links

User avatar

mgcjag
Moderator
Posts: 8091
Joined: Fri Jul 09, 2010 6:15 pm
Location: Ludlow Shropshire
Great Britain

#7 Re: Series 2 clutch

Post by mgcjag » Wed Jan 15, 2020 2:50 pm

Just beware of release bearing part number.....i have seen both of the ones in my photo above sold under the same part number as James quoted above......so ensure a replacement is the shape you need and do not just rely on the part number you order....Steve
Steve
69 S2 2+2 (just sold) ..Realm C type replica, 1960 xk150fhc

Link:
BBcode:
HTML:
Hide post links
Show post links


Topic author
JC
Posts: 56
Joined: Tue Sep 25, 2012 9:13 pm
Location: Worcester
Great Britain

#8 Re: Series 2 clutch

Post by JC » Thu Jan 30, 2020 8:15 pm

Thank you all for the very useful advice, particularly the pitfalls when 'fitting' and the heads-up on dropping the engine. Not that I don't trust you, but I checked up on the 'dropping engine' approach - there may be more to come off, but it looks an awful lot less scary!!

I was going to post a link to my 'clutch replacement blog' - but that absolutely pristine example shown puts my very-well-used bodywork to shame!!

Cheers, JC
Cheers, John

Link:
BBcode:
HTML:
Hide post links
Show post links


Mancity8040
Posts: 6
Joined: Tue Aug 27, 2019 3:00 pm
Great Britain

#9 Re: Series 2 clutch

Post by Mancity8040 » Mon Aug 24, 2020 7:57 pm

Hi I have a 69 series 2fhc and the clutch needs replacing has anyone a rough costing on the job or recommendations I’m in Manchester my friend is a mechanic ex aa but it looks a difficult job also any recommendations on seals to replace while I’m at it thanks

Link:
BBcode:
HTML:
Hide post links
Show post links

User avatar

bitsobrits
Posts: 414
Joined: Tue Dec 27, 2011 2:09 am
Location: Omaha, NE area
United States of America

#10 Re: Series 2 clutch

Post by bitsobrits » Tue Aug 25, 2020 2:05 am

Removing the engine from the bottom can be done without an engine crane, using only a floor jack.

I've never removed an E engine out the top, and have only done two out/in the bottom, both without a crane, so I can't provide a comparison of time or complexity.

You are right that more needs removed when the engine comes out the bottom, but all of the removed bits are probably ready for a good clean and new gaskets anyway. For a pro shop you are paying by the hour maybe out the top is more efficient, but for a DIY job, the bottom route takes less heavy equipment, though likely more time.

So not saying the way I did it is the right way, but here's the brief overview;
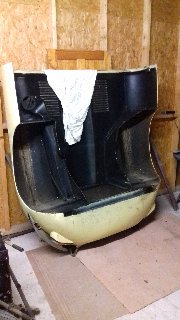
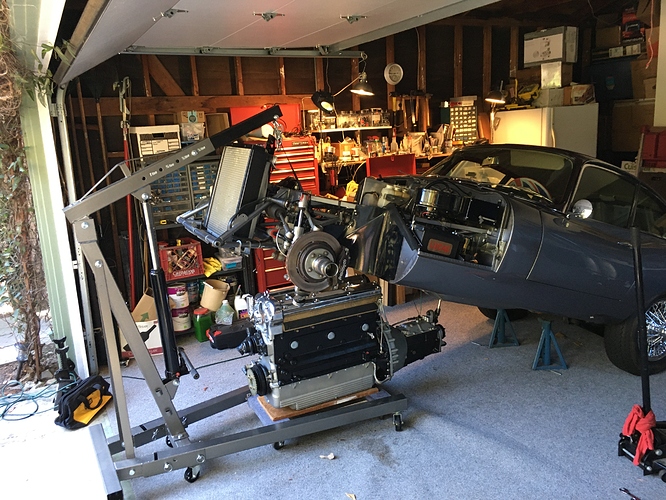
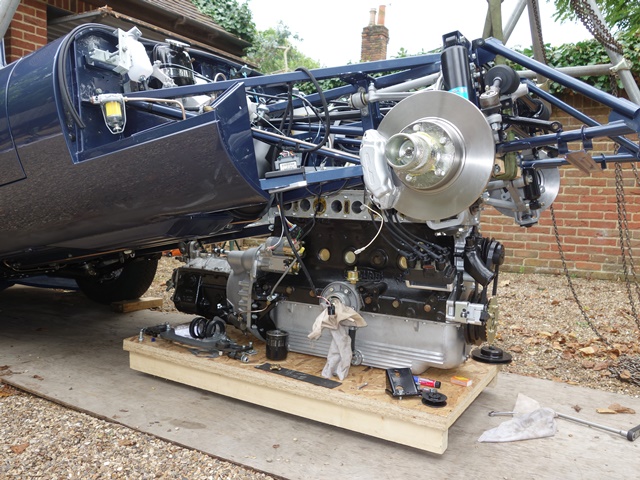
Once the bonnet is off, engine ancillaries, exhaust, driveshaft, reaction plate, etc are removed, remove the front wheels and lower the car until the oil pan is resting on a low and sturdy wheeled dolly (I used an inexpensive moving dolly with a reinforcing plate of 3/4" plywood on top). Support the engine frames with the floor jack and remove all the engine attaching hardware and then the engine mounts from the front sides of the engine block. To lift the chassis up and 'over' the engine takes two people if the suspension is still in place, but it's manageably light. (I'm 165lbs, so not a big guy). Lift the body/chassis slowly and roll it fore/aft as required on the rear wheels to clear the subframes and roll the body/chassis back from the engine and set the font end on previously prepared stands. Alternatively, if you have access to some sort of hoist you could use that to lift the chassis.

The second time I did this, I did the reinstall totally solo, but the front of the car was stripped down to the bare subframes so it was very light indeed.
Steve
'65 S1 4.2 FHC (early)

Link:
BBcode:
HTML:
Hide post links
Show post links


tinworm
Posts: 611
Joined: Mon Jan 02, 2012 9:48 am
Location: devon
Great Britain

#11 Re: Series 2 clutch

Post by tinworm » Tue Aug 25, 2020 6:22 am

Or you can disconnect the exhaust, prop, brake pipes, bonnet etc , unbolt the engine frames at the bulkhead and split the car in two - wheel the lot out with a trolly jack under the gearbox.

Barrie
1968 E-type roadster, 1964 E-type fixed head 1995 Ferrari 355 1980 Ferrari 308 1987 V8 90 Landrover 1988 Bedford rascal van 1943 Ford GPW

Link:
BBcode:
HTML:
Hide post links
Show post links

Post Reply Previous topicNext topic