


Hi All,
I am currently re building a series 3 and have got the stage of fitting the Torsion Bars, I could really do with some help! The vehicle is in the later serial numbers that require the Torsion Bars to have pre-tension.
I don’t have access to the Jaguar setting tool.
So far I have got as far making a setting link and rotating the torsion bar until the reaction bracket bolts line up.
Could someone please tell me in a simple step by step description what comes next.
Thanks in advance
Mark
Series 3 Torsion bar setting
#2 Re: Series 3 Torsion bar setting
At the end of the day, without tools, you'll have to solve the answer backwards by thinking laterally.
If you have no tool to control the tension by making changes to the tension at the back of the torsion bar, then you must make the back the fixed point and make your control of the tension at the front of the bars.
You've achieved the right end result when the front suspension arms are horizontal when they settle.
Settling them means moving the car so the sideways friction of the tyres doesn't falsely affect the ride height. The manual says roll the car backwards and forwards several times on a level surface to achieve this.
The s3 has cams on the front suspension so you have some leeway to make adjustments if too low.
With no setting tools and the front of the car up in the air, you can instead of mounting the lower wishbones into the front frames using the bolts Jaguar gives you, use much longer bolts or studs. This gives you the ability to mount the lower wishbones away from the frames and then wind them into the frames to tension the torsion bars that way, instead of via the setting tool. Then drop the car down and go back to settling the car as described above.
Now take a view as to whether you pretensioned enough and raise the car again, wind out the tension, change the tension and re-lower the car.
There is no danger when there is no tension in the bars. The flipside is that you don't want to be under the wishbones or allow them to jump sideways when you are winding them up with tension (by dropping the car or by jacking the wishbones) as each corner of the car is supporting a quarter of the weight of the car. That means each torsion bar unloaded must be substantially twisting around to to push the wishbone into the ground.
In summary, by mounting the front wishbones away from the frames using longer studs (as a temporary measure during installation only) whilst the car is held unnaturally high in the air, you can wind tension into the torsion bars that way, rather than by using a factory tool and then wind the wishbones onto the frames together with the bars, thus pretensioning the torsion bars to achieve the desired ride height.
kind regards
Marek
| Link: | |
| BBcode: | |
| HTML: | |
| Hide post links |
#3 Re: Series 3 Torsion bar setting
Hi Mark,
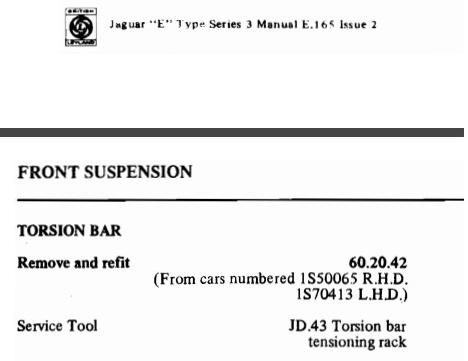
If you would rather do the job as per the manual and if you are a member or join the JEC (Jaguar Enthusiasts Club), you can hire the JD43 torsion bar tensioning tool from Ken Jenkins who runs their tool hire scheme, . Also, SNGB now offer a reproduction of the original Kent Moore tool https://www.sngbarratt.com/English/#/UK ... %20tool%60, but it is a bit pricey.
Bob
Bob
'71 S3
'71 S3
| Link: | |
| BBcode: | |
| HTML: | |
| Hide post links |


#4 Re: Series 3 Torsion bar setting
Sooo, after Mark has the reaction plate bolts holes nicely lined up, from this position he mis-aligns the reaction plate one spline tooth, then uses the special tool, or Bill’s turnbuckle, or Marek’s wishbone bolt method, to re-establish the alignment and bolt up?
I’ve never had to do this, my car is the earlier type, per the manual I use an 8 mm longer setting and therefore don’t need to use any pre-tensioning tool/jig. Can anyone enlighten me (us?), why was this method changed, why not for earlier cars also, or why can’t the earlier method be used for later cars, all we are doing is adjusting the ride height?
I’ve never had to do this, my car is the earlier type, per the manual I use an 8 mm longer setting and therefore don’t need to use any pre-tensioning tool/jig. Can anyone enlighten me (us?), why was this method changed, why not for earlier cars also, or why can’t the earlier method be used for later cars, all we are doing is adjusting the ride height?
Regards,
ColinL
'72 OTS manual V12
ColinL
'72 OTS manual V12
| Link: | |
| BBcode: | |
| HTML: | |
| Hide post links |
#5 Re: Series 3 Torsion bar setting
Hi Colin
Not directly relevant to the original question so apologies to Mark for that, but would you mind confirming that your early torsion bars are 0.75" dia, ie the same as the later ones which were extended beyond the working length to accomodate fitting the JD43 tensioning tool. I have taken it that they were the same, since 0.75" was in the original spec released by Jaguar and is the diameter of the later bars, although if they were different it might explain the different setting bar lengths.
One other question, several early cars I have images of show what appears to be a reinforcing block at the body mount end of the bar. This is not shown in the parts manual, and isn't used with the later bars. Does your car have these and if so do they have any function apart from reinforcing the mounting point.
Thanks,
Bob
Bob
'71 S3
'71 S3
| Link: | |
| BBcode: | |
| HTML: | |
| Hide post links |
#6 Re: Series 3 Torsion bar setting
Hi Bob – is relevant if it’s giving options, special tools not required?
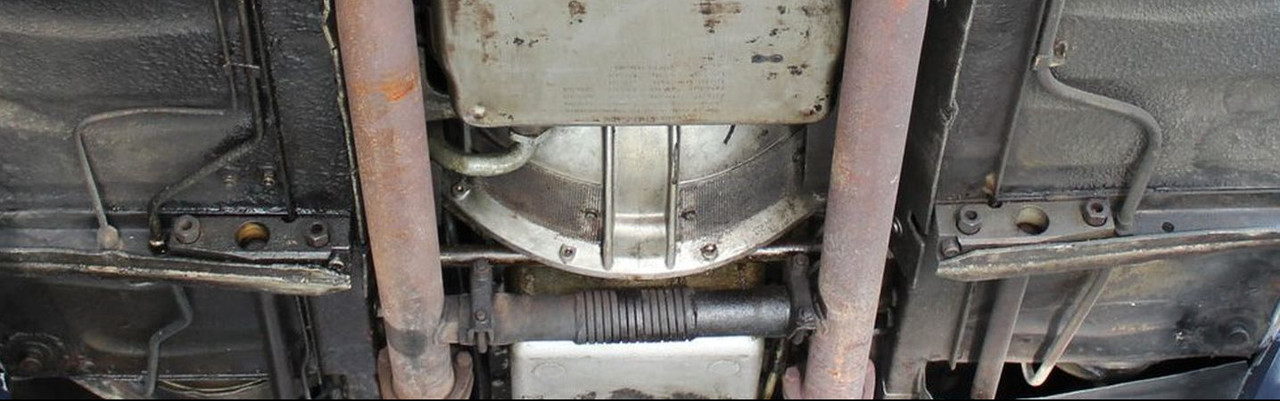
My torsion bars are ¾ inch diameter, I don’t have that heavy plate, my torsion bars protrude from the back of the reaction plate mounting by 25 mm.
My understanding, there is only one set of torsion bar part numbers so there should be only one design of torsion bar, seems inconsistent with yr advice that there was a later design with longer splines to accommodate the pre-tensioning tool?
I am seeing that the earlier method, a longer setting (497 mm b/w shock absorber mounts) and no pretensioning, yields exactly the same result as a shorter setting (489 mm) with a one tooth presetting. Hopefully there is universal understanding that, because the bars are all the same diameter, the spring rates, handling, everything, will be exactly the same, the only reason for this torsion bar adjustment is to set the ride height.
In my case, diligently following the early method resulted in a slightly nose up stance, that I couldn’t correct using the cams. So I used science and maths to calculate the setting distance that should have given me the stance I wanted; if didn’t, too nose-down. So I drilled a 3rd hole half way between, 49 cm, close enough for final adjustment using the cams.
So maybe, if Mark doesn’t bother with the pre-tensioning, just bolts up the reaction plate as it is currently aligned, will be perfect for him also?
Regards,
ColinL
'72 OTS manual V12
ColinL
'72 OTS manual V12
| Link: | |
| BBcode: | |
| HTML: | |
| Hide post links |
#7 Re: Series 3 Torsion bar setting
Hi Colin
Sorry, when you said in #4 that your car was the early type I hadn't noticed that it says 72 OTS in the footnote, so it would have the later type torsion bars, which are as you describe, 0.75"dia with extended rear splines. Only 2+2s had the early type, up to 1S50064 RHD and 1S70412 LHD. These were the ones without the extension of the rear splined section so can't accomodate the tensioning tool. It is interesting that the damper part numbers also changed at the same point.
2+2PM
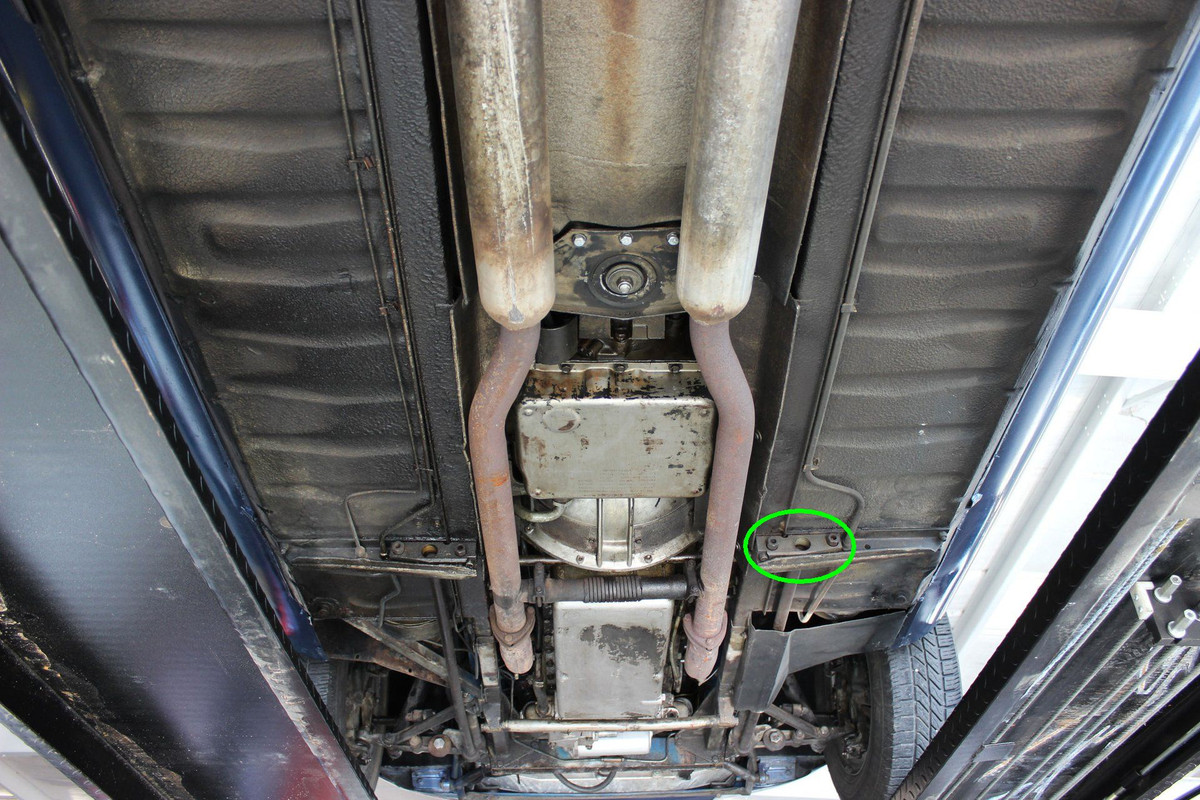
The PM doesn't show the difference but these images illustrate.
Early type with reinforcing block fitted
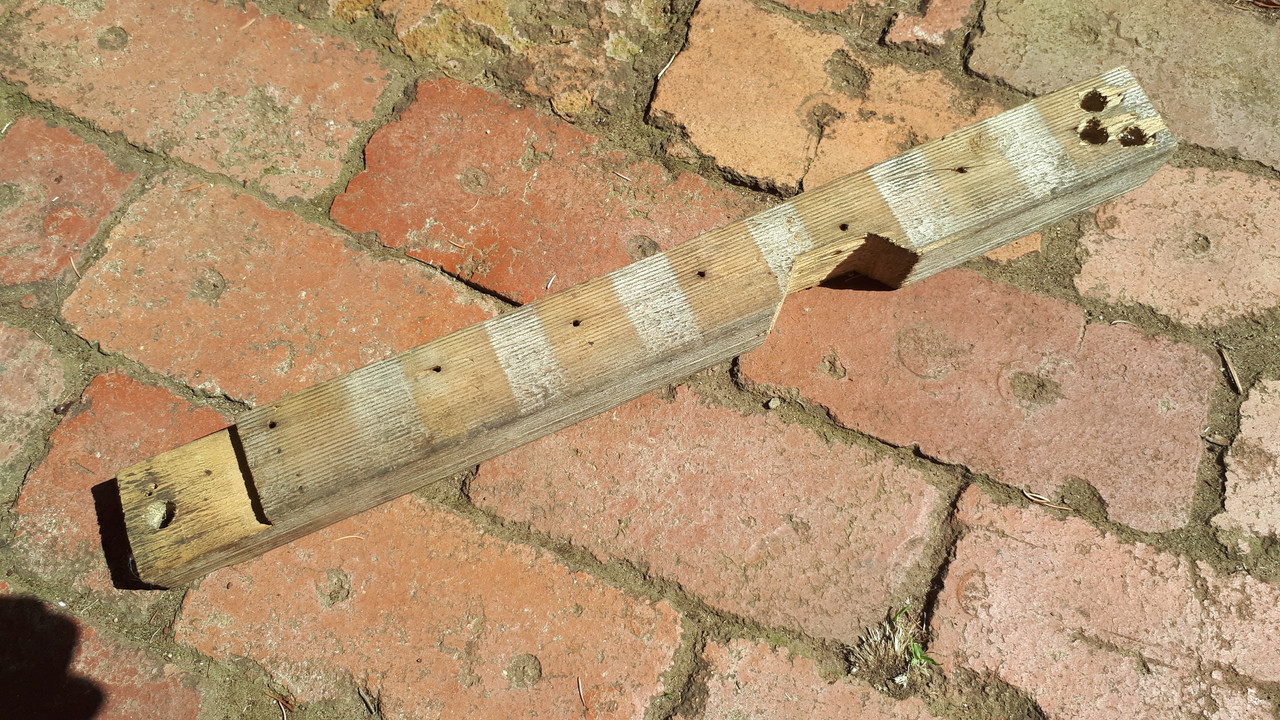
Early type without reinforcing block fitted
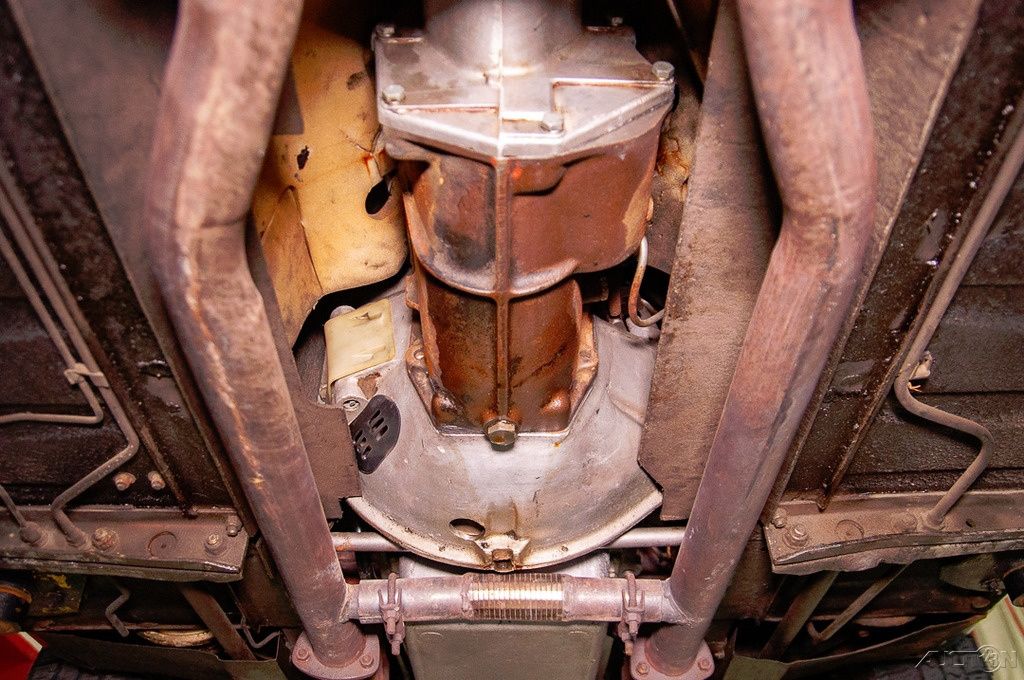
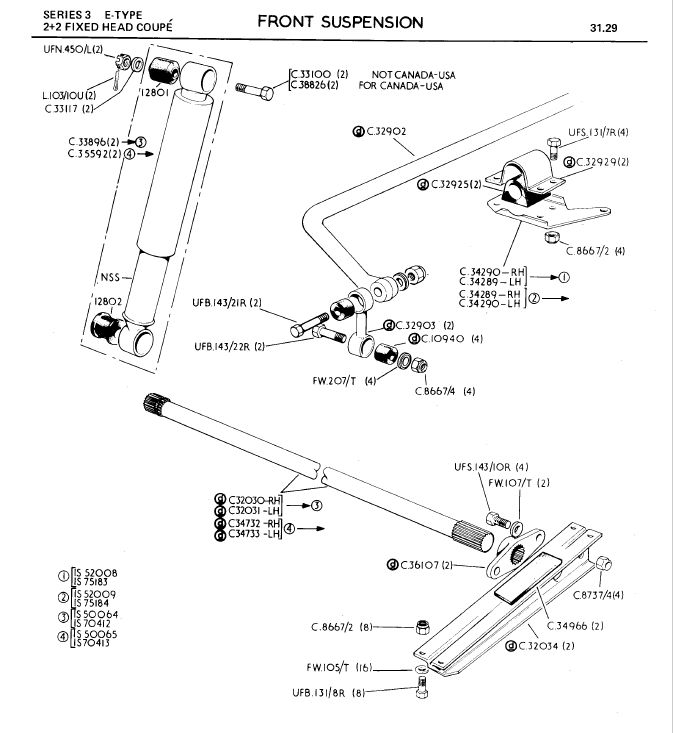
Later, longer rear spline type
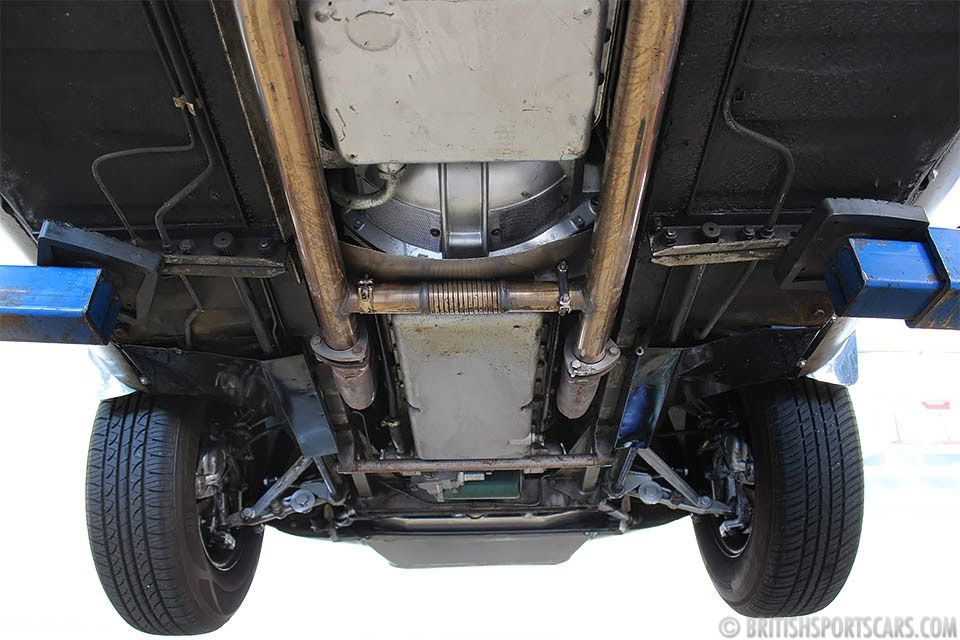
I don't think there was any change in diameter between the two but if anyone has the early shorter bars on their car if would be good to confirm that the diameter is 0.75".
Sorry, when you said in #4 that your car was the early type I hadn't noticed that it says 72 OTS in the footnote, so it would have the later type torsion bars, which are as you describe, 0.75"dia with extended rear splines. Only 2+2s had the early type, up to 1S50064 RHD and 1S70412 LHD. These were the ones without the extension of the rear splined section so can't accomodate the tensioning tool. It is interesting that the damper part numbers also changed at the same point.
2+2PM
The PM doesn't show the difference but these images illustrate.
Early type with reinforcing block fitted
Early type without reinforcing block fitted
Later, longer rear spline type
I don't think there was any change in diameter between the two but if anyone has the early shorter bars on their car if would be good to confirm that the diameter is 0.75".
Bob
'71 S3
'71 S3
| Link: | |
| BBcode: | |
| HTML: | |
| Hide post links |
#8 Re: Series 3 Torsion bar setting
Weird, my manual doesn't say that the instructions are for 2+2's only:
If you are right it answers my question, torsion bar tensioning rack is not necessary?
If you are right it answers my question, torsion bar tensioning rack is not necessary?
Regards,
ColinL
'72 OTS manual V12
ColinL
'72 OTS manual V12
| Link: | |
| BBcode: | |
| HTML: | |
| Hide post links |
#9 Re: Series 3 Torsion bar setting
The clue in the ROM is the car numbers given in brackets, which says "From Car Nos 1S50065 and 1S70413" which are 2+2s. There is no mention of 1S1xxx and 1S2xxxx Car Numbers which would be OTS. In 1970, out of the first 590 cars produced, only 3 were OTS, so given that 476 had early bars they may well have all been 2+2s.
None of which explains why two different setting link lengths were specified if the early and late torsion bars are the same diameter, which I strongly suspect they are, but I have no proof. The explanation lies elsewhere.
None of which explains why two different setting link lengths were specified if the early and late torsion bars are the same diameter, which I strongly suspect they are, but I have no proof. The explanation lies elsewhere.
Bob
'71 S3
'71 S3
| Link: | |
| BBcode: | |
| HTML: | |
| Hide post links |
#10 Re: Series 3 Torsion bar setting
Thank you all for your input, I used the reaction plate method in the end , jacking up the inboard end bought the reaction plate in range of the bolts, easy to then pull the reaction plate back into position, thanks to Peter Grace in particular.
I would also like to take this opportunity to thank Roger Clinton at Kiley Clinton for his invaluable help in converting my steering rack, a true gentleman!
Mark
I would also like to take this opportunity to thank Roger Clinton at Kiley Clinton for his invaluable help in converting my steering rack, a true gentleman!
Mark
| Link: | |
| BBcode: | |
| HTML: | |
| Hide post links |
#11 Re: Series 3 Torsion bar setting
Colin Wrote:
I can't see how the result can be exactly the same.
The diameters of TBs for the earlier and later cars are the same and when I get time to remove a TB from an early car, I'll have it tested to determine the heat treatment and compare with a later car TB.
To use a Setting Link to achieve the same result as the 48.89cm Pitch Setting Bar and 1 x rear spline tooth index combination, by my calculations, it would have to have holes at a circa 52.64cm pitch. I believe the reason indexing the TB by one tooth of the rear spline with the indexing tool, is that the lower wishbone can't accommodate being rotated about its fulcrum by a further 14.4 degrees to be able to use just a setting link.
If the TBs of the early and later cars are the same, the use of a 48.89cm Pitch Setting Bar and 1 x rear spline tooth index, would have to result in a higher ride height.
Regards,
Bill
Hello Colin,I am seeing that the earlier method, a longer setting (497 mm b/w shock absorber mounts) and no pretensioning, yields exactly the same result as a shorter setting (489 mm) with a one tooth presetting. Hopefully there is universal understanding that, because the bars are all the same diameter, the spring rates, handling, everything, will be exactly the same, the only reason for this torsion bar adjustment is to set the ride height.
I can't see how the result can be exactly the same.
The diameters of TBs for the earlier and later cars are the same and when I get time to remove a TB from an early car, I'll have it tested to determine the heat treatment and compare with a later car TB.
To use a Setting Link to achieve the same result as the 48.89cm Pitch Setting Bar and 1 x rear spline tooth index combination, by my calculations, it would have to have holes at a circa 52.64cm pitch. I believe the reason indexing the TB by one tooth of the rear spline with the indexing tool, is that the lower wishbone can't accommodate being rotated about its fulcrum by a further 14.4 degrees to be able to use just a setting link.
If the TBs of the early and later cars are the same, the use of a 48.89cm Pitch Setting Bar and 1 x rear spline tooth index, would have to result in a higher ride height.
Regards,
Bill
| Link: | |
| BBcode: | |
| HTML: | |
| Hide post links |
#12 Re: Series 3 Torsion bar setting
Both methods are supposed to yield exactly the same result; a ride height of 15.3 – 16.5 cm (front subframe above the ground). As you point out, theory suggests they can’t. Bob is surmising that the earlier bars must be a different diameter. You are surmising they must have a different heat treatment. I am surmising that the instructions are BS (yes I know, perpetrating sacrilege again …)
You are surmising that the pre-tensioning tool was introduced because the lower wishbone can’t be rotated far enough, meaning you haven’t tried it? On my car it does it easily. At the time I didn’t know that the chassis numbers used to demarcate the two methods were for 2+2’a only so I used the 1st method, very grateful that I didn’t have to even think about any pre-tensioning rigmarole. Now it seems, no-one else does either?
You are surmising that the pre-tensioning tool was introduced because the lower wishbone can’t be rotated far enough, meaning you haven’t tried it? On my car it does it easily. At the time I didn’t know that the chassis numbers used to demarcate the two methods were for 2+2’a only so I used the 1st method, very grateful that I didn’t have to even think about any pre-tensioning rigmarole. Now it seems, no-one else does either?
Regards,
ColinL
'72 OTS manual V12
ColinL
'72 OTS manual V12
| Link: | |
| BBcode: | |
| HTML: | |
| Hide post links |
#13 Re: Series 3 Torsion bar setting
Colin Wrote:
No, I agree. A lot of the instruction in the S3 E Type Workshop Manual is BS. One is the method described to refit the Lay Shaft when assembling the Gearbox. The method that they dropped was much better, but simply inverting the gearbox that I use is best of all. Another is the instruction relating to setting the pre-load of the differential Pinion Bearing; that's totally wrong.
If the lower wishbone will rotate the additional 14.4 degrees, why in the world would anyone suggest this more complicated system torquing the TB the one spline tooth?
Regards,
Bill
Hello Colin,I am surmising that the instructions are BS (yes I know, perpetrating sacrilege again …)
No, I agree. A lot of the instruction in the S3 E Type Workshop Manual is BS. One is the method described to refit the Lay Shaft when assembling the Gearbox. The method that they dropped was much better, but simply inverting the gearbox that I use is best of all. Another is the instruction relating to setting the pre-load of the differential Pinion Bearing; that's totally wrong.
If the lower wishbone will rotate the additional 14.4 degrees, why in the world would anyone suggest this more complicated system torquing the TB the one spline tooth?
Regards,
Bill
| Link: | |
| BBcode: | |
| HTML: | |
| Hide post links |
#14 Re: Series 3 Torsion bar setting
Using a 48.89cm Pitch Setting Bar and 1 x rear spline tooth index combination, equates to usings a circa 52.64cm pitch setting link. If the TBs of the early production S3 2+2 were had the same torsion rating as the later cars, using the much longer setting link must result in a higher ride height.
Given the same material used in the manufacture of the TBs from the early and later cars, heat treatment won't have an effect on the spring rating of the TB, only the Yield Point, the hardened and tempered TB having a much higher YP than a TB in the annealed state. Accordingly, to use affectively two quite different length setting links to achieve the same ride height, the TBs must be different diameters and indeed, that's where the TBs from the early and later cars differ. Two early S3 2+2 cars I have in work have TBs measuring 21.2mm (0.835"), in later cars the TBs are 19.05mm (0.75").
The smaller diameter TB would require a greater initial torque to achieve the same ride height as the higher spring rating, larger diameter TB, hence the equivalent of a 52.64cm pitch setting link for the smaller diameter TB. If the lower wishbone can be swung down enough to accept this length setting link, its a bit surprising that Jaguar would use both a setting link and a tool to preload the TB by 1 tooth of the rear spline. Surely that would be a slower operation.
Regards,
Bill
| Link: | |
| BBcode: | |
| HTML: | |
| Hide post links |
#15 Re: Series 3 Torsion bar setting
Imo the BS bit is the 14.4 degrees, i.e., the 1 tooth pre-tension. Surely, I am not the only person who has managed to set the correct ride height without any pre-tensioning?
Hopefully there is universal awareness that such pre-tensioning has no impact on suspension stiffness, it is only about ride-height.
I used 49 cm setting distance. My ride height is 15 cm, i.e., at the lower end of the range, because this is what I want. To achieve this, the cams are wound up close to maximum lift. My tyres are 215/70R15, these increase ride height by 7 mm relative to the oem tyre.
A future upgrade will be 215/55R17 tyres, these are same diameter as the oem tyres. For these and a neutral cam setting, my 49 cm setting without pre-tensioning would not be enough, ride height would be a tad low. However, I am not limited to 49 cm setting distance, before I settled on this I tried 50 cm (497 mm), from memory this required the lower wishbone to be rotated very close to its limit. Still is more than enough for pre-tensioning to not ever be required.
My assumption is, everyone who pre-tensions as per the manual, probably also has to back their cams right off in order to get down as close as possible to the maximum ride height; 16.5 cm.
Bill, heading your way later this week, hopefully you'll be there, Cheers.
Regards,
ColinL
'72 OTS manual V12
ColinL
'72 OTS manual V12
| Link: | |
| BBcode: | |
| HTML: | |
| Hide post links |
#16 Re: Series 3 Torsion bar setting
Hello Colin,
The TBs for the early cars are a larger diameter, therefore, their spring rating must be greater. If the same Setting Link were to be used for both diameter of TB, the larger diameter would result in a higher ride height, that is unequivocal. Accordingly, I can see reason in using a setting link with a different pitch, but if the lower wishbone can rotate the further 14.4 degrees, I'm puzzled as to why a longer setting link wasn't used, instead of the rigmarole of using the pre-torque tool.
I'm not sure of the weight difference between the S3 2+2 and the OTS, but one can assume that is the reason why the OTS with the same lighter rated TBs seems to be exempt in using the pre-torque procedure.
At the end of the day, it only matters that the right, or desirable ride height is achieved, not how it was actually achieved.
I'll be at the workshop.
Regards,
Bill
| Link: | |
| BBcode: | |
| HTML: | |
| Hide post links |
#17 Re: Series 3 Torsion bar setting
Hi Bill,
Thank you for providing the first solid evidence that the early torsion bars were a different diameter to the later ones. Can you confirm that the bars fitted are of the shorter length of rear spline, do not protrude through the rear mounting bracket as the later bars do and that there is a thick steel block bolted to that bracket as shown in the first photo in post#7 above. Can you say what the car numbers are, or if you would rather not without the owners' consent, can you confirm that these 2+2s are within or just outside the range 1S50001-64 or 1S70001-412?
Just to clarify, from the introduction of the 0.75" bars and a new damper, both OTS and 2+2s had the same bars, the same dampers and the same setting procedure irrespective of any weight difference between the two models. The reason the early set up procedure did not apply to OTS was that all early production was 2+2s and by the time OTS production started it appears the new design had already been introduced.
Given that a torsion bar spring rate is proportional to the fourth power of the radius, a change from 0.835" to 0.75" represents a reduction of nearly 54% in wheel rate which seems a very large change to introduce only a few months into production and suggests a problem uncovered late in development testing. I wonder if the steel block attached to the rear mount was in fact a mass damper introduced as a palliative in an attempt to cure a resonance problem when travelling over high frequency input surfaces like pavé. It was not continued with the later bars, doesn't appear in the parts list or parts manual and it would seem unecessary to reinforce such a stiff structure as is the I beam section rear mount.
Bob
'71 S3
'71 S3
| Link: | |
| BBcode: | |
| HTML: | |
| Hide post links |