Front Crank Seal Fitting Tips Please

Technical advice Q&A
User avatar

Topic author
politeperson
Posts: 1295
Joined: Tue Jun 07, 2016 8:26 pm
Location: Boston UK
Great Britain

#21 Re: Front Crank Seal Fitting Tips Please

Post by politeperson » Sun May 07, 2017 6:40 pm

Thanks Steve,

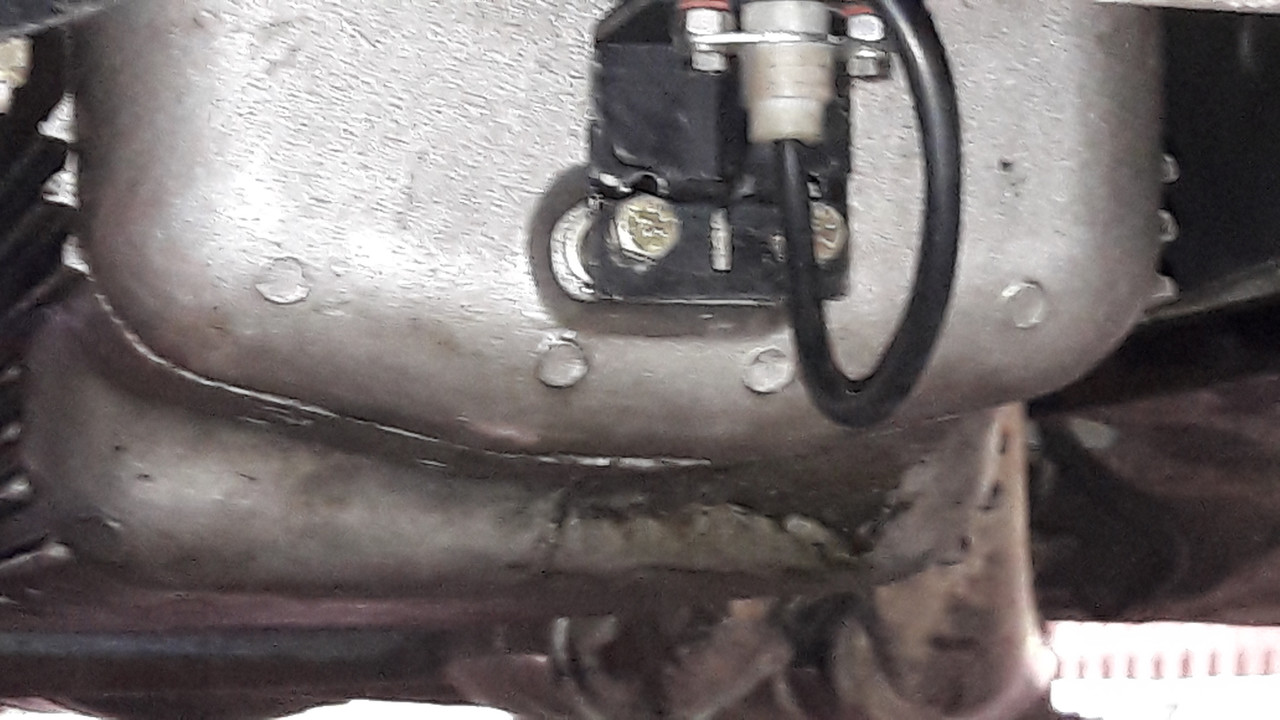
A fairly productive weekend. Look how drip free my sump is! I am such a show off.

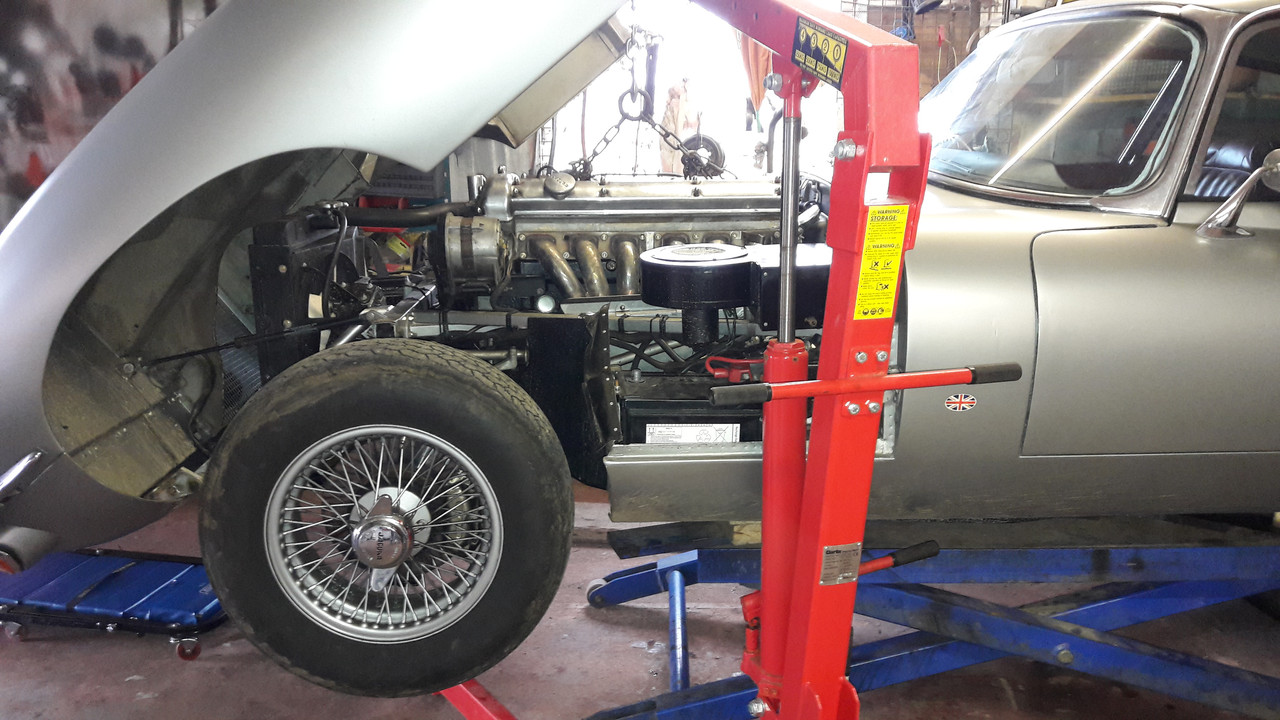
As with most things, I find I better to just get on with it. If I fail, it was better that watching TV so whats to lose?
Image

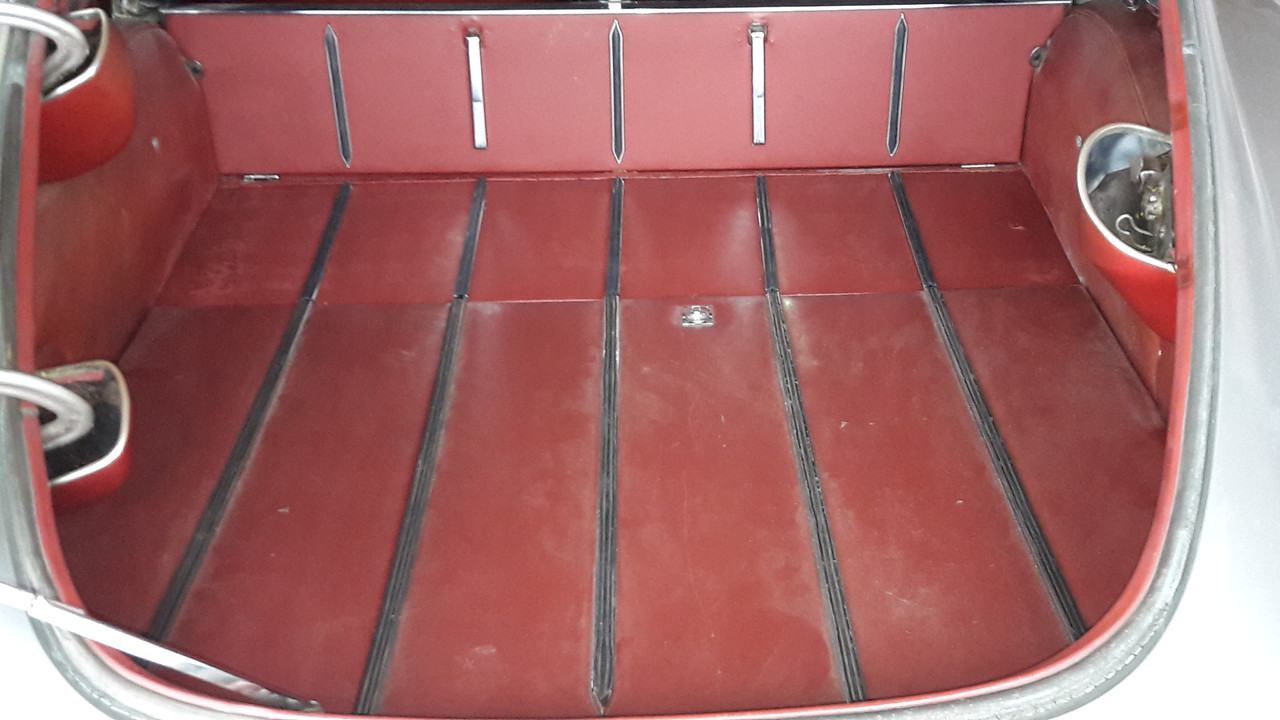
And, after it was pointed out to me at Bicester that I had carpet in the wrong place, I carefully pulled it off, revealing the original vinyl, that I cleaned with panel wipe, recoloured with Woolies Jag aerosol and attached some load bars from SNG. So much cleaner I think.
Image

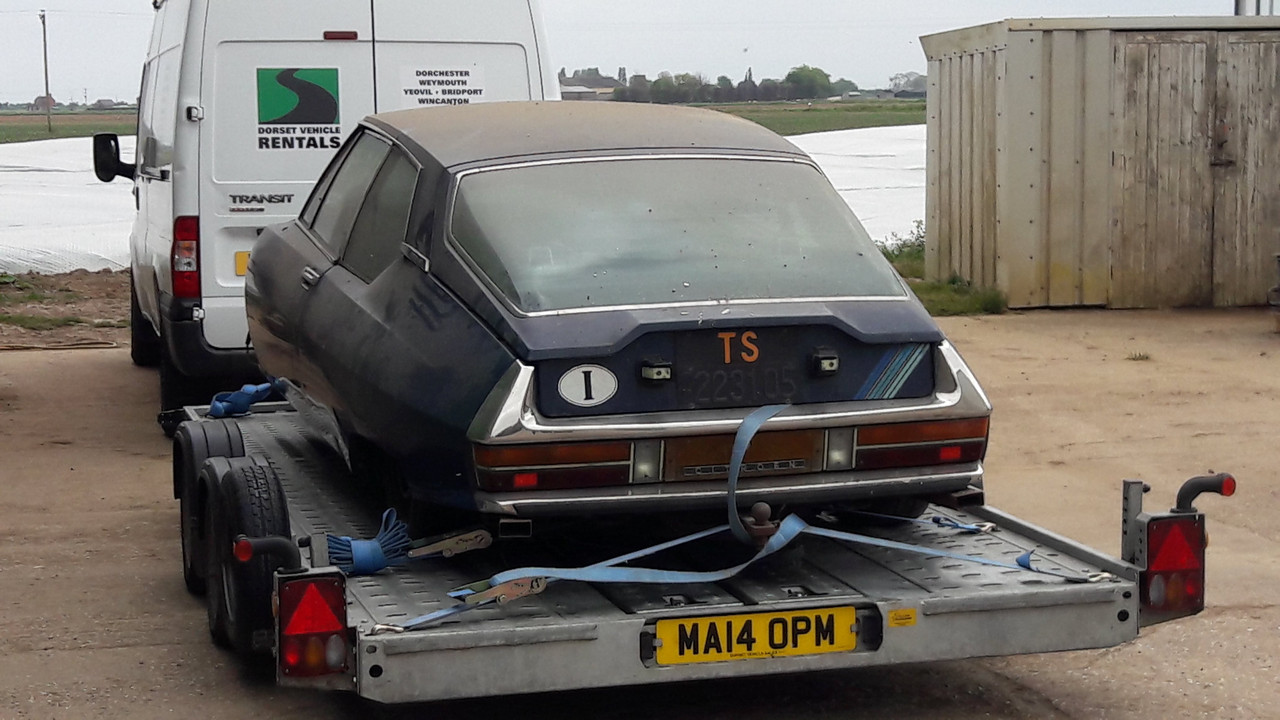
And, I sold my Citroem SM project in 100 bits today. Good luck Paul if you are reading, you are the right man for the job.

Image
Its true, but Enzo never said it
Too many E types
XK120 SUs

Link:
BBcode:
HTML:
Hide post links
Show post links

User avatar

mgcjag
Moderator
Posts: 8092
Joined: Fri Jul 09, 2010 6:15 pm
Location: Ludlow Shropshire
Great Britain

#22 Re: Front Crank Seal Fitting Tips Please

Post by mgcjag » Sun May 07, 2017 6:47 pm

Hi James.....could you add a bit more detail on getting the sump off.....again lots in the past on how difficult this is....what did you actually do, re gear lever, center console, engine staibiliser....how much did you have to lift it...thanks... Steve
Steve
69 S2 2+2 (just sold) ..Realm C type replica, 1960 xk150fhc

Link:
BBcode:
HTML:
Hide post links
Show post links

User avatar

Topic author
politeperson
Posts: 1295
Joined: Tue Jun 07, 2016 8:26 pm
Location: Boston UK
Great Britain

#23 Re: Front Crank Seal Fitting Tips Please

Post by politeperson » Sun May 07, 2017 7:41 pm

Steve,

I have a ramp and I also have crawler wheels to lie down on. The car was 4 feet in the air. I had it supported under the bulkhead on wood so the whole underside of the engine was accessible. I didn't go anywhere near the centre console or the gear lever. Gosh these cars are strong if you think about the bending forces of the whole engine and front suspension and I still have the same bonnet gap with the front wheels in the air.

So-
  • I un-tensioned the lower belt and pushed it out of the way.

    I undid the water pump pulley and crank nut lock washer.

    I put a stick to push the brakes, locking the engine in 4th gear and cracked off the crank nut.

    I improvised a pulley for the damper. This entailed reinserting the crank nut. I then inserted 2 longer 5/16 UNF screws through the removed water pump pulley, into the damper and wound the in with a 1/2 inch ring spanner against a flat plate to pull off the damper evenly. I then took off the crank nut off for the second time.

    I the prised off the damper cone.

    I undid the rubber oil return pipe and pulled it off, removed the dip stick and I drained the oil.

    I then undid 24 of the 26 sump screws, leaving 2 in the middle either side.

    I then lowered the car and removed the two large engine mount screws and unbolted the top gearbox steady nut. Having removed this special nut recessed washer, I then inserted a small flatblade screwdriver into the lower recessed washer from directly above and wound it down a couple of turns. I could then get my finger on it behind the engine and quickly wind it all the way down to the end of the thread.

    Bonnet on, I carefully attached the engine crane to the two lifting hooks. The car was now just enough off the ground to allow me to slide under, on my back on the crawler.

    Watching the bodywork, the bonnet and the gearbox steady rod, I then jacked it all up until I felt I might bend something. This was about 10-15mm at least. I could see the gearbox steady thread raise up as I jacked at the bulkhead.

    I then went underneath the car to see if I could get the little bollocks clear. Yes, the rear of the sump has a pair of little bollocks that will not lift over the reaction plate unless you achieve 10-15 mm of lift.

    Lying on my back with the last two screws removed, I gently whacked the sump with a white rubber mallet until I felt the seal break. I did have to cheat and gently insert a screwdriver and gently twist to start it off.

    It came down at the front, pulling clear of the timing cover studs. I was able to manoeuvre it with two hands, over the reaction plate and place the sump on the ground.

    I could then pull out the old distance piece and old seal.

    I released the engine lift and raised the car to a comfortable working height.

    I then cleaned of the old gasket using a blade, scraper panel wipe and Scotchbrite, being careful not to score the alloy.

    I then repeated to process on the block, using a narrow craft knife with a 90 degrees blade for the tricky bits.

    After removing old gasket material and gunk, I then started to think about reassembly.

    The rear sump seal fits to a curved surface. It came from SNG-cut to an exact length I thought.

    Using high quality Wynns gasket compound, I used office spring clips to bond it into place to the sump, as I knew it would be easy to dislodge refitting.

    Having bonded the seal in place( making the compound go off quickly with a gentle heat gun) I glued on the two sump gaskets to the sump using the new bearing and 10 sump bolts to ensure it was in the correct position, and making sure the seal/paper joint was well cemented.

    I then carefully manoeuvred the new grey oil seal into position, making sure the woodruff keys would not interfere with the seal when I was trying to carefully insert it into the timing case (Series 2 design don't forget).

    I then dropped the car and raised the gearbox/engine again.

    I then got back under and heroically manoeuvred the little bollocks over the reaction plate, praying I was not scraping off my new seal /gaskets. I had a couple of sump bolts to hand with a half inch 1/4 drive socket.

    With the front of the sump aligned to 4 timing case studs, I pushed up the rear and bingo it was in. 2 bolts inserted.

    Working quickly, before the goo went off, I inserted all the other bolts. The easy ones first, the ones above the exhaust last.

    Then put the rest together! ie new distance piece, cone, damper, pulley, trigger wheel etc.
Image
Last edited by politeperson on Wed May 17, 2017 5:59 pm, edited 1 time in total.
Its true, but Enzo never said it
Too many E types
XK120 SUs

Link:
BBcode:
HTML:
Hide post links
Show post links

User avatar

mgcjag
Moderator
Posts: 8092
Joined: Fri Jul 09, 2010 6:15 pm
Location: Ludlow Shropshire
Great Britain

#24 Re: Front Crank Seal Fitting Tips Please

Post by mgcjag » Sun May 07, 2017 8:25 pm

Thanks James....a really well detailed post...all the best....steve
Steve
69 S2 2+2 (just sold) ..Realm C type replica, 1960 xk150fhc

Link:
BBcode:
HTML:
Hide post links
Show post links

User avatar

JD-JAG66
Posts: 194
Joined: Sat Mar 22, 2014 12:40 pm
Location: Italy
Italy

#25 Re: Front Crank Seal Fitting Tips Please

Post by JD-JAG66 » Sun May 14, 2017 12:42 pm

Well, I am at the stage where I lifted the engine up, about 10-15mm, and have the sump loose from the engine - there is around a 10mm gap at the rear and up front the top edge of the sump is far below the timing cover bolts.
But no amount of pulling, pushing, sliding etc have made it come of completely. I would say it is not stuck on the reaction plate because I can move the sump up and down at the rear for at least the 10-15mm that I jacked the engine up. I even managed to "slide-move" the sump forward 15-20 mm but it will not become "unstuck". :banghead:
Please note, I have a XJ6 Series 3 engine in my car with its original sump (bulges on each side towards the end of the engine.
So, is there anything else I need to take care of to make the sump come off? :helpsos:
Please don't tell me that an XJ6 engine needs to come out to remove the sump...
Jan Deurinck
Series 1 - 1966 - 2+2 - LHD - American Import
Si vales, bene est, ego valeo

Link:
BBcode:
HTML:
Hide post links
Show post links

User avatar

Topic author
politeperson
Posts: 1295
Joined: Tue Jun 07, 2016 8:26 pm
Location: Boston UK
Great Britain

#26 Re: Front Crank Seal Fitting Tips Please

Post by politeperson » Wed May 17, 2017 11:27 am

On the assumption you have released the engine mounts and the reaction bar, you probably need to jack if up a few more mm.

I would go up until you just feel the weight of the car lift up.

The sump has two little bumps at the rear which catch the reaction plate, this is the problem.
Its true, but Enzo never said it
Too many E types
XK120 SUs

Link:
BBcode:
HTML:
Hide post links
Show post links


alfazagato
Posts: 74
Joined: Thu Mar 24, 2016 5:28 pm
Location: London
Great Britain

#27 Re: Front Crank Seal Fitting Tips Please

Post by alfazagato » Wed May 17, 2017 5:14 pm

To remove the sump finally try turning the crank to achieve clearance. BTW I am somewhat confused by the comment concerning the removal of the thrower. The environment of the timing chest is totally oily and from the face of the cover one can see the lines of oil running down, effectively behind the thrower, and right onto the seal. Or have I missed something. I know that my front seal doesn't leak!

Stuart
Series 1.5 FHC

Link:
BBcode:
HTML:
Hide post links
Show post links

User avatar

mgcjag
Moderator
Posts: 8092
Joined: Fri Jul 09, 2010 6:15 pm
Location: Ludlow Shropshire
Great Britain

#28 Re: Front Crank Seal Fitting Tips Please

Post by mgcjag » Wed May 17, 2017 5:15 pm

Have you removed the dipstick
Steve
69 S2 2+2 (just sold) ..Realm C type replica, 1960 xk150fhc

Link:
BBcode:
HTML:
Hide post links
Show post links

User avatar

Topic author
politeperson
Posts: 1295
Joined: Tue Jun 07, 2016 8:26 pm
Location: Boston UK
Great Britain

#29 Re: Front Crank Seal Fitting Tips Please

Post by politeperson » Wed May 17, 2017 6:04 pm

Yes Steve, don't forget the dipstick!

Yes Stuart, I was a bit confused about the oil thrower as well.

How could it be possible that an automotive oil seal manufacturer could sell an oil seal that could not withstand engine temperatures! Bit beyond me.

Anyway, my teflon seal ,with oil singer in situ, is doing fine so far (200 miles), but watch this space. Any leaks and I promise the forum members will be the first to hear about it.
Its true, but Enzo never said it
Too many E types
XK120 SUs

Link:
BBcode:
HTML:
Hide post links
Show post links

User avatar

Hugo
Posts: 1263
Joined: Mon Aug 29, 2016 11:16 am
Location: Horsham West Sussex
Contact:
Great Britain

#30 Re: Front Crank Seal Fitting Tips Please

Post by Hugo » Thu May 18, 2017 9:43 am

Is this Teflon seal one of those new-fangled things that looks like wax paper? If so, I believe they are supposed to be fitted dry, for reasons which I have never understood. They use them on Cummins diesel engines, which I operate - they seem far too delicate to work, but work they do. The tube is a fitting sleeve I would expect.
Hugo Miller - rebuilding an imported Series II OTS & converting to RHD

Link:
BBcode:
HTML:
Hide post links
Show post links


alfazagato
Posts: 74
Joined: Thu Mar 24, 2016 5:28 pm
Location: London
Great Britain

#31 Re: Front Crank Seal Fitting Tips Please

Post by alfazagato » Mon May 22, 2017 4:30 pm

Politeperson, I do so agree with your comment about the suitability of the seal if it has to be "cooled" by indiscriminate splashing oil. Are there seal experts who could shine a light on this matter?

Stuart
Series 1.5 FHC

Link:
BBcode:
HTML:
Hide post links
Show post links

User avatar

Hugo
Posts: 1263
Joined: Mon Aug 29, 2016 11:16 am
Location: Horsham West Sussex
Contact:
Great Britain

#32 Re: Front Crank Seal Fitting Tips Please

Post by Hugo » Mon May 22, 2017 5:05 pm

politeperson wrote:Steve,
I put a stick to push the brakes, locking the engine in 4th gear and cracked off the crank nut."=
I usually put a wrench or socket on the pulley nut, then give the starter a quick stab. That'll shift it!
Hugo Miller - rebuilding an imported Series II OTS & converting to RHD

Link:
BBcode:
HTML:
Hide post links
Show post links

User avatar

Hugo
Posts: 1263
Joined: Mon Aug 29, 2016 11:16 am
Location: Horsham West Sussex
Contact:
Great Britain

#33 Re: Front Crank Seal Fitting Tips Please

Post by Hugo » Mon May 22, 2017 5:09 pm

I think the reasoning is simply that it is less likely to leak if you're not throwing oil directly at it.
Hugo Miller - rebuilding an imported Series II OTS & converting to RHD

Link:
BBcode:
HTML:
Hide post links
Show post links


alfazagato
Posts: 74
Joined: Thu Mar 24, 2016 5:28 pm
Location: London
Great Britain

#34 Re: Front Crank Seal Fitting Tips Please

Post by alfazagato » Wed May 24, 2017 2:02 pm

Hugo, The thrower prevents oil from reaching the front seal by hurling it outwards. In theory, with the thrower left in place, there will be less oil reaching the seal. But if the thrower is removed as suggested then there will be more oil on the seal which, it has been postulated, is needed for cooling. On the other hand there are comments that the seal needs to "burn-in" to be effective irrespective of oil. We need a seal expert to throw light on this tricky little subject. My seal is still not leaking!
Series 1.5 FHC

Link:
BBcode:
HTML:
Hide post links
Show post links

User avatar

Hugo
Posts: 1263
Joined: Mon Aug 29, 2016 11:16 am
Location: Horsham West Sussex
Contact:
Great Britain

#35 Re: Front Crank Seal Fitting Tips Please

Post by Hugo » Wed May 24, 2017 2:36 pm

Needed for cooling? I don't buy it. Who came up with that idea? The oil thrower just reduces or eliminates the amunt of oil being thrown directly at the seal, and thereby reduces or eliminates leakage. Why invent another rationale when the true one is obvious?
If this is one of those seals that look like wax paper, they have to be fitted dry. I'm not familiar with this particular seal, so I don't know whether it is or not.
Hugo Miller - rebuilding an imported Series II OTS & converting to RHD

Link:
BBcode:
HTML:
Hide post links
Show post links


tim wood
Posts: 1213
Joined: Fri Nov 20, 2009 6:52 pm
Location: Leighton Buzzard UK
Great Britain

#36 Re: Front Crank Seal Fitting Tips Please

Post by tim wood » Sun Feb 02, 2020 1:20 pm

This post by James has become my bible for the last week or so whilst I contemplate changing my front crank oil seal.
Well, I’ve finally got off my backside and the job is underway.
A few points I’ve noticed:
The woodruff key on the crank had to be at the 1 o’clock position to allow the sump to drop. I don’t know if this is always the case.
The oil seal on mine was time hardened and a visible gap twixt this and the collar.
The collar is definitely marked and as Adrian has said I’m going to change it.
Plenty of gunge in the sump but no spare bits !

Finally the rear sump oil seal was the original cork type again gone hard. This finished about 6mm short of the sump surface on both ends. My feeling is that this can’t be right and will have contributed to the drip from that end.
Thoughts are welcome on this point.

Tim
Series 1 FHC purchased 40 years ago. Courted my wife in it.
Series 1 2+2 when the kids were small now sold.
Series 1.5 OTS in opalescent maroon, Californian car. My retirement present.

Link:
BBcode:
HTML:
Hide post links
Show post links


tim wood
Posts: 1213
Joined: Fri Nov 20, 2009 6:52 pm
Location: Leighton Buzzard UK
Great Britain

#37 Re: Front Crank Seal Fitting Tips Please

Post by tim wood » Mon Feb 03, 2020 1:47 pm

I’ve had a fruitful but messy morning cleaning the sump out. Now it’s new and smart inside and out.
The new gasket set arrived today with both the cork seal and the rubber version. Both exactly the same length and definitely at least 12+ mm longer the the cork version I removed.

I,m confident the sump hasn’t been off before and this is the original factory seal which has hardened and shrunk over the last 50 years.
Series 1 FHC purchased 40 years ago. Courted my wife in it.
Series 1 2+2 when the kids were small now sold.
Series 1.5 OTS in opalescent maroon, Californian car. My retirement present.

Link:
BBcode:
HTML:
Hide post links
Show post links

User avatar

PeterCrespin
Posts: 4561
Joined: Fri Mar 05, 2010 8:22 pm
Location: Gaithersburg, Maryland.
Contact:
United States of America

#38 Re: Front Crank Seal Fitting Tips Please

Post by PeterCrespin » Mon Feb 03, 2020 10:22 pm

Sorry, no way has an original cork seal shrunk 12 mm IMO whilst soaked in oil... I bet your sump has been off and the off-centre front seal proves it (also just IMO). Factory front seals wear evenly all round with a flattened lip where it should have a sharp edge. Off-centre front seals are a very common DIY outcome.
1E75339 UberLynx D-Type; 1R27190 70 FHC; 1E78478; 2001 Vanden Plas

Link:
BBcode:
HTML:
Hide post links
Show post links

User avatar

MarkRado
Posts: 339
Joined: Fri Jan 26, 2018 9:13 am
Location: Graz
Austria

#39 Re: Front Crank Seal Fitting Tips Please

Post by MarkRado » Tue Feb 04, 2020 5:31 am

I think Tim is talking about the rear cork seal; I also found shrinking with mine several years ago
Mark
1963 OTS 880436

Link:
BBcode:
HTML:
Hide post links
Show post links

User avatar

PeterCrespin
Posts: 4561
Joined: Fri Mar 05, 2010 8:22 pm
Location: Gaithersburg, Maryland.
Contact:
United States of America

#40 Re: Front Crank Seal Fitting Tips Please

Post by PeterCrespin » Tue Feb 04, 2020 8:48 am

“The oil seal on mine was time hardened and a visible gap twixt this and the collar.
The collar is definitely marked....”

I took the above as a front seal comment.

I’ll accept your shrinking oil-soaked cork if you’ll buy my off-centre front seal? :-)
1E75339 UberLynx D-Type; 1R27190 70 FHC; 1E78478; 2001 Vanden Plas

Link:
BBcode:
HTML:
Hide post links
Show post links

Post Reply Previous topicNext topic