


From my French imposed isolation (take care everyone) , l want to use the time to do some of the jobs l have been meaning to get to....l need to change the outer seals that run along the door glass as with age they seem to have lost the last inch or two.
Could anyone let me know how it is removed as my inner trim is very neatly riveted in place and if necessary l will drill it out but in the workshop manual it indicates you ‘Carefully tap chrome bead towards front of car then prise bead upwards. It doesn’t mention any fixings. With glass down the chrome seems fixed and l am reluctant to hit it too hard without asking a higher authority!
Do l need to remove inner upper trim to get at any fixings or just (gently)hit it harder?
Sorry if it’s a stupid question, thanks for any advice.
Door waist/glass seal 2+2
-
chris420sa
- Posts: 66
- Joined: Tue Aug 30, 2016 1:50 pm

#2 Re: Door waist/glass seal 2+2
Hi Bob - this self isolation seems to make it compulsory to spend time in the garage getting those jobs done which get deferred under more normal circumstances.
I recently replaced my passenger and driver door assemblies so had to fit the windows and all the trim parts before hanging the doors.
If you look at Page 33.25 of the Parts Catalogue (see the Forum's Knowledge Base if you don't have a hard copy) you'll see that the parts are:
a) BD 26706/3 - special rivet ("cup and rivet" per SNGB)
b) BD 29358 (RH) and BD 29359 (LH) - window seal rubber retaining strip
c) BD 21073/4 - window seal rubber
If all is original, b) is removed by tapping b) forwards given that b) is held in place by the five special rivets a).
These rivets have a "collar" over which the "slot tabs" of b) fasten.
However I was unable to find these special rivets from SNGB, Martin Robey, SC Parts and Welsh Enterprises (and I've just checked the websites of these suppliers again with the same result). I recall also looking at the websites of various rivet manufacturers until boredom set in and success was nil.
Given that I had to fit all of the parts to the new door assemblies, I used ordinary rivets to fasten b) (very carefully in order to get b) in the correct position) and then inserted the window assembly which was quite a tight fit and which explains why special rivets were used to instal b) without having to remove the window.
In my case, even with the window down as far as possible it would not have been possible to insert the rivets.
So please first check to see what type of rivets have been used. If they are per the Parts Catalogue then tapping the strip forwards using a wooden block or similar would work (some WD40 or similar would help if there's some corrossion).
If they are not per the Parts Catalogue, it would seem to be case of first removing the window and drilling out the rivets to remove b). The lock down period is unlikely to be over before you've finished (?)
Hopefully a member of the forum can advise where to purchase these special rivets.
Inserting a new c) into a new or existing b) is not easy and requires copious amounts of liquid detergent and great care not to bend c) as your frustration level rises. The rubber will probably need a bit of trimming at the ends but be sure to get a good seal at front and rear (or only drive in dry weather and never wash the windows). You may also need to coat the window side of the rubber seal with some silicone spray to avoid it being pulled downwards when the window is opened - the mess on the glass doesn't last too long!
Hope that helps but I happily defer to other members to provide their inputs.
Best regards
Chris
Chris Davies
1972 Series 3 2+2
1972 Series 3 2+2
| Link: | |
| BBcode: | |
| HTML: | |
| Hide post links |
#3 Re: Door waist/glass seal 2+2
Thank you very much for your detailed reply, l understand your description for what l mistakenly thought would be quite an easy little job but like always it can rapidly become a bit more complicated.
I think l will be in lockdown for 6 weeks here so hopefully will have the time to do the job but the special rivets could be a problem, l will tackle it this weekend as my work keep me near my computer all day and will check if my spare rivets will do the job. I have had the seals for a few months which is good as there are no deliveries here during the lockdown so l will have to work out a fix with whatever l have. Thanks again...
I think l will be in lockdown for 6 weeks here so hopefully will have the time to do the job but the special rivets could be a problem, l will tackle it this weekend as my work keep me near my computer all day and will check if my spare rivets will do the job. I have had the seals for a few months which is good as there are no deliveries here during the lockdown so l will have to work out a fix with whatever l have. Thanks again...
| Link: | |
| BBcode: | |
| HTML: | |
| Hide post links |
-
chris420sa
- Posts: 66
- Joined: Tue Aug 30, 2016 1:50 pm
#4 Re: Door waist/glass seal 2+2
Hi Bob - hope all's well.
I'd be interested to know how the work on the window rubber etc went when you've finished.
Best regards
Chris
I'd be interested to know how the work on the window rubber etc went when you've finished.
Best regards
Chris
Chris Davies
1972 Series 3 2+2
1972 Series 3 2+2
| Link: | |
| BBcode: | |
| HTML: | |
| Hide post links |

#5 Re: Door waist/glass seal 2+2
Direwolf Wrote:
From SNG Barratt, BD29358 (RH) and BD29359 (LH) have been replaced with a generic, one part fits either side component, part number BD31446. This part doesn't have the slotted arrangement as per the original part, only holes, the fixing arrangement for which will be just plain pop rivets, or small screws. Accordingly, if you're going to be replacing the chrome retaining strip for the rubber waist seal, then you will have to remove the window to be able to secure it and therefore, you may as well cut to the chase, remove the window and drill out the rivets and cups that are securing the original part.
If you're only replacing the rubber seal, an original seal being installed in an original chrome retaining strip can be accomplished by lubricating the "T" section of the seal with rubber grease and sliding it in from one end to the other. This is not the case with the "After Market" seal being offered. The best way I've found is to engage one side of the seal's retaining section for its full length with the chrome strip and then carefully press (insert) the other side of the retaining section in the chrome strip using a medium sized screw driver.
Regards,
Bill
Hello Direwolf,Thank you very much for your detailed reply, l understand your description for what l mistakenly thought would be quite an easy little job but like always it can rapidly become a bit more
complicated.
From SNG Barratt, BD29358 (RH) and BD29359 (LH) have been replaced with a generic, one part fits either side component, part number BD31446. This part doesn't have the slotted arrangement as per the original part, only holes, the fixing arrangement for which will be just plain pop rivets, or small screws. Accordingly, if you're going to be replacing the chrome retaining strip for the rubber waist seal, then you will have to remove the window to be able to secure it and therefore, you may as well cut to the chase, remove the window and drill out the rivets and cups that are securing the original part.
If you're only replacing the rubber seal, an original seal being installed in an original chrome retaining strip can be accomplished by lubricating the "T" section of the seal with rubber grease and sliding it in from one end to the other. This is not the case with the "After Market" seal being offered. The best way I've found is to engage one side of the seal's retaining section for its full length with the chrome strip and then carefully press (insert) the other side of the retaining section in the chrome strip using a medium sized screw driver.
Regards,
Bill
| Link: | |
| BBcode: | |
| HTML: | |
| Hide post links |
#6 Re: Door waist/glass seal 2+2
Thank you very much for your reply’s, l do not have the rivets small enough to re-assemble the door just now and cannot get deliveries during the lock down so l will carry on with a few other jobs during the time off. I do not want to take the doors apart and not be able to put them together again, thank you again for your feedback, when l can get ‘bits’ again l will tackle this and post my results. Thanks and stay well.
| Link: | |
| BBcode: | |
| HTML: | |
| Hide post links |
#7 Re: Door waist/glass seal 2+2
I just thought l would post my progress with this issue. I was a bit distracted with some other issues (mixing 2 tons of concrete to redo driveway to get Jag out -eventually- a bit more easily but that’s another forum issue!!)
I removed the upper trim which was held by small rivets, l could see through the glass that the outer seal trim looked like it had the same standard rivets so although the Jag Repair/Operation Manual says tap it from rear in a fwd direction this would cause damage due to the fixed (not allowing sliding movement) rivets that had been used. I started taking the frame off...(with glass low at first then lifting as you go..)wriggle the frame up watching the front which is tight...then removing the glass. I then (being careful with the follow through) drilled the rivets holding the chrome seal trim. I gaffer-tapped an old number plate behind to protect the outer skin.
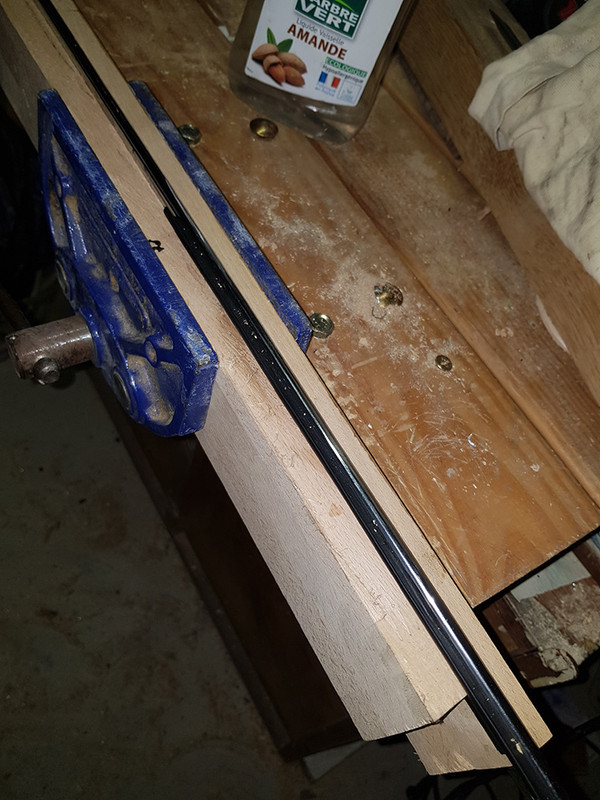
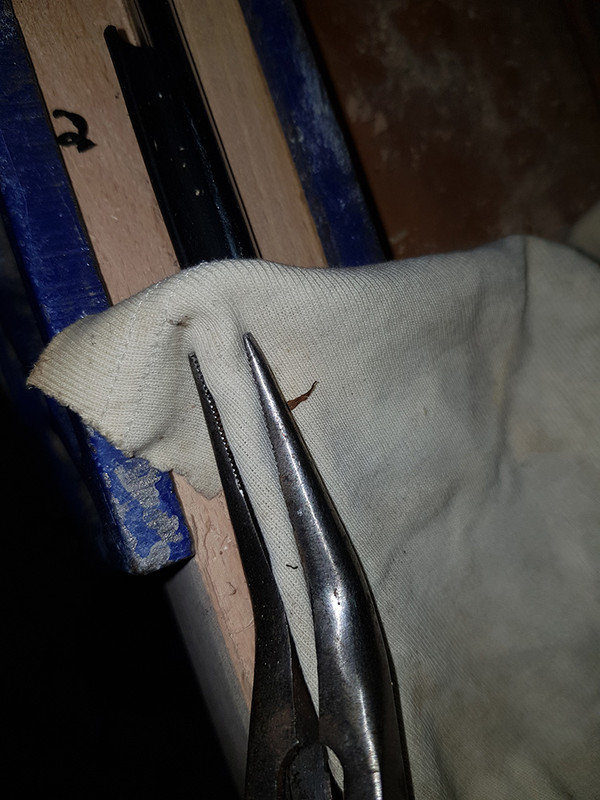
On the bench l had tried to fit the new rubber seal over the whole length using a screwdriver to feed it in but l could not get this to work so l managed to feed the seal in at one end and using two long bits of hardwood to protect the chrome, an old tee shirt to protect the seal and using long nose pliers and the gentle use of a heat gun...wriggled the rubber...along the chrome trim, this took a lot of time but eventually it was in place.
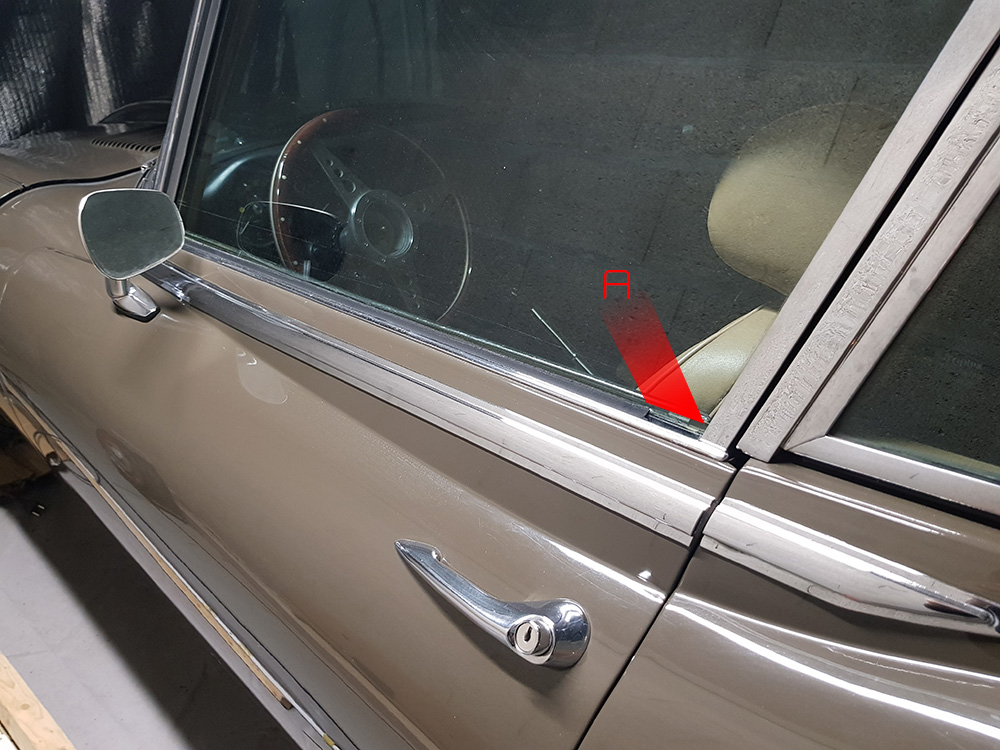
Then as l now know this fixing is not as the manual suggests, l used the small rivets l could get and fixed the seal trim and fitted the frame (adjusting the alignment as it was a bit out at the top before) and glass. (I think l got the front of the frame in then the glass in then the rear of the frame in-all a bit tight but with another pair of hands not too difficult just more wriggling) When l fitted the seal in the chrome l left it long at each end, this is a bit fiddly at the front when fitting the frame but when in the seal can be trimmed off.
So that’s good, but l have only done one side!!! Maybe l wait till the next pandemic to do the other....or next weekend! I hope pix come through ok and if it helps anyone great..sorry if it’s not!
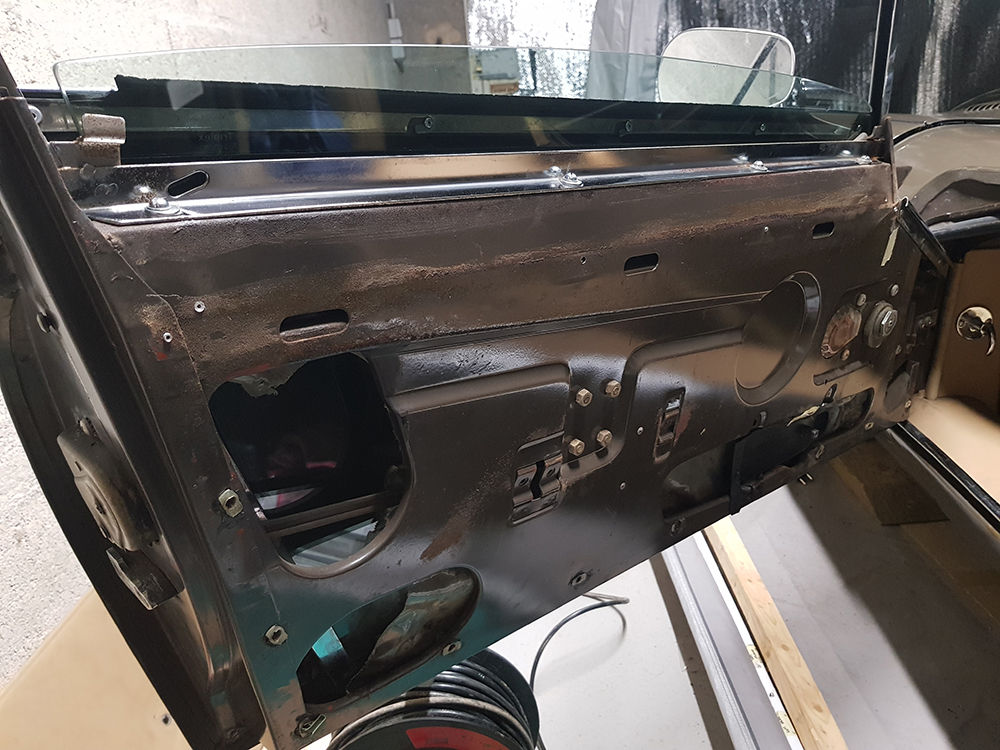
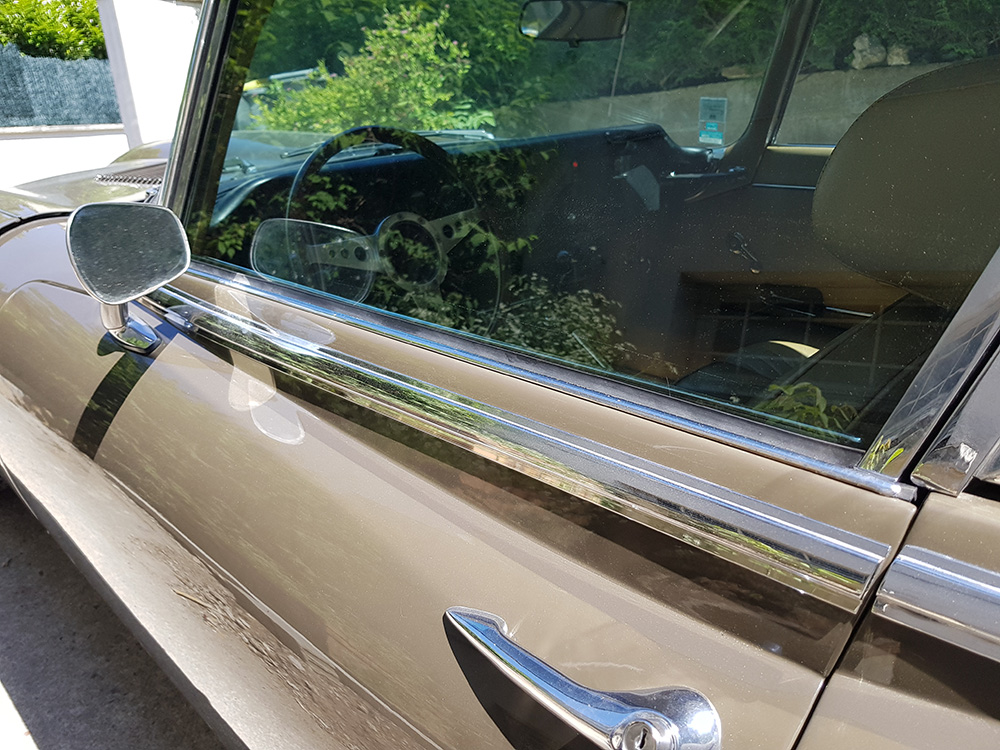
I removed the upper trim which was held by small rivets, l could see through the glass that the outer seal trim looked like it had the same standard rivets so although the Jag Repair/Operation Manual says tap it from rear in a fwd direction this would cause damage due to the fixed (not allowing sliding movement) rivets that had been used. I started taking the frame off...(with glass low at first then lifting as you go..)wriggle the frame up watching the front which is tight...then removing the glass. I then (being careful with the follow through) drilled the rivets holding the chrome seal trim. I gaffer-tapped an old number plate behind to protect the outer skin.
On the bench l had tried to fit the new rubber seal over the whole length using a screwdriver to feed it in but l could not get this to work so l managed to feed the seal in at one end and using two long bits of hardwood to protect the chrome, an old tee shirt to protect the seal and using long nose pliers and the gentle use of a heat gun...wriggled the rubber...along the chrome trim, this took a lot of time but eventually it was in place.
Then as l now know this fixing is not as the manual suggests, l used the small rivets l could get and fixed the seal trim and fitted the frame (adjusting the alignment as it was a bit out at the top before) and glass. (I think l got the front of the frame in then the glass in then the rear of the frame in-all a bit tight but with another pair of hands not too difficult just more wriggling) When l fitted the seal in the chrome l left it long at each end, this is a bit fiddly at the front when fitting the frame but when in the seal can be trimmed off.
So that’s good, but l have only done one side!!! Maybe l wait till the next pandemic to do the other....or next weekend! I hope pix come through ok and if it helps anyone great..sorry if it’s not!
| Link: | |
| BBcode: | |
| HTML: | |
| Hide post links |