


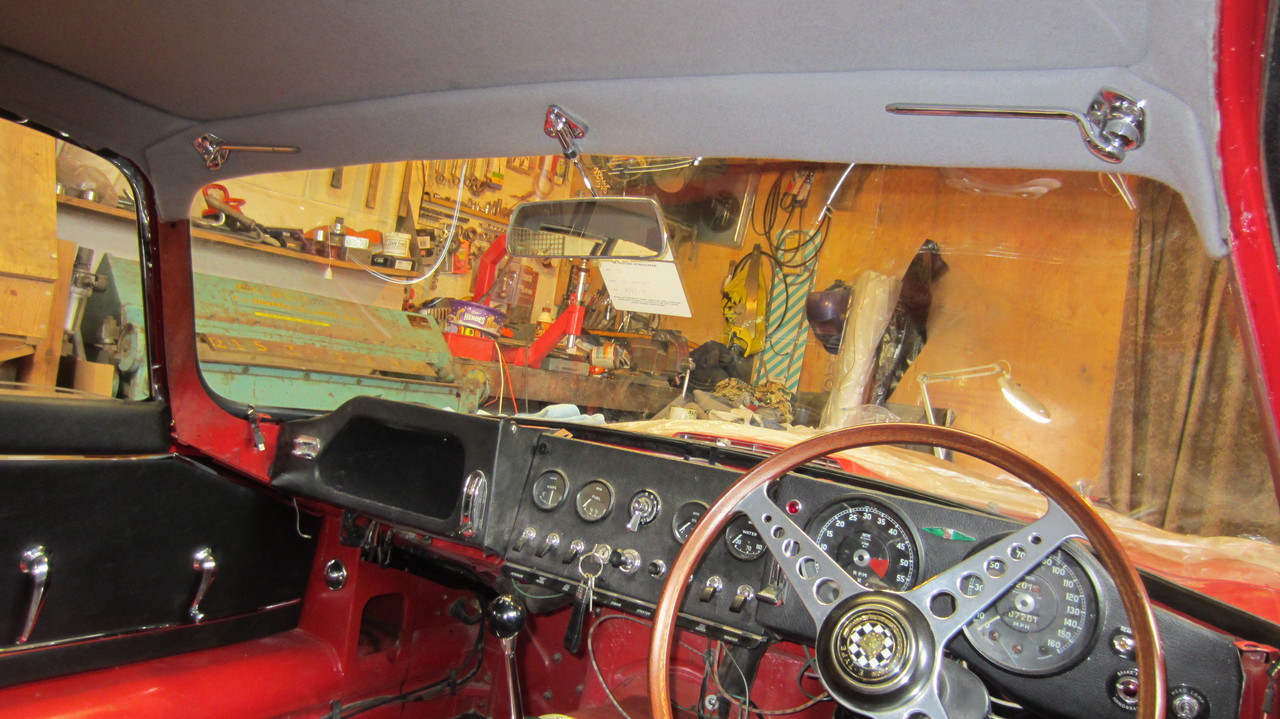
Hi - is it possible for someone with a Series 1 to post a picture of their sun visor bracket, where it is affixed to the cant rail? I assume all models have similar brackets. I recently retrimmed the interior and am trying to work out which way up the bracket goes as the original holes are now covered. I have located the central ‘hole’ to find the general position and I assume the bracket is fixed with the wider part of the ‘triangle’ at the top, but it would be good to see a photo before I start drilling holes! I also assume that the sun visors are not handed so it doesn’t matter which one goes on which side, as both the brackets and the visors themselves appear to have the same part numbers.
Many thanks
Sun visor photo
#1 Sun visor photo
Malc
Series 1 2+2, 1968 Blue exterior, grey interior
Series 1 2+2, 1968 Blue exterior, grey interior
| Link: | |
| BBcode: | |
| HTML: | |
| Hide post links |

#2 Re: Sun visor photo
David Jones
S1 OTS OSB
1997 Porsche 911 Guards Red
2024 Lexus LBX
Add your E-Type to our World Map: http://forum.etypeuk.com/viewtopic.php?f=1&t=1810
S1 OTS OSB
1997 Porsche 911 Guards Red
2024 Lexus LBX
Add your E-Type to our World Map: http://forum.etypeuk.com/viewtopic.php?f=1&t=1810
| Link: | |
| BBcode: | |
| HTML: | |
| Hide post links |
#3 Re: Sun visor photo
Hi Malc,
I think the 2+2 is the same as the FHC.
And they are handed.
The holes have captured nuts for the chrome setscrews, so you should not need to drill holes.
Paul
I think the 2+2 is the same as the FHC.
And they are handed.
The holes have captured nuts for the chrome setscrews, so you should not need to drill holes.
Paul
65 Series 1 FHC, 68 Jaguar 340
| Link: | |
| BBcode: | |
| HTML: | |
| Hide post links |
#4 Re: Sun visor photo
Thanks for that - I don’t remember the captured nuts as the PO had secured them with all sorts of different screws. Have ordered some ‘proper’ ones. Got a bit of time now to actually finish the car off!
Malc
Series 1 2+2, 1968 Blue exterior, grey interior
Series 1 2+2, 1968 Blue exterior, grey interior
| Link: | |
| BBcode: | |
| HTML: | |
| Hide post links |
-
 politeperson
- Posts: 1388
- Joined: Tue Jun 07, 2016 8:26 pm
- Location: Boston UK

#5 Re: Sun visor photo
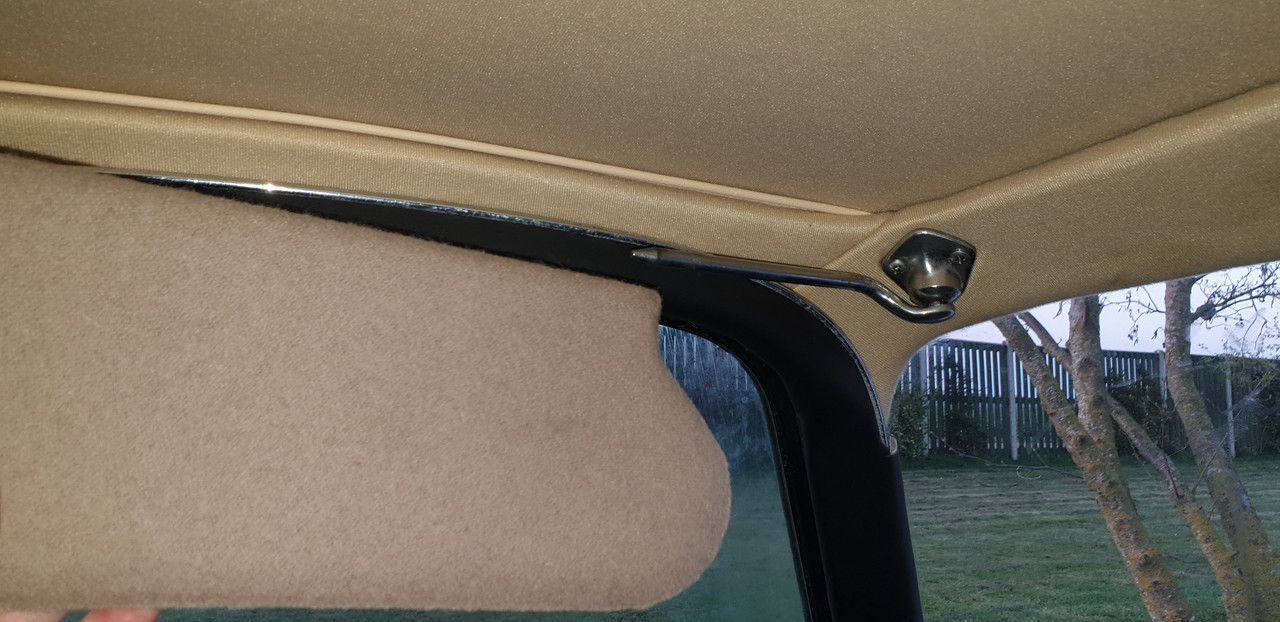
The problem I am experiencing is my new sun-visors are not sliding onto the brackets!
Possibly too much of an interference fit! The hole is too small.
Original brackets, new visors.
Possibly too much of an interference fit! The hole is too small.
Original brackets, new visors.
Finishing off an S1 roadster
| Link: | |
| BBcode: | |
| HTML: | |
| Hide post links |
#6 Re: Sun visor photo
Hi James,
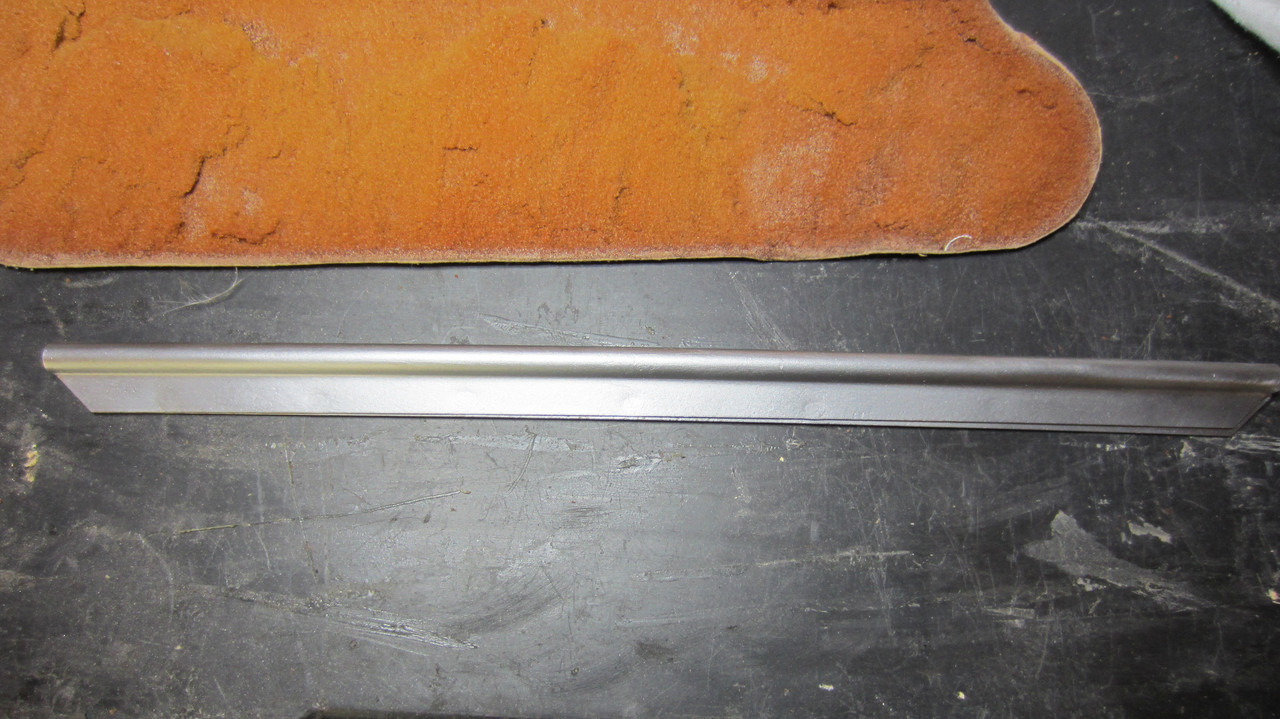
I dont know if the new sunvisors are made in the same way as the old, but the original ones has a sheet metal part folded over to make the hole.
If yours are the same, it should be relatively easy to widen the hole with a suitable tapered rod.
Paul
I dont know if the new sunvisors are made in the same way as the old, but the original ones has a sheet metal part folded over to make the hole.
If yours are the same, it should be relatively easy to widen the hole with a suitable tapered rod.
Paul
65 Series 1 FHC, 68 Jaguar 340
| Link: | |
| BBcode: | |
| HTML: | |
| Hide post links |
-
politeperson
- Posts: 1388
- Joined: Tue Jun 07, 2016 8:26 pm
- Location: Boston UK
#7 Re: Sun visor photo
Thanks Paul,
I will have a go later today and report back.
James
I will have a go later today and report back.
James
Finishing off an S1 roadster
| Link: | |
| BBcode: | |
| HTML: | |
| Hide post links |

#8 Re: Sun visor photo
Hi James,
I had the same issue with my new visors. First they were too loose and kept slipping down, so had to expand the ‘slotted’ ends. Then it was very difficult to get them back on. In the end, I had to take the assembly off the car, put a tiny smear of liquid soap on the arms which helped get them back on. The liquid evaporates/dries and they are now fine.
I had the same issue with my new visors. First they were too loose and kept slipping down, so had to expand the ‘slotted’ ends. Then it was very difficult to get them back on. In the end, I had to take the assembly off the car, put a tiny smear of liquid soap on the arms which helped get them back on. The liquid evaporates/dries and they are now fine.
Richard
Previous owner and restorer of a S1 3.8 FHC Opalescent Golden Sand with Tan Trim 889504 (now sold and headed for Athens)


Previous owner and restorer of a S1 3.8 FHC Opalescent Golden Sand with Tan Trim 889504 (now sold and headed for Athens)
| Link: | |
| BBcode: | |
| HTML: | |
| Hide post links |
-
politeperson
- Posts: 1388
- Joined: Tue Jun 07, 2016 8:26 pm
- Location: Boston UK
#9 Re: Sun visor photo
Paul, today took a while but the sun visors are now sorted.
For such a simple thing it was about as difficult as it could be made!
If you recall I was hoping to be able to slide a new pair of sunvisors onto the brackets bolted onto the roof behind the windscreen. New paint, new headliner.
I had already had quite a bit of difficulty aligning the captive nuts in the windscreen bar to bolt the brackets into place. They jiggle around inside the cage and fall below the mounting hole. Even with my trusty podger stick. I really did not want to take the brackets off again for fear of damaging these captive nuts.
So when the sin visors would not go into the visor hole I was a bit miffed to say the least.
Bear in mind that the combined cost of these brackets and the sunvisors is now in the realms of a £few hundred quid now.
All this going on around a new light colored headliner too.
I ended up having to re wrap the visors and ream them out in the engineering workshop. They differ from the original design as the mounting hole is just a tube, originally it was a circular pressing with a flap inside the visor. I gues you had a chance of adjusting the old design.
I did all this without marking the cloth, but the hole escapade was a bit of a waste of time. Took me as long to fit 2 sun visors as it would normally take me to remove an entire floor.
For such a simple thing it was about as difficult as it could be made!
If you recall I was hoping to be able to slide a new pair of sunvisors onto the brackets bolted onto the roof behind the windscreen. New paint, new headliner.
I had already had quite a bit of difficulty aligning the captive nuts in the windscreen bar to bolt the brackets into place. They jiggle around inside the cage and fall below the mounting hole. Even with my trusty podger stick. I really did not want to take the brackets off again for fear of damaging these captive nuts.
So when the sin visors would not go into the visor hole I was a bit miffed to say the least.
Bear in mind that the combined cost of these brackets and the sunvisors is now in the realms of a £few hundred quid now.
All this going on around a new light colored headliner too.
I ended up having to re wrap the visors and ream them out in the engineering workshop. They differ from the original design as the mounting hole is just a tube, originally it was a circular pressing with a flap inside the visor. I gues you had a chance of adjusting the old design.
I did all this without marking the cloth, but the hole escapade was a bit of a waste of time. Took me as long to fit 2 sun visors as it would normally take me to remove an entire floor.
Finishing off an S1 roadster
| Link: | |
| BBcode: | |
| HTML: | |
| Hide post links |
#10 Re: Sun visor photo
Hi James,
Sorry to hear that you had such a hard time, but well done in the end
My interior has been a complete nightmare; most of it I have had to do more than once, for a multitude of reasons; if it could go wrong it would go wrong and I have to say that a large proportion of replacement parts were ether poor quality or simply didn’t fit!
Definitely my last restoration!
Paul
Sorry to hear that you had such a hard time, but well done in the end
My interior has been a complete nightmare; most of it I have had to do more than once, for a multitude of reasons; if it could go wrong it would go wrong and I have to say that a large proportion of replacement parts were ether poor quality or simply didn’t fit!
Definitely my last restoration!
Paul
65 Series 1 FHC, 68 Jaguar 340
| Link: | |
| BBcode: | |
| HTML: | |
| Hide post links |