I had Pilkingtons make two door glasses to-measure in an attempt to get a better fit between said glasses and hood-rubbers, this struggle was logged on this string :
viewtopic.php?f=3&t=10352&p=169478#p169478
and I've just (seven years later) fitted the glass back into the car.
As David (Heuer) pointed out at the time, we don't have much to go on regarding the reassembly of the glass to the carrier frames, so this may inspire others confronted with the same challenge.
It is of course possible to use modern PU glues or mastics to make this much easier, but it's not that hard to do it properly, using stretched rubber strips.
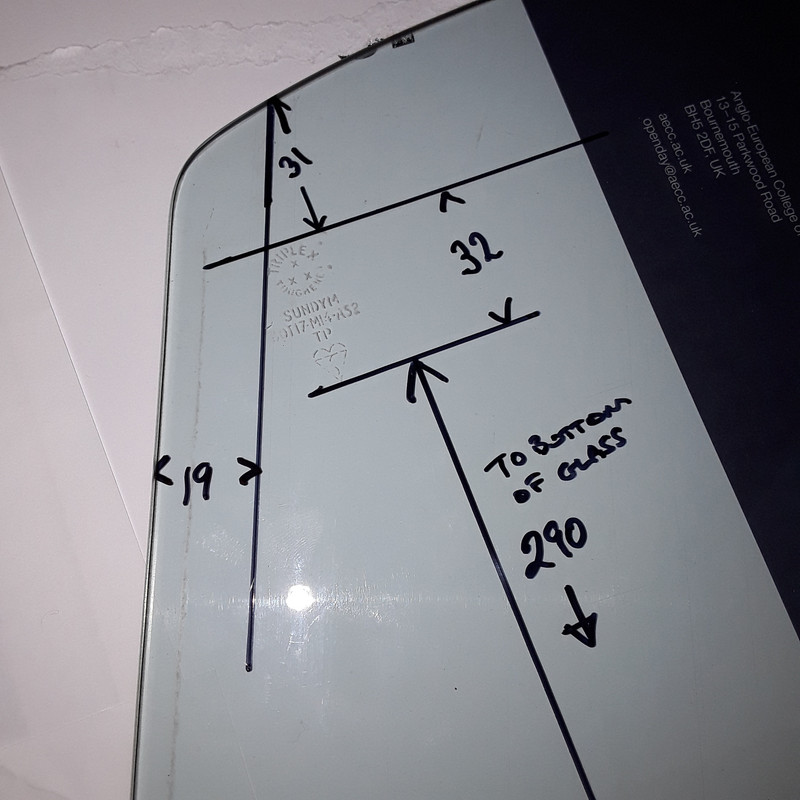
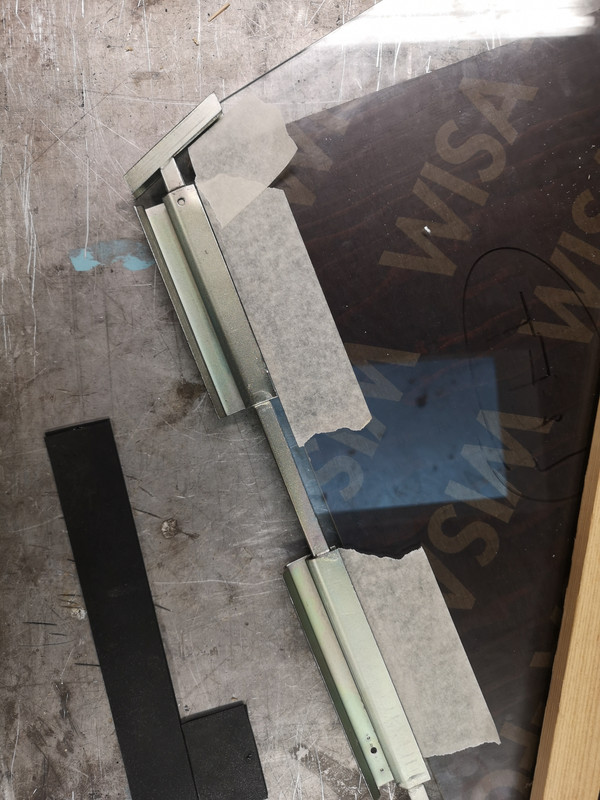
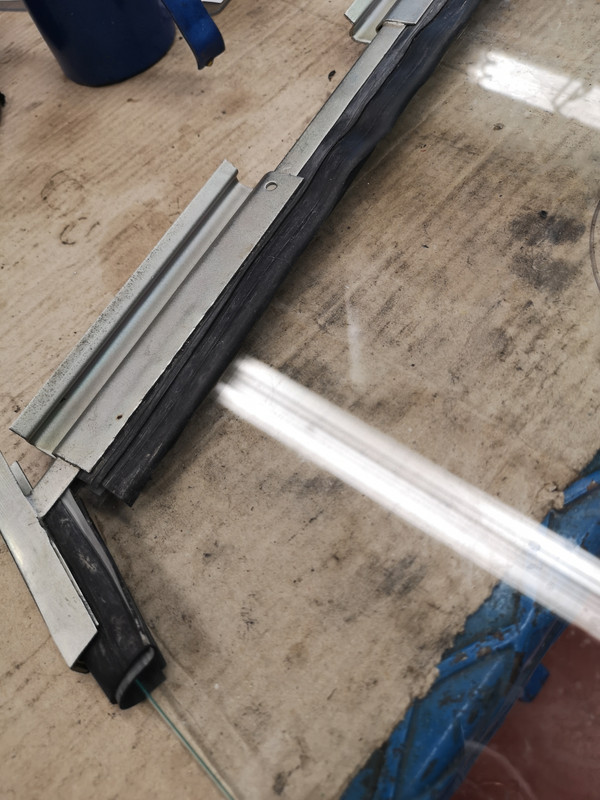
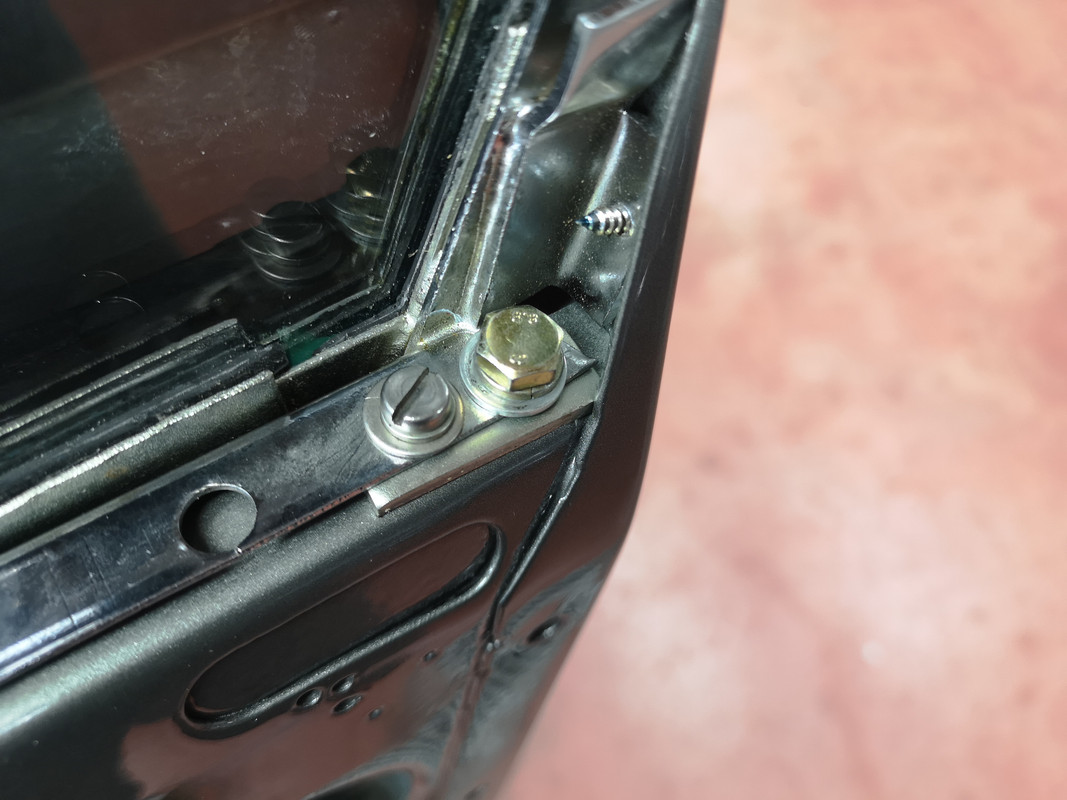
The channels on my car were about 7.50mm wide, and the new glass was 4.80mm thick.
So the rubber has to be above 1.35mm thick to start any sort of grip.
I tried using 1mm EPDM pond-liner doubled, see below, to make 2mm-thick strips, initially, but that turned out to be way too optimistic.
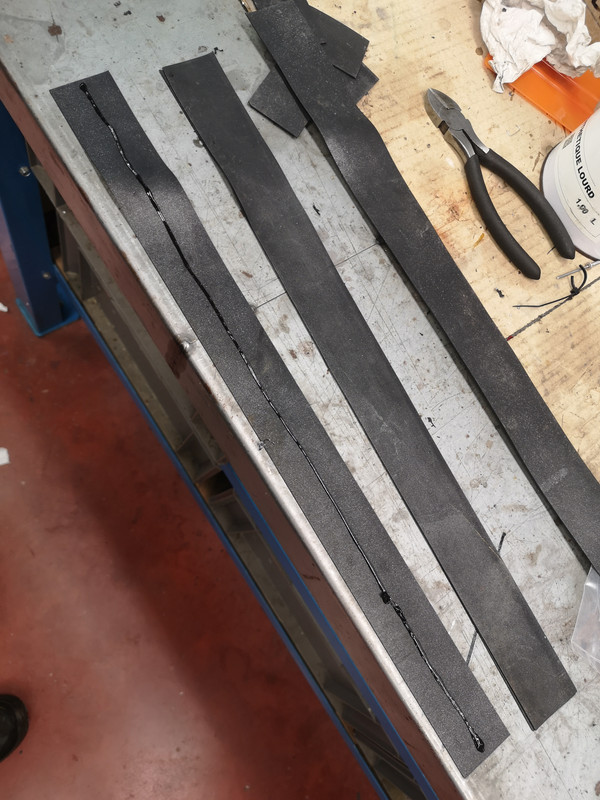
Eventually I struck lucky with 700/25 bicycle inner tubes, their thickness seems to vary from brand to brand, I used a Decathlon one (at about 0.85mm) for one door and a Continental one (about 0.89mm) for the second.
It's important to grasp that no amount of banging will get you anywhere with this as the rubber just bounces and returns to where it was.
I made a flat wooden jig such that the curved top of the glass butted up against a series of wooden stops, leaving the lower edge and the rear heel of the glass exposed.
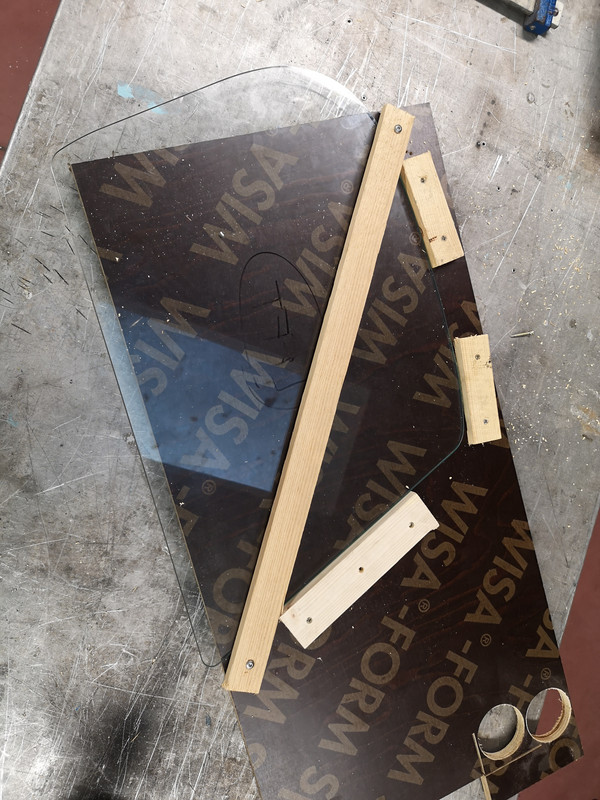
I then screwed a batten down to hold the glass in place.
I found it helped to stick some masking tape onto the glass to replicate the "full-depth" mark, as it's not easy to judge how you're progressing without this reference.
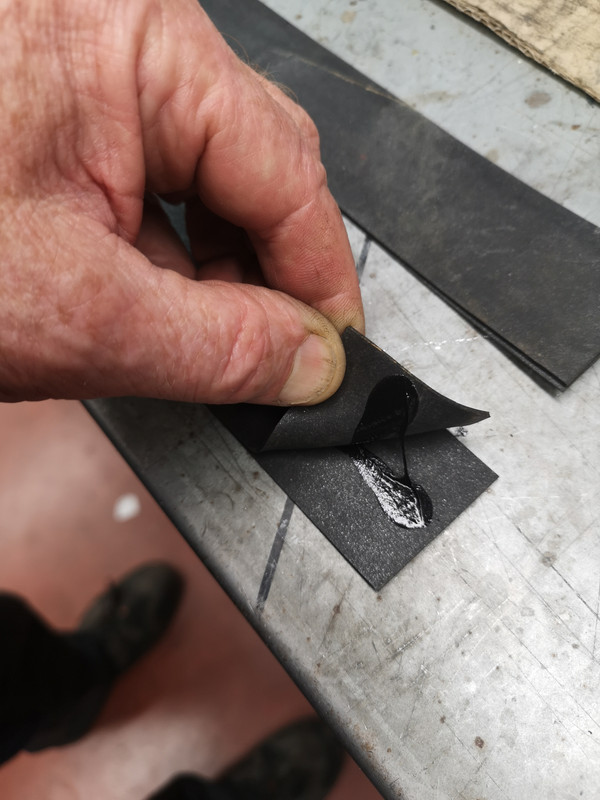
The next thing is to make a sandwich of two thicknesses of inner-tube, that have just been cut along the length, and lubricate them liberally with soapy water, both between themselves and on the outside.
This is then forced into the channel with a thin shim of some description - if you orient the
inner length of inner-tube so it's "inside-out", this helps to make it more welcoming for the initial approach.
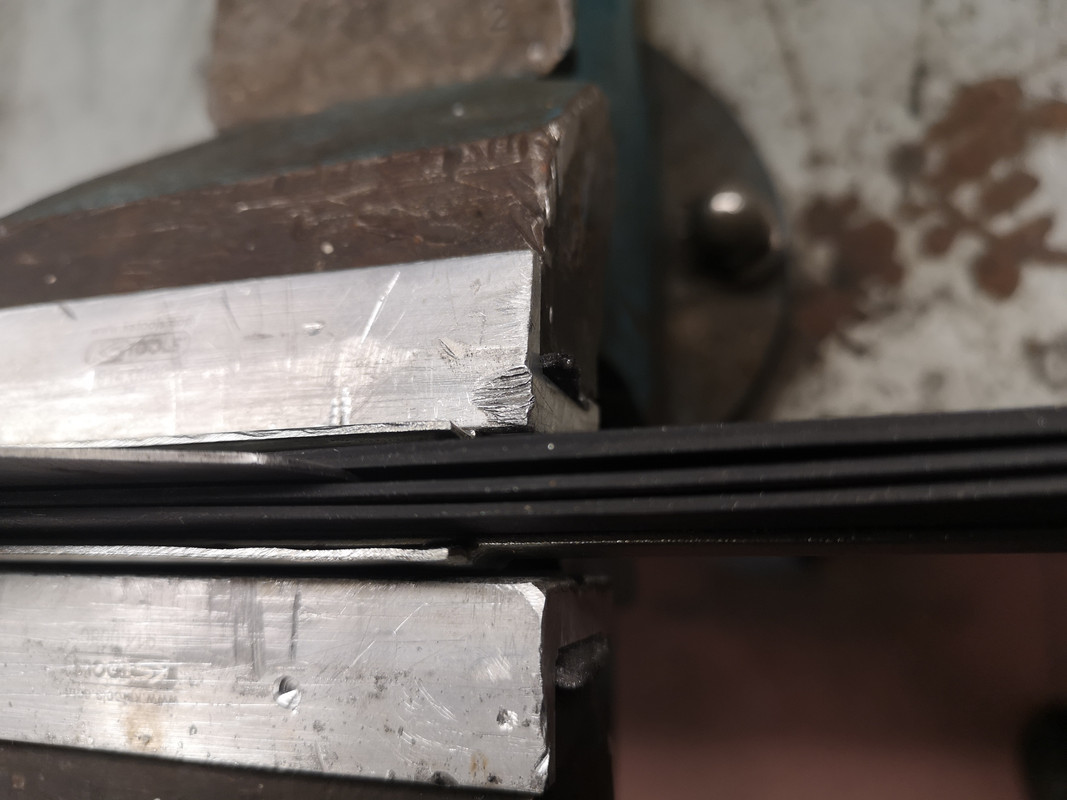
I made two distinct parts, one for the heel and one for the bottom length, rather than trying to make it one single length.

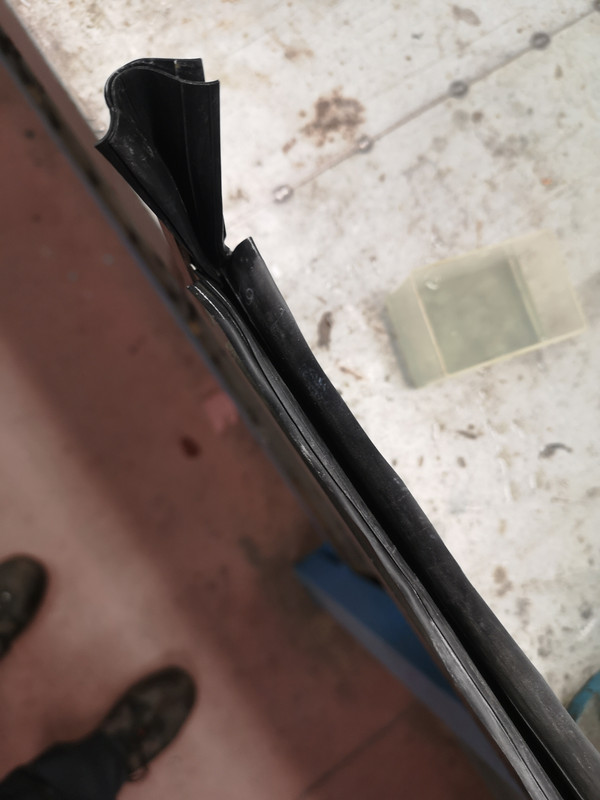
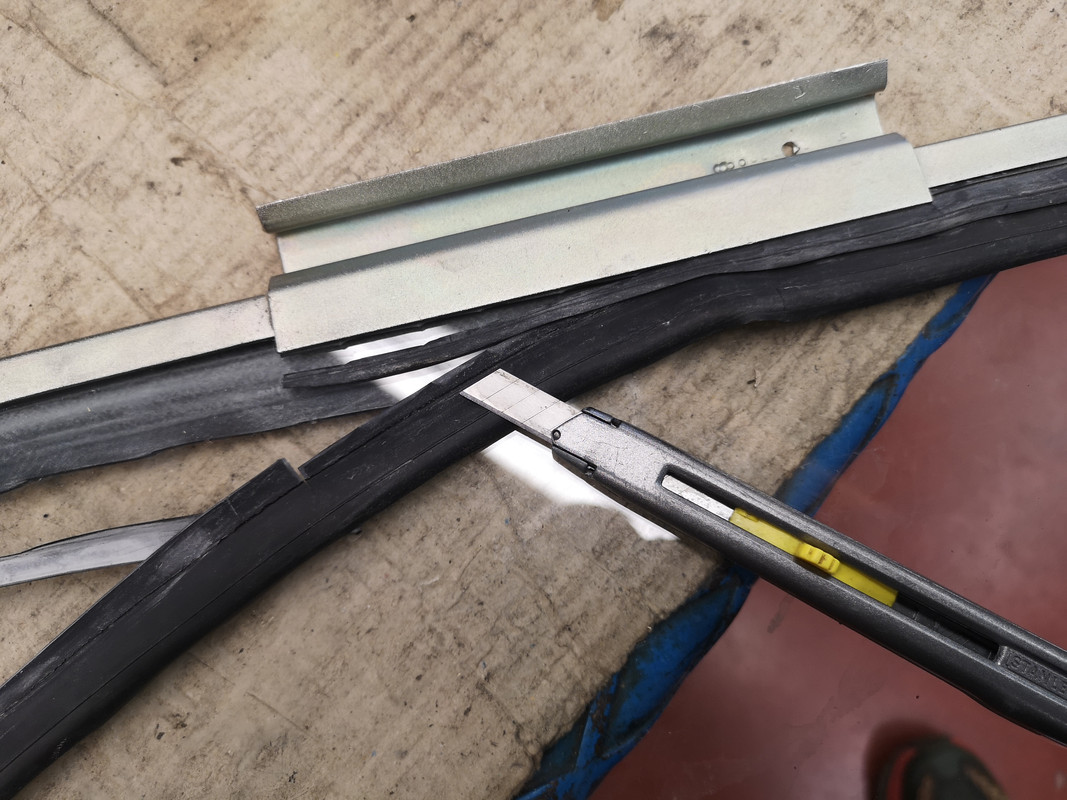
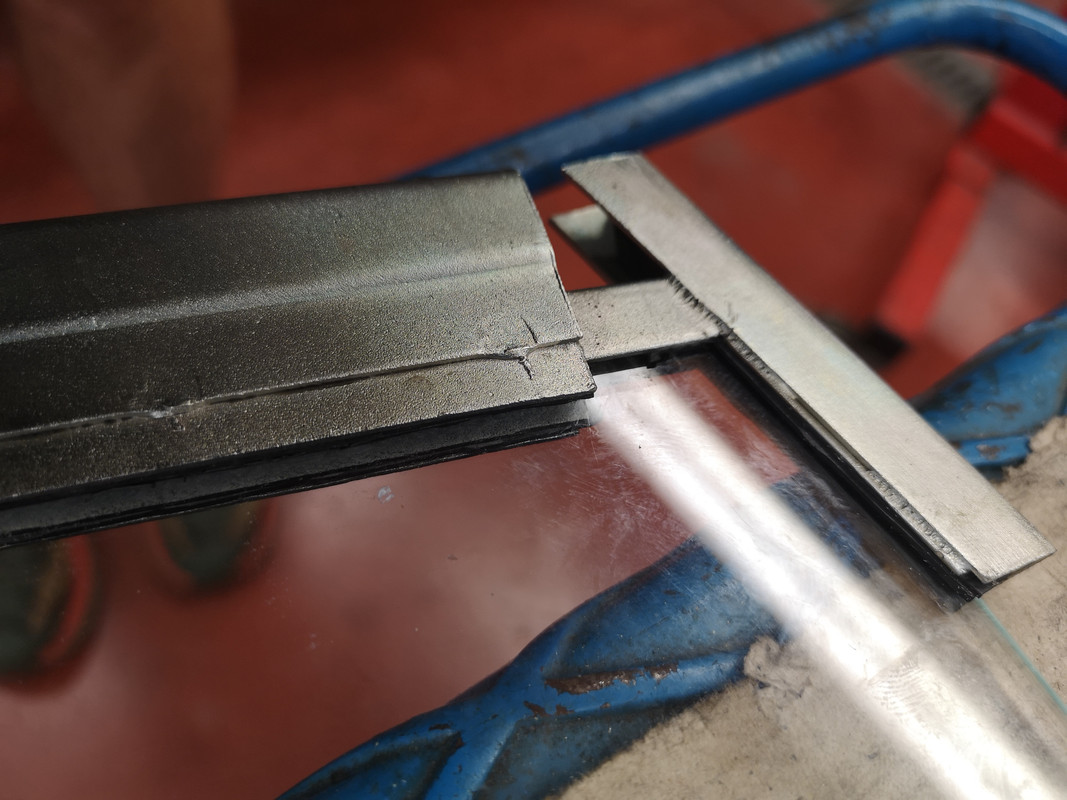
This is what it then looks like as you offer the glass into the rubber.
I then "just" used a multitude of sash-cramps to incrementally compress the glass into my inner-tube-lined channel, one much longer one to bring the heel into line at the same time.
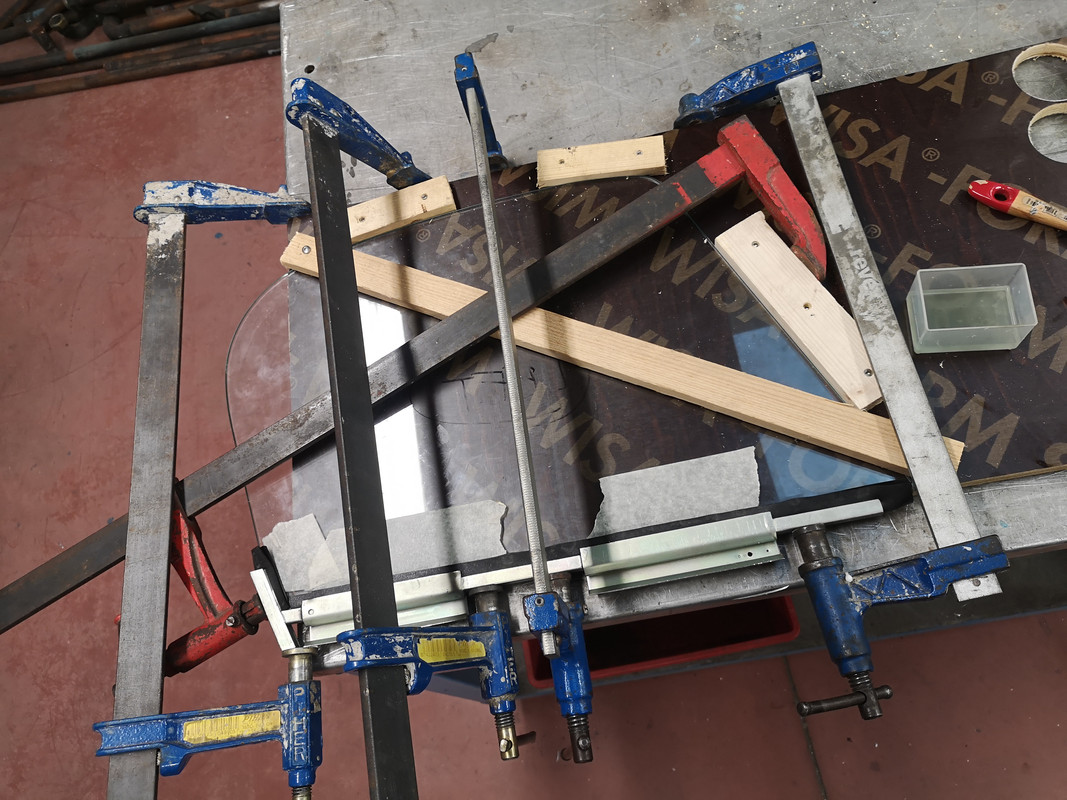
It requires a fair bit of patience as you can't rush this, and it needs as many sash cramps as you can fit along the bottom rail so as to spread the load, otherwise it would be very easy to bend both the channel and the track for the winder frame.
I even used a suitably-sized slug wedged into the winder-channel so that I could use a sash-cramp in the centre of each section without crushing it.
Once you've got the knack and appreciate the cramping forces necessary, I found it surprisingly easy (and satisfying) to squeeze the glass into the bottom of the frame channels.
I then put the windows out in the sun for a whole day to get good and hot, both to dry off the soapy water and to see if there was the slightest propensity for the glass to be ejected.
I can do you a video with the singing of the cigales if you like.
But it worked, and all you need to do then is use a really sharp cutter, and just a drop of soapy water, to trim off the excess.
I claim no other experience or expertise in this field, and would have liked to had my hand held a bit with some thoughts like these before I got stuck in.
I had, though, had seven years during which I was able to mull this over