The following is courtesy of my work colleague, being his response to a Post on another Forum, where a 1/2" spacer had been used between the bottom members of the Bonnet Hinge Frame and the Picture Frame. Any time something like has to be done there is a defect as a cause and in my opinion, the defect should be rectified, rather than applying a fudge.
Regards,
Bill
Brent Wrote:
No offence intended, but that, in my opinion, would look good to those that didn’t know what they are looking at. Those in the know would be saying WTF. When exercising a due diligence inspection of a car for purchase, your Bonnet Hinge Frame to Picture Frame spacer would be ringing alarm bells loudly for me. We have a lot of cars through work that look great until you start to look really closely. Unless you know who did previous work and what their work is like, buying a tarted up E Type (or any other make for that matter), can be fraught with danger.
To require that extent of spacer between the Bonnet Hinge Frame and the Picture Frame, there is something wrong with the Front End/Bonnet Assembly that would deserve further investigation and a proper fix.
We often see cars where the Bonnet Hinge Frame members are obviously damaged and many where the damage is only detectable via careful measurement (no obvious visible clues).
We set the chassis rails of the tub parallel to the a known level area of the workshop, when transfer important points to the floor using a plum bob, where diagonal, width and length measurements can be made (the old school method of measuring a chassis during crash repair). Height measurements of the hinge axis relative to a datum can also be easily made.
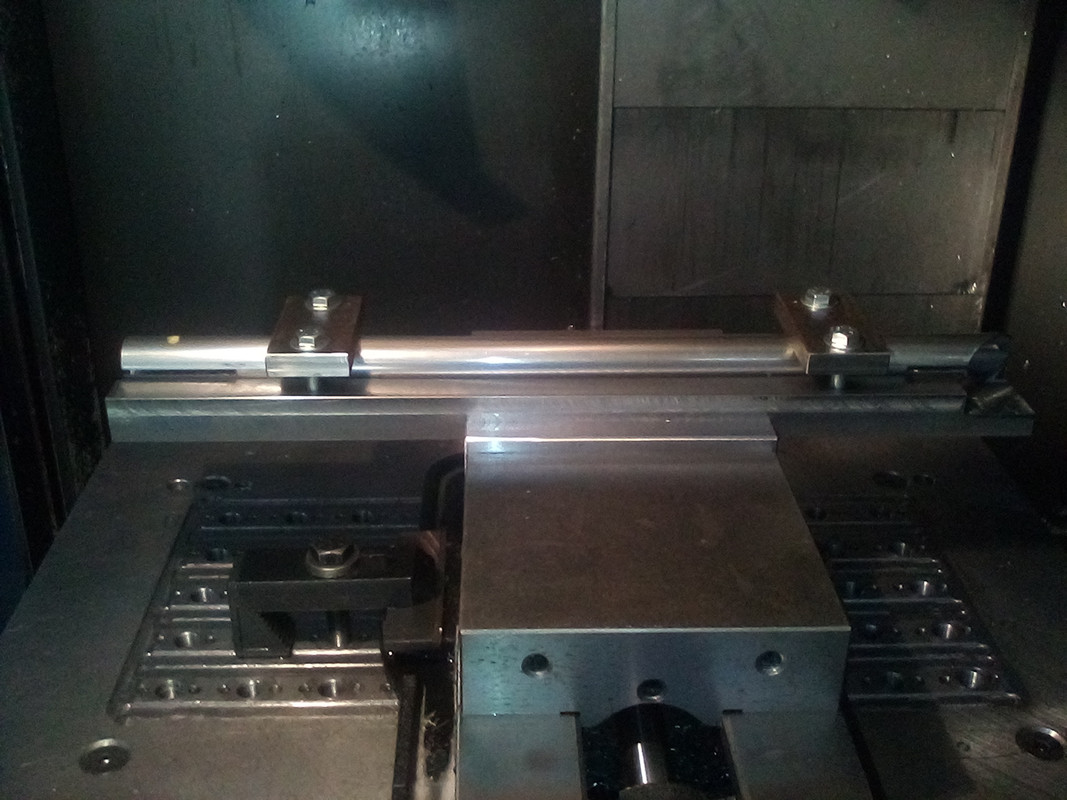
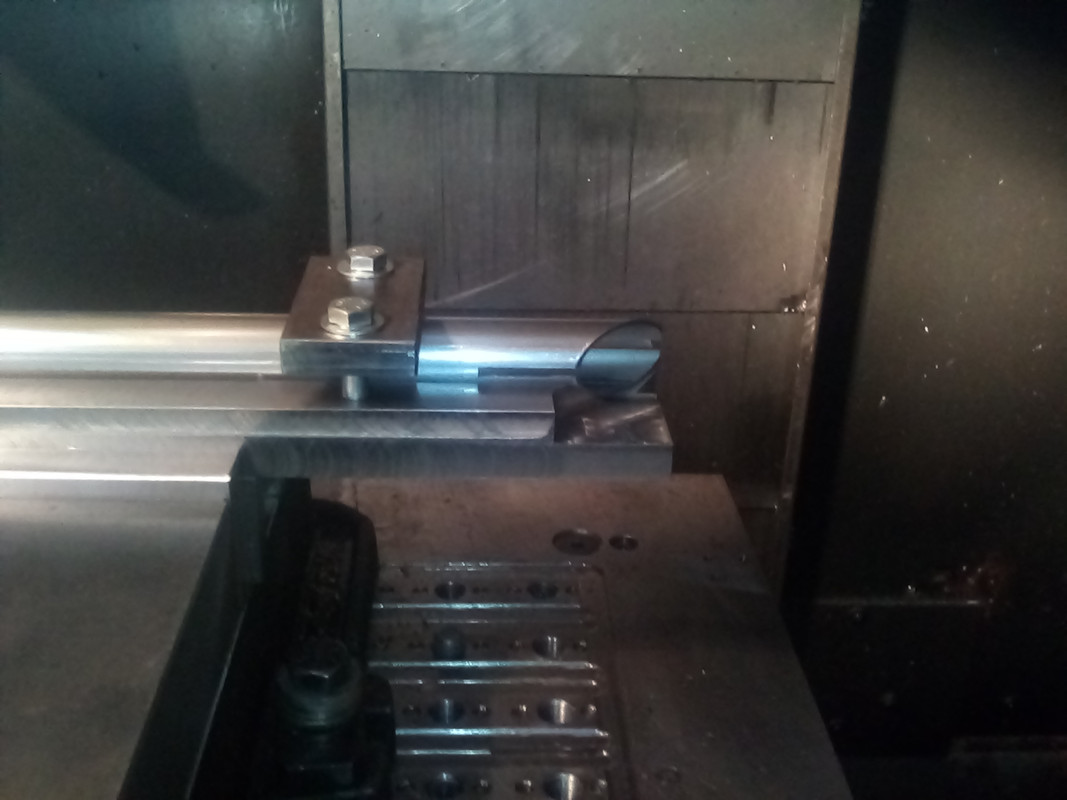
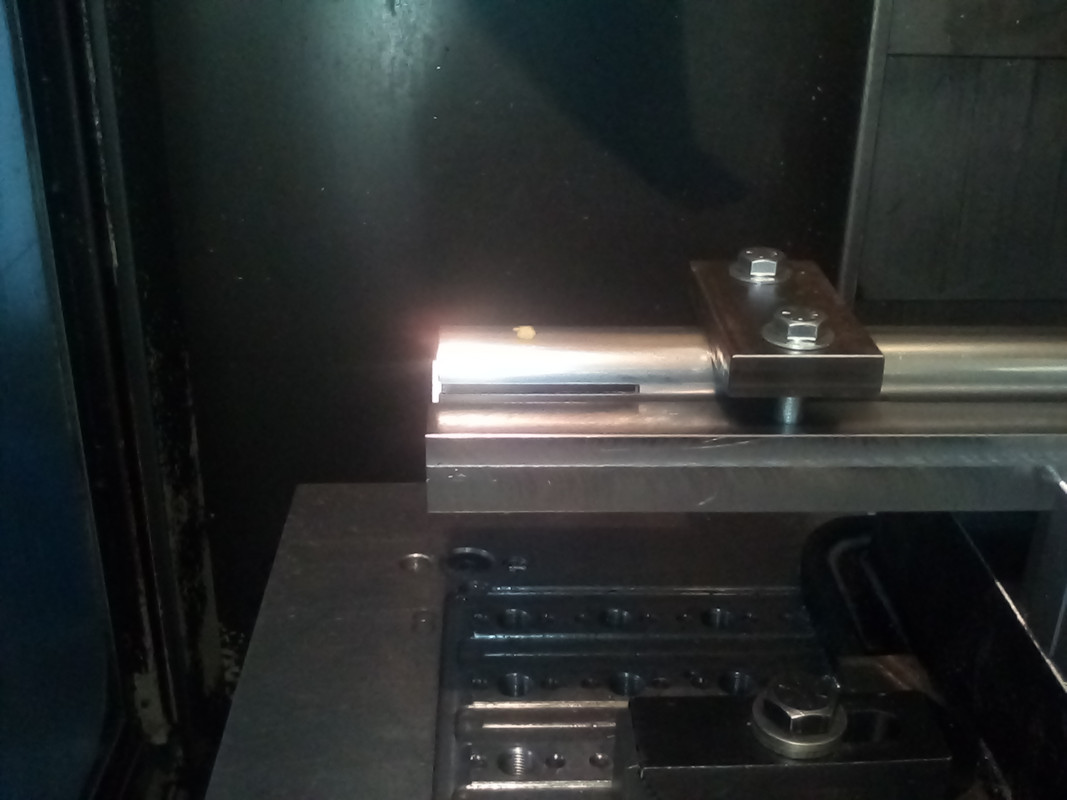
The following pictures show our manufacture of new diagonal members of the Bonnet Hinge Frame; its important that the slots are aligned front to back and end to end.
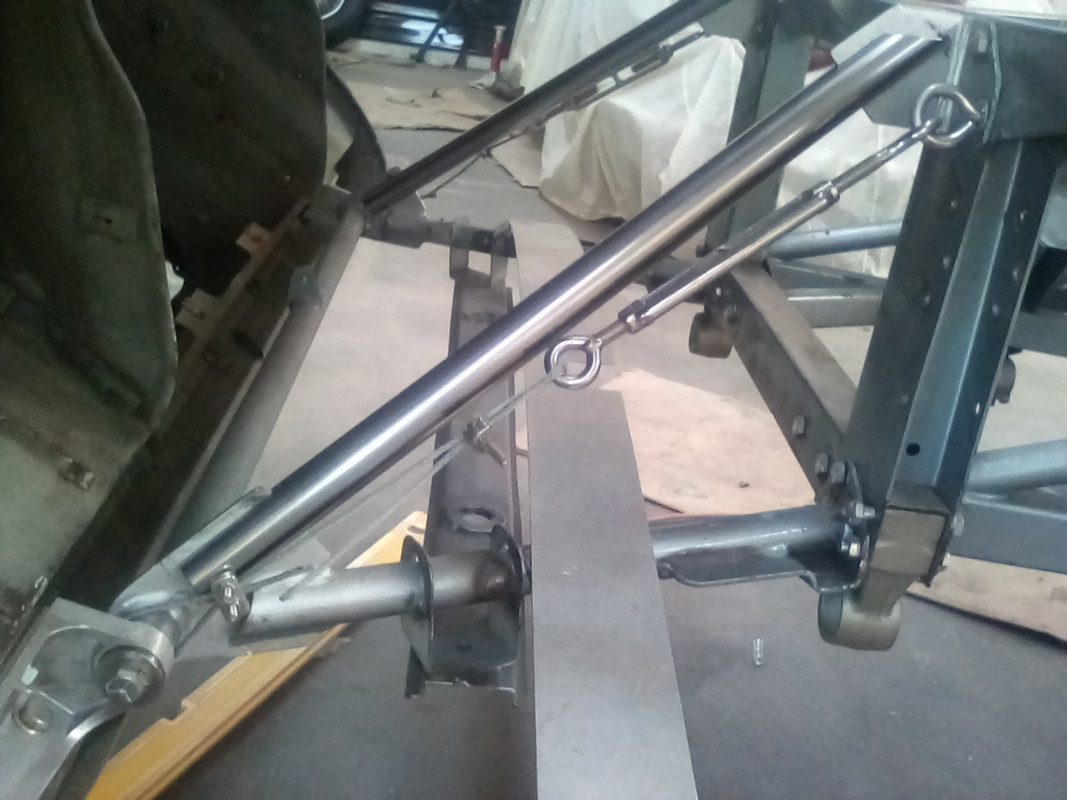
The following picture show the new diagonal tubes in place and the Hinge Frame being adjusted to the correct geometric position using cable and turnbuckles.
We use a minimal amount of spacers between the faces of the hinge and the bonnet so to have fine adjustment for the final fit of the bonnet. We normally have no more than 6mm of spacers after the final fit. 11mm is the max before distortion of the hinge assembly area starts to occur when the hinge bolts are tightened.
Brent