Phil Wrote:
Hi All. Am in the middle of curing a few oil leaks on my Series 3 car. The steering rack was leaking fluid and has been removed and sent to Kiley-Clinton for a refurbishment. Meanwhile, I am trying to tackle the fairly substantial oil leak from the speedo drive. First problem is removing the knurled brass nut which retains the angled drive. Appreciate it is brass and a fine thread, so have soaked in penetrating fluid, applied gentle heat from a hot air gun, and carefully applied a gentle force with pliers. The fear is that it has had thread sealant applied in a misjudged attempt to cure the leak. Is this nut normally only finger tight? Is there a technique to removal? One this is removed, there is a locking setscrew to be removed. Is this easily accessible or is there a recommended approach? Thanks for any help.
Hello Phil,
More times than not, the knurled retainer is more than hand tight to undo, irrespective of whether it was that way when assembled. If you use a strip of copper or aluminum to protect the retainer from the grip of a set of vice grips and apply the grips to the end of the retainer where the cable passes through, this being the radially strongest ares and able to resist collapsing due to the force applied by the vice grips, you can generally get the knurled retainer to move. Don't go crazy with the force you apply with the vice grips; just enough to stop the vice grips and protector strip from rotating on the circumference of the retainer.
If you still don't have success after trying the above, it's likely that some type of retaining compound has been used. Accordingly, use your heat gun to get the barrel of the knurled retainer good and hot to try and degrade the characteristics of the Loctite or whatever retaining compound that may have been used. Whilst hot, move as quickly as possible to repeat the effort using the protector strip and vice grips.
After you have removed the Speedo Angle Drive, there is a bolt with a short, plain, spigot end that locates into a hole in the wall of the Speedo Drive Housing; see the following picture for its location.
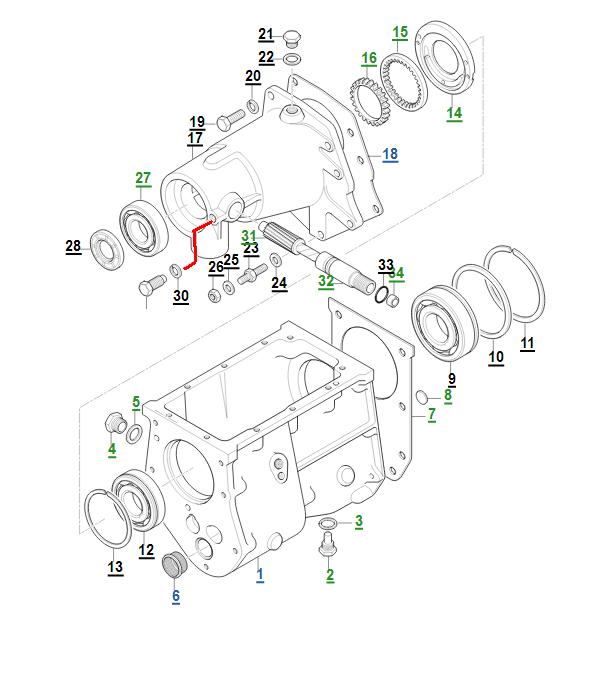
This must be removed before the Speedo Drive assembly can be withdrawn. You may find that the process with Protector Strip and Vice Grips will have to used to get the assembly to move. Once it starts to move, a twisting motion combined with axial force will see the assemble free of the Gearbox Extension.
When reassembling the Speedo Drive with the Gearbox Extension, draw an Axial line on the OD of the Speedo Drive in line with the centre of the hole that the Spigot Bolt interfaces with. Also draw a Radial line on the face where the Speedo Drive enters the Gearbox Extension in line with the Threaded Hole for the retaining, Spigot Bolt. These two lines will aid in assembling the Speedo Drive with the Gearbox Extension so that the hole in the side of the Speed Drive Housing aligns with the Threaded Hole in the Gearbox Extension.
Ensure that the Threaded Hole in the Gearbox Housing and the Speed Drive Housing are aligned, as failure to do this may lead to deformation of the mouth of the hole if considerable force is used when assembling the Spigot Bolt. Test the alignment before assembling the Spigot Bolt by using the shank of a drill that is a close fit in the hole in the Speedo Drive Housing. With the Drill Shank passing through the Threaded Hole and located in the hole in the Speedo Drive Housing, look to see if the Drill Shank is concentric with the Threaded Hole.
The Diameter of the Spigot Journal at the end of the Bolt is close to the Minor Diameter of the Thread, accordingly, the shank of the drill that's a close fit in the hole in the Speedo Drive Housing will be reasonably close to the Minor Diameter hole of the Thread. It will be a little smaller, as the tapping size drill for the tapped hole will be slightly larger than the Thread Minor Diameter and the Spigot Diameter slightly less.
Regards,
Bill