Page 1 of 1
#1 Rear hub removal
Posted: Sat Sep 09, 2023 3:15 pm
by TheMadBadger
It is possible to remove a rear hub assembly while the suspension is under the car? Or does the rear suspension need to be dropped to remove a hub. I may have a hub bearing going bad.
Thanks
Mark
#2 Re: Rear hub removal
Posted: Sat Sep 09, 2023 3:36 pm
by Robbiee
No need
Pull split pin
Undo castellated nut
Push off hub from splined drive shaft
Undo outer fulcrum nut
Slide out fulcrum shaft
Remove hub carrier
Onto the bench
#3 Re: Rear hub removal
Posted: Sun Sep 10, 2023 2:19 am
by TheMadBadger
Sounds simple enough, thank you
Mark
#4 Re: Rear hub removal
Posted: Sun Sep 10, 2023 3:20 am
by bitsobrits
While Robbiee's explanation in not incorrect, he does gloss over the reality of how tight the hub can be on the splines. And the remaining stub shaft doesn't exactly fall out of the bearings. But, yeah, you can remove it without dropping the IRS. Personally, I would remove the half shaft from the diff (at the brake disc) and take off the whole lot (half shaft and hub assembly) and work on disassembly on the bench, and with a press.
#5 Re: Rear hub removal
Posted: Sun Sep 10, 2023 6:37 am
by Mosboss
Hi Mark
There is a lengthy reply to the same question you posted at J L take a look at it
Cheers
Chris
#6 Re: Rear hub removal
Posted: Sun Sep 10, 2023 11:14 am
by Robbiee
I agree the splined hub can be tight but once you’ve screwed in the pusher and released the grip the hub should slide off
#7 Re: Rear hub removal
Posted: Mon Sep 11, 2023 12:05 pm
by angelw
Mark Wrote:
Sounds simple enough, thank you
It's simple until its not. I do this job many times a year and I'd say that probably only 1% dismantle easily.
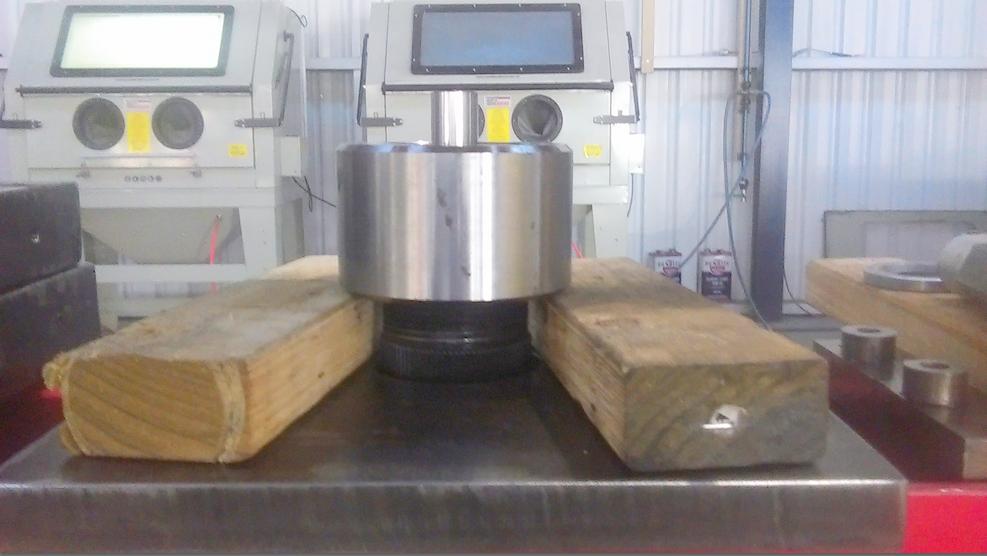
Many are assembled using Loctite on the splines and a fair percentage using high strength Loctite. These are real bears to get apart, with the standard JD7A tool not having a ghost of a chance of separating the splines.
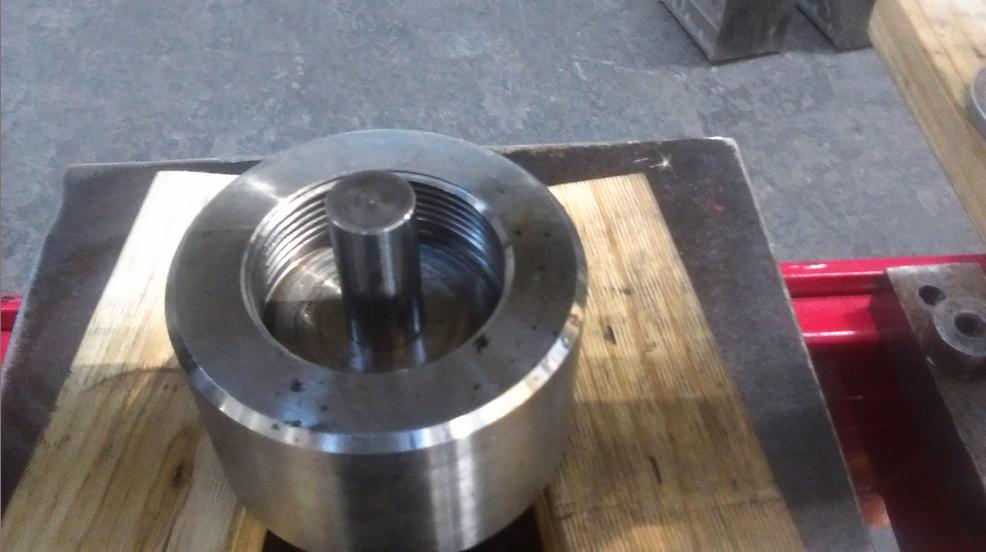
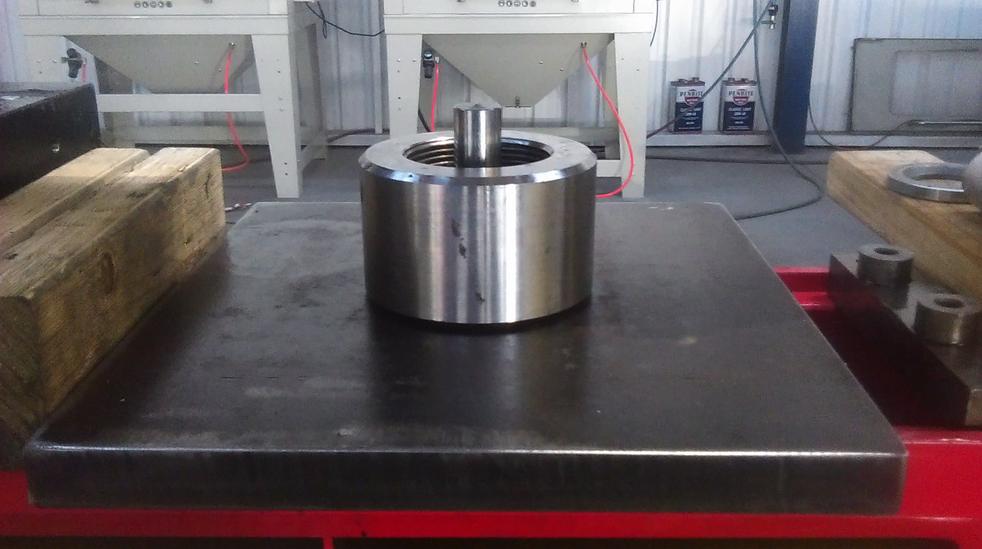
The following pictures show the tool that I made and use and will separate the toughest assemblies. However, I draw the line at circa 9 ton force, at which point I put the whole assembly in an oven to destroy the characteristics of the Loctite. Heating with a flame doesn't work that well, for there is quite an insulating air gap between where the flame can be applied and where the heat is require. A soaking heat is required and that's what the oven supplies.
The end of the threaded journal is relatively weak, due to the two crossed, slit pin holes and a rather large centre drilled hole in the end of the shaft. The standard JD7A tool has a Ball Bearing on the end of the Threaded Mandrel, which imparts a bursting pressure on the centre drilled hole; accordingly, its good practice to leave the nut on the end of the shaft, until the splines start to separate, to support the weak end of the thread.
The timber packers in the following pictures are only to show the hub coming up from underneath the plate. In operation the tool is assembled as in the last picture.
Regards,
Bill
#8 Re: Rear hub removal
Posted: Wed Sep 13, 2023 12:08 pm
by rfs1957
Hey Bill, do you think you could post a picture of the tool disassembled, please ?
I’m guessing it’s two parts, the black core sliding in the threaded collar, right ?
Thanks,
Rory