Page 1 of 1
#1 Glove box liner
Posted: Tue Jan 27, 2026 11:20 am
by lowact
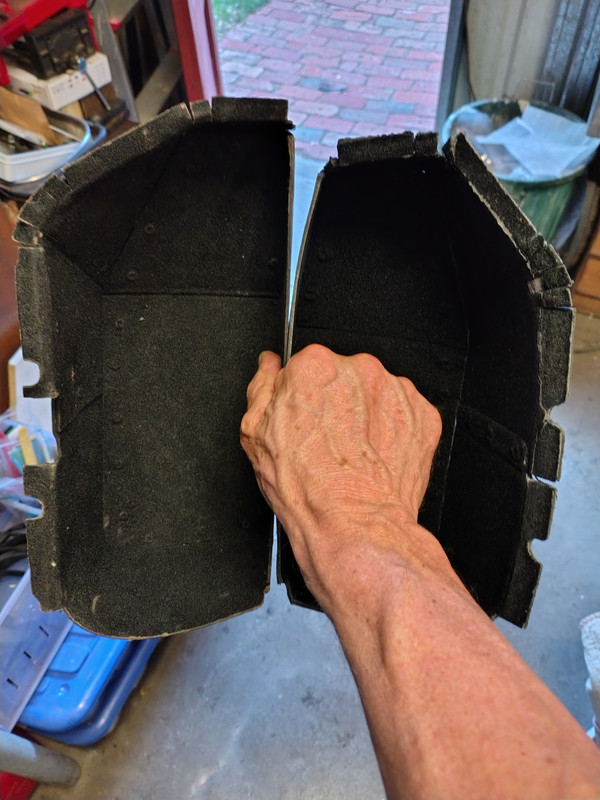
Well now this is tedious. The glove box liner (BD27499) that I bought too long ago to now complain about turns out to be way too small; the inside length (closest to the door hinges) needs to be more than 28 cm but is barely 26.5 cm. Also the cardboard tears and delaminates, as does the flocked lining.
The various suppliers that I know about all seem to be offering the exact same crappy repro. Does this mean I need to make my own? Are these a known waste of money or did I just get unlucky?
New one on the right ...
#2 Re: Glove box liner
Posted: Wed Feb 11, 2026 3:37 am
by lowact
Made me one out of sheet metal, 0.5 mm aluminium, glued and riveted. Flattened out my oem LHD liner to use as a pattern, just folded it up in the opposite direction to create a RHD version.
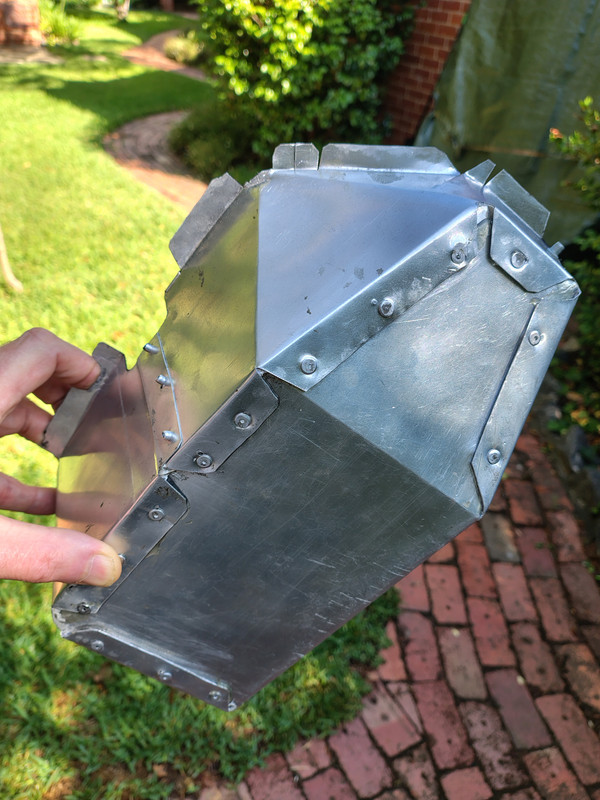
Metal meant I could use Rivnuts for the bottom mountings; instead of those split paper pins … also the metal was then an excellent and convenient cathode for the interior flocking. Been a long time since anything I’ve done has worked 1st time so I’m very satisfied; it’s a drop-in fit that imo looks better than the cardboard. So now I’m wondering if I should do similar for the cardboard parcel shelves…
I’ve an unsubstantiated theory about how/why aftermarket parts can be so ill-fitting; it is that Jaguar, when they modified a part for a later series car; if the modified part was backwards compatible they didn’t change the part number. Subsequently the earliest designs were sometimes the basis of the aftermarket parts. As in this case, ok if you’ve got a door less glove box/cubby; not otherwise.
#3 Re: Glove box liner
Posted: Fri Feb 13, 2026 3:39 pm
by 61Elite
From your photo, it looks as if the original is structurally sound, and the flocking has worn off. If so, you could do what I did to recondition mine. I was able to find black flocking material on Amazon (USA) a few years ago. I lightly sanded off the remaining flocking, painted the inside with a slow drying enamel paint and while it was still wet, "dusted" the inside with the flocking. The flocking adhered to the paint very well. Flocking has a tendency to "clump" so i used a screened funnel to sift the flocking on. I did this 6 or 7 tears ago and it still looks great. Relatively easy project. I have done a few of these over the years. It works.