


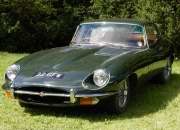

Doing the front suspension bushes. Top done OK.
I am wondering if the lower bushes can be replaced by disconecting the lower wishbone Balljoint and roll bar link. Unloading it ( how far down/degrees would it go ?) and then taking the end attachment brackets off one at a time to replace the bush.
Anyone done it or other ideas to avoid taking the whole torsion bar setup apart ?
Lower Wishbone Bush Replacement

#2
Hi Gerry.....removing and replacing the torsion bars is not difficult.....however some seem to think it is and there is a bit of a myth built up about it being complicated.....the only awkward bit is if its seized......but if thats the case you may as well dismanlte it to un seize and clean up......follow the steps in the manual and you will be ok......make sure you follow the steps exactly to unload the tension.....you will need a setting link to reset the bars..this can be mede very simply with a flat bar and a couple of holes drilled......make sure you get the correct measurement for your model there are several in the manual..all the best
Steve
69 S2 2+2 (sold) ..Realm C type replica, 1960 xk150fhc
69 S2 2+2 (sold) ..Realm C type replica, 1960 xk150fhc
| Link: | |
| BBcode: | |
| HTML: | |
| Hide post links |
#3
Having done this with the trial and tribulations that it involves I would suggest 2 things.
Read up on torsion bar removal in the archives. It is correct that it is not difficult but many people find seized bolts and other issues.
Secondly, and in my case, it rises to a bad case of shipwrights disease.
Good luck
Tim
Read up on torsion bar removal in the archives. It is correct that it is not difficult but many people find seized bolts and other issues.
Secondly, and in my case, it rises to a bad case of shipwrights disease.
Good luck
Tim
Series 1 FHC purchased 50 years ago. Courted my wife in it.
Series 1 2+2 when the kids were small now sold.
Series 1.5 OTS in opalescent maroon, Californian car. My retirement present.
Series 1 2+2 when the kids were small now sold.
Series 1.5 OTS in opalescent maroon, Californian car. My retirement present.
| Link: | |
| BBcode: | |
| HTML: | |
| Hide post links |
-
 Moeregaard
- Posts: 763
- Joined: Thu Mar 13, 2008 7:23 pm
- Location: Thousand Oaks, California

#4
Shipwright's Disease--when a simple valve job turns into a stem-to-stern restoration. Been there, done that, but I digress....
Disconnecting the lower ball joint is my preferred method for relieving the torsion-bar preload. Remove the rear brackets as well, and give all the splines a really good cleaning. The torsion-bar setting gauge is detailed on Page 230, Figure 11.13 in the Haynes manual. It's not a difficult job, but you will spend a fair amount of time under the car so please ensure that it's safely supported. Mark the bars "Right" and "Left" so that they go back onto their respective sides.
Disconnecting the lower ball joint is my preferred method for relieving the torsion-bar preload. Remove the rear brackets as well, and give all the splines a really good cleaning. The torsion-bar setting gauge is detailed on Page 230, Figure 11.13 in the Haynes manual. It's not a difficult job, but you will spend a fair amount of time under the car so please ensure that it's safely supported. Mark the bars "Right" and "Left" so that they go back onto their respective sides.
Mark (Moe) Shipley
Former owner '66FHC, #1E32208
Former owner '65FHC, #1E30036
Planning on getting E-Type No. 3 as soon as possible....
Former owner '66FHC, #1E32208
Former owner '65FHC, #1E30036
Planning on getting E-Type No. 3 as soon as possible....
| Link: | |
| BBcode: | |
| HTML: | |
| Hide post links |
#5
Dont rely on the Haynes manual for the setting links dimensions ....the jaguar manual also gives dimensions for all models and by chassis numbers on pages J.X.S.1 and J.Y.S.1...... dont get the torsion bar link confused with the suspension link (castor)... if you dont have the Jaguar manual...its in the kniwledge base
Steve
69 S2 2+2 (sold) ..Realm C type replica, 1960 xk150fhc
69 S2 2+2 (sold) ..Realm C type replica, 1960 xk150fhc
| Link: | |
| BBcode: | |
| HTML: | |
| Hide post links |