




I would not rule out the need for a tappet stakedown kit either, installed a kit in my 3.8 and the noise disappeared.
http://www.etypeuk.com/forum/viewtopic.php?t=5517
Had tappet noise every now and then but only when staring the engine, inspection showed no real damage, but it had early signs of loose tappet's. Quite easy to install and a modest investment.
http://www.jag-lovers.org/technical/tappet.html
Engine Tappety Noise
-
 ALAN COCHRANE
Topic author - Posts: 712
- Joined: Sun May 06, 2012 9:37 am
- Location: Fife

#22
Rory
The tappety noise can also be heard while idling in the garage/drive so I'm going to try the valve clearance issue first. The worst offenders tie in with the source of the noise.
Yes you're right about the micrometer-it seemed like a good buy at the time but I'm now looking for a professional one. I borrowed the local garage's Snap-On micrometer and ended up having to buy a new battery for it. There's a certain irony there.
Trondvo
Thanks for the link.
The Jag-Lovers thread doesn't read like a simple DIY job more like a DIY minefield. It's full of warnings and doom and disaster. I'll take it one step at a time. Better to learn to walk before you try to run.
Alan
The tappety noise can also be heard while idling in the garage/drive so I'm going to try the valve clearance issue first. The worst offenders tie in with the source of the noise.
Yes you're right about the micrometer-it seemed like a good buy at the time but I'm now looking for a professional one. I borrowed the local garage's Snap-On micrometer and ended up having to buy a new battery for it. There's a certain irony there.
Trondvo
Thanks for the link.
The Jag-Lovers thread doesn't read like a simple DIY job more like a DIY minefield. It's full of warnings and doom and disaster. I'll take it one step at a time. Better to learn to walk before you try to run.
Alan
Alan Cochrane
1961 S1 OTS,1968 Triumph TR250, 1971 Triumph GT6 Mk3, 2008 Porsche Boxster RS60 Spyder
1961 S1 OTS,1968 Triumph TR250, 1971 Triumph GT6 Mk3, 2008 Porsche Boxster RS60 Spyder
| Link: | |
| BBcode: | |
| HTML: | |
| Hide post links |
-
 Moeregaard
- Posts: 763
- Joined: Thu Mar 13, 2008 7:23 pm
- Location: Thousand Oaks, California

#23
Alan, you may have already done this, but get a stethoscope (or just use a wooden dowel) and go around the head while the engine is idling in the drive. You'll at least be able to nail down where the "problem child" lies. This sounds like a case of excessive valve clearance. You only need to worry when they start getting really quiet, which can be a sign of valve-seat troubles.
I'll toss in another vote for the tappet hold-down kit. It's definitely money well spent.
I ran a small R&D machine shop for many years (great place for making E-Type parts, but I digress...). My favorite calipers and micrometers were Brown & Sharpe and Mitutoyo. B&S are made by Swiss Precision and also sold under the TESA name. The U.S.-made Starrett brand is quite good as well. The dial versions are around $125US, the digital a little more.
I'll toss in another vote for the tappet hold-down kit. It's definitely money well spent.
I ran a small R&D machine shop for many years (great place for making E-Type parts, but I digress...). My favorite calipers and micrometers were Brown & Sharpe and Mitutoyo. B&S are made by Swiss Precision and also sold under the TESA name. The U.S.-made Starrett brand is quite good as well. The dial versions are around $125US, the digital a little more.
Mark (Moe) Shipley
Former owner '66FHC, #1E32208
Former owner '65FHC, #1E30036
Planning on getting E-Type No. 3 as soon as possible....
Former owner '66FHC, #1E32208
Former owner '65FHC, #1E30036
Planning on getting E-Type No. 3 as soon as possible....
| Link: | |
| BBcode: | |
| HTML: | |
| Hide post links |
-
christopher storey
- Posts: 5698
- Joined: Sun Mar 09, 2008 3:07 pm
- Location: cheshire , england
#24
Also , Aldi do a good set of digital calipers, German made, for about a tenner. Very useful as depth gauges as well
| Link: | |
| BBcode: | |
| HTML: | |
| Hide post links |
-
ALAN COCHRANE
Topic author - Posts: 712
- Joined: Sun May 06, 2012 9:37 am
- Location: Fife
#25
Gents
Thanks for the recommendations. I was actually looking at a Mitutoyo today:-
http://www.ebay.co.uk/itm/Mitutoyo-Digi ... 3392a62862
The latest update is that I've received the replacement shims from SNG and just as an afterthought I measured them with the borrowed micrometer. The reading consistently showed 5thou above the stated size. The garage are going to check the micrometer's accuracy tomorrow and let me know. This means the shims are the wrong size either way-five thou to large if the micrometer is to be believed or the existing shims have been measured 5thou to large if it is indeed reading too high.
I strongly suspect the former is the case. I should have bought a decent one to start with-arrggh!
Mark
I did check with my stethoscope and the loudest tappety noise was coming from the front of both cams.
The saga continues.
Cheers
Alan
Thanks for the recommendations. I was actually looking at a Mitutoyo today:-
http://www.ebay.co.uk/itm/Mitutoyo-Digi ... 3392a62862
The latest update is that I've received the replacement shims from SNG and just as an afterthought I measured them with the borrowed micrometer. The reading consistently showed 5thou above the stated size. The garage are going to check the micrometer's accuracy tomorrow and let me know. This means the shims are the wrong size either way-five thou to large if the micrometer is to be believed or the existing shims have been measured 5thou to large if it is indeed reading too high.
I strongly suspect the former is the case. I should have bought a decent one to start with-arrggh!
Mark
I did check with my stethoscope and the loudest tappety noise was coming from the front of both cams.
The saga continues.
Cheers
Alan
Alan Cochrane
1961 S1 OTS,1968 Triumph TR250, 1971 Triumph GT6 Mk3, 2008 Porsche Boxster RS60 Spyder
1961 S1 OTS,1968 Triumph TR250, 1971 Triumph GT6 Mk3, 2008 Porsche Boxster RS60 Spyder
| Link: | |
| BBcode: | |
| HTML: | |
| Hide post links |


#26
Alan ! Spend some money ! Buy your own micrometer ! Then you can zero it yourself ............... honestly, you Scots.
Rory
3.8 OTS S1 Opalescent Silver Grey - built May 28th 1962
3.8 OTS S1 Opalescent Silver Grey - built May 28th 1962
| Link: | |
| BBcode: | |
| HTML: | |
| Hide post links |
-
ALAN COCHRANE
Topic author - Posts: 712
- Joined: Sun May 06, 2012 9:37 am
- Location: Fife
#27
Rory
I've put my hand in my pocket and bought a decent one. A Mitutoyo off of Amazon and it didn't hurt to much. It should be with me tomorrow, so I can get to the bottom of this conundrum. I usually spend money on quality tools but this was an exception-sometimes your heritage is too strong to resist.
Does this mean I'll now have to leave Scotland? I can already see people looking at me in an odd way-although this may not have anything to do with spending a wad of cash!
Alan
I've put my hand in my pocket and bought a decent one. A Mitutoyo off of Amazon and it didn't hurt to much. It should be with me tomorrow, so I can get to the bottom of this conundrum. I usually spend money on quality tools but this was an exception-sometimes your heritage is too strong to resist.
Does this mean I'll now have to leave Scotland? I can already see people looking at me in an odd way-although this may not have anything to do with spending a wad of cash!
Alan
Alan Cochrane
1961 S1 OTS,1968 Triumph TR250, 1971 Triumph GT6 Mk3, 2008 Porsche Boxster RS60 Spyder
1961 S1 OTS,1968 Triumph TR250, 1971 Triumph GT6 Mk3, 2008 Porsche Boxster RS60 Spyder
| Link: | |
| BBcode: | |
| HTML: | |
| Hide post links |
-
 ralphr1780
- Posts: 1104
- Joined: Wed Apr 11, 2012 4:29 pm

#28
"Does this mean I'll now have to leave Scotland? I can already see people looking at me in an odd way-although this may not have anything to do with spending a wad of cash! "
Alan, you are midway to Holland now

Cheers,
Alan, you are midway to Holland now
Cheers,
Ralph
'69 OTS + '62 OTS - Belgium
'69 OTS + '62 OTS - Belgium
| Link: | |
| BBcode: | |
| HTML: | |
| Hide post links |

#29
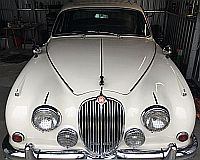
This is what you need.
Andrew.
881824, 1E21538. 889457. 1961 4.3l Mk2. 1975 XJS. 1979 MGB (supercharged).
Adelaide, Australia
881824, 1E21538. 889457. 1961 4.3l Mk2. 1975 XJS. 1979 MGB (supercharged).
Adelaide, Australia
| Link: | |
| BBcode: | |
| HTML: | |
| Hide post links |
-
ALAN COCHRANE
Topic author - Posts: 712
- Joined: Sun May 06, 2012 9:37 am
- Location: Fife
#30
Andrew
Can you send them to me-I'll pay the postage or it might be cheaper to fly to Oz and pick them up! That amount of shims should be kept in a locked safe. They're worth about ?2.50 a pop.
Well the latest update-I couldn't wait for my new vernier micrometer to arrive so I went back up to the garage and used their old half moon mechanical micrometer, guess what, the new shims were all spot on-no real surprise there!
The micrometer's owner, Andy said that the digital micrometers were "rubbish" at measuring shims and he always used the mechanical version. Isn't it funny that the man you really want to speak to is the one that's not allowed out of the workshop in case he frightens off the punters. I've dealt with Andy before and he's the one that seems to have the answer when everyone else is stumped.
Anyway I re-measured he existing shims with this micrometer and have now ordered a second batch of (hopefully) correct sized shims.
Isn't life grand when you finally start making some headway.
Alan
P.S The GT6 is getting much used running back and forward to the garage-so not all bad.
Can you send them to me-I'll pay the postage or it might be cheaper to fly to Oz and pick them up! That amount of shims should be kept in a locked safe. They're worth about ?2.50 a pop.
Well the latest update-I couldn't wait for my new vernier micrometer to arrive so I went back up to the garage and used their old half moon mechanical micrometer, guess what, the new shims were all spot on-no real surprise there!
The micrometer's owner, Andy said that the digital micrometers were "rubbish" at measuring shims and he always used the mechanical version. Isn't it funny that the man you really want to speak to is the one that's not allowed out of the workshop in case he frightens off the punters. I've dealt with Andy before and he's the one that seems to have the answer when everyone else is stumped.
Anyway I re-measured he existing shims with this micrometer and have now ordered a second batch of (hopefully) correct sized shims.
Isn't life grand when you finally start making some headway.
Alan
P.S The GT6 is getting much used running back and forward to the garage-so not all bad.
Alan Cochrane
1961 S1 OTS,1968 Triumph TR250, 1971 Triumph GT6 Mk3, 2008 Porsche Boxster RS60 Spyder
1961 S1 OTS,1968 Triumph TR250, 1971 Triumph GT6 Mk3, 2008 Porsche Boxster RS60 Spyder
| Link: | |
| BBcode: | |
| HTML: | |
| Hide post links |
-
ALAN COCHRANE
Topic author - Posts: 712
- Joined: Sun May 06, 2012 9:37 am
- Location: Fife
#31
Hi Everyone
Well I've got my new Mitutoyo Verrnier micrometer and it's very impressive and accurate.
I've now replaced the shims as per my calculations, brought the engine up to TDC(firing) on No6 and am in the process of bolting down the exhaust cam-with TDC mark in the right place according to the cam timing tool.
I know you should fit only one cam at a time to avoid valve fouling and just need to check that connecting up the exhaust timing chain sprocket to the cam and then turning the engine is the way to check all the exhaust valve clearances. Then disconnect and remove the exhaust cam and repeat for the inlet cam. Finally bolting both down at No6 TDC position
None of the Forum threads or manuals actually state this is the method to use.
A bit of a silly question, I know but I'm in expensive mistake land right now and want to tread cautiously.
Trondvo
I found your thread on the fitting of the tappet hold down kit very clear with the images-well done!
I've checked and there's no sign of the tappets having hit either cam so the tappety noise isn't down to that. This would only cause a noise when the engine is cold or warming up and if anything my noise happens mainly at full operating temperature.
Cheers
Alan
Well I've got my new Mitutoyo Verrnier micrometer and it's very impressive and accurate.
I've now replaced the shims as per my calculations, brought the engine up to TDC(firing) on No6 and am in the process of bolting down the exhaust cam-with TDC mark in the right place according to the cam timing tool.
I know you should fit only one cam at a time to avoid valve fouling and just need to check that connecting up the exhaust timing chain sprocket to the cam and then turning the engine is the way to check all the exhaust valve clearances. Then disconnect and remove the exhaust cam and repeat for the inlet cam. Finally bolting both down at No6 TDC position
None of the Forum threads or manuals actually state this is the method to use.
A bit of a silly question, I know but I'm in expensive mistake land right now and want to tread cautiously.
Trondvo
I found your thread on the fitting of the tappet hold down kit very clear with the images-well done!
I've checked and there's no sign of the tappets having hit either cam so the tappety noise isn't down to that. This would only cause a noise when the engine is cold or warming up and if anything my noise happens mainly at full operating temperature.
Cheers
Alan
Alan Cochrane
1961 S1 OTS,1968 Triumph TR250, 1971 Triumph GT6 Mk3, 2008 Porsche Boxster RS60 Spyder
1961 S1 OTS,1968 Triumph TR250, 1971 Triumph GT6 Mk3, 2008 Porsche Boxster RS60 Spyder
| Link: | |
| BBcode: | |
| HTML: | |
| Hide post links |
-
christopher storey
- Posts: 5698
- Joined: Sun Mar 09, 2008 3:07 pm
- Location: cheshire , england
#32
You are far safer, and it is really not that much more work, to connect both cams up before turning the engine. One cam at a time is fine when the head is off the engine and you can use other methods to turn the camshaft . The problem with your method is that it is difficult to get proper tension on the upper chain with only one sprocket in place, and of course if the inlet cam is not to be connected it MUST be removed before you turn the engine
| Link: | |
| BBcode: | |
| HTML: | |
| Hide post links |

#33
Hi Alan........have a look at the post I put up a while ago re tapprts/ cams. At the bottom I listed a workable procedure....it worked for me and a friend just done his like this over the past few days http://etypeuk.com/forum/viewtopic.php? ... ht=tappets good luck Steve
Steve
69 S2 2+2 (sold) ..Realm C type replica, 1960 xk150fhc
69 S2 2+2 (sold) ..Realm C type replica, 1960 xk150fhc
| Link: | |
| BBcode: | |
| HTML: | |
| Hide post links |
-
ALAN COCHRANE
Topic author - Posts: 712
- Joined: Sun May 06, 2012 9:37 am
- Location: Fife
#34
Gents
Thanks for the advice. I think I'll fit both cams and chain sprockets for the very reason you've mentioned Chris (sorry Steve). I was a bit concerned about the lack of chain tension with one cam removed.
I suppose you could always re-engage the eccentric tensioner. This should theoretically tension the section between the crank, exhaust sprocket and the tensioner as you are rotating the engine.
I've managed to measure three of the exhaust valve clearances with the cam at TDC and instead of 8,8&9thou they're now 6,6&4.5thou-a 66% hit rate so far-not bad for a first attempt.
Anyway this will all have to wait until tomorrow, since I'm now sitting with a nice cold beer and checking out Ebay!
Cheers
Alan
Thanks for the advice. I think I'll fit both cams and chain sprockets for the very reason you've mentioned Chris (sorry Steve). I was a bit concerned about the lack of chain tension with one cam removed.
I suppose you could always re-engage the eccentric tensioner. This should theoretically tension the section between the crank, exhaust sprocket and the tensioner as you are rotating the engine.
I've managed to measure three of the exhaust valve clearances with the cam at TDC and instead of 8,8&9thou they're now 6,6&4.5thou-a 66% hit rate so far-not bad for a first attempt.
Anyway this will all have to wait until tomorrow, since I'm now sitting with a nice cold beer and checking out Ebay!
Cheers
Alan
Alan Cochrane
1961 S1 OTS,1968 Triumph TR250, 1971 Triumph GT6 Mk3, 2008 Porsche Boxster RS60 Spyder
1961 S1 OTS,1968 Triumph TR250, 1971 Triumph GT6 Mk3, 2008 Porsche Boxster RS60 Spyder
| Link: | |
| BBcode: | |
| HTML: | |
| Hide post links |
-
ALAN COCHRANE
Topic author - Posts: 712
- Joined: Sun May 06, 2012 9:37 am
- Location: Fife
#35
Hello Again
Well I've managed to replace the shims and after two attempts the clearances seem to be correct. Now for the next problem-the cam bearings.
The inlet cam bearings seem to be showing signs of significant wear particularly the one closest to the chain sprocket. Two of the bearings have small gouges in them. The camshaft doesn't bare any signs of wear at all-which means the bearings are doing their job. These images show the bearings from the back to the front of the engine:-
https://www.dropbox.com/s/pf18l9bsjot0ka4/P8030063.JPG
https://www.dropbox.com/s/sldigh18g4u3yie/P8030064.JPG
https://www.dropbox.com/s/80am4jlfbaavn7i/P8030066.JPG
https://www.dropbox.com/s/xqq95607ye49ir3/P8030065.JPG
The exhaust cam bearings by comparison seem ok, showing little wear.
Again the images show the bearings from the back to the front of the engine:-
https://www.dropbox.com/s/fvpxtavj6vnbdyr/P8030070.JPG
https://www.dropbox.com/s/71dcd91wifmevcc/P8030069.JPG
https://www.dropbox.com/s/maeg7wqpe7uzasi/P8030068.JPG
https://www.dropbox.com/s/9bljbbaa5ghejot/P8030067.JPG
I don't think the tappety noise is down to the bearings-especially the front inlet or could it be a contributing noise? Step forward Forum experts.
I'm assuming replacement is fairly straight forward-similar to big end bearings?
Will new bearings effect the valve clearances?
Alan
Well I've managed to replace the shims and after two attempts the clearances seem to be correct. Now for the next problem-the cam bearings.
The inlet cam bearings seem to be showing signs of significant wear particularly the one closest to the chain sprocket. Two of the bearings have small gouges in them. The camshaft doesn't bare any signs of wear at all-which means the bearings are doing their job. These images show the bearings from the back to the front of the engine:-
https://www.dropbox.com/s/pf18l9bsjot0ka4/P8030063.JPG

https://www.dropbox.com/s/sldigh18g4u3yie/P8030064.JPG

https://www.dropbox.com/s/80am4jlfbaavn7i/P8030066.JPG

https://www.dropbox.com/s/xqq95607ye49ir3/P8030065.JPG

The exhaust cam bearings by comparison seem ok, showing little wear.
Again the images show the bearings from the back to the front of the engine:-
https://www.dropbox.com/s/fvpxtavj6vnbdyr/P8030070.JPG

https://www.dropbox.com/s/71dcd91wifmevcc/P8030069.JPG

https://www.dropbox.com/s/maeg7wqpe7uzasi/P8030068.JPG

https://www.dropbox.com/s/9bljbbaa5ghejot/P8030067.JPG

I don't think the tappety noise is down to the bearings-especially the front inlet or could it be a contributing noise? Step forward Forum experts.
I'm assuming replacement is fairly straight forward-similar to big end bearings?
Will new bearings effect the valve clearances?
Alan
Alan Cochrane
1961 S1 OTS,1968 Triumph TR250, 1971 Triumph GT6 Mk3, 2008 Porsche Boxster RS60 Spyder
1961 S1 OTS,1968 Triumph TR250, 1971 Triumph GT6 Mk3, 2008 Porsche Boxster RS60 Spyder
| Link: | |
| BBcode: | |
| HTML: | |
| Hide post links |
-
ALAN COCHRANE
Topic author - Posts: 712
- Joined: Sun May 06, 2012 9:37 am
- Location: Fife
#36
Well I've finally managed to get the cylinder head back together and after a full two turns by hand I decided to go for it!
I turned the engine over with the king lead removed and everything sounded ok. I was then confident enough to try and fire it up. Hey presto it started without any fuss and what a difference! The tappety noise had gone to be replaced with a faint rhythmic mechanical chatter. It appears to have a smoother. deeper toned idle and tickover has dropped to 750-800rpm.
Rory you would be pleased with me. Not only did I splash out on a new micrometer but I also bought the cam chain tensioning tool and a proper set of lock wire pliers.
I've previously struggled to tighten the cam chain successfully. However with the tensioner tool it was much easier. I managed to get the chains "dead tight" and then back the tensioner off a notch to allow for "not dead tight" as Jaguar helpfully states.
Anyway thanks again to all the members who responded with helpful advice. This Forum is an absolute goldmine of information. If any other member has a similar "tappety" engine this job is well worth the effort and if anyone needs some shims then look no further!
Cheers
Alan
I turned the engine over with the king lead removed and everything sounded ok. I was then confident enough to try and fire it up. Hey presto it started without any fuss and what a difference! The tappety noise had gone to be replaced with a faint rhythmic mechanical chatter. It appears to have a smoother. deeper toned idle and tickover has dropped to 750-800rpm.
Rory you would be pleased with me. Not only did I splash out on a new micrometer but I also bought the cam chain tensioning tool and a proper set of lock wire pliers.
I've previously struggled to tighten the cam chain successfully. However with the tensioner tool it was much easier. I managed to get the chains "dead tight" and then back the tensioner off a notch to allow for "not dead tight" as Jaguar helpfully states.
Anyway thanks again to all the members who responded with helpful advice. This Forum is an absolute goldmine of information. If any other member has a similar "tappety" engine this job is well worth the effort and if anyone needs some shims then look no further!
Cheers
Alan
Alan Cochrane
1961 S1 OTS,1968 Triumph TR250, 1971 Triumph GT6 Mk3, 2008 Porsche Boxster RS60 Spyder
1961 S1 OTS,1968 Triumph TR250, 1971 Triumph GT6 Mk3, 2008 Porsche Boxster RS60 Spyder
| Link: | |
| BBcode: | |
| HTML: | |
| Hide post links |
#37
Great news.
There never was a tool I bought that I have ever regretted, except for the cheap ones.
I threw a new set of cam bearings in last time I had mine apart, since the lower front shell was markedly more worn than the others - and my chains had been too tight ; however maybe those ones must always get more grief than the others so you never really know .............
Tools ? What can you get for 15? nowadays ?
Get this :
http://www.winbag.eu/
It's a third-hand, not a Marital Aid.
Who will be the first to find a use on an E-Type ?
There never was a tool I bought that I have ever regretted, except for the cheap ones.
I threw a new set of cam bearings in last time I had mine apart, since the lower front shell was markedly more worn than the others - and my chains had been too tight ; however maybe those ones must always get more grief than the others so you never really know .............
Tools ? What can you get for 15? nowadays ?
Get this :
http://www.winbag.eu/
It's a third-hand, not a Marital Aid.
Who will be the first to find a use on an E-Type ?
Rory
3.8 OTS S1 Opalescent Silver Grey - built May 28th 1962
3.8 OTS S1 Opalescent Silver Grey - built May 28th 1962
| Link: | |
| BBcode: | |
| HTML: | |
| Hide post links |
-
ALAN COCHRANE
Topic author - Posts: 712
- Joined: Sun May 06, 2012 9:37 am
- Location: Fife
#38
Rory
Yes I also replaced the cam bearing shells. Like you I found that the front shells were exhibiting the most wear. The chain tightness may well be the cause although in my case it was too slack. It may have something to do with the "pulling down" effect of the chain as it moves over the top of the sprocket and probably magnified by the amount of tension it's under- step forward the mechanical engineers!
?lan
Yes I also replaced the cam bearing shells. Like you I found that the front shells were exhibiting the most wear. The chain tightness may well be the cause although in my case it was too slack. It may have something to do with the "pulling down" effect of the chain as it moves over the top of the sprocket and probably magnified by the amount of tension it's under- step forward the mechanical engineers!
?lan
Alan Cochrane
1961 S1 OTS,1968 Triumph TR250, 1971 Triumph GT6 Mk3, 2008 Porsche Boxster RS60 Spyder
1961 S1 OTS,1968 Triumph TR250, 1971 Triumph GT6 Mk3, 2008 Porsche Boxster RS60 Spyder
| Link: | |
| BBcode: | |
| HTML: | |
| Hide post links |
#39
Already done it :-)rfs1957 wrote:
Who will be the first to find a use on an E-Type ?
I used something similar (a pressure bag that we use to push in IV fluids) to break into my coupe when I locked the keys in it.
As to replacing cam bearings affecting the valve clearances; sadly yes I suspect they will.
Andrew.
881824, 1E21538. 889457. 1961 4.3l Mk2. 1975 XJS. 1979 MGB (supercharged).
Adelaide, Australia
881824, 1E21538. 889457. 1961 4.3l Mk2. 1975 XJS. 1979 MGB (supercharged).
Adelaide, Australia
| Link: | |
| BBcode: | |
| HTML: | |
| Hide post links |
-
Robert Hiland
- Posts: 31
- Joined: Thu Nov 28, 2013 12:03 pm
- Location: Manotick Ontario Canada

#40 Valave clearance and shims
Assuming the clearances were correct in the first place, simply flip the existing shims over.
They tend to cup on one side and remain flat on the other.
Saves a lot of time and frustration.
They tend to cup on one side and remain flat on the other.
Saves a lot of time and frustration.
| Link: | |
| BBcode: | |
| HTML: | |
| Hide post links |