Page 1 of 3
#1 Covered Headlight Conversion S1.25
Posted: Thu Oct 28, 2021 8:20 pm
by eddiecross
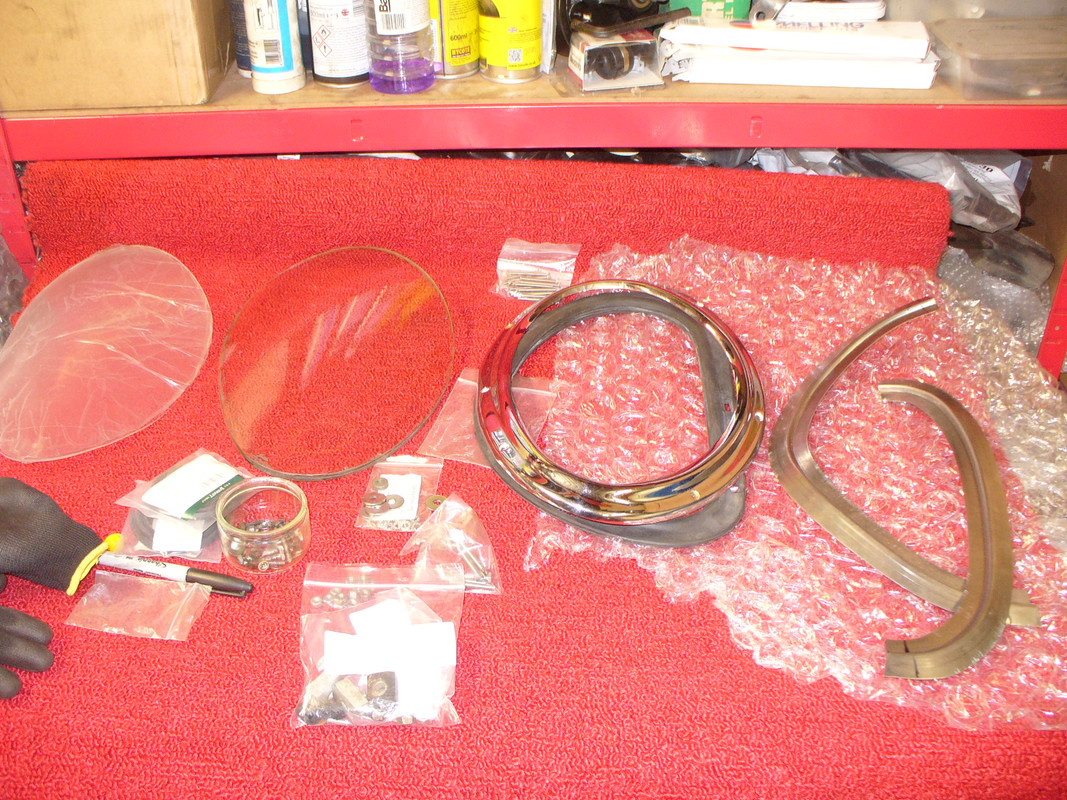
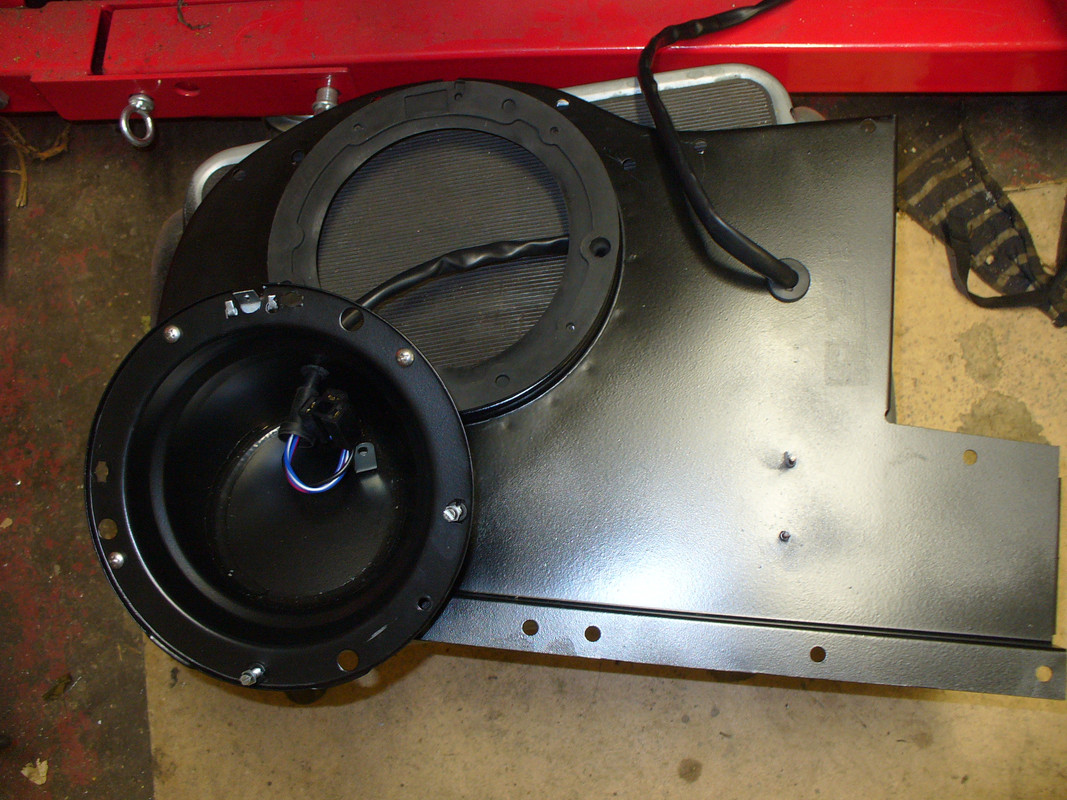
Parts assembled over a couple of years.
Flanges purchased from Chuck at Monocoque Metalworks
Chuck also supplied the clear plastic covers. I have the glass ones as well
I have plenty of questions so would be grateful for help from S1 owners
As for attaching the flanges- my thinking so far is to lap the flanges under the existing edge using the rivet holes for the S1.25/S1.5 scoops and maybe add one or two more and then maybe the odd mig weld tack at each end. I'll coat all surfaces in POR15
Reasoning...
1. Minimal mods. Can revert back to original spec if required (Chuck)
2. No butt welding to the existing bonnet opening which involves total refinishing of the bonnet (not ready for that yet)
Questions so far:
1. There is talk of a metal support under the sugar scoop at the front. Any shots of this would be useful. Got it thx.
2. I do have a pair of used rubber seals but who sells the best ones if these prove tricky to fit?
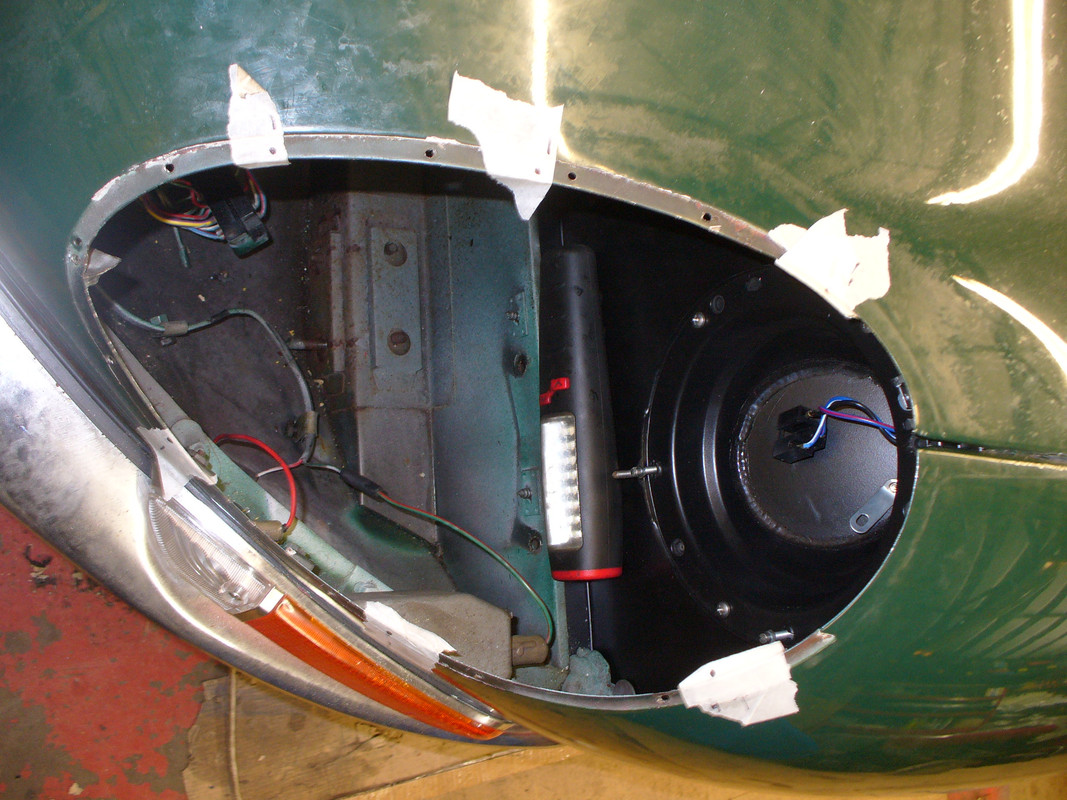
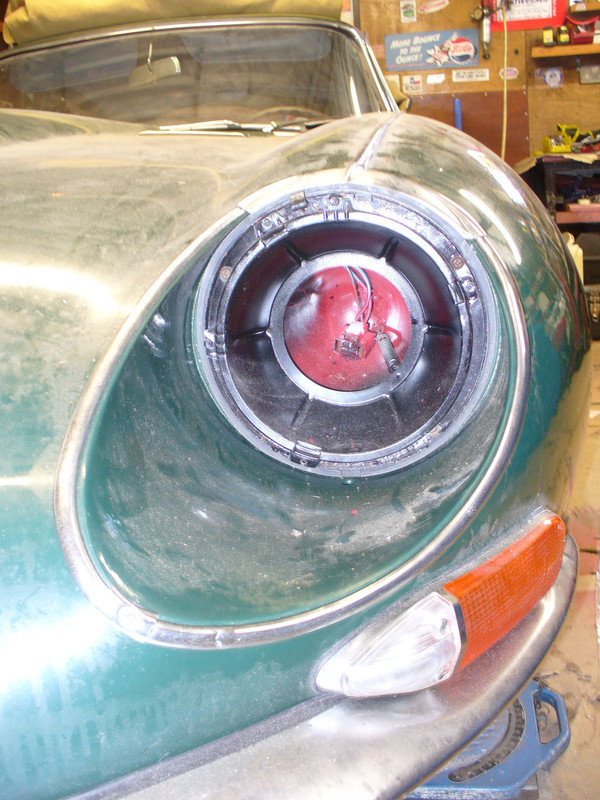
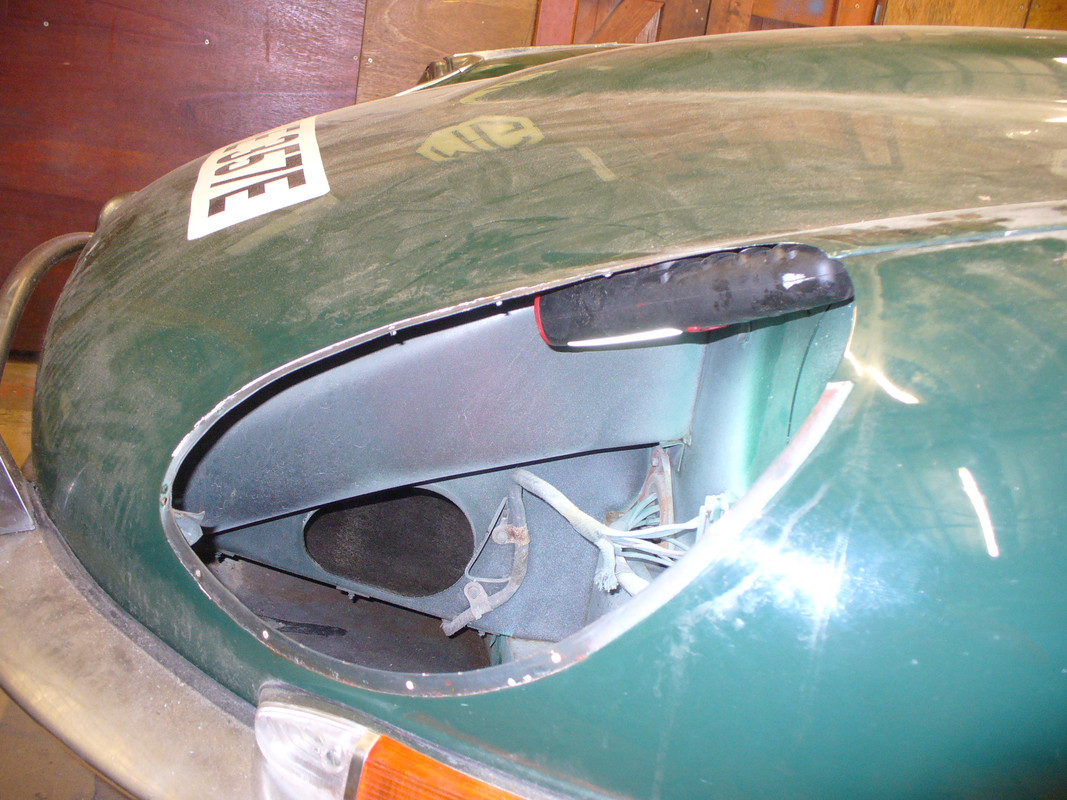
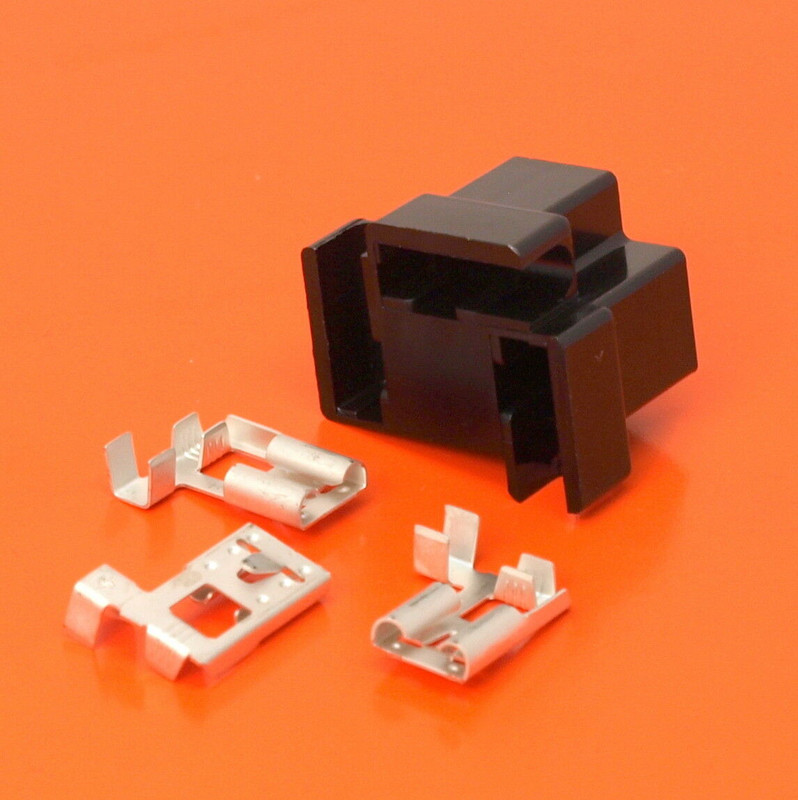
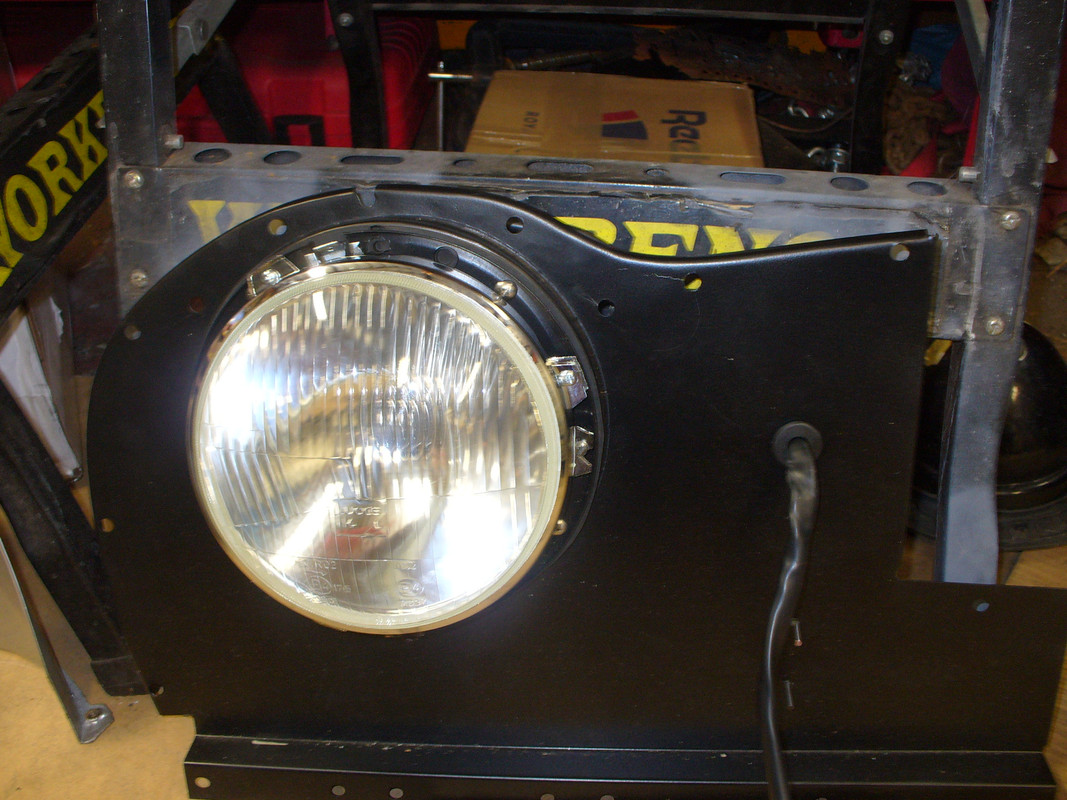
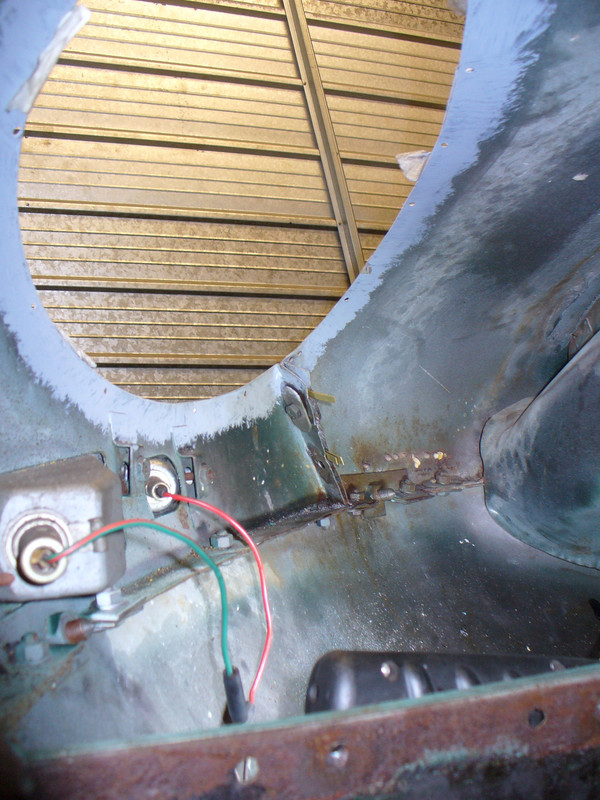
3. Headlamp connector is fouling the back of the headlamp bowl when you attach it to the seating bowl (new thread). Now fixed. Cure is Wipac lamps which are not ass deep. Work around needs connector plug with wires at the side or removed, trim 1mm off bulb terminals so it plugs in as far as possible. Swapping to this (bottom image)
#2 Re: Covered Headlight Conversion S1.25
Posted: Thu Oct 28, 2021 8:31 pm
by eddiecross
#3 Re: Covered Headlight Conversion S1.25
Posted: Fri Oct 29, 2021 5:38 am
by Geoff Allam
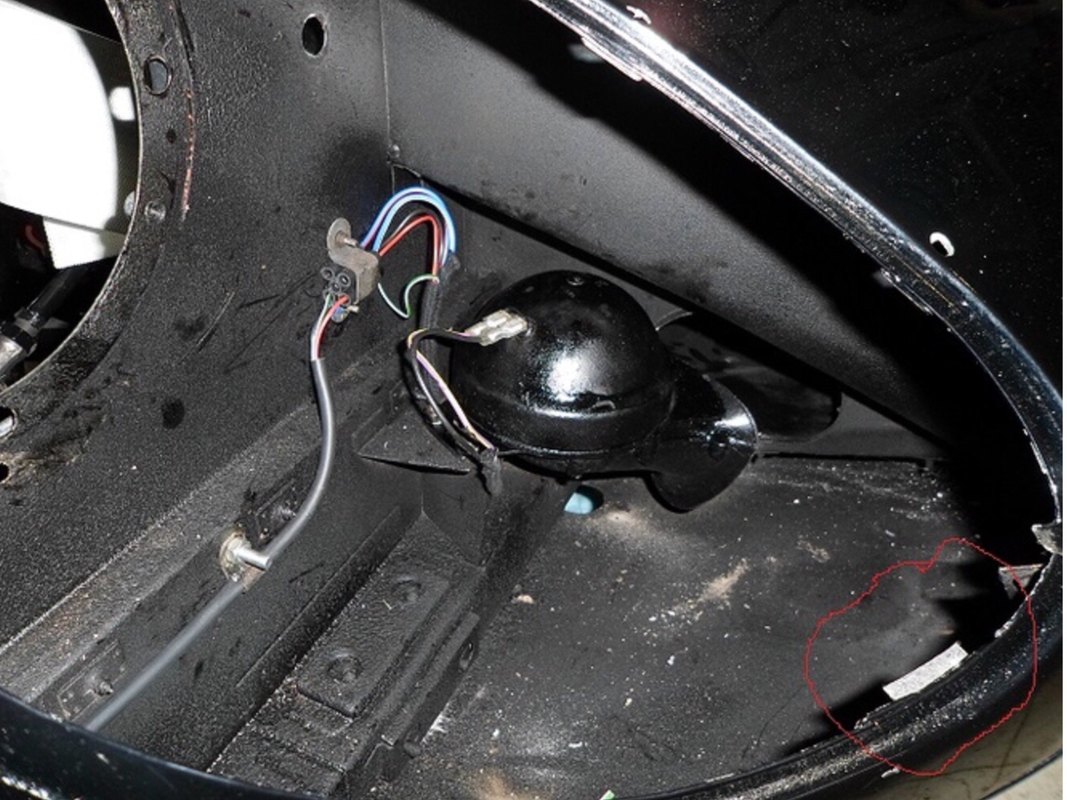
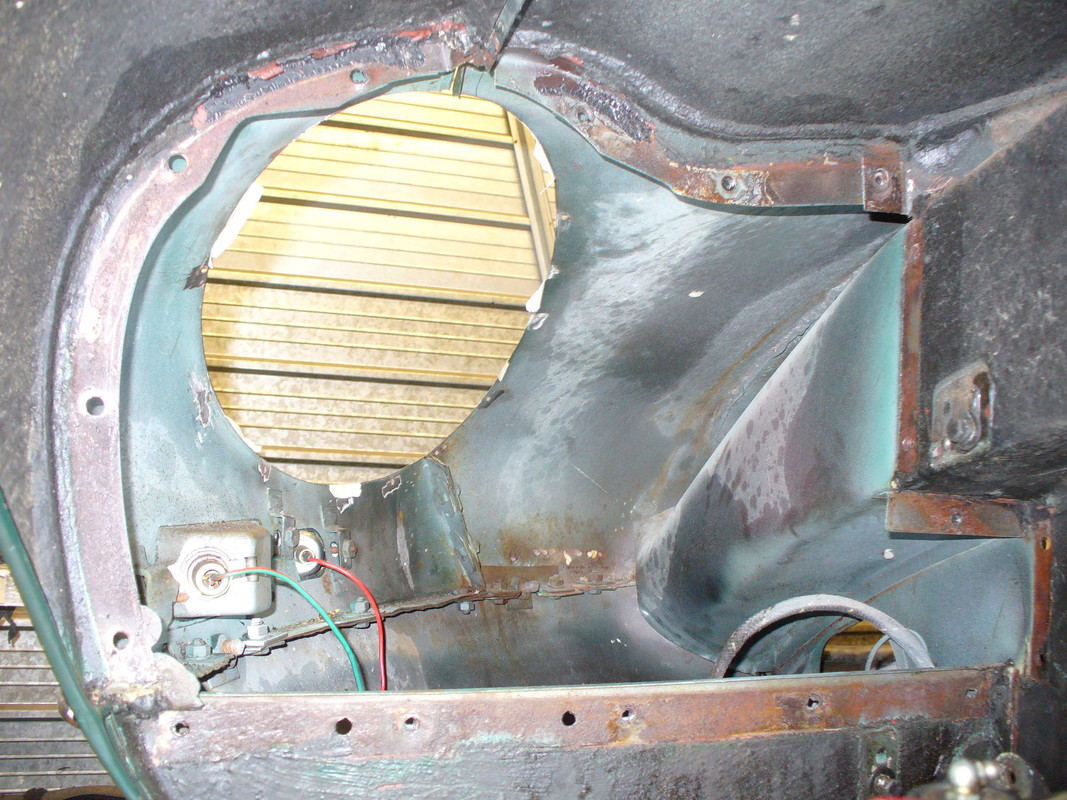
This is a picture of the support tab you are asking about. I cannot help you with size as mine are missing and this picture was sent to me by another lister on Jag-lovers. It is a simple L shaped bracket and supports the front lip of the sugar scoop. I would guess that they were originally welded on but I intend to just bond them in place after the scoops are positioned.
#4 Re: Covered Headlight Conversion S1.25
Posted: Fri Oct 29, 2021 8:22 pm
by eddiecross
Thanks Geoff. I'll probably do the same.
Eddie
#5 Re: Covered Headlight Conversion S1.25
Posted: Sat Oct 30, 2021 5:51 am
by Geoff Allam
Hope it helps. If you get it set up please post your results as I am not sure exactly how I am going to set up the positioning since the sugar scoop will block access from the headlight opening. I think I may be able to get access through the horn opening, glue in the bracket temporarily and then remove the sugar scoop to attach it permanently. It will be awhile before I get to that stage tho.
#6 Re: Covered Headlight Conversion S1.25
Posted: Sat Oct 30, 2021 7:03 pm
by eddiecross
Not sure myself. Before I saw your offset bracket, I was thinking of adding a bracket either side of the seam, using the front bolt to attach the bracket.
Thx
Eddie
#7 Re: Covered Headlight Conversion S1.25
Posted: Sat Oct 30, 2021 7:56 pm
by Robsan
I have one of these conversation, had for some time while its gets a hint of the brown stuff. I will make some comments
I didnt think there was a horn opening in the bonnet underframe on a serie 1 The horns are bolted to brackets {LH and RH] which attach to picure frame
The CRITICAL fit imho is the Glass chrome bezel to bonnet and wing section, using threaded and spot welded tabs ........... .......... Is it six per headlamp ?They are very similar to the fixings for Sidelight on series 1
You cant weld those tabs on if the there is not material underneatH...................... in the right place

The fit of the sugar scoop is NOT so critical
So my approach would be to use the chrome glass rim and try to approximate what material need sadding or removing around te aperture ?? and see how those fixing lugs come to together ??
hope this helps

#8 Re: Covered Headlight Conversion S1.25
Posted: Sun Oct 31, 2021 9:40 am
by ALAN COCHRANE
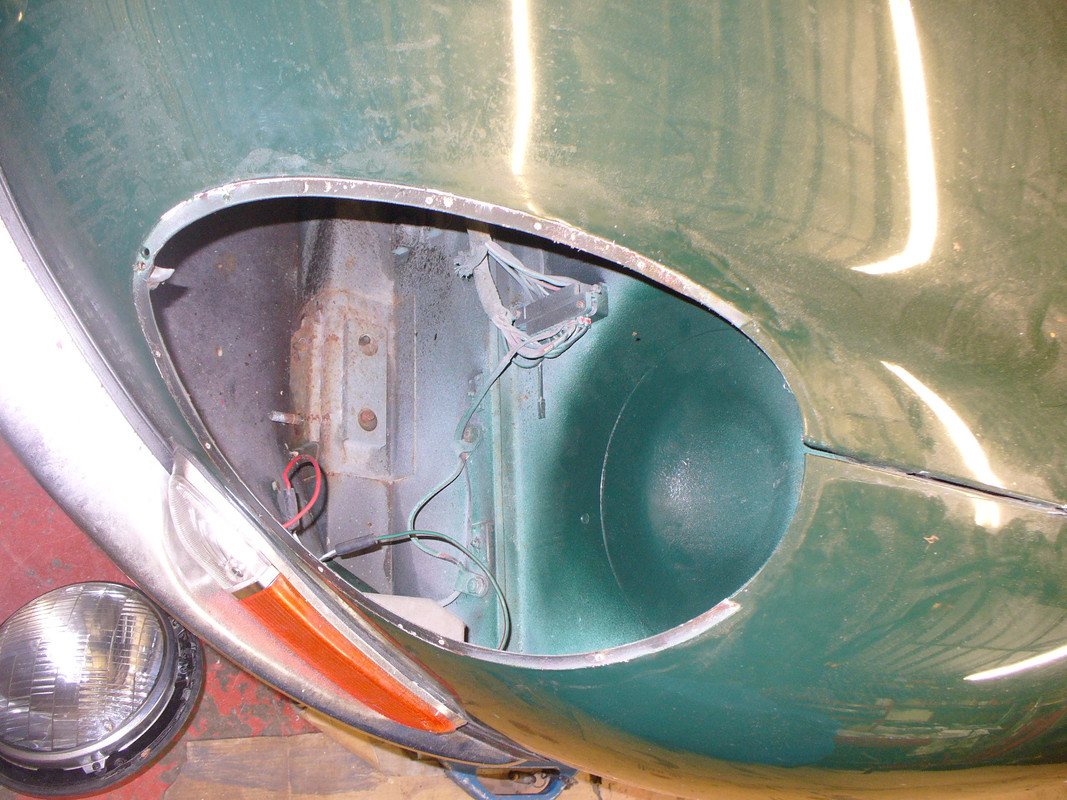
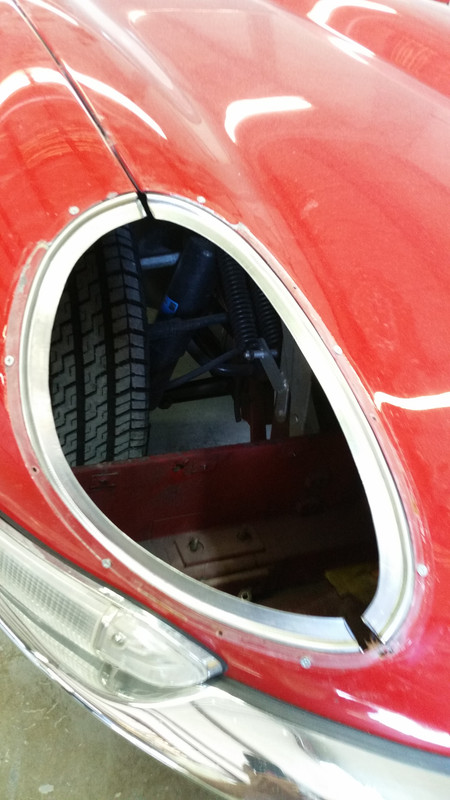
The 3.8 Series 1s have their horns mounted internally, one under each sugar scoop. There's a lozenge shaped hole cut out in the left and right hand side of the bonnet air scoop tunnel to allow the sound out and the muck in! You can see one in Geoff's image-just to the right of the horn trumpet.
This setup is a bit of a faff if you have a faulty horn, involving the removal of the bonnet glass and sugar scoop to gain access.
I think the change to picture frame mounting came with the 4.2 Series 1.
#9 Re: Covered Headlight Conversion S1.25
Posted: Sun Oct 31, 2021 11:37 am
by eddiecross
Thanks all
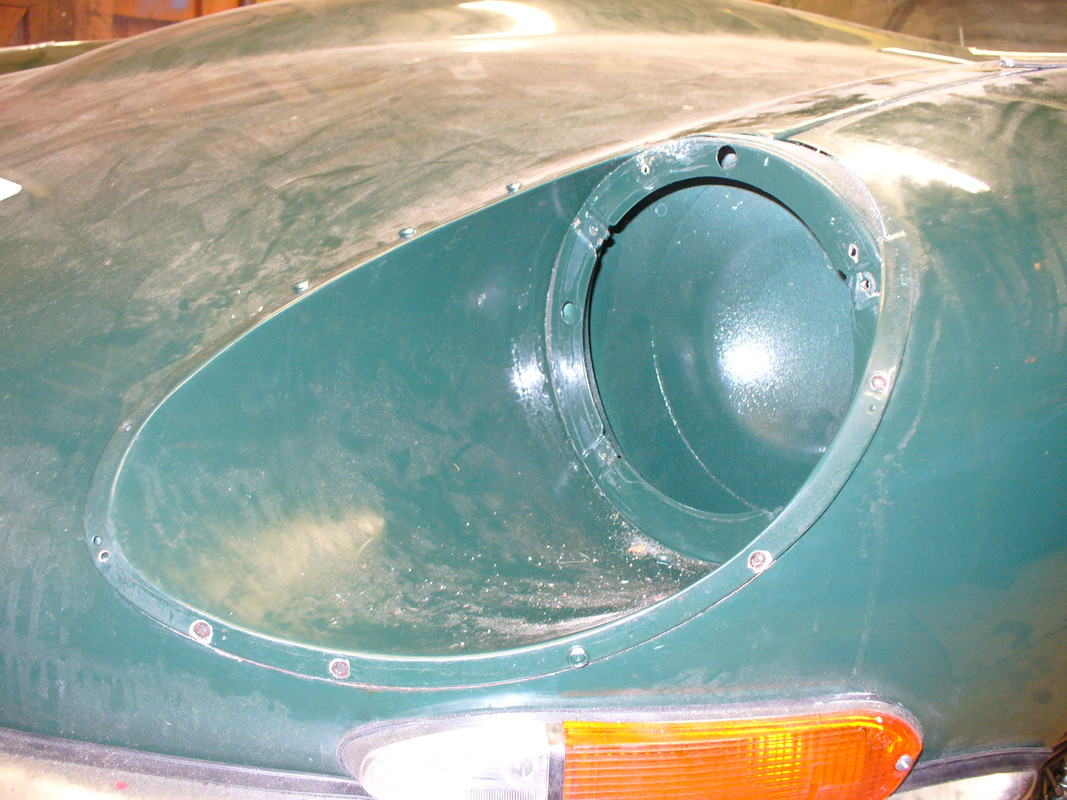
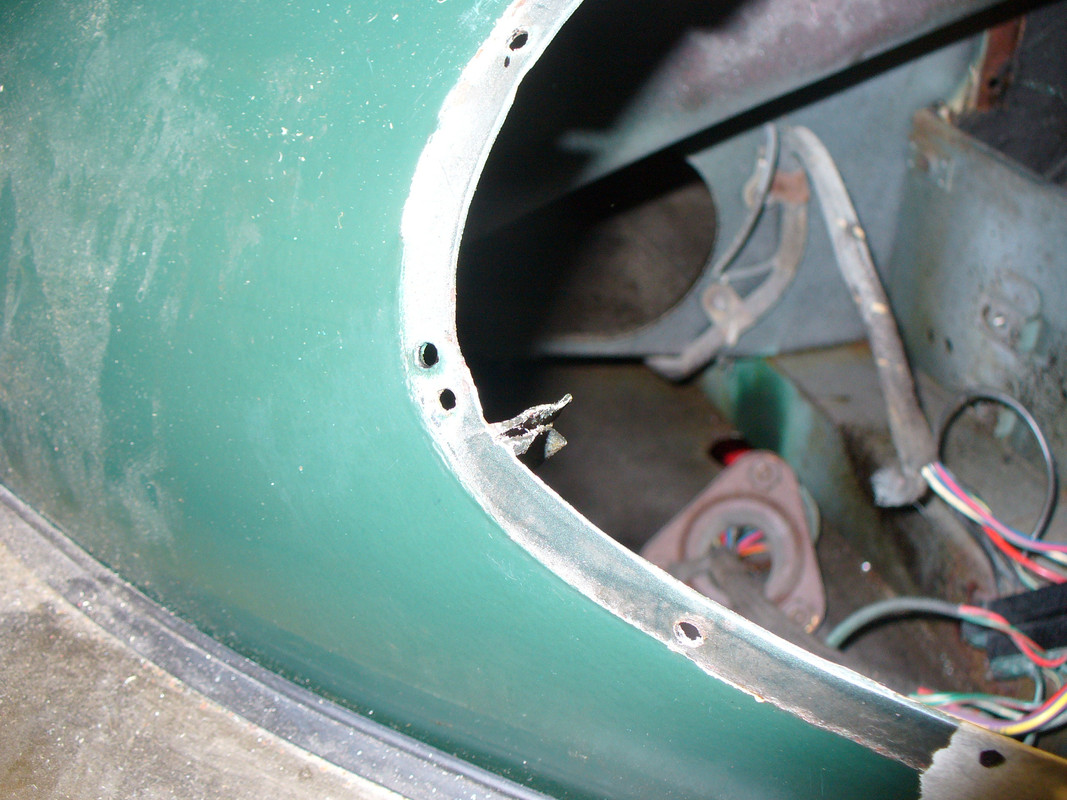
Robsan- I have marked where the holes are required. The 2 at the top require more metal added to get a fixing but that's fine as Chucks lip flanges are so spot on you can see where the opening is too large.
Captives for the chrome...currently I am for self tapping stainless raised countersunk at the moment- there are two layers of metal to hold the screws so I'm not sure that welding captives has any extra value- also it means changes are more permanent and goes against 1st objective of being reverseable.
Next pressing issue...!
headlamp plug connector fouling headlamp bowl.
I'll post another thread.
Thx
Eddie
#10 Re: Covered Headlight Conversion S1.25
Posted: Wed Nov 03, 2021 10:39 am
by eddiecross
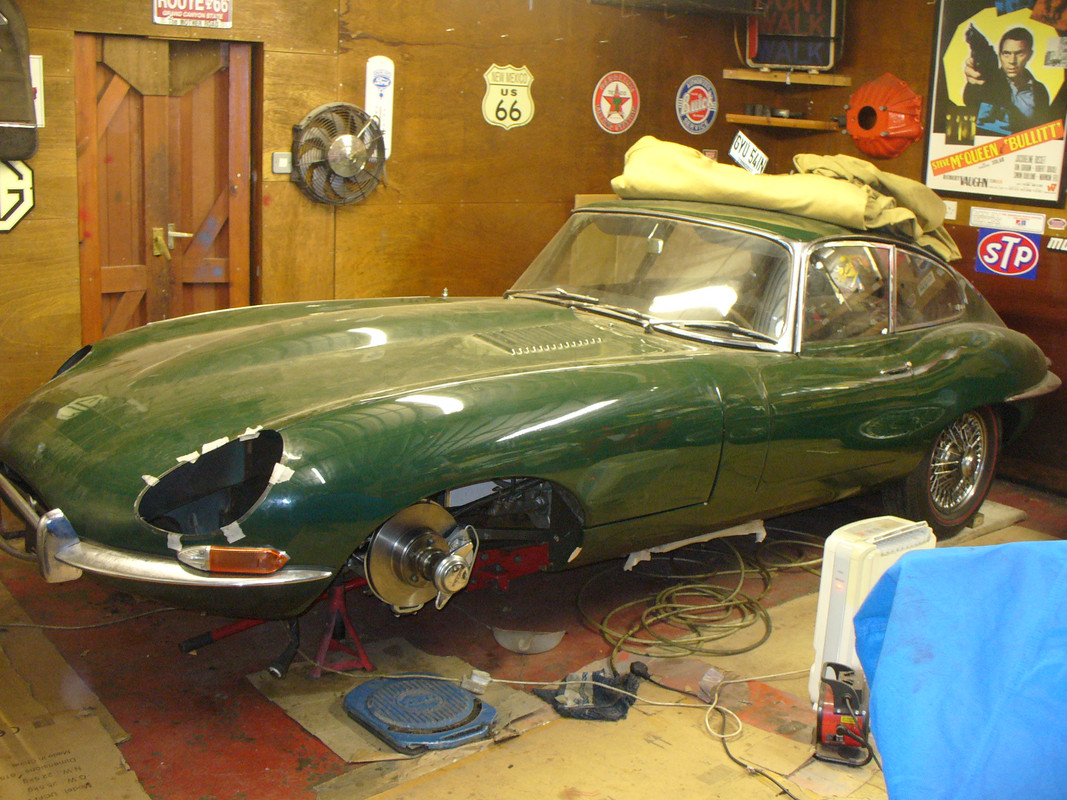
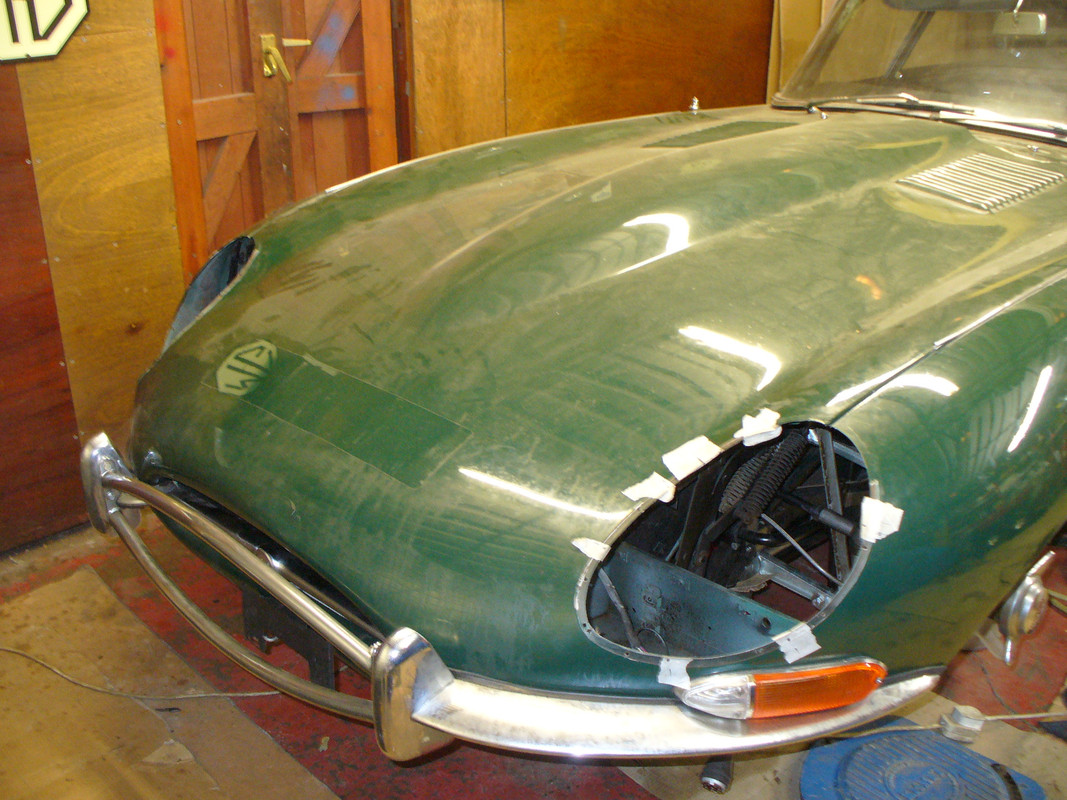
Few more shots.
To be honest I'm doing everything to put off the point of no return when I start trimming Chucks headlamp opening flanges!
#11 Re: Covered Headlight Conversion S1.25
Posted: Wed Nov 03, 2021 7:50 pm
by keithmac
Hi Eddie
I am following your post with great interest. I have an open headlight 67 and have been considering converting it with Chucks kit also. Great photos !
Thanks for posting
Keith
#12 Re: Covered Headlight Conversion S1.25
Posted: Wed Nov 03, 2021 10:42 pm
by eddiecross
Thanks for the encouragement Keith.
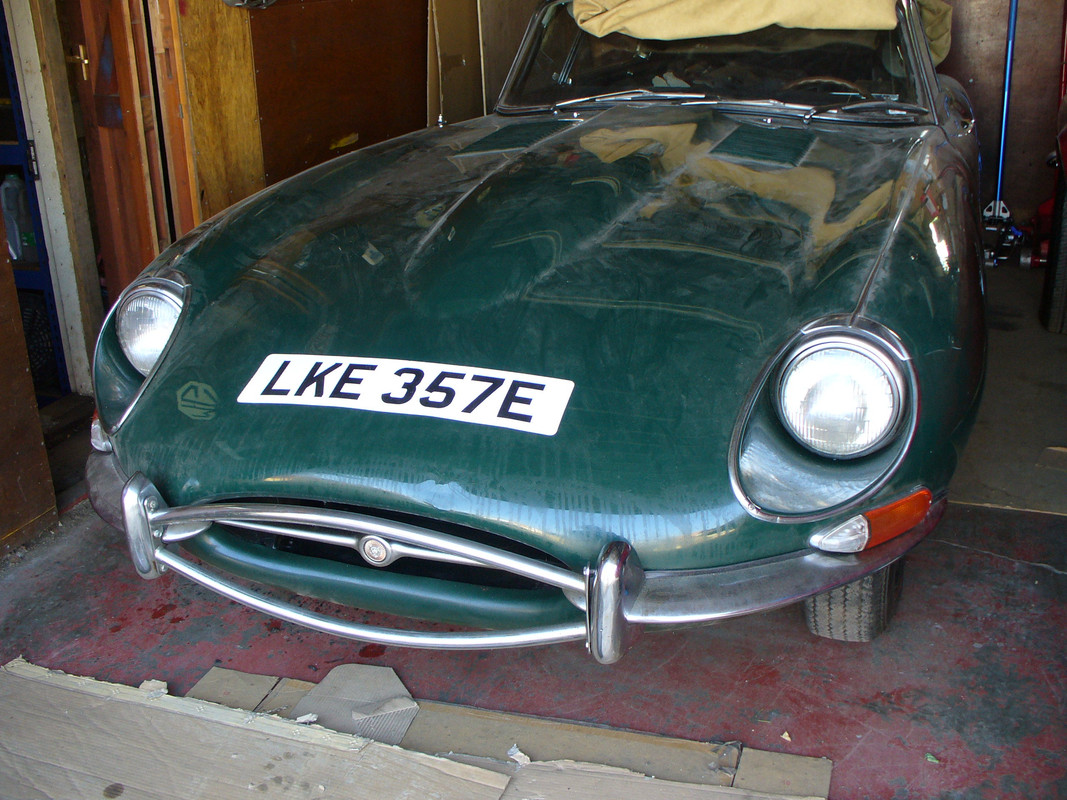
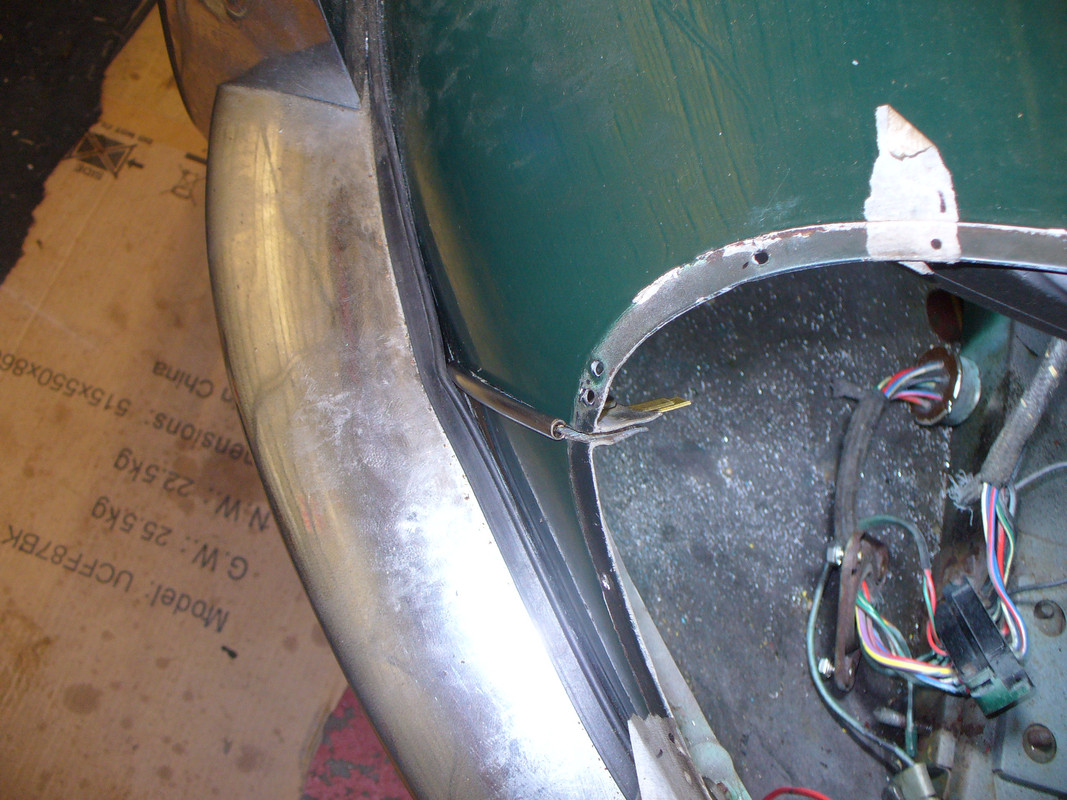
The lack of a seam under the lights is bothering me. So may be off on another minor diversion. Looks like just lazy filling rather than an issue.
Should also include some links to the Monocoque Metalworks site re: Covered Headlights. Great work, great attitude....
https://monocoque-metalworks.myshopify. ... series-1-5
https://www.monocoque-metalworks.com/ma ... onversion/
https://www.monocoque-metalworks.com/ma ... onversion/
Cheers
Eddie
#13 Re: Covered Headlight Conversion S1.25
Posted: Wed Nov 03, 2021 10:56 pm
by keithmac
Ya I was thinking about that . It would be an incomplete job not to ad the seam and chrome trim back.
The pictures helped. Would it be possible to Undo the fasteners and hacksaw blade/cut the slot back in and ad the correct chrome trim ?
I wonder is the seam lead filled or body filler ?
#14 Re: Covered Headlight Conversion S1.25
Posted: Thu Nov 04, 2021 7:46 am
by eddiecross
Was wondering how to do this. Great plan Keith.
Remove 2x bolts
Junior hacksaw blade along the seam.
Maybe miniature rat file on outside to get the profile for the moullding
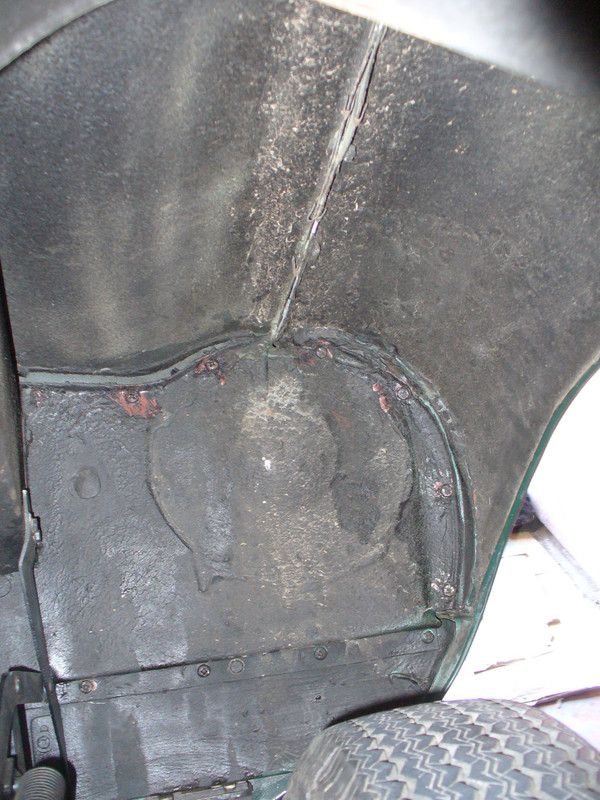
Dent puller holes/filler traces and filler on the right in the picture make it a pretty sure bet for filler.
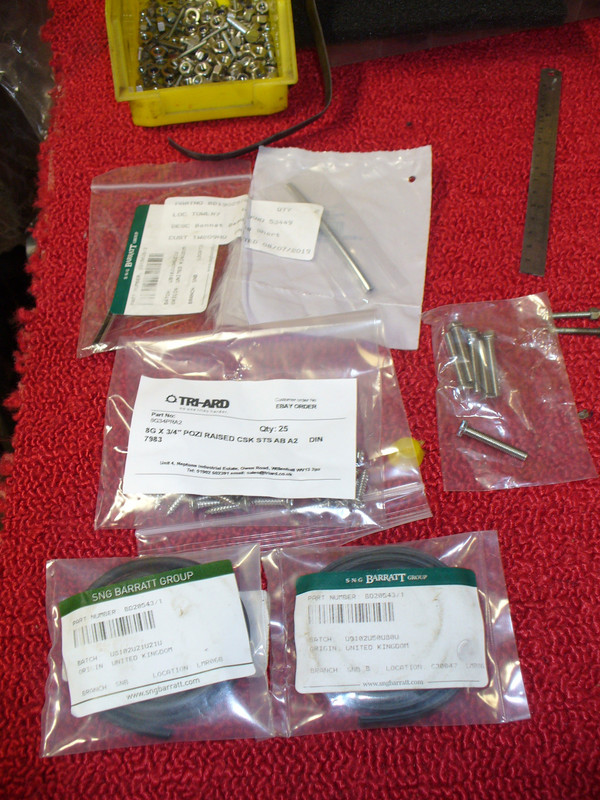
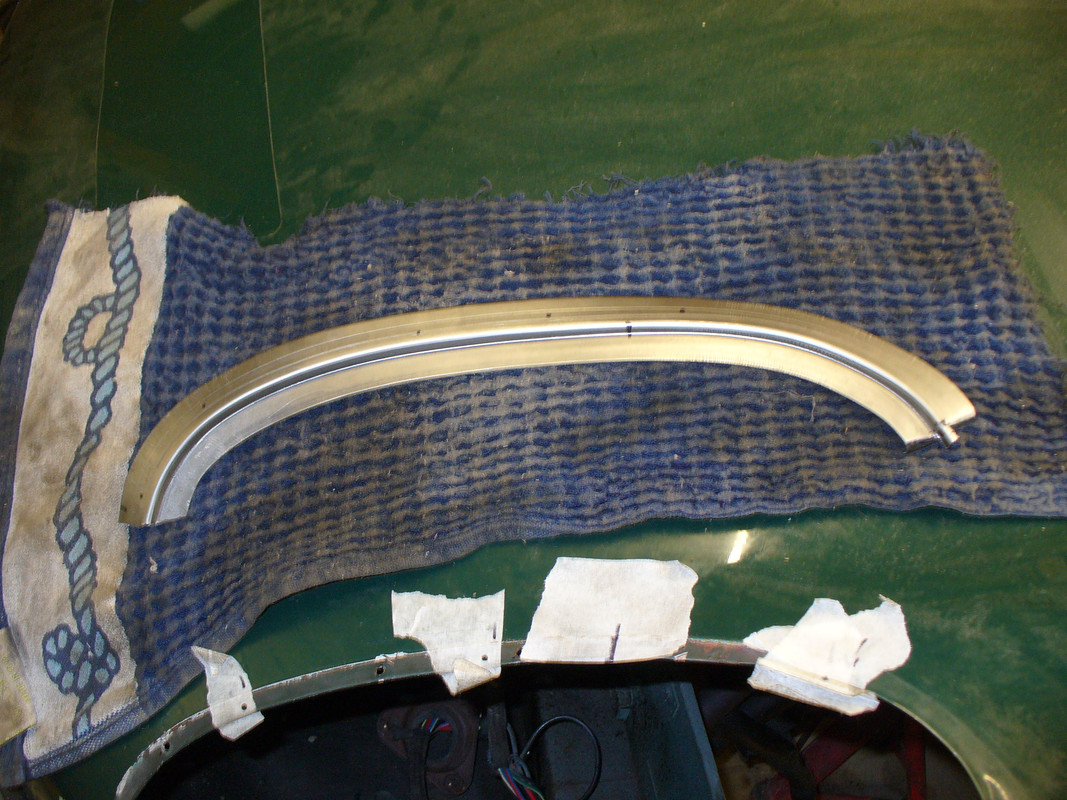
Some parts below.
Bolt on right is S/S 1 1/4 " 10/32 1/4 unf for attaching scoops to diaphram panel
s/s self tappers for chrome trim..ok I'll swap for slotted once happy it fits
#15 Re: Covered Headlight Conversion S1.25
Posted: Thu Nov 04, 2021 10:34 pm
by eddiecross
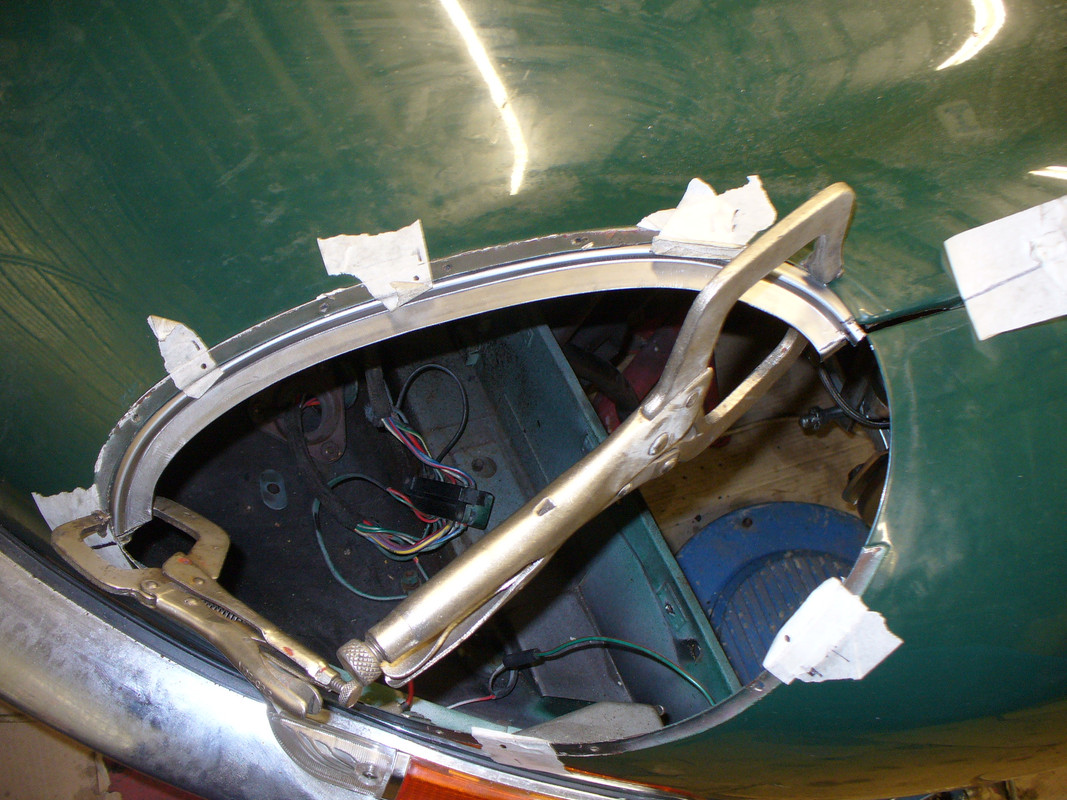
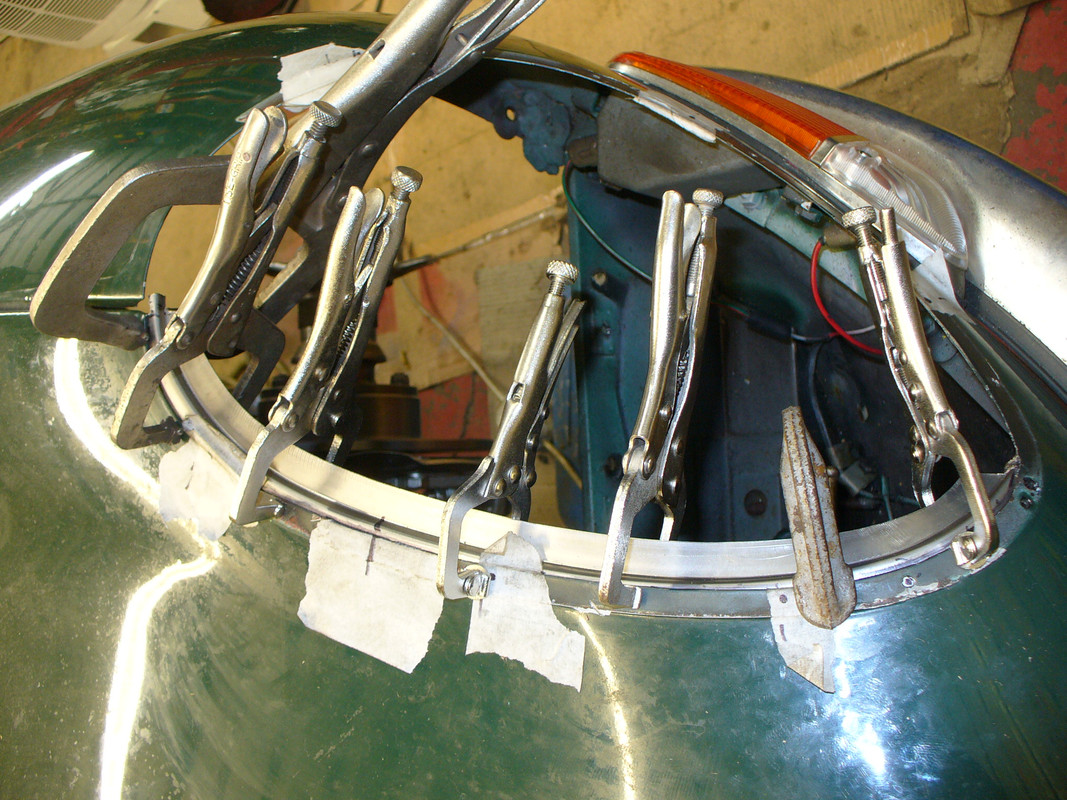
Trim and trial fit on the LH Inner flange
Not bad. Ran out of mini c clamps so 4 more on order.

Keith...
You were right. 1st few bites of the mini hacksaw and hit lead. Bit stumped.
#16 Re: Covered Headlight Conversion S1.25
Posted: Fri Nov 05, 2021 2:43 am
by keithmac
Hmmm...just thinking the lead would be softer than steel. Perhaps you might keep cutting , maybe the steel flanges would guide the blade. Might the bumpers have to come off ?
Flange fit looks good. How do you verify the glass fit before permanently attaching the flanges?
Cheers
#17 Re: Covered Headlight Conversion S1.25
Posted: Fri Nov 05, 2021 8:19 am
by eddiecross
Hi Keith,
Every day is a school day on Jags.
So..
S1 had the seam visible under the headlamp covers with the trim added
S1.25 and S1.5 the seam was lead loaded?
I assumed the lack of a seam was due to refinishing.
I guess that makes opening this up easier in that it won't all fall off and leave an annoying respray job.
Flange fit
Hmmm
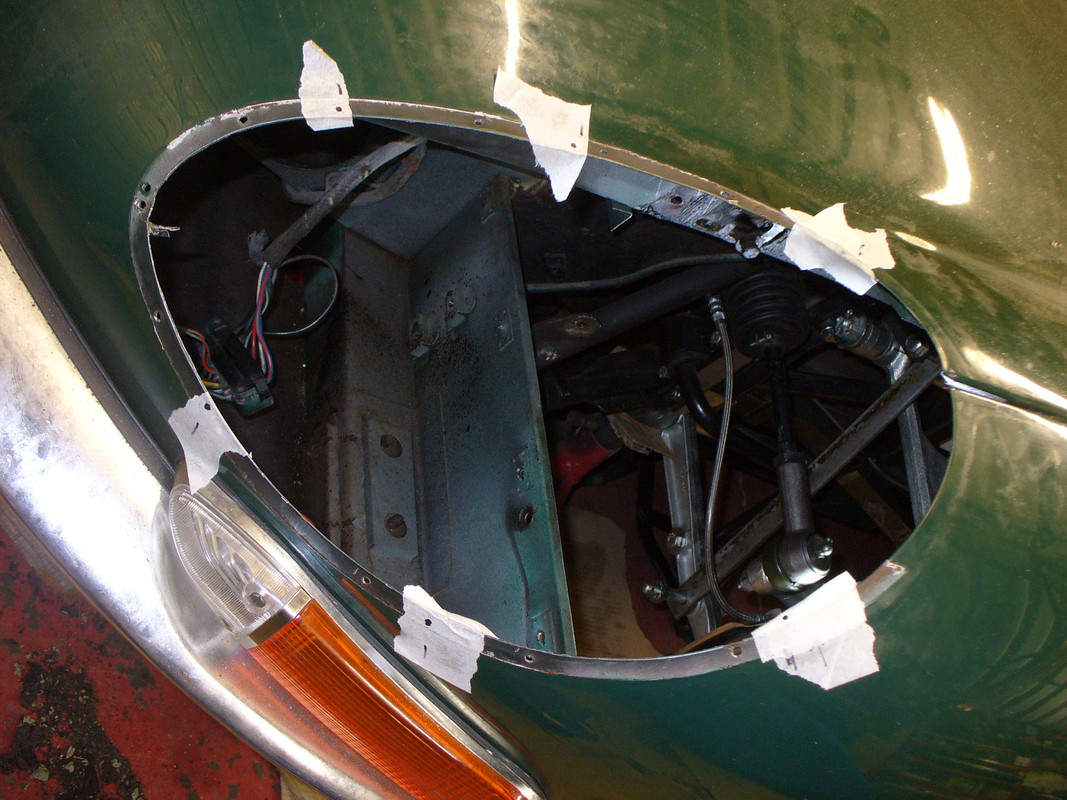
I found this image from a 1.5.
I'll try and follow the same position then clamp, drill the flange at the rivet holes and rivet
or maybe small mig tacks at the edges. Then trial fit.
drilling will be a swine if I need to adjust afterwards.
I will probably err on the side of moving the flanges inwards- the seal can be trimmed and the glass/plexi is a lot smaller.
#18 Re: Covered Headlight Conversion S1.25
Posted: Mon Nov 08, 2021 10:37 pm
by eddiecross
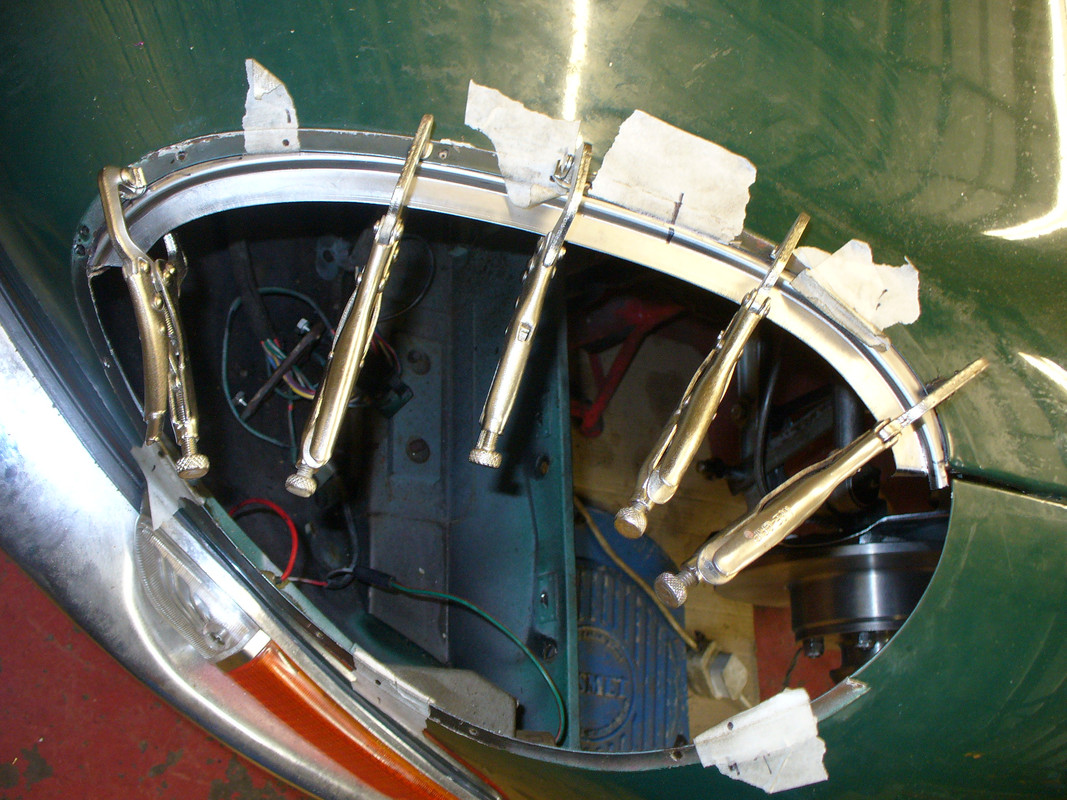
Grips arrived x4.
Pretty happy with the fit on the inside.
On Chucks links he has an example where the opening is bigger at the top of the wing- same as mine
Have marked where the bezel holes fit.
#19 Re: Covered Headlight Conversion S1.25
Posted: Tue Nov 09, 2021 8:54 pm
by eddiecross
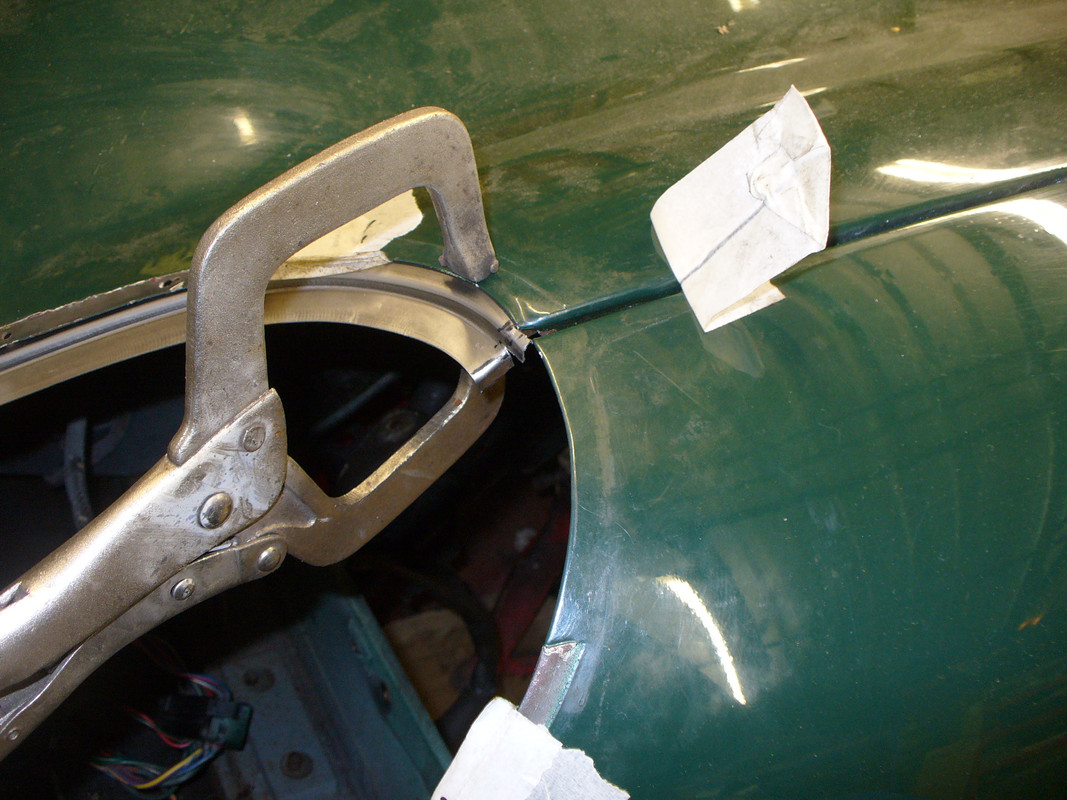
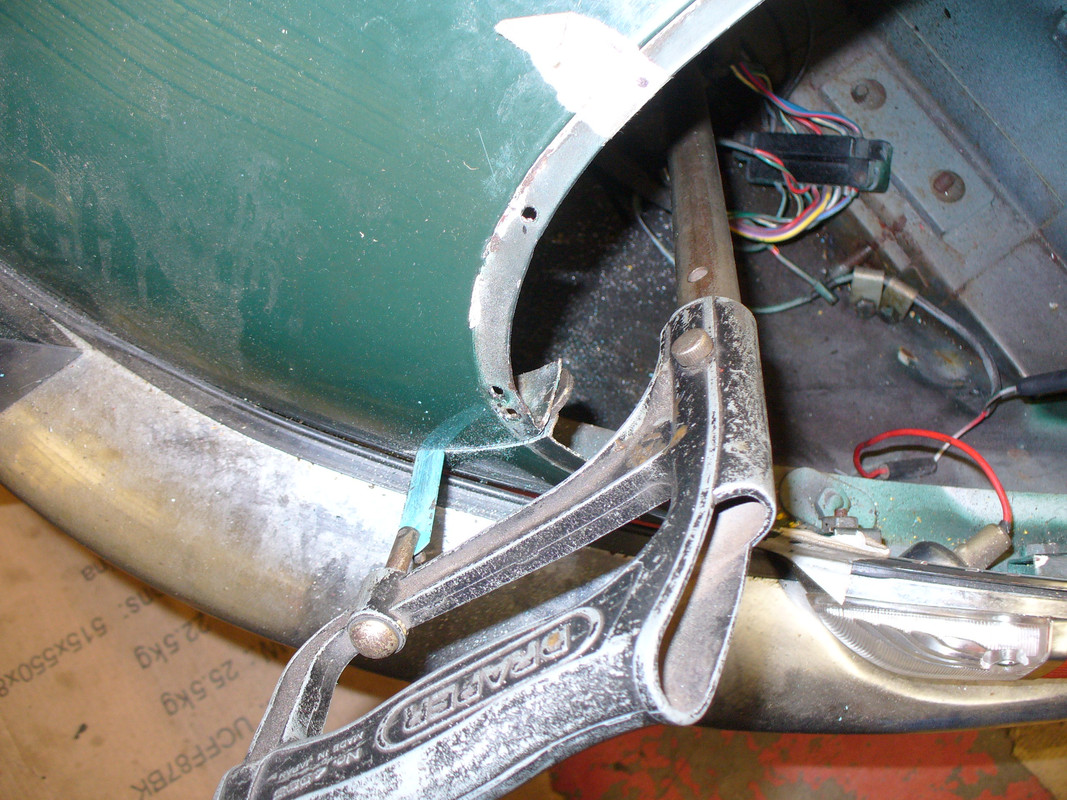
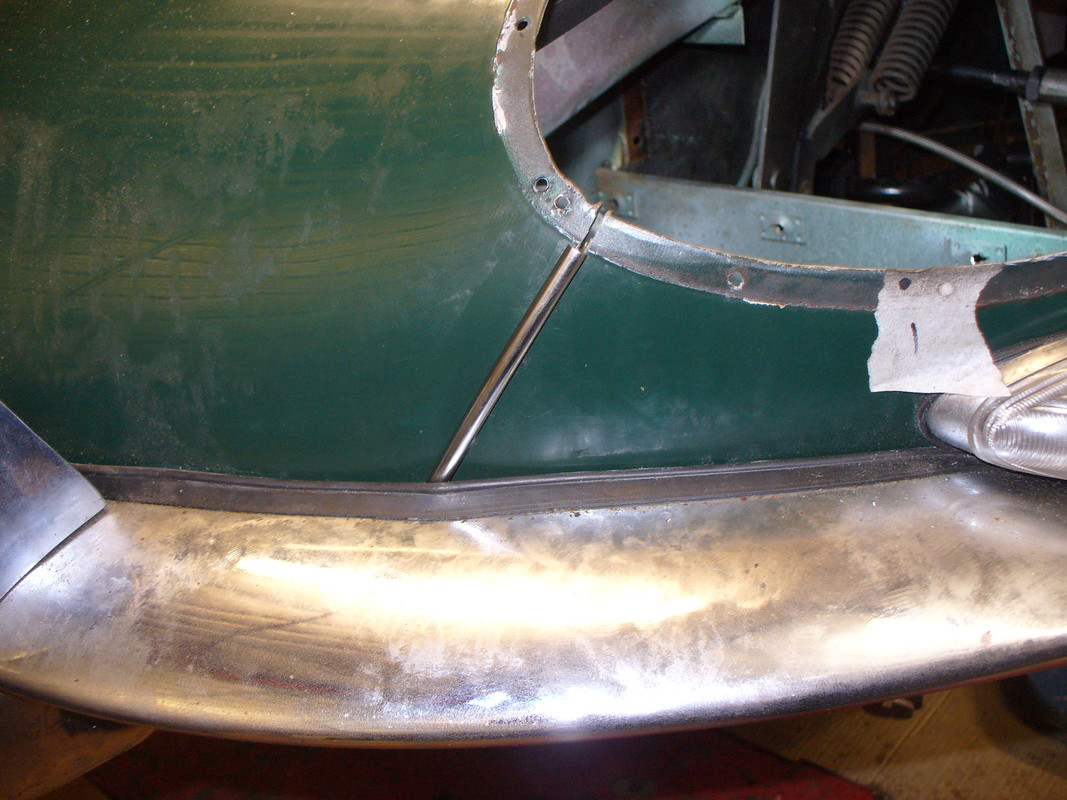
Opening for the trim under the headlight.
2 bolts with a spacer washer separating the flanges between each bolt
No dramas thank goodness.
Careful cut with the hacksaw following the flanges on the inside.
As soon as the cut was clear of the 1st bolt i reattached with the spacer washer to keep all in place (probably not necessary) undid the blade and slotted it through under the bolt to continue
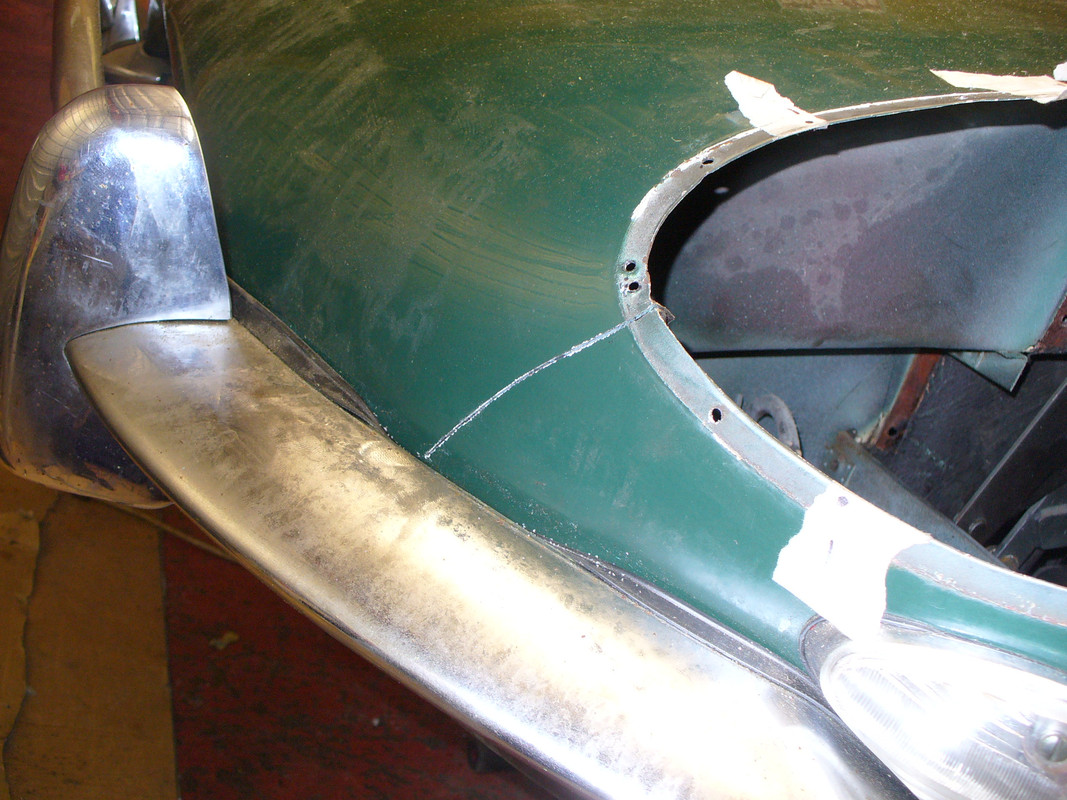
I extended the cut down to the line of the bumper. Thought of removing the bumper then looked at the bolts and thought better of it. It may tuck in just on or below the bumper rubber
Profiled with miniature files
Clips on order.
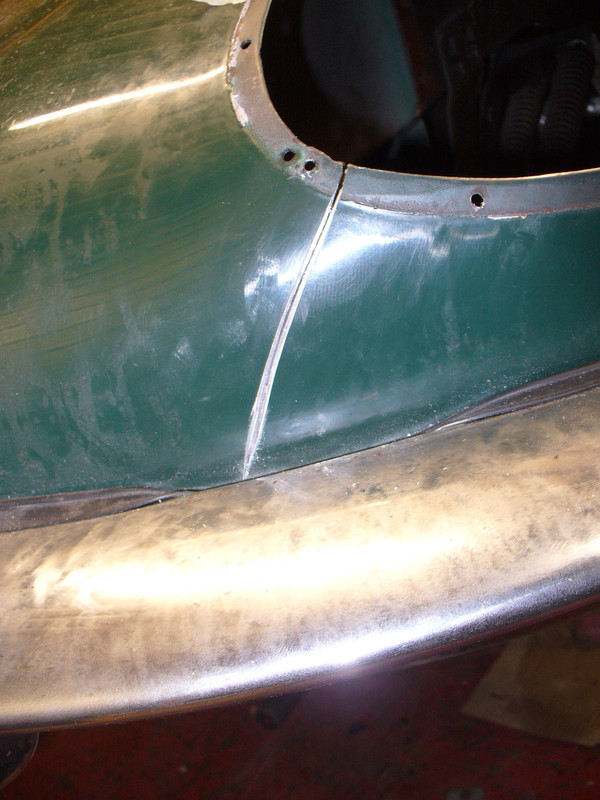
Couple more shots. I wrapped the clips round some wire to give a firmer grip on the trim.

#20 Re: Covered Headlight Conversion S1.25
Posted: Wed Nov 10, 2021 1:49 am
by keithmac
Looking good Ed. Following with great interest. Hacksaw worked a treat !