


I need to check the voltage at the headlights. They are very dim right now and the alternator diodes have blown. I don't have a maintenance manual and all I see is one screw holding the ring around the hood opening. If someone could get me started getting the lights out it would be greatly appreciated.
Elliott
69 FHC
Head light removal

#2 Re: Head light removal
The first thing you need is the Operation and Workshop manual which is available from Amazon amongst others.
Whilst Forum members can assist with diagnostics you really do need to have the manual in front of you to understand the way things work and are assembled.
Whilst Forum members can assist with diagnostics you really do need to have the manual in front of you to understand the way things work and are assembled.
David Jones
S1 OTS OSB
1997 Porsche 911 Guards Red
2024 Lexus LBX
Add your E-Type to our World Map: http://forum.etypeuk.com/viewtopic.php?f=1&t=1810
S1 OTS OSB
1997 Porsche 911 Guards Red
2024 Lexus LBX
Add your E-Type to our World Map: http://forum.etypeuk.com/viewtopic.php?f=1&t=1810
| Link: | |
| BBcode: | |
| HTML: | |
| Hide post links |

#3 Re: Head light removal
First off, David is right, you need some sort of manual. there are originals and cheaper ones made by a multitude of publishers. even the worst of them is better than flying blind. even an online catalog will show the assembly
but enough preaching
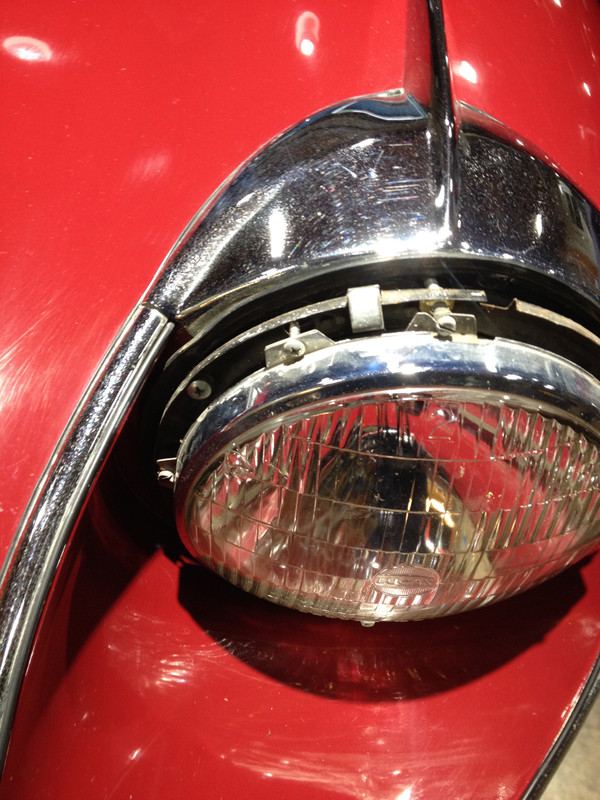
if you want the lights out, start by prying off the chrome ring around the bulb. get under an edge with a screwdriver. then its a little more obvious. two screws adjust the aim. the others hold it in.
good luck
but enough preaching
if you want the lights out, start by prying off the chrome ring around the bulb. get under an edge with a screwdriver. then its a little more obvious. two screws adjust the aim. the others hold it in.
good luck
Bob F
69 S2 E-type OTS LHD
69 S2 E-type OTS LHD
| Link: | |
| BBcode: | |
| HTML: | |
| Hide post links |

#4 Re: Head light removal
Just to add that you prise the chrome headlamp rim off from the bottom. At 6 o'clock there is a sprung clip that holds it in place. There are then two lips at 10 and 2 that you simply lift the rim off.
A thick lump of rag against the paintwork and a long screwdriver does the trick.
Hope it helps.
cheers
Ash
A thick lump of rag against the paintwork and a long screwdriver does the trick.
Hope it helps.
cheers
Ash
Series 2 FHC 1970
1R 20607
1R 20607
| Link: | |
| BBcode: | |
| HTML: | |
| Hide post links |
#5 Re: Head light removal
Thanks to those who gave the secret of getting to the headlight ring. I have a minimum manual but show no exploded view of the headligh assy. I didn't want to damage any of the paint in the area.
I have gone through 3 alternators in the past year as the diodes keep blowing. The latest one lasted about 7 months. It was driven in daylight on small, 10 miles or so then I drove it about 80miles and the trip home was with the lights on. The dash light came on 2 miles from home.
I have a expert mechanic who rewired the regulator circuits out of the system and made it a one wire hookup. So I have to see the voltages at the lights to see if any drain causing the altermator to heat up and fail. He is willing to exchange the blown alternator but we need to check the wiring.
Thanks
Elliott
69FHC
Elliott Stage
1969 FHC
Silver
1969 FHC
Silver
| Link: | |
| BBcode: | |
| HTML: | |
| Hide post links |
#6 Re: Head light removal
Here is a colour wiring diagram courtesy of Bill Molloy: https://www.dropbox.com/s/dx7f9jvz6pvca ... r.jpg?dl=1
Here is a parts diagram courtesy of SNGB from their web site:

Here is a parts diagram courtesy of SNGB from their web site:
David Jones
S1 OTS OSB
1997 Porsche 911 Guards Red
2024 Lexus LBX
Add your E-Type to our World Map: http://forum.etypeuk.com/viewtopic.php?f=1&t=1810
S1 OTS OSB
1997 Porsche 911 Guards Red
2024 Lexus LBX
Add your E-Type to our World Map: http://forum.etypeuk.com/viewtopic.php?f=1&t=1810
| Link: | |
| BBcode: | |
| HTML: | |
| Hide post links |
#7 Re: Head light removal
Another way to check the voltage at the headlights is to leave the headlight in place but remove the LHS side light/indicator unit which is held in by two screws and easier to remove without damaging paintwork. With it removed, through the opening you can reach the multiway connector block at the back with you voltmeter probes, measure the voltage on the headlight wires as well as coming into the connector block from the bonnet harness and check for poor earths.
John
1969 Series 2 FHC
1969 Series 2 FHC
| Link: | |
| BBcode: | |
| HTML: | |
| Hide post links |
#8 Re: Head light removal
Just go the headlight ring off. Minor chipping of the black rubber/plastic behind the ring. I like the idea of checking voltages thru side light.
Also, I ordered a official manual and suggested by all of you. I was a Air Force fighter jet mechanic and I know better. I was just being cheap.
Voltages to follow. Hopefully tomorrow.
Elliott
Also, I ordered a official manual and suggested by all of you. I was a Air Force fighter jet mechanic and I know better. I was just being cheap.
Voltages to follow. Hopefully tomorrow.
Elliott
Elliott Stage
1969 FHC
Silver
1969 FHC
Silver
| Link: | |
| BBcode: | |
| HTML: | |
| Hide post links |
-
dal2.0litrefrogeye
- Posts: 1090
- Joined: Fri Aug 06, 2010 10:48 pm
- Location: sarf london
- Contact:

#9 Re: Head light removal
Just a little tip when removing / fitting trim on or around bodywork masking tape is your freind. Any slip of screwdriver said masking tape may save ones bacon
Its a way of life not a hobby
Darren . 64 4.2 modded 69 4.2
Darren . 64 4.2 modded 69 4.2
| Link: | |
| BBcode: | |
| HTML: | |
| Hide post links |