


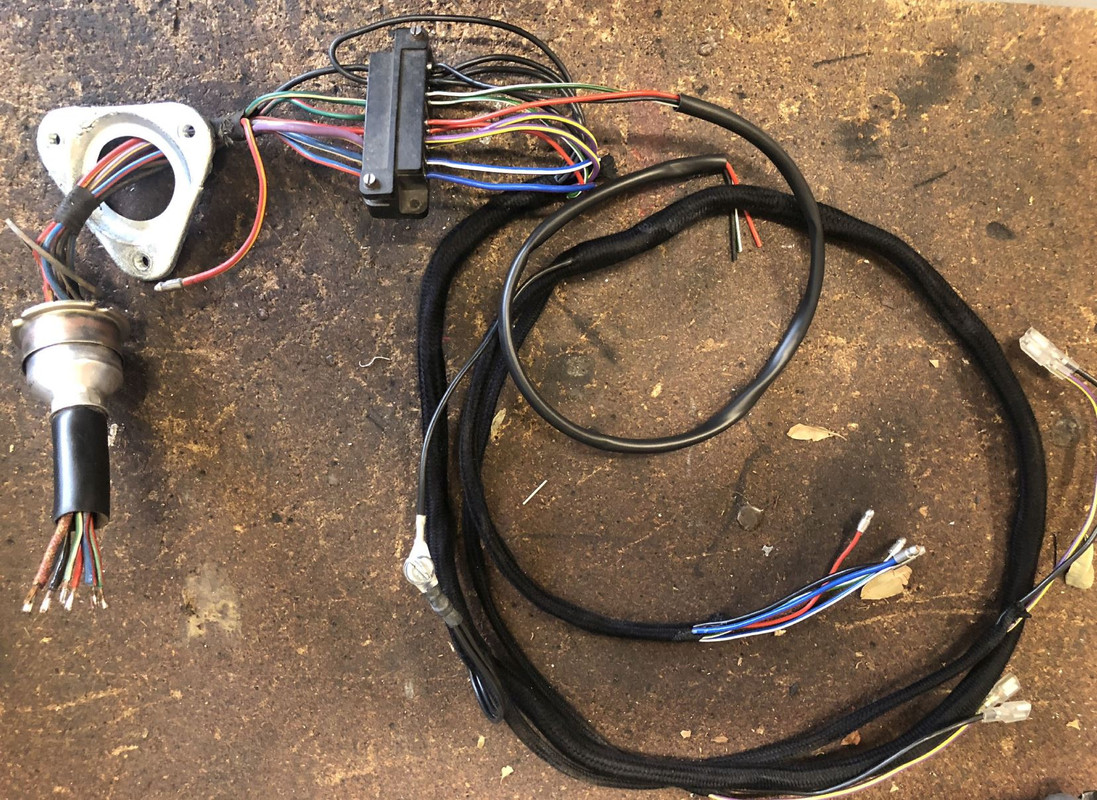
As part of my RHD conversion I have decided to replace not only the dash wiring harness but also the engine wiring harness as this connects to the dash one inside. The only issue I have found (so far) is the wiring for the multi-way plug connecting to the bonnet. The harness from SNGB has 6 wires whereas the old harness has a think what looks like brown / orange wire extra - not sure what that is for but my car is US whereas I guess the new harness is UK specification.
I want to re-use the old plug as there is nothing wrong with it and having read a little the new ones don't seem to of the same quality - I was intending using the self solder joints to join the existing wires to those of the new harness rather than dis-assembling the plug itself but wondered if the plug could be taken apart and if so how the 'old' wires are connected to the plug.
In addition, the bonnet plug is not mounted to the bonnet itself - is there a description / picture of how the plug should be mounted and how best can I get to the plug itself as it seems to be buried in the bonnet assembly
Bonnet electrical plug
#1 Bonnet electrical plug
Chris Drew
SII Roadster in Red (looking like a bit of a project!)
SII Roadster in Red (looking like a bit of a project!)
| Link: | |
| BBcode: | |
| HTML: | |
| Hide post links |


#2 Re: Bonnet electrical plug
Is your brown/orange wire actually faded yellow/red? This is for fog lights, which aren't usually fitted.
The plug can be disassembled, but it is fragile and if you break things you can't get replacements. The wires are crimped into the end of the terminals. This can be undone and then the new wires are soldered in place.
Your idea of cutting off the plug with a tail of wire, then soldering it to the new loom is probably easier. You may need to spend a bit of time making sure you get the plastic covering properly in place. You can buy the rubber boot C16921/1 if you want to replace it.
Alternatively you could use a piece of heat shrink to cover the join.
The bonnet side of the plug mounts into a round hole in a bonnet panel inboard of the left front wheel. It is held in place with a plate with three captive 1/4" UNF nuts.
The plug can be disassembled, but it is fragile and if you break things you can't get replacements. The wires are crimped into the end of the terminals. This can be undone and then the new wires are soldered in place.
Your idea of cutting off the plug with a tail of wire, then soldering it to the new loom is probably easier. You may need to spend a bit of time making sure you get the plastic covering properly in place. You can buy the rubber boot C16921/1 if you want to replace it.
Alternatively you could use a piece of heat shrink to cover the join.
The bonnet side of the plug mounts into a round hole in a bonnet panel inboard of the left front wheel. It is held in place with a plate with three captive 1/4" UNF nuts.
Andrew.
881824, 1E21538. 889457. 1961 4.3l Mk2. 1975 XJS. 1979 MGB (supercharged).
Adelaide, Australia
881824, 1E21538. 889457. 1961 4.3l Mk2. 1975 XJS. 1979 MGB (supercharged).
Adelaide, Australia
| Link: | |
| BBcode: | |
| HTML: | |
| Hide post links |