seat removal...unless welded !

Talk about the E-Type Series 2
User avatar

Topic author
rolando38
Posts: 349
Joined: Mon Jun 03, 2013 6:02 pm
Location: Grenoble, french Alps
France

#1 seat removal...unless welded !

Post by rolando38 » Sun Mar 01, 2015 6:17 pm

in order to change the seats covers , diaphragms and foams, I had a look today at how to remove them..

and here is what I found

Image

Image

Image

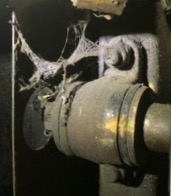
do you also understand , as I do, that they had been welded "at some stage" ?
or do I miss a hidden screw somewhere ?

any idea how to proceed , if possible without having to grind the rails ?


Roland
2+2 1970

Link:
BBcode:
HTML:
Hide post links
Show post links

User avatar

abowie
Posts: 4155
Joined: Wed Sep 07, 2011 9:15 pm
Location: Australia
Australia

#2

Post by abowie » Sun Mar 01, 2015 8:26 pm

You remove the rear screw on both rails and then push the seat back. It is located at the front on a slot at the bottom of the rail you can't see.
Andrew.
881824, 1E21538. 889457. 1961 4.3l Mk2. 1975 XJS. 1979 MGB (supercharged).
Adelaide, Australia

Link:
BBcode:
HTML:
Hide post links
Show post links

User avatar

nefematic
Posts: 369
Joined: Sun Aug 12, 2012 4:18 pm
Location: Stuttgart, Germany
Germany

#3

Post by nefematic » Sun Mar 01, 2015 8:29 pm

Roland,

there should be philips screws visible - but since there seem to welded on brackets of some sort I would check from underneath for a fastening nut, or bolt.

Martin
Martin Scherz
Late S2 1970 OTS US LHD

Link:
BBcode:
HTML:
Hide post links
Show post links

User avatar

nefematic
Posts: 369
Joined: Sun Aug 12, 2012 4:18 pm
Location: Stuttgart, Germany
Germany

#4

Post by nefematic » Sun Mar 01, 2015 8:31 pm

Oh I goofed - your picture is of the front part. Andrew is right.
Martin
Martin Scherz
Late S2 1970 OTS US LHD

Link:
BBcode:
HTML:
Hide post links
Show post links

User avatar

Topic author
rolando38
Posts: 349
Joined: Mon Jun 03, 2013 6:02 pm
Location: Grenoble, french Alps
France

#5

Post by rolando38 » Sun Mar 01, 2015 8:48 pm

hi Andrew

you mean that the welding is normal ?
(the picture is at the front, with front seat pushed back as far as possible)
I can probably remove the screws at the back, though
2+2 1970

Link:
BBcode:
HTML:
Hide post links
Show post links

User avatar

nefematic
Posts: 369
Joined: Sun Aug 12, 2012 4:18 pm
Location: Stuttgart, Germany
Germany

#6

Post by nefematic » Sun Mar 01, 2015 9:19 pm

Roland,

the runners are fastened with screws only in the back. The front is held in place with sliding the welded on bracket forward onto donutstyle washers that are screwed onto the floor. Once you have the rear screws out (I had to use WD40 and a big screwdriver) you slide the runners towards the back to get them free of the fastening washers.

Martin
Martin Scherz
Late S2 1970 OTS US LHD

Link:
BBcode:
HTML:
Hide post links
Show post links

User avatar

Topic author
rolando38
Posts: 349
Joined: Mon Jun 03, 2013 6:02 pm
Location: Grenoble, french Alps
France

#7

Post by rolando38 » Mon Mar 02, 2015 6:23 am

oh good news !
thanks very much Martin and Abowie
was afraid to have to use the grinder inside the car !
2+2 1970

Link:
BBcode:
HTML:
Hide post links
Show post links

User avatar

abowie
Posts: 4155
Joined: Wed Sep 07, 2011 9:15 pm
Location: Australia
Australia

#8

Post by abowie » Mon Mar 02, 2015 6:48 am

rolando38 wrote: was afraid to have to use the grinder inside the car !
Wait til you need to use the blowtorch... :twisted: :evil:
Andrew.
881824, 1E21538. 889457. 1961 4.3l Mk2. 1975 XJS. 1979 MGB (supercharged).
Adelaide, Australia

Link:
BBcode:
HTML:
Hide post links
Show post links

User avatar

Topic author
rolando38
Posts: 349
Joined: Mon Jun 03, 2013 6:02 pm
Location: Grenoble, french Alps
France

#9

Post by rolando38 » Mon Mar 02, 2015 10:23 am

God bless me and my E-type, I chose a sample that should normally not need such a barbarian tool !
2+2 1970

Link:
BBcode:
HTML:
Hide post links
Show post links

User avatar

Topic author
rolando38
Posts: 349
Joined: Mon Jun 03, 2013 6:02 pm
Location: Grenoble, french Alps
France

#10

Post by rolando38 » Tue Mar 10, 2015 6:09 am

Hi

I managed to remove the passenger seat, quite easily thanks to Marttin's advice

the foam is falling apart

Image

but the diaphragm is pretty decent (will change it anyway)

and the cover is great once fed with ox shoe oil

Image

my plan is to change the foam without removing the cover (stapled one the side), therefore introducing the foam by underneath; might need some silicon spray to ease it in
any previous experience ?
2+2 1970

Link:
BBcode:
HTML:
Hide post links
Show post links

User avatar

nefematic
Posts: 369
Joined: Sun Aug 12, 2012 4:18 pm
Location: Stuttgart, Germany
Germany

#11

Post by nefematic » Wed Mar 11, 2015 10:16 pm

Roland,
with the seat cover in place I don't see how the foam could possibly fit in through the bottom, the foam will be hard to get in place in relation to the cover seams. The covers are glued to the foam in the middle section, you're going to have a hard time getting all of the old foam out. Third point is getting the seat cover to stay down in the middle seam going from left to right. Get a good stapler, take your cover off, refit the new foam and restaple the old cover. It worked for me and I am happy with the result. I put threads in the middle seam and pulled that seam down towards the diaphragm and fastened it to the metal seat bottom. That way I have a nice crease in the seat bottom. Don't be afraid to reuse your covers, it will work out OK.
Martin
Martin Scherz
Late S2 1970 OTS US LHD

Link:
BBcode:
HTML:
Hide post links
Show post links

User avatar

Topic author
rolando38
Posts: 349
Joined: Mon Jun 03, 2013 6:02 pm
Location: Grenoble, french Alps
France

#12

Post by rolando38 » Wed Mar 11, 2015 10:33 pm

thanks Martin

the first step of removing the foam was pretty straightforward, though
(here pictured half way, now all foam removed)

Image
2+2 1970

Link:
BBcode:
HTML:
Hide post links
Show post links

User avatar

nefematic
Posts: 369
Joined: Sun Aug 12, 2012 4:18 pm
Location: Stuttgart, Germany
Germany

#13

Post by nefematic » Thu Mar 12, 2015 9:49 pm

Roland,

It's looking good! Maybe you will manage the foam inside through the bottom. I had the stiffer king, so there wasn't to much wiggle room. Still, I wanted to have a pronounced valley in the seat. Gluing would not hold, so I took to the strings holfing the leather down. A local upholsterer recommended sewing a strong material along the seam and sewing that fown, but I didn't decide for that. Here some pictures of my seats


Strings attached http://lh5.googleusercontent.com/-jrgtt ... G_6822.JPG

Still missing the headrests
http://lh3.googleusercontent.com/-c6wpr ... G_6823.JPG

My Mom, helping with the seats
http://lh4.googleusercontent.com/-coPoY ... G_6824.JPG

Bottom
http://lh6.googleusercontent.com/-e4vwe ... G_6827.JPG
Martin Scherz
Late S2 1970 OTS US LHD

Link:
BBcode:
HTML:
Hide post links
Show post links

Post Reply Previous topicNext topic