


How do I remove dash on my series 3 ? Bullet points please
. Just wish to replace bulbs with led’s. Are there any issues to be aware of when fitting led conversion ?
Dashboard removal
#1 Dashboard removal
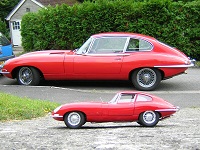
1972 OTS
Opalescent silver blue
Purchased Oct 2020
Opalescent silver blue
Purchased Oct 2020
| Link: | |
| BBcode: | |
| HTML: | |
| Hide post links |
#2 Re: Dashboard removal
Its really easy
Buy a service manual
Best £50 you will ever spend.
Rob Gill
Buy a service manual
Best £50 you will ever spend.
Rob Gill
| Link: | |
| BBcode: | |
| HTML: | |
| Hide post links |
#3 Re: Dashboard removal
I'll write up some instructions later.
It's a total waste of time fitting LEDs into the dash. How much wattage do you think you are going to save?
kind regards
Marek
It's a total waste of time fitting LEDs into the dash. How much wattage do you think you are going to save?
kind regards
Marek
| Link: | |
| BBcode: | |
| HTML: | |
| Hide post links |

#4 Re: Dashboard removal
If you want instruments that can be read after dark, the best solution I've seen was strips of LEDs wrapped around the inside of each instrument casing. This particular solution including a controller that could alter the LEDs changing their colour according to the reading of the instrument, eg turning red when the temp gauge indicated overheating.
Get yourself on to Jag-Lovers, a US based forum and interrogate their archives.
I've tried loads of led bulbs. The few that fit into the instrument bulb holders, as Marek has already stated, did nothing to improve the amount of light. The one thing that does improve the lighting of the instruments is to remove the plastic colour filters in each of the bulb holders. I was fortunate in that several had already decayed, so punching out the rest simply evened things up.
However, improving the visibility of the instrument panel is only one aspect of night driving. I find that driving at night on today's crowded roads, facing modern vehicles with led and HID headlamps turns my H4 halogen headlamps into far away candles.
Chris '67 S1 2+2
| Link: | |
| BBcode: | |
| HTML: | |
| Hide post links |

#5 Re: Dashboard removal
I've got LED dash lights which work well. Not too bright, a gentle green, but can read all the instruments clearly when before they might as well have been turned off.
I didn't buy them to save on power, merely to get dash lights I could see.
I didn't buy them to save on power, merely to get dash lights I could see.
Malcolm
I only fit in a 2+2, so got one!
1969 Series 2 2+2
2009 Jaguar XF-S
2015 F Type V6 S
I only fit in a 2+2, so got one!
1969 Series 2 2+2
2009 Jaguar XF-S
2015 F Type V6 S
| Link: | |
| BBcode: | |
| HTML: | |
| Hide post links |
#6 Re: Dashboard removal
The panel lights, or gauge lights, are worth doing (as opposed to "dash lights"). I'd discard the two settings for "PANEL LIGHTS" and simply have them come when sidelights are on.
One white high brightness LED per small gauge will do nicely. The two large gauges need have their illumination recessed much more into the housings and for 3.6v white high brightness LEDs into each bulb slot are still not enough.
To clarify, the green turn indicator tell-tales, alternator light, low fuel light and high beam aren't worth doing. Unless you understand alternators, doing that light may result in your alternator not functioning.
The front part of the dash is held on with four studs. Two are in the extreme corners at the A-pillars and the other two are inside the centre drop down panel. You'll need a socket set with a screwdriver handle for the outer two and a small spanner or ratchet for the middle two. Isolate the battery first as you'll likely not want to drop one of the centre two nuts onto live centre dash wiring below.
The two crash roll chrome finishers need to be removed first. Use a cross headed screwdriver to remove the two screws holding the quarter circle trim holding them either side.
Next remove the rear view mirror, same Philips screwdriver.
Loosen the right hand side A-post top cap so the black hockey stick trim is loose.
Undo four said nuts/washers holding the crash roll.
Undo and isolate the two wires going to the Map light.
Now lift the crash roll a couple of inches so the four aircon hoses can be loosened and do a back flip with the crash roll so what was its most forward part is facing upwards. You can now continue the back flip and shimmy it past the loosened A-post hockey stick. It's a tight fit, but that's all there is to it.
When going back the other way, use a jeweller's screwdriver to locate the holes that the first four screws have to hit. If the car has been "restored", then there may be multiple holes for where the trim screws can fit.
It's worth replacing the piddly Map light with a white LED strip whilst you are there. You might also want to move the rear view mirror down low so it isn't a god awful blind spot when you are at a T-junction. When mounted low, the blind spot is over part of the bonnet and you have full vision through the windscreen.
kind regards
Marek
https://www.jag-lovers.org/snaps/snap_v ... 1473782550
| Link: | |
| BBcode: | |
| HTML: | |
| Hide post links |
-
Craig Balzer
- Posts: 81
- Joined: Fri Mar 03, 2017 2:02 am

#7 Re: Dashboard removal
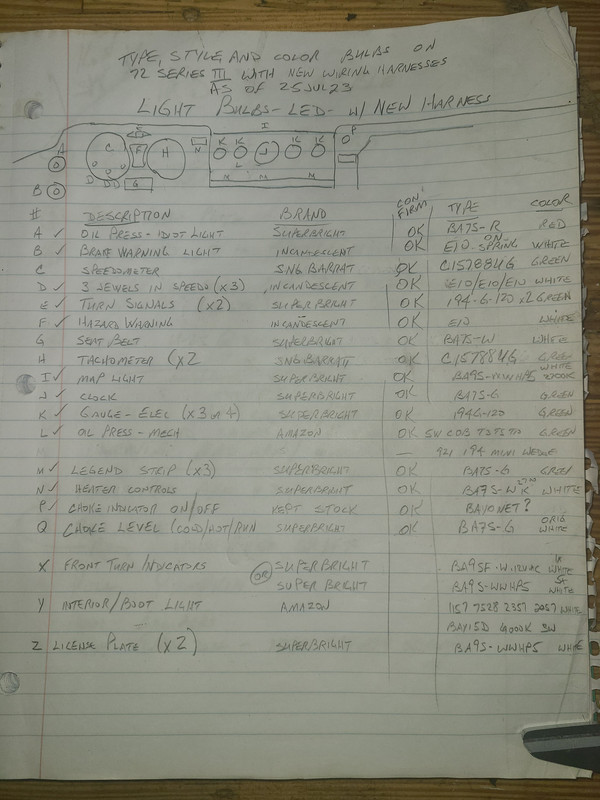
I decided to go the LED route for the dash lights on my Series III OTS.
The restoration is still 9-12 months from completion so I can't provide first-hand observations on their utility.
Here are my notes on the bulbs I used
The restoration is still 9-12 months from completion so I can't provide first-hand observations on their utility.
Here are my notes on the bulbs I used
Craig Balzer
Colorado Springs, CO, USA
1972 Series III OTS, 4-Speed (soon-to-be a Guy Broad 5-Speed), A/C, CWW
Colorado Springs, CO, USA
1972 Series III OTS, 4-Speed (soon-to-be a Guy Broad 5-Speed), A/C, CWW
| Link: | |
| BBcode: | |
| HTML: | |
| Hide post links |
#8 Re: Dashboard removal
Steve
1965 S1 4.2 FHC (early)

1965 S1 4.2 FHC (early)
| Link: | |
| BBcode: | |
| HTML: | |
| Hide post links |