


One of the problems we have when restoring our cars (or replacing a component) is understanding exactly how the factory fitted them.
We are adding 'stickies' for each model Series which will contain detailed photographs from the area of a car that the photographer believes to be untouched from when it was originally built.
Over time, we hope to build a comprehensive resource for restorers to reference.
If you have a photograph you would like to add, please send them via PM to any of the moderators (this will allow us to avoid any duplicates etc).
Below is the link to the JCNA judging guides (these can be printed off and are a useful reference when trying to work out what colour to paint a component for example).
S3: http://www.jcna.com/library/concours/2007/e-type3.pdf
Please help support this new initiative. Angus.
FACTORY FIT - Series 3
#2 Small Instruments Dashboard
Internal and External views of an unrestored dashboard. Note the date sticker on the internal shot. Thanks go to Philippe Picavet.


| Link: | |
| BBcode: | |
| HTML: | |
| Hide post links |

#3
S3 toolkit:
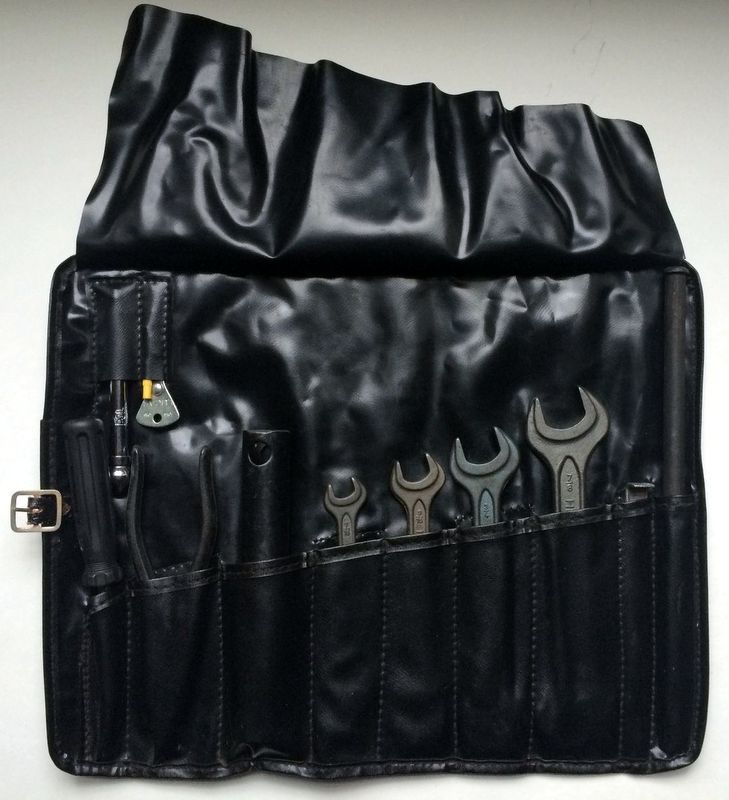
Kit is comprised of the following tools:
Four (4) Heyco Open Ended Spanners:
3/8 AF x 7/16 AF marked "Heyco"
7/16 AF x 1/2 AF marked "Heyco"
5/8 AF x 3/4 AF marked "Heyco"
13/16 AF x 7/8 AF marked "Heyco
Pliers - marked "Sheffield"
Box Spanner - marked 1/2 BSF
Tommy Bar for Box Spanner
Tyre/Tire Pressure Gage - marked "PCL" and "Made in England" with Patent Information
Screwdriver - Marked "Heyco" and "W. Germany" removable/reversible Phillips & flat blades
Lucas Distributor Points Screw Driver/Feeler Gage - solid rivet and marked "Lucas" and "0.014" "0.016"
Tyre/Tire Valve Tool - Yellow Plastic
Hub Cap Removal Tool
Vinyl Tool Roll with Leather Strap
David Jones
S1 OTS OSB
1997 Porsche 911 Guards Red
2024 Lexus LBX
Add your E-Type to our World Map: http://forum.etypeuk.com/viewtopic.php?f=1&t=1810
S1 OTS OSB
1997 Porsche 911 Guards Red
2024 Lexus LBX
Add your E-Type to our World Map: http://forum.etypeuk.com/viewtopic.php?f=1&t=1810
| Link: | |
| BBcode: | |
| HTML: | |
| Hide post links |

#4 Re: FACTORY FIT - Series 3
All,
Again regards from California, USA.
Some time ago, I wrote Mr. Cleave who is the author of the JCNA judges guide for Series 3 E types, regarding his fine publication, which link Heuer has provided on this string. It is extremely well done and would leave little doubt to any question as to authenticity if that were a priority (which in many cases is not everyone's "cup of tea").
Depending on how often I may visit the forum, i have a completely unrestored and extremely low mileage E Type Series III that has been in my ownership since the beginning. Time permitting, I can try to provide information or photos, albeit, we must maintain these cars and necessarily replace original hoses, vacuum lines, and other expendables.
The photos of the E type Series 3 tool kit provided by Heuer is absolutely correct, as i have the same. If you refer to the Spare Parts Catalogue (February 1974) the last few pages identify the proper equipment contained in the tool kit.
In addition there is mention in that catalogue of a locking gas cap and engine heater, both of which i acquired many years ago but are in storage since i don't need to use them. More interesting is that i have the power aerial therein described, which would normally be activated by a relay when the radio is turned on. Since i am not a fan of a fully erected aerial each time the radio is powered, I bypassed the aerial relay and had a two detent rocker switch (much like a power window lift rocker switch on XJ's) installed where on the 2+2, the heated rear window switch would be found, but is a dead switch on the OTS. This raises and lowers the aerial to your desired height. I even found the proper white block lettering for the rocker panel to exactly match the lettering for the other switches.
On another note, I have used Mobil 1 in this car since it was introduced in 1976, and advanced the timing to accommodate higher octane low lead fuel available at most small airports. Most of you don't have this to deal with, but the USA cars were troublesome because of the emissions requirements that hampered the engines and caused overheating, many times leading to engine damage.
I find the forum to be a great resource, and thank you all for providing your input.
Cheers from across the pond.
Barry K (aka Kinglaw)
California
| Link: | |
| BBcode: | |
| HTML: | |
| Hide post links |

#5 Re: FACTORY FIT - Series 3
The JCNS guide posted as a link above appears only to be available to jcna members. Is it possible to access here? Thanks.
Gordon James
S3 1971 - Original (JHT) LHD/Auto/Air Con. Re-imported from US via UK in 1994, rebuilt Antwerp. Dk Blue (orig Sable)/Biscuit (orig Beige)
Porsche 911SC 1983
VW T2A Bus 1971
VW Beetle Cabrio 1967 (but bit of a mixture!)
S3 1971 - Original (JHT) LHD/Auto/Air Con. Re-imported from US via UK in 1994, rebuilt Antwerp. Dk Blue (orig Sable)/Biscuit (orig Beige)
Porsche 911SC 1983
VW T2A Bus 1971
VW Beetle Cabrio 1967 (but bit of a mixture!)
| Link: | |
| BBcode: | |
| HTML: | |
| Hide post links |
#6 Re: FACTORY FIT - Series 3
Check out the Forum Knowledge Base, there is an S3 Originality Guide in there somewhere: viewtopic.php?f=16&t=700
David Jones
S1 OTS OSB
1997 Porsche 911 Guards Red
2024 Lexus LBX
Add your E-Type to our World Map: http://forum.etypeuk.com/viewtopic.php?f=1&t=1810
S1 OTS OSB
1997 Porsche 911 Guards Red
2024 Lexus LBX
Add your E-Type to our World Map: http://forum.etypeuk.com/viewtopic.php?f=1&t=1810
| Link: | |
| BBcode: | |
| HTML: | |
| Hide post links |
-
Craig Balzer
- Posts: 92
- Joined: Fri Mar 03, 2017 2:02 am

#7 Re: FACTORY FIT - Series 3
S3 Originality Guide in there somewhere:
Try this
S3 Originality Guide: https://www.dropbox.com/s/5tn6egk2jcokm ... 3.pdf?dl=1
Try this
S3 Originality Guide: https://www.dropbox.com/s/5tn6egk2jcokm ... 3.pdf?dl=1
Craig Balzer
Colorado Springs, CO, USA
1972 Series III OTS, 4-Speed (soon-to-be a Guy Broad 5-Speed), A/C, CWW
Colorado Springs, CO, USA
1972 Series III OTS, 4-Speed (soon-to-be a Guy Broad 5-Speed), A/C, CWW
| Link: | |
| BBcode: | |
| HTML: | |
| Hide post links |
-
Craig Balzer
- Posts: 92
- Joined: Fri Mar 03, 2017 2:02 am
#8 Re: FACTORY FIT - Series 3
Duplicate Posting
Last edited by Craig Balzer on Wed Mar 11, 2026 10:50 pm, edited 1 time in total.
Craig Balzer
Colorado Springs, CO, USA
1972 Series III OTS, 4-Speed (soon-to-be a Guy Broad 5-Speed), A/C, CWW
Colorado Springs, CO, USA
1972 Series III OTS, 4-Speed (soon-to-be a Guy Broad 5-Speed), A/C, CWW
| Link: | |
| BBcode: | |
| HTML: | |
| Hide post links |
-
Craig Balzer
- Posts: 92
- Joined: Fri Mar 03, 2017 2:02 am
#9 Re: FACTORY FIT - Series 3
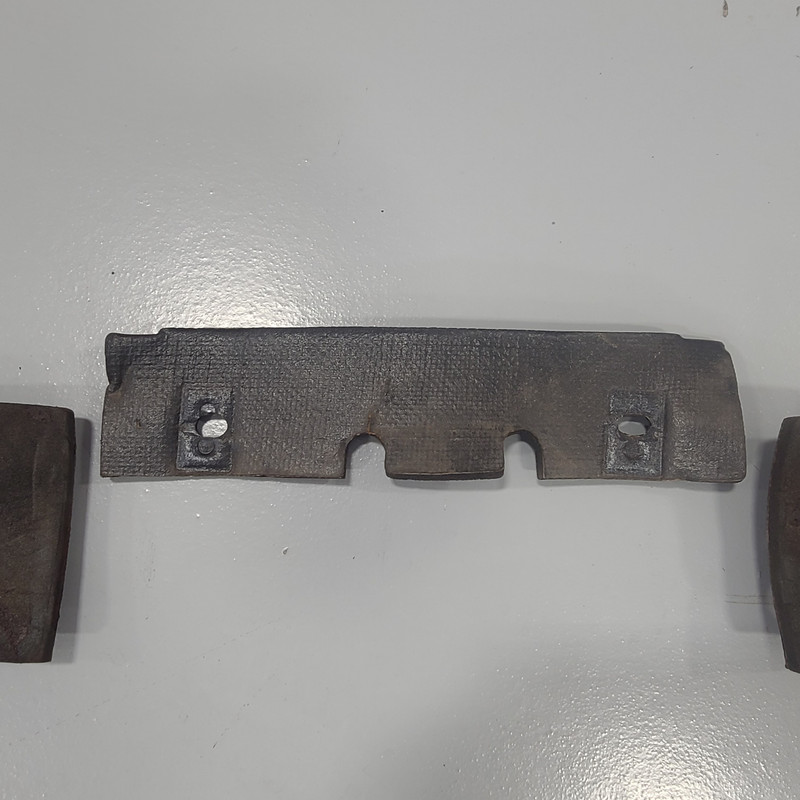
DUST SHIELDS OR NOISE DAMPERS (??) BEHIND SIII DASHBOARD
I found these three panels during disassembly of my 1972 SIII OTS’s dashboard/instrument panels amidst a total restoration. I have never been able to find them on any vendor’s website so I don’t know the names of them much less any part numbers (and I’m guessing at their function in the title).
Two years ago, I visited @Jeff_Schroeder’s E-Type repair/restoration shop in Denver. He has a set of microfiche cards that are from the factory showing exploded diagrams and part numbers for all series of E-Type. He couldn’t find anything on them.
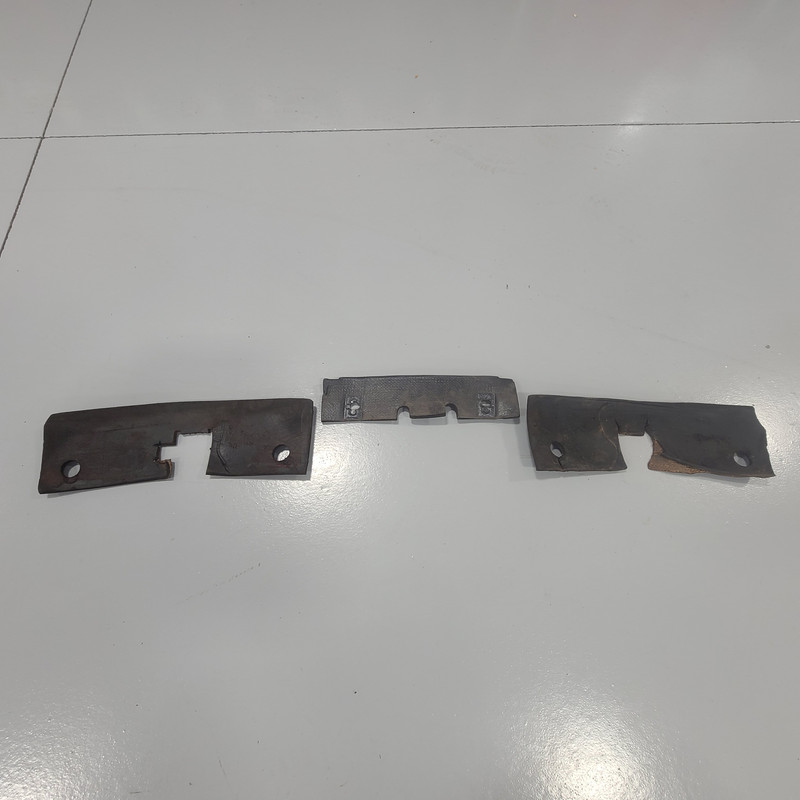
Overview of dashboard panels:
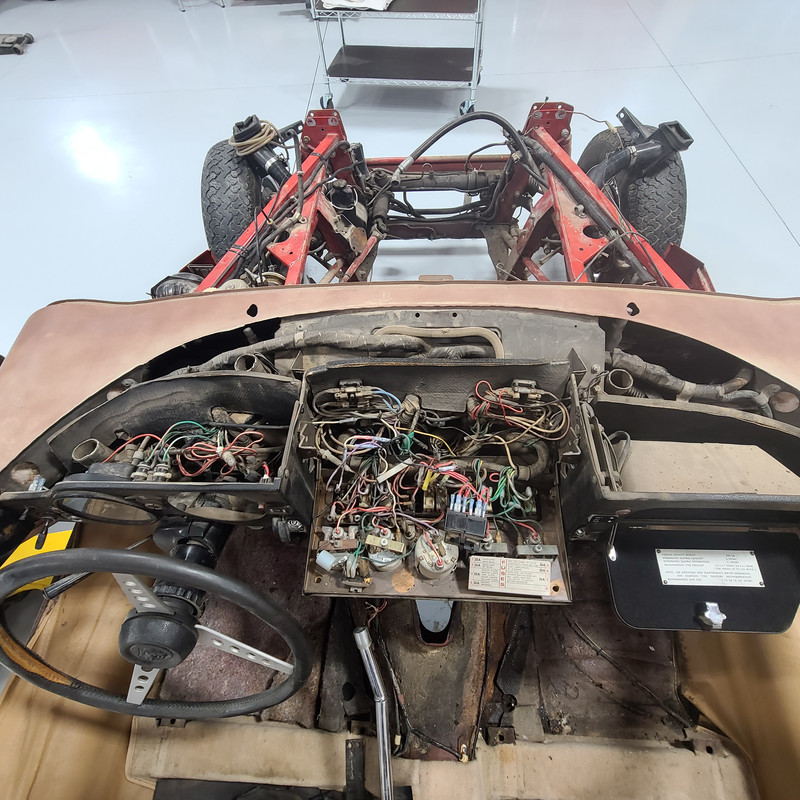
They are black-ish hardura panels positioned vertically behind the three elements of the E-Type dashboard.
The panels removed from the dashboard in sequence from left to right are shown below:
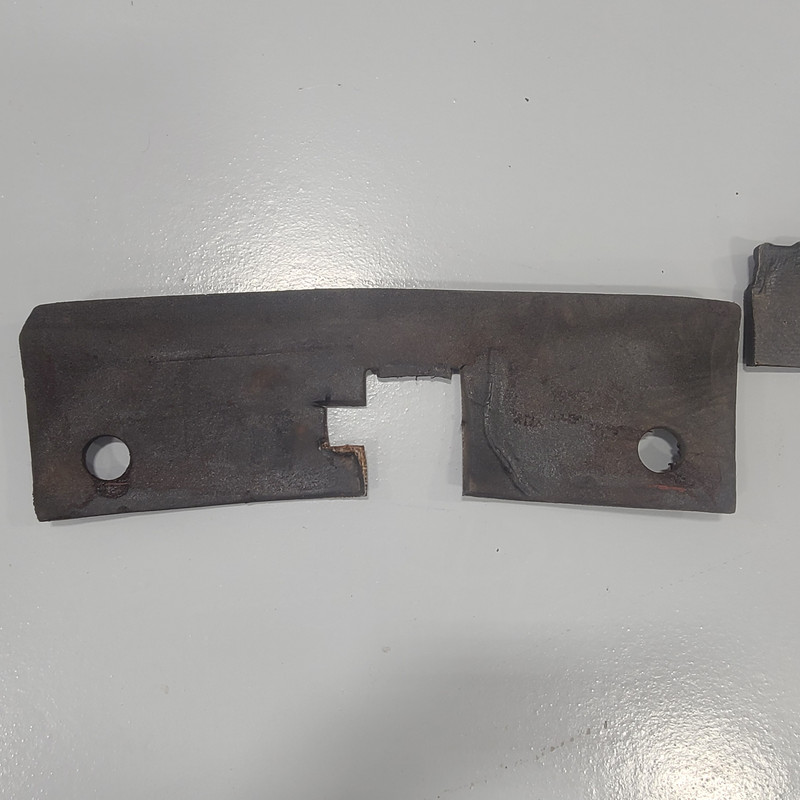
Close up of Speedometer/Tachometer panel:
The panel:
Naked dash
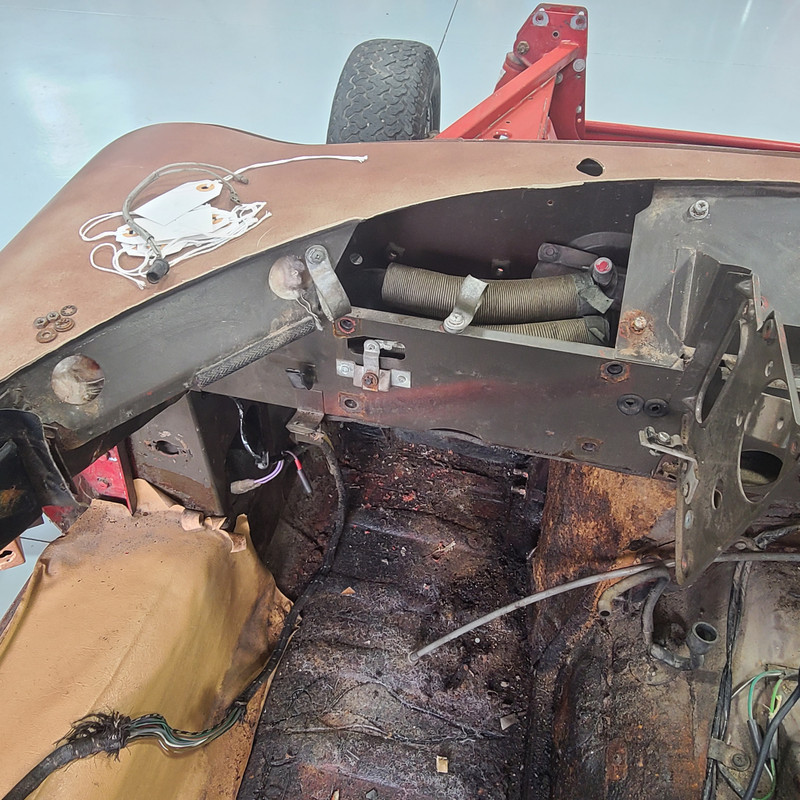
/
Panel set in place. It is sitting too high; one the right side, I believe the circular hole aligns with the bolt hole inches below it. The rectangular opening is for the steering column and wire harness(es) to pass through.

/
Close up of gauge/switch panel.
The panel:
Naked dash
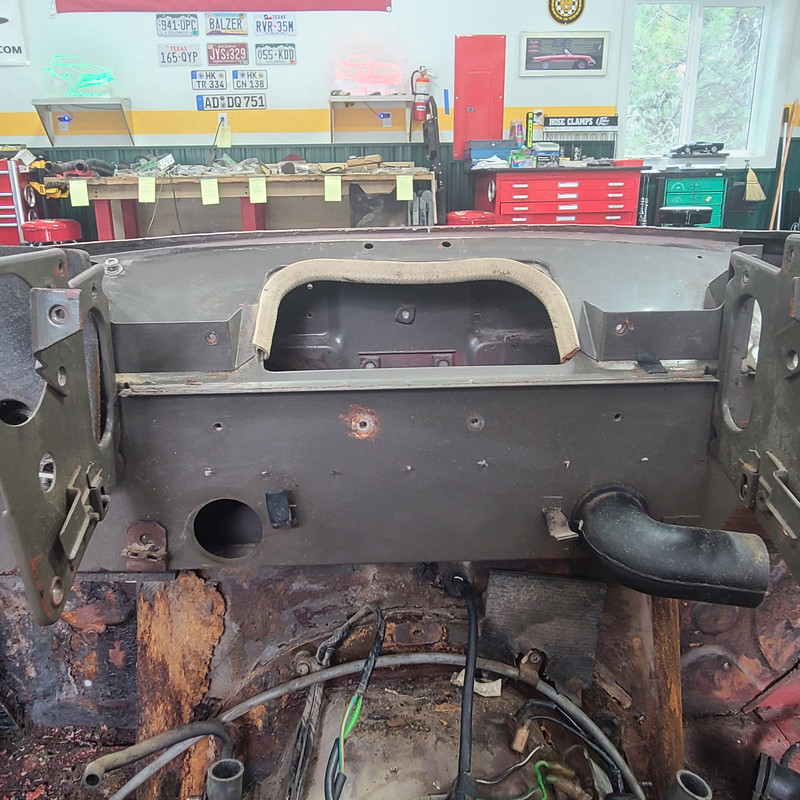
/
Panel set in place.
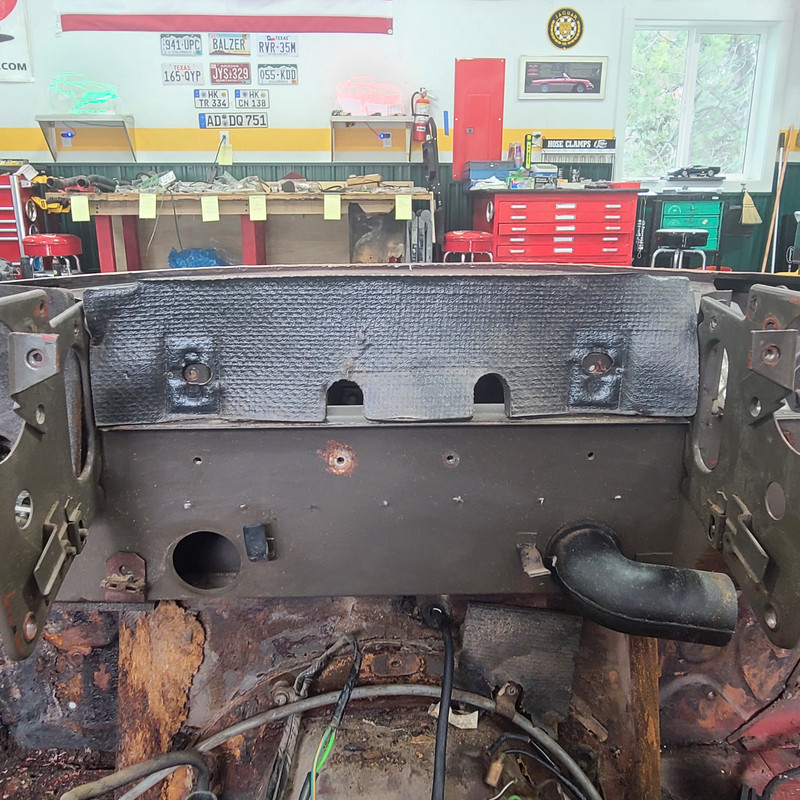
The rectangular indentations (top left and right) are from the upper fuse boxes; the bolt holes for the lower fuse boxes are directly below but not in the panel. The bolt holes centered beneath the panel are for P-clamps securing wiring harnesses. The semi-circular openings are for the switch/gauge wiring harnesses to pass thru - see next photo:
/
/

Close up of glove box panel
The panel
The naked dash
The panel set in place
The panel is set too high by 2-3 inches but was the only way I could get it to stay place (braced by the P-clamp at 12 o’clock).
The circular holes in the lower corners should align with the bottom of body sheet metal.
I am curious if anyone has part names and/or part numbers for any of these three panels
I found these three panels during disassembly of my 1972 SIII OTS’s dashboard/instrument panels amidst a total restoration. I have never been able to find them on any vendor’s website so I don’t know the names of them much less any part numbers (and I’m guessing at their function in the title).
Two years ago, I visited @Jeff_Schroeder’s E-Type repair/restoration shop in Denver. He has a set of microfiche cards that are from the factory showing exploded diagrams and part numbers for all series of E-Type. He couldn’t find anything on them.
Overview of dashboard panels:
They are black-ish hardura panels positioned vertically behind the three elements of the E-Type dashboard.
The panels removed from the dashboard in sequence from left to right are shown below:
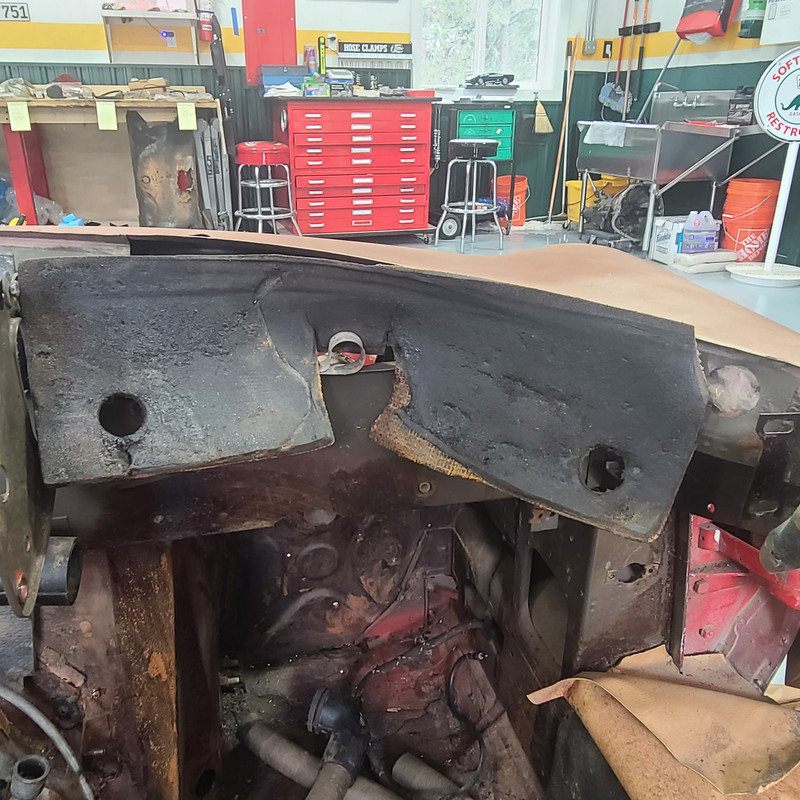
Close up of Speedometer/Tachometer panel:
The panel:
Naked dash
/
Panel set in place. It is sitting too high; one the right side, I believe the circular hole aligns with the bolt hole inches below it. The rectangular opening is for the steering column and wire harness(es) to pass through.
/
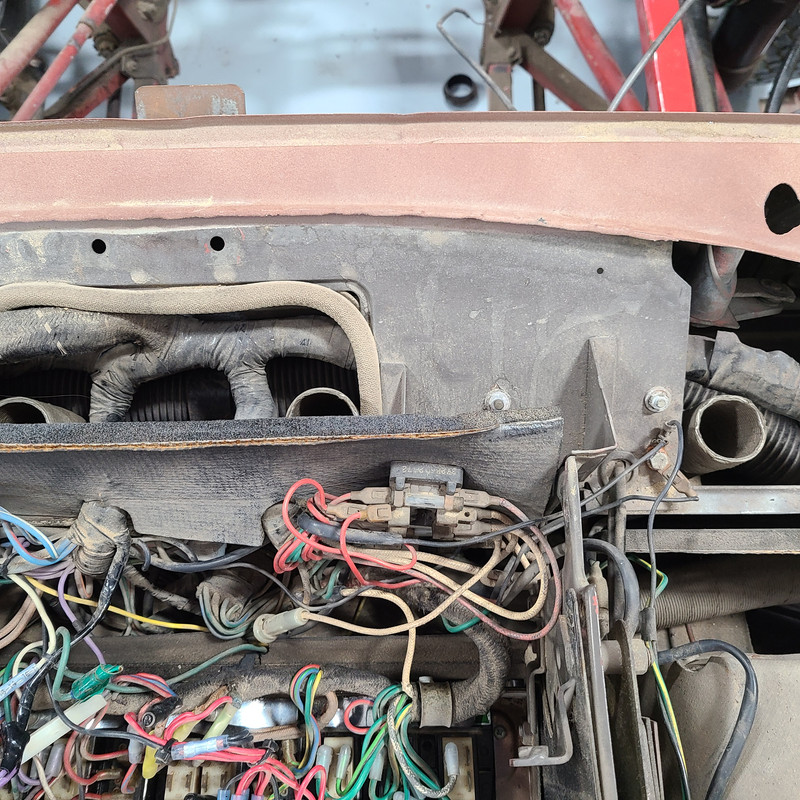
Close up of gauge/switch panel.
The panel:
Naked dash
/
Panel set in place.
The rectangular indentations (top left and right) are from the upper fuse boxes; the bolt holes for the lower fuse boxes are directly below but not in the panel. The bolt holes centered beneath the panel are for P-clamps securing wiring harnesses. The semi-circular openings are for the switch/gauge wiring harnesses to pass thru - see next photo:
/
/
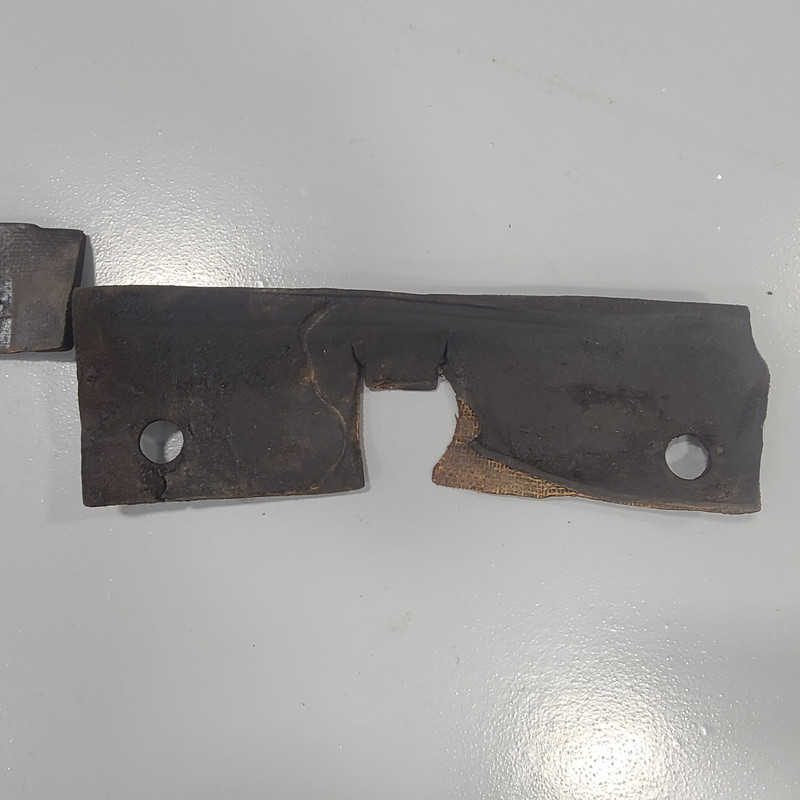
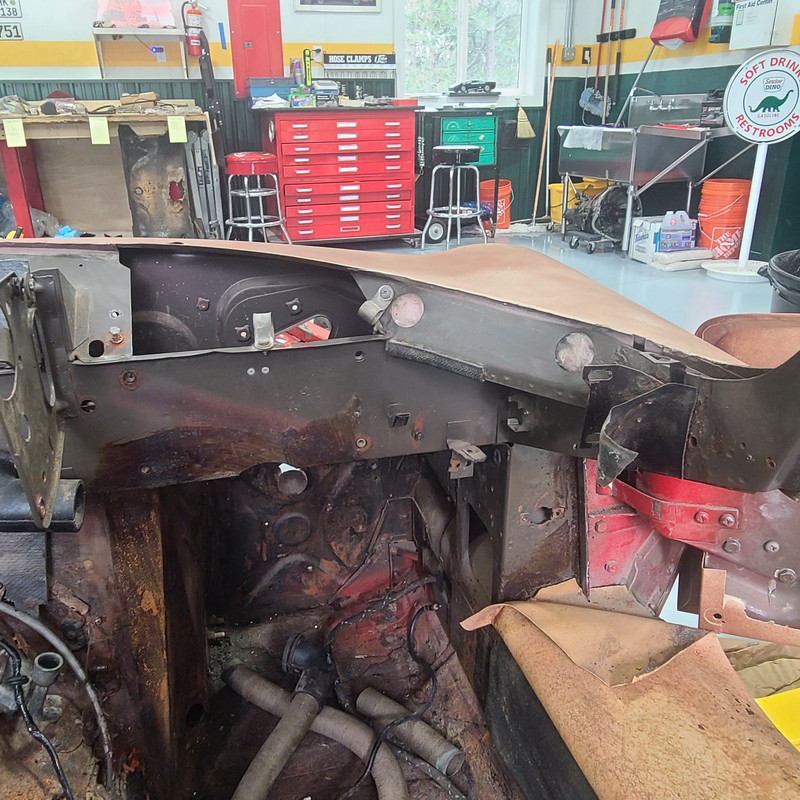
Close up of glove box panel
The panel
The naked dash
The panel set in place
The panel is set too high by 2-3 inches but was the only way I could get it to stay place (braced by the P-clamp at 12 o’clock).
The circular holes in the lower corners should align with the bottom of body sheet metal.
I am curious if anyone has part names and/or part numbers for any of these three panels
Craig Balzer
Colorado Springs, CO, USA
1972 Series III OTS, 4-Speed (soon-to-be a Guy Broad 5-Speed), A/C, CWW
Colorado Springs, CO, USA
1972 Series III OTS, 4-Speed (soon-to-be a Guy Broad 5-Speed), A/C, CWW
| Link: | |
| BBcode: | |
| HTML: | |
| Hide post links |