Small but job-stopping problem with the front lower wishbone forward fulcrum shaft...

Talk about the E-Type Series 3
User avatar

Topic author
panamacarrera
Posts: 94
Joined: Sun Jul 09, 2017 4:36 pm
Location: Southport, UK
Great Britain

#1 Small but job-stopping problem with the front lower wishbone forward fulcrum shaft...

Post by panamacarrera » Sat Apr 02, 2022 8:46 am

I'm overhauling the front suspension on my '71 S3 OTS.

All was going well till I came to remove the top bolt on the forward fulcrum trunnion. At first it wouldn't move at all, but now it is moving it is not unscrewing.

As far as I can see there is no nut on the inner side of the picture frame - it's a closed tube at that point, I'm guessing there is a captive nut inside the frame that has become detached.

Has anybody else had a similar problem? Better, has anyone found a solution, please?

Many thanks

Nigel
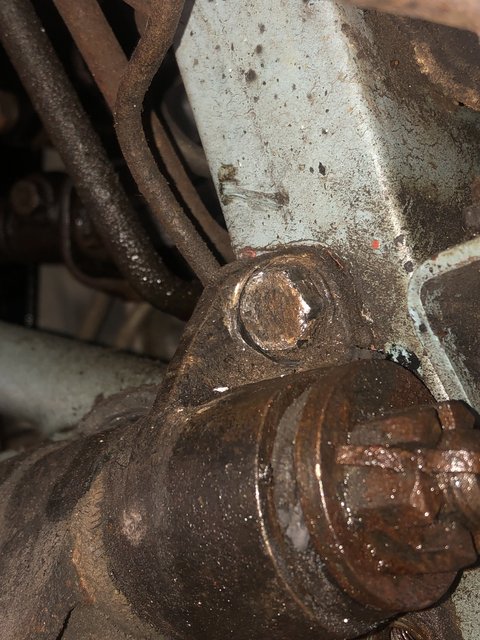

Image
'71 S3 OTS

Link:
BBcode:
HTML:
Hide post links
Show post links

User avatar

mgcjag
Moderator
Posts: 8097
Joined: Fri Jul 09, 2010 6:15 pm
Location: Ludlow Shropshire
Great Britain

#2 Re: Small but job-stopping problem with the front lower wishbone forward fulcrum shaft...

Post by mgcjag » Sat Apr 02, 2022 9:18 am

Hi Nigel....you should see the nuts behind in the recess of the picture frame......not captive....easy to get a socket on them.....Steve
Steve
69 S2 2+2 (just sold) ..Realm C type replica, 1960 xk150fhc

Link:
BBcode:
HTML:
Hide post links
Show post links

User avatar

Topic author
panamacarrera
Posts: 94
Joined: Sun Jul 09, 2017 4:36 pm
Location: Southport, UK
Great Britain

#3 Re: Small but job-stopping problem with the front lower wishbone forward fulcrum shaft...

Post by panamacarrera » Sat Apr 02, 2022 12:55 pm

Thanks Steve… but I think you’re referring to a six-cylinder car…

On a V12 I’m sure the picture frame is a closed tube behind this bolt and, with all the plumbing for the power steering, no way could you describe it as “…easy to get a socket on…”
'71 S3 OTS

Link:
BBcode:
HTML:
Hide post links
Show post links

User avatar

rswaffie
Posts: 1647
Joined: Sat Jul 19, 2014 7:56 am
Location: Lincolnshire
Great Britain

#4 Re: Small but job-stopping problem with the front lower wishbone forward fulcrum shaft...

Post by rswaffie » Sat Apr 02, 2022 1:21 pm

What does it show in the S3 parts section for front suspension? It may well show if there is a nut/washer on the back of the frame, or a bolt without a nut.
Richard

Previous owner and restorer of a S1 3.8 FHC Opalescent Golden Sand with Tan Trim 889504 (now sold and headed for Athens)

:swerve: :wrench: :hammer: :fingerscrossed:

Link:
BBcode:
HTML:
Hide post links
Show post links

User avatar

mgcjag
Moderator
Posts: 8097
Joined: Fri Jul 09, 2010 6:15 pm
Location: Ludlow Shropshire
Great Britain

#5 Re: Small but job-stopping problem with the front lower wishbone forward fulcrum shaft...

Post by mgcjag » Sat Apr 02, 2022 1:31 pm

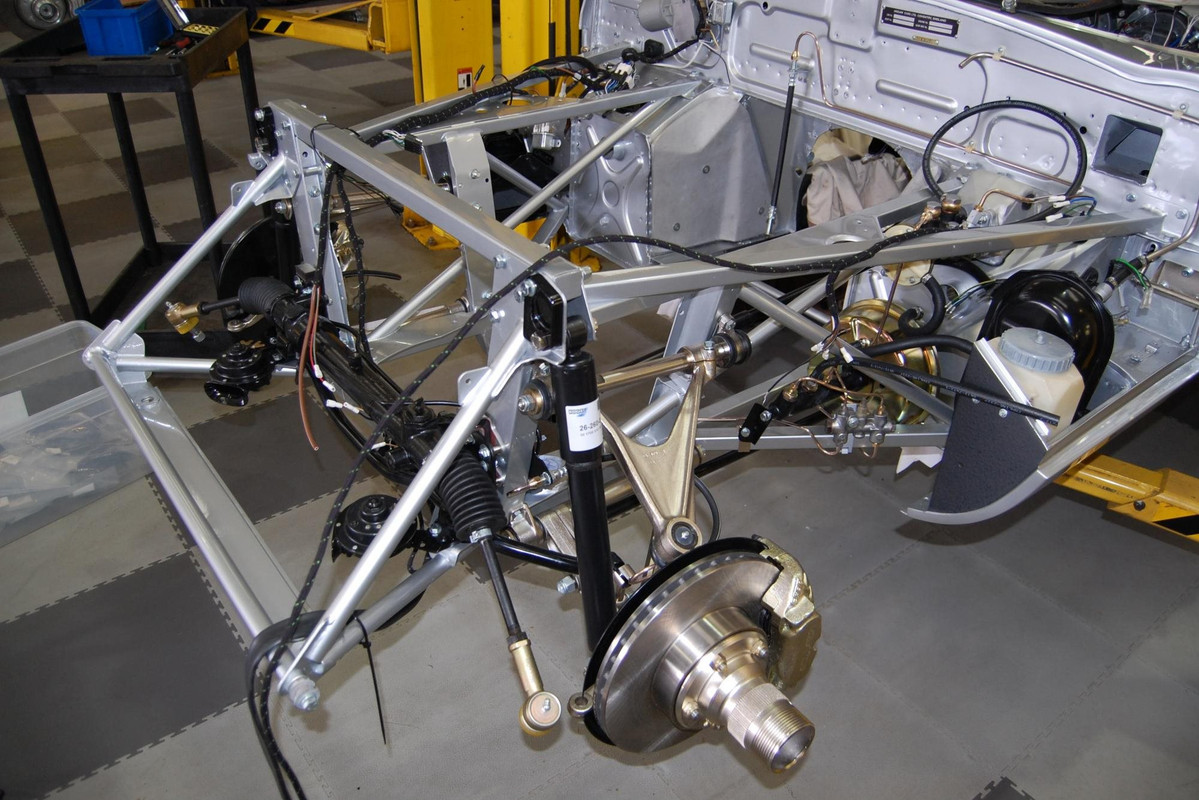
No not thinking of a six......here is a photo of a 12 with the nuts clearly shown........Steve
Image
Steve
69 S2 2+2 (just sold) ..Realm C type replica, 1960 xk150fhc

Link:
BBcode:
HTML:
Hide post links
Show post links


MarekH
Posts: 1569
Joined: Wed Jul 21, 2010 8:30 pm
Location: Surrey
Great Britain

#6 Re: Small but job-stopping problem with the front lower wishbone forward fulcrum shaft...

Post by MarekH » Sat Apr 02, 2022 3:01 pm

Yes it's captive. The bottom of the picture frame has two inserts, c35447 and cc35452 which bolt into the bottom at the outboard edge corners of where your jacking hardwood piece of wood would go. You'll need to unbolt the relevant insert with a half inch socket, pull it out and then you can consider how to reweld a nut in. It looks to me that the bottom nut goes into a captive nut in the insert but the top nut might be actually be captive into the picture frame itself.

Since it's the lower bolt you'll need to grind it off and then drill it out to get just the insert out. Ouch.

Obviously, for the upper nut, if you find you need to weld into there in situ, you'd despair, but all is not lost..... Upon reassembly, you can do the upper fulcrum nut up from underneath before you've put the insert back in! a serrated washer would give enough bite on the inside such that done up finger tight first would mean it'd tighten up properly later.

Getting that insert out will be a chore.

kind regards
Marek

Link:
BBcode:
HTML:
Hide post links
Show post links

User avatar

mgcjag
Moderator
Posts: 8097
Joined: Fri Jul 09, 2010 6:15 pm
Location: Ludlow Shropshire
Great Britain

#7 Re: Small but job-stopping problem with the front lower wishbone forward fulcrum shaft...

Post by mgcjag » Sat Apr 02, 2022 3:12 pm

Nigel...my mistake...i thought you were talking about the upper wishbone.....i should have paid more attention to the title.....Steve
Steve
69 S2 2+2 (just sold) ..Realm C type replica, 1960 xk150fhc

Link:
BBcode:
HTML:
Hide post links
Show post links

User avatar

Topic author
panamacarrera
Posts: 94
Joined: Sun Jul 09, 2017 4:36 pm
Location: Southport, UK
Great Britain

#8 Re: Small but job-stopping problem with the front lower wishbone forward fulcrum shaft...

Post by panamacarrera » Sat Apr 02, 2022 3:32 pm

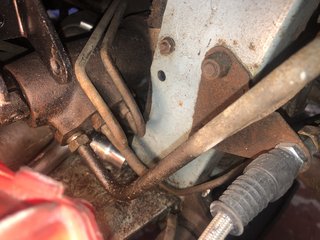
Sorry folks.... I'd left this post in "Preview" mode, got called away from my desk and just pressed 'SUBMIT" when I returned, not realising there were a couple more posts since I wrote it... that's why it seems out of sequence... :oops: Bizarrely, it looks like there are bolts on the inner side of the picture frame in Steve's photo....

Holy c**p, Steve, I see what you mean...

Image

...you're right, it is easy, once you've removed the bonnet, radiator, engine and the power steering plumbing.

Time for some serious head scratching

Many thanks
Last edited by panamacarrera on Sat Apr 02, 2022 3:46 pm, edited 1 time in total.
'71 S3 OTS

Link:
BBcode:
HTML:
Hide post links
Show post links


MarekH
Posts: 1569
Joined: Wed Jul 21, 2010 8:30 pm
Location: Surrey
Great Britain

#9 Re: Small but job-stopping problem with the front lower wishbone forward fulcrum shaft...

Post by MarekH » Sat Apr 02, 2022 3:37 pm

Two other points:-

You might want to unload the torsion bar before it shifts and unloads on you. (It'll be held only by the rear bracket if you have undone the two front bolts.)

Assuming the insert and lower bolt are out, wedging in a broad screwdriver in from the underside may mean you can undo the upper nut normally (or maybe a slim spanner will have some purchase if inserted).

kind regards
Marek

Link:
BBcode:
HTML:
Hide post links
Show post links

User avatar

Topic author
panamacarrera
Posts: 94
Joined: Sun Jul 09, 2017 4:36 pm
Location: Southport, UK
Great Britain

#10 Re: Small but job-stopping problem with the front lower wishbone forward fulcrum shaft...

Post by panamacarrera » Sat Apr 02, 2022 4:03 pm

Thanks Marek, thanks Steve... not the news I wanted but I have a 'next step' now so really appreciate you taking the time to share thoughts.

Marek, I'm following the Jaguar Workshop Manual so torsion bar already removed, thanks for the tip all the same.

Tomorrow I'm back in the garage. I'll let you know how I get on.
'71 S3 OTS

Link:
BBcode:
HTML:
Hide post links
Show post links

User avatar

Topic author
panamacarrera
Posts: 94
Joined: Sun Jul 09, 2017 4:36 pm
Location: Southport, UK
Great Britain

#11 Re: Small but job-stopping problem with the front lower wishbone forward fulcrum shaft...

Post by panamacarrera » Mon Apr 04, 2022 7:40 pm

I spent yesterday evening studying the parts catalogue, squeezing my hands into tight spaces and crawling under the car.

Here's what I found...

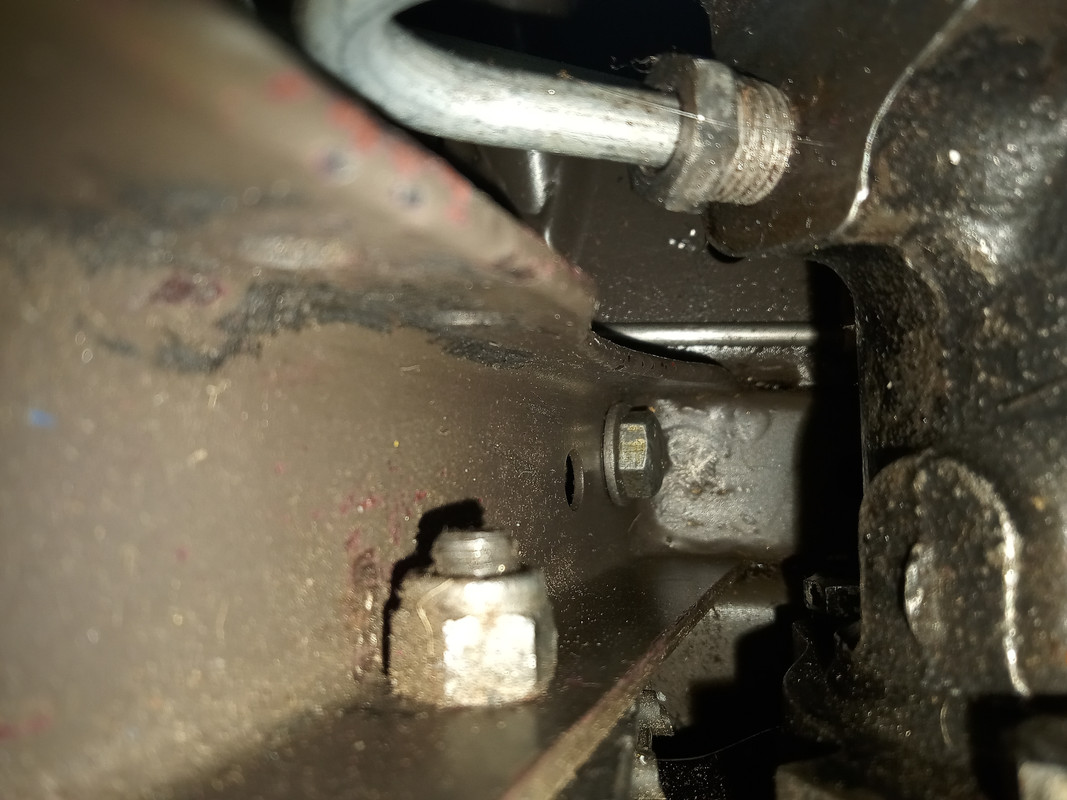
Each bottom bolt/set screw on the trunnions go into captive nuts in the frame, but the top bolts go through the frame and into a nyloc nut. The upper rear is easy to get at but the front is buried in the flanges on the inner sides of the picture frame, and on the driver's side, behind pipework for the power steering.

You can see in this photo how difficult it's going to be yo get a socket on the inner nut.


Image

I've realised it is probably easier to work on the problem nut with the bonnet off the car and to work from the top.

I have a busy week ahead so not much time on the car, but I'll post a progress report, once I have progress to report.

Thanks all.
'71 S3 OTS

Link:
BBcode:
HTML:
Hide post links
Show post links


angelw
Posts: 634
Joined: Sat Feb 16, 2013 8:27 pm
Location: Ballarat, Vic, Australia
Australia

#12 Re: Small but job-stopping problem with the front lower wishbone forward fulcrum shaft...

Post by angelw » Mon Apr 04, 2022 9:10 pm

panamacarrera Wrote:
I've realised it is probably easier to work on the problem nut with the bonnet off the car and to work from the top.
The bonnet is not all that hard to remove, but doing so by not disturbing the attachment of the hinges to the lower valance and disconnecting them from the Bonnet Hinge Frame makes replacing infinitely easier.

However, by raising the front of the car and disconnecting the gas strut from the bonnet (located on the RHS), the bonnet can be opened to the point of standing vertical by either having the front B/Bar over-riders come to rest on wooden blocks, or by securing a tether to prevent the bonnet falling further forward. This will give near the same access as removing the bonnet. The procedure for this is described in the S3 Workshop Manual.

Regards,

Bill

Link:
BBcode:
HTML:
Hide post links
Show post links

User avatar

Topic author
panamacarrera
Posts: 94
Joined: Sun Jul 09, 2017 4:36 pm
Location: Southport, UK
Great Britain

#13 Re: Small but job-stopping problem with the front lower wishbone forward fulcrum shaft...

Post by panamacarrera » Tue Apr 05, 2022 6:49 am

Thanks Bill

You’re tapping into my current thinking…

I’ve had the bonnet off before, and it’s a pain to get off and I have the constant worry that it’s going to get damaged while standing in the corner of the garage.

I’m thinking something similar to the suspension setting tool, the one that goes in the shock absorber mountings, to go in place of the bonnet’s gas strut would hold the bonnet in a vertical position… having said that, depending on progress on the front trunnion bolts, I may need to remove the radiator.

Thanks for the suggestion. 😊
'71 S3 OTS

Link:
BBcode:
HTML:
Hide post links
Show post links

User avatar

lowact
Posts: 627
Joined: Mon Oct 09, 2017 10:05 am
Location: Canberra, Australia
Contact:
Australia

#14 Re: Small but job-stopping problem with the front lower wishbone forward fulcrum shaft...

Post by lowact » Tue Apr 05, 2022 7:54 am

Can you put a ring spanner on it going down the channel from the top, to hold the nut while you unscrew the bolt from the outside?
Might have to undo a couple of the wiring clamps. Here is mine with the wiring moved, its the bolt head you can see (not the nut) because I swapped mine around.
Image
Regards,
ColinL
'72 OTS manual V12

Link:
BBcode:
HTML:
Hide post links
Show post links


jfmassa
Posts: 11
Joined: Wed Jun 26, 2019 3:30 pm
United States of America

#15 Re: Small but job-stopping problem with the front lower wishbone forward fulcrum shaft...

Post by jfmassa » Tue Apr 05, 2022 9:00 pm

I did this job last spring and did not think I could access all the nuts (none were captive). In some cases I had to remove wiring and other obstructions to gain access to the nuts. For the one by the power steering pump I used a flat head screw driver as a wedge between the nut and side frame to hold the nut while removing the bolt. It was also challenging, on some bolts, to to get the washer and nut started when reinstalling. Very frustrating!! I am sure you might have better experience/techniques to mitigate this issue. Best of luck!

Joe

Link:
BBcode:
HTML:
Hide post links
Show post links

User avatar

Topic author
panamacarrera
Posts: 94
Joined: Sun Jul 09, 2017 4:36 pm
Location: Southport, UK
Great Britain

#16 Re: Small but job-stopping problem with the front lower wishbone forward fulcrum shaft...

Post by panamacarrera » Tue May 17, 2022 11:28 am

Just to close of this post, here's how I got on.

Each upper wishbone trunnion is held on by two bolts that pass through tubes set into the front frame and attach to nyloc bolts on the inner side.

Each lower wishbone trunnion is attached at the top in the same way as the upper wishbone trunnions but the lower attachment is by a set screw that goes into a captive thread in the frame.

Getting a spanner onto the nyloc nuts isn't easy, the rearward nuts can be reached by removing the air filter boxes and passing the spanner though the engine mounts while the forward bolts, on the picture frame, by removing the top cross member of the picture frame.

All my suspension parts are at the platers currently, so I still have to go through reassembly, which Joe says isn't easy, but the job has come a long way since I started this post.

Thanks to all

Nigel
'71 S3 OTS

Link:
BBcode:
HTML:
Hide post links
Show post links

Post Reply Previous topicNext topic