Update of where this tool is at:
Available to purchase as a FULL set or a HALF set. FULL set includes 8 holding plates, 4 holding bolts, 2 aluminium blocks, weighs 0.75 kg. HALF set is half of the above.
FULL set is recommended for fitting new IRS mounts to all e-types, including S3’s and 2+2’s. For smaller cars, where the IRS is able to be rotated into position, it is possible that a HALF set may be sufficient, although I haven’t tried this. HALF set also enables incrementally lower postage cost. With a HALF set you will need to find your own substitute for the 2nd aluminium block.
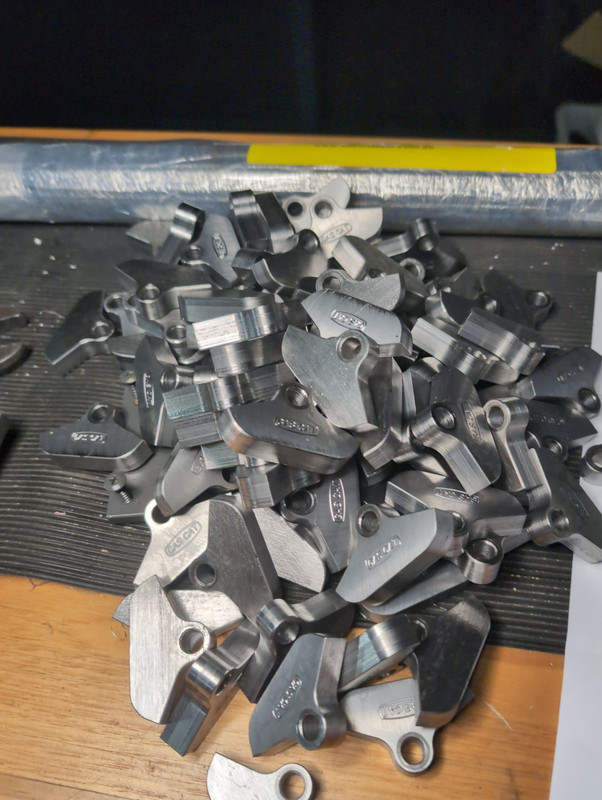
The following costs are only if purchased via this forum, after some “mass production”. Otherwise, costs would be a lot higher. Fun fact: Ebay seller fees are more than 13% of the total, including postage and taxes.
The following costs INCLUDE tracked shipping (economy air, nom. 2 weeks) via Australia Post.
Australia: FULL set = AUD 265, HALF set = AUD 141
New Zealand: FULL set = AUD 275, HALF set = AUD 151
International: FULL set = AUD 296, HALF set = AUD 172
The above costs do NOT include import duty and tax. I will declare HS/TARIC code 8205.70 (hand tools - steel clamps and the like). Use this code as the product description in
https://www.simplyduty.com/import-calculator/ to calculate the import duty and tax that you may (?) have to additionally pay to your king and country, if they notice.
Purchasing process via this forum:
PayPal. The above costs INCLUDE all PayPal (seller) fees.
You PM or email to me (Colin,
lowact@gmail.com), what you would like to buy, including the delivery address. I will reply confirming the corresponding price (as above), also earliest shipping date (based on stock availability) and provide an invoice number. You send the above AUD to my paypal account:
lowact@gmail.com, referencing the invoice number. I will pack, dispatch and reply with the tracking number.
Usage guide will be included, initially based on my e-type-s3 experience, i.e.:
Independent Rear Suspension (IRS) Installation Tool
1. For holding IRS rubber mounts compressed during installation of the IRS units fitted to some Jaguar, Aston Martin and Daimler cars during 1961-1992. Before using, please read these guidelines entirely.
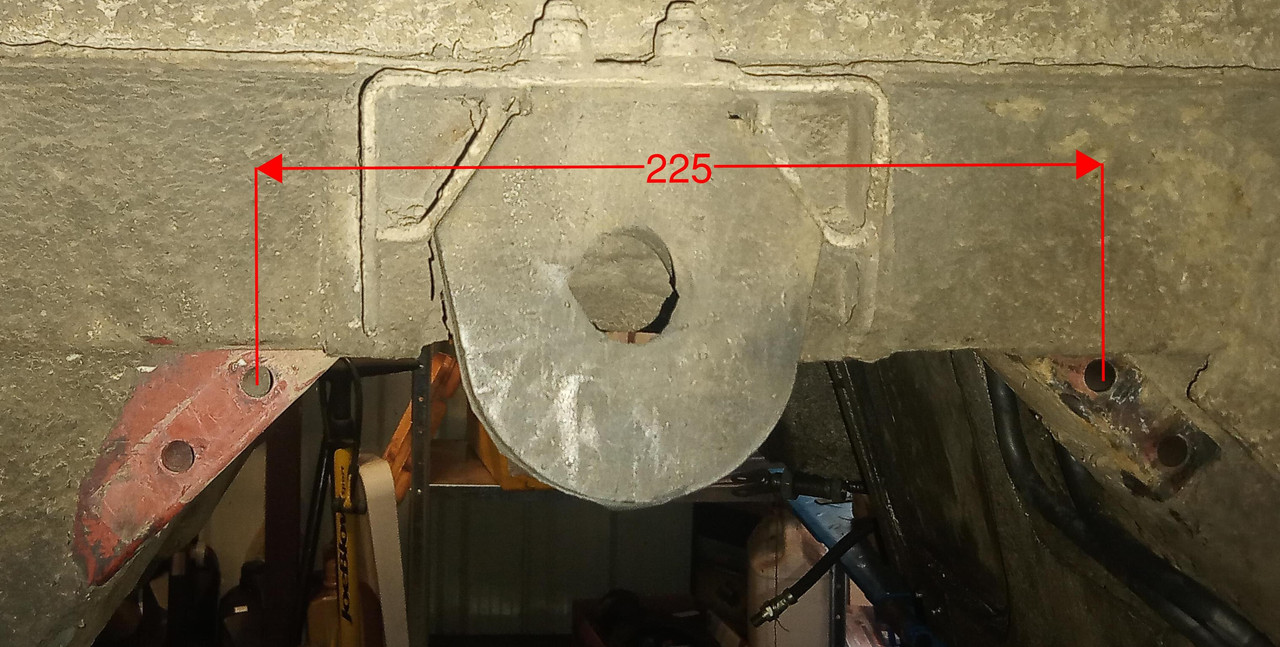
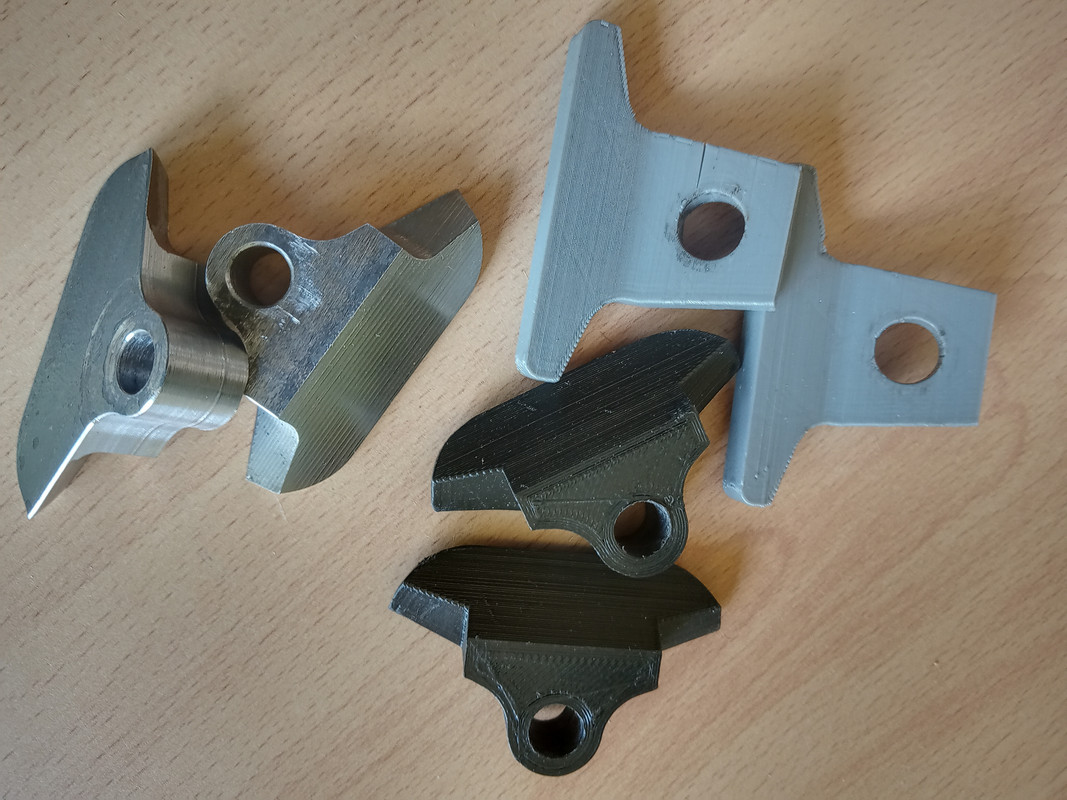
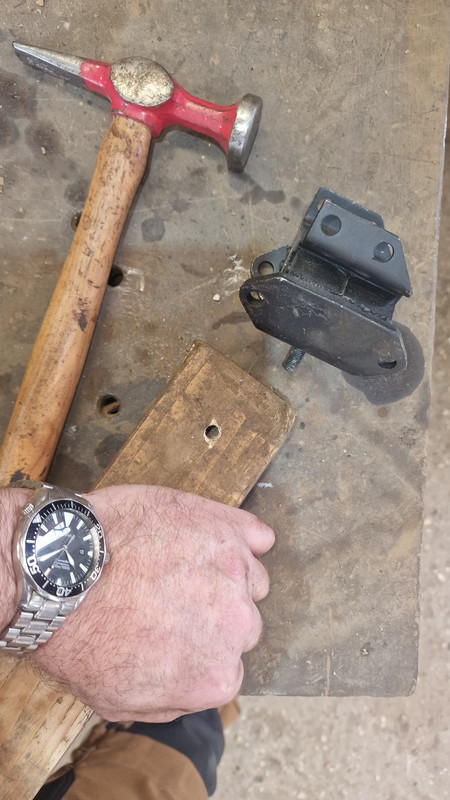
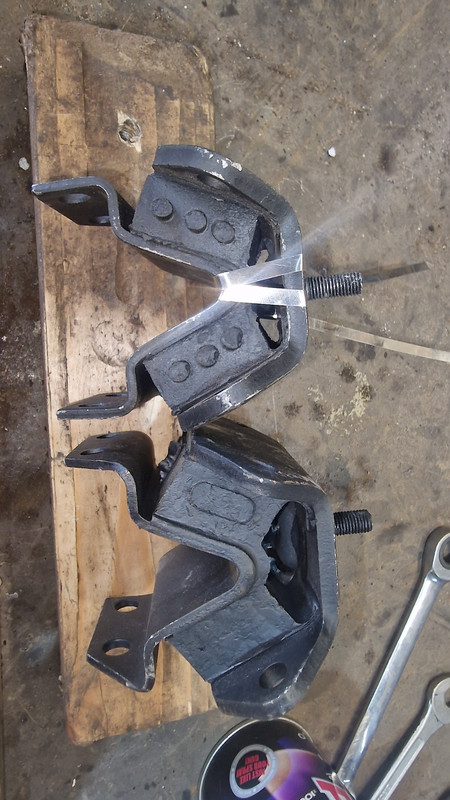
2. Definitions: The IRS mounts that are compressed by this tool comprise elastomeric material that is bonded between a steel inner bracket, that bolts to the chassis of the car, and a heavier steel outer bracket, that bolts to the IRS:
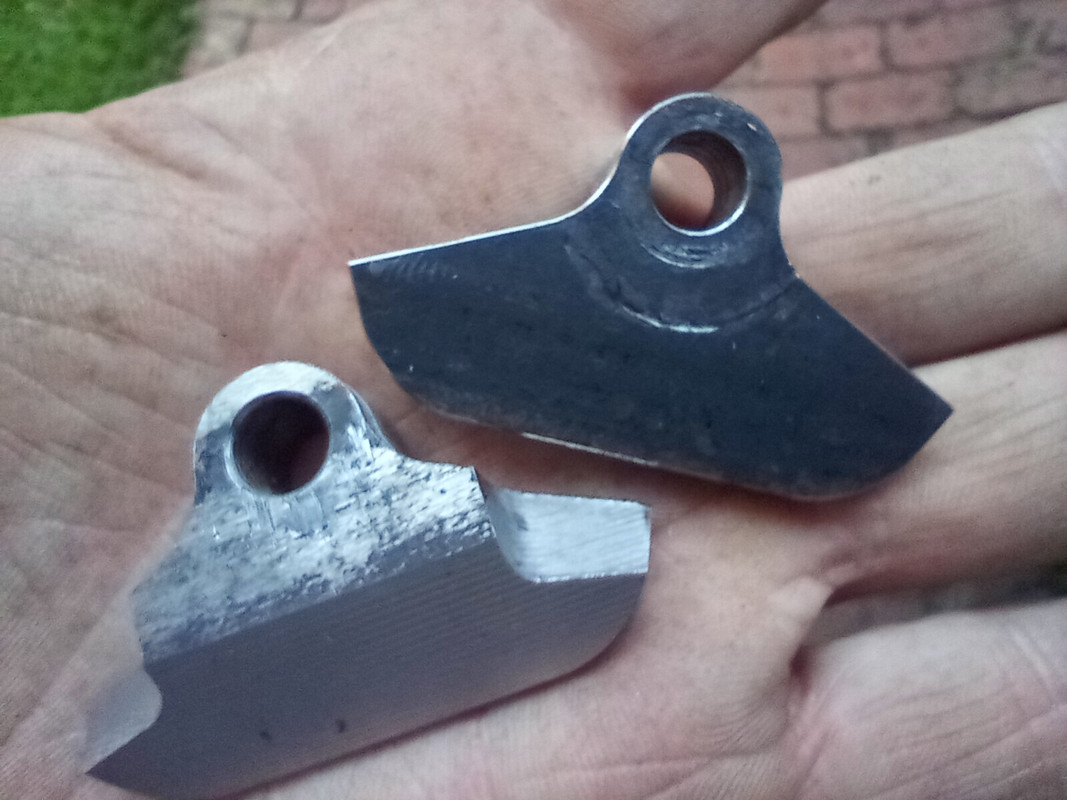
3. Tool comprises steel clamping plates, holding bolts and aluminium blocks, the latter provide for the IRS mounts on Jaguar E-type’s to be readily and safely compressed without distortion. Other cars would require “user-made” blocks of different dimensions.
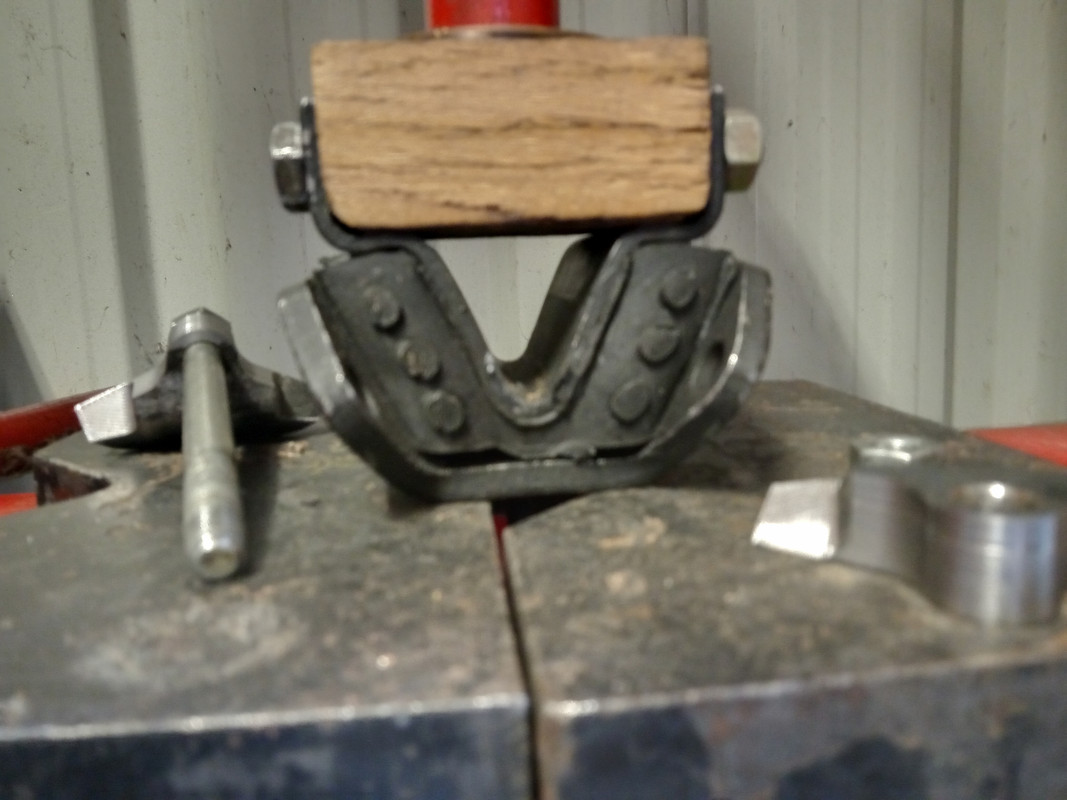
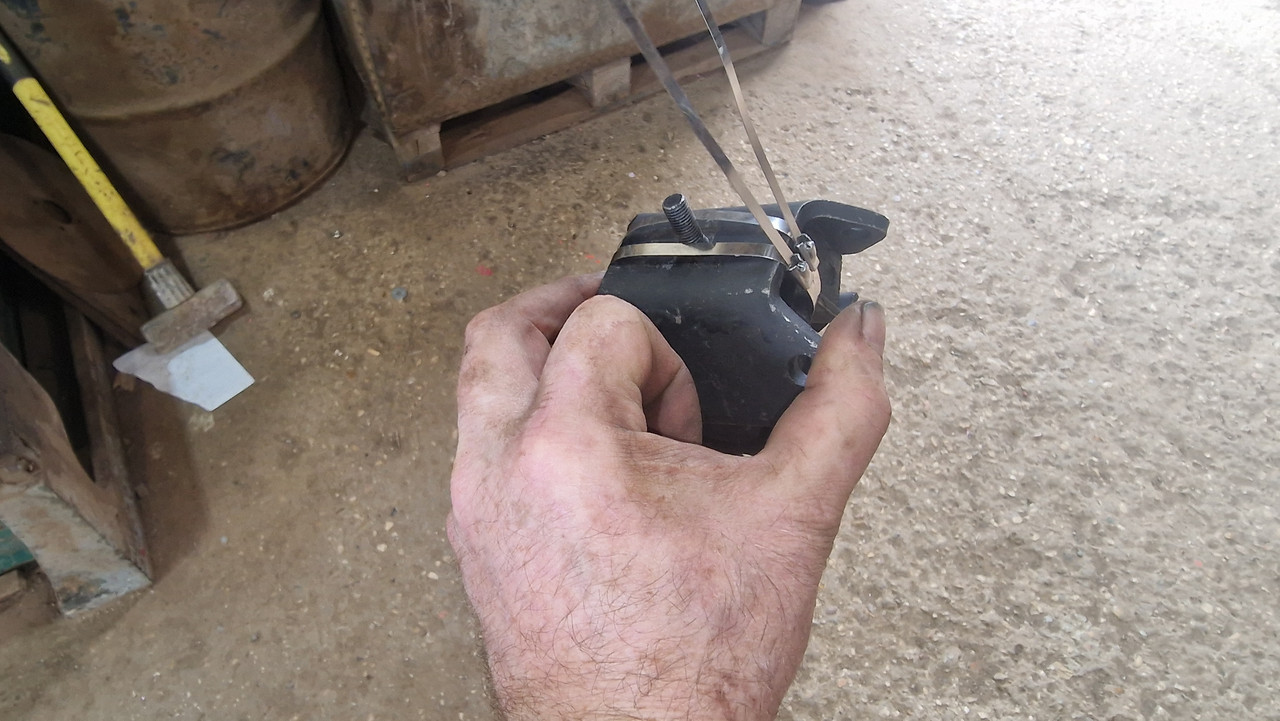
4. Place the aluminium blocks onto an IRS mount; one block should be lightly fastened (fastener not included) between the flanges of the inner bracket. The other should be placed over the centre stud that protrudes from underneath the mount’s outer bracket.
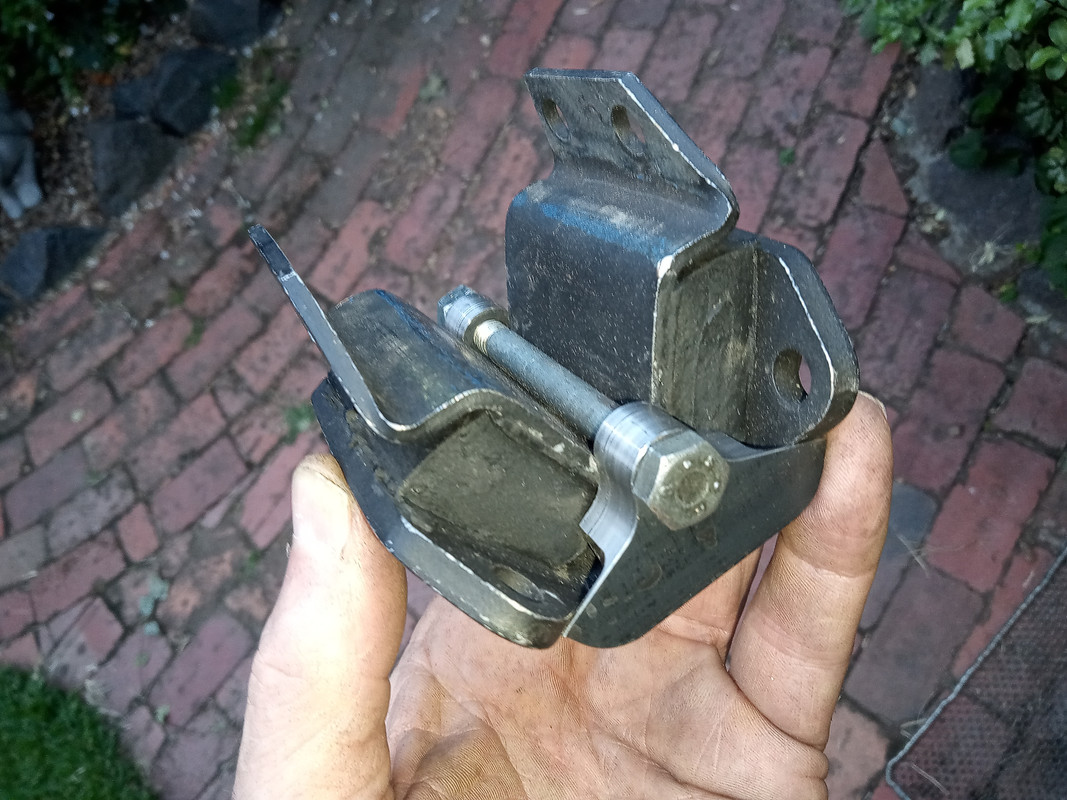
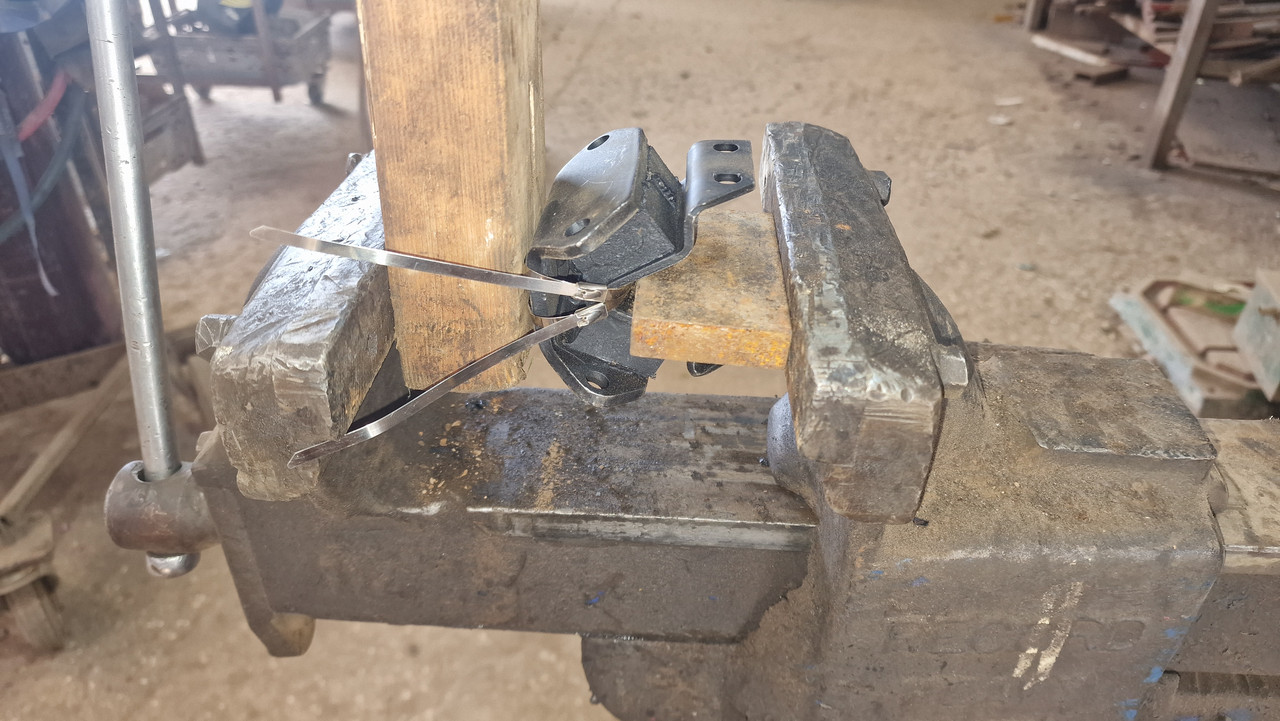
5. Use a suitable vice or press to compress the IRS mount between the aluminium blocks. The compression req’d is to enable a holding bolt, along the “valley” of the inner bracket, to connect two clamping plates under the ends of the outer bracket, that are fully in contact with the ends of the mount’s inner bracket. Ensure that the head of the holding bolt is on the side that is opposite the chamfered end of the inner bracket, so that the holding bolt can be subsequently removed (downwards) after the IRS has been installed. Lightly tighten the holding bolt into this position.
6. With the bolt holding the clamps lightly tightened into position, release the press/vice. The elastomeric material will expand until any gap between the “tips” of the clamping plates and the outer bracket (underneath the wings) is taken up. Take care to keep fingers clear of these gaps when releasing the press/vice.
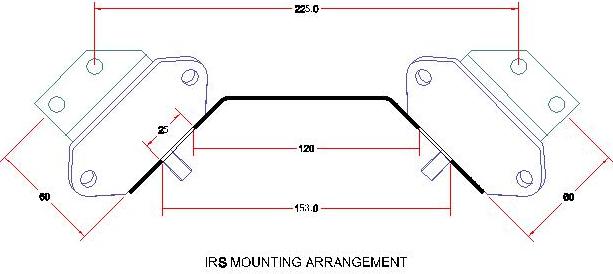
7. Remove the aluminium blocks and install the IRS mount onto the car. If the mount is new and upgraded (thicker and or harder elastomeric) and was over-compressed, it may be necessary to prise the aluminium block from between the flanges of the inner bracket. This demonstrates the principal purpose of the aluminium blocks; to prevent the compressed elastomeric forcing the inner bracket to fold inwards. Promptly installing the compressed IRS mount onto the car is recommended. Note – for Jaguar E-type the specified distance between the flanges of the inner bracket is 2-3/8” ± 1/32”.
8. Repeat steps (4) to (7) for all IRS mounts.
9. Use a floor lift to raise the (330 lb) IRS unit up to the mounts. If the car and IRS are level and square and the lift is vertical, when the IRS unit is raised the bolt holes, for attaching the IRS unit to its mounts, will all be in alignment. Install the bolts but do not tighten until all are installed. If any bolt holes are not in alignment, one technique is to slightly loosen the holding bolt, allowing the expanding elastomeric to force the holes into alignment. Don’t loosen the holding bolts prematurely; to retighten you will need to put the mount back in the vice.
10. Technique for loosening the holding bolts: hand not power tools, hold the nut and turn the bolt. As you loosen the bolt the clamps will slide up and out along the underside of the lower bracket, allowing the compression to be gradually and smoothly released in a controlled manner, as evidenced by the loosening being stiff, all the way to the end. If you do opposite, hold the bolt and loosen the nut, the plates may be temporarily caught up on the bolt thread or some burr on the underside of the lower bracket, allowing the nut to spin loose without the compression releasing until it suddenly lets go with a bang. Irrespective, whenever loosening a holding bolt, if it starts to loosen prematurely, stop and give it a light tap until the loosening becomes stiff again.
11. Connect the radial arms before or after removing the holding bolts and lowering the hoist, depending on the alignment.