


Hi everyone,
I am still struggling with the rubber seals under the bonnet. After pictures from colleagues on the forum and visitiung a memberin Devon I have managed to get the main rubbers on the mudguards pop riveted on but I am now left with two pre-drilled steel strips and the rubbers. I know one goes toward the mouth of the bonnet under the air ram on the right, but there are no obvious holes or location for one on the left on my E type.
I can't see these on the "Factory Fit" images. Would someone be ever so helpful and send me a photo of the positions on their E type S1 please?
Many thanks in anticipation
Steve
Mudguard rubbers under the bonnet
-
 stephen.mather
Topic author - Posts: 31
- Joined: Wed Sep 17, 2014 11:32 am
- Location: Clevedon, Somerset
#1 Mudguard rubbers under the bonnet
Steve M.
Somerset, UK.
E type S1 3.8 FHC No. 860671
Somerset, UK.
E type S1 3.8 FHC No. 860671
| Link: | |
| BBcode: | |
| HTML: | |
| Hide post links |
-
stephen.mather
Topic author - Posts: 31
- Joined: Wed Sep 17, 2014 11:32 am
- Location: Clevedon, Somerset
#2
Further to my previous post about mudguard rubbers: I mean I can't see a picture on the "Factory fit" of a right hand rubber. Was there one on the Series 1 ?
Steve
Steve
Steve M.
Somerset, UK.
E type S1 3.8 FHC No. 860671
Somerset, UK.
E type S1 3.8 FHC No. 860671
| Link: | |
| BBcode: | |
| HTML: | |
| Hide post links |
-
stephen.mather
Topic author - Posts: 31
- Joined: Wed Sep 17, 2014 11:32 am
- Location: Clevedon, Somerset
#4
Hi Neil..Thanks for that.
The problem is with the right hand side. I have the rubber fitted to the main mudguard. Is there a smaller one on the right hand side of the bonnet, as on the left ,on the S1?
Steve
The problem is with the right hand side. I have the rubber fitted to the main mudguard. Is there a smaller one on the right hand side of the bonnet, as on the left ,on the S1?
Steve
Steve M.
Somerset, UK.
E type S1 3.8 FHC No. 860671
Somerset, UK.
E type S1 3.8 FHC No. 860671
| Link: | |
| BBcode: | |
| HTML: | |
| Hide post links |
#5
Hi Steve,
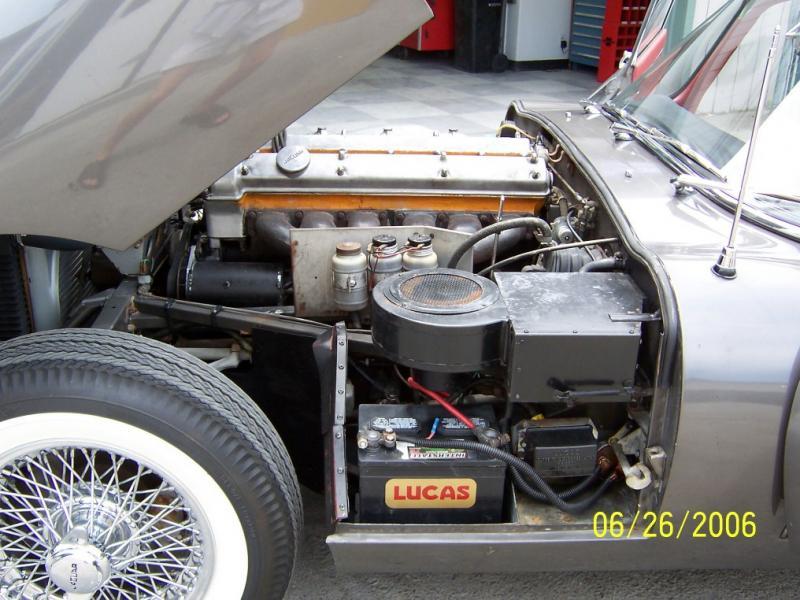
The rubber continues all the way round (in a continuous strip) from the mudguard down to the sill edge. There are 2 strips of metal - 1 curly one for the mudguard & one about 6 inches long (& 3 rivet holes) to take it to edge of sill (similar to other side near battery).
The last photo on page 1 of the link above shows it.
HTH
Neil
Neil
1962 S1 OTS
1967 S1 FHC
1962 S1 OTS
1967 S1 FHC
| Link: | |
| BBcode: | |
| HTML: | |
| Hide post links |

#6
No.stephen.mather wrote:Is there a smaller one on the right hand side of the bonnet, as on the left ,on the S1?
David Jones
S1 OTS OSB
1997 Porsche 911 Guards Red
2024 Lexus LBX
Add your E-Type to our World Map: http://forum.etypeuk.com/viewtopic.php?f=1&t=1810
S1 OTS OSB
1997 Porsche 911 Guards Red
2024 Lexus LBX
Add your E-Type to our World Map: http://forum.etypeuk.com/viewtopic.php?f=1&t=1810
| Link: | |
| BBcode: | |
| HTML: | |
| Hide post links |
-
stephen.mather
Topic author - Posts: 31
- Joined: Wed Sep 17, 2014 11:32 am
- Location: Clevedon, Somerset
#7
Hi again
Yes, I see, but is there anything on the right hand side of the bonnet??
Many thanks
Steve
Yes, I see, but is there anything on the right hand side of the bonnet??
Many thanks
Steve
Steve M.
Somerset, UK.
E type S1 3.8 FHC No. 860671
Somerset, UK.
E type S1 3.8 FHC No. 860671
| Link: | |
| BBcode: | |
| HTML: | |
| Hide post links |
#8
No
David Jones
S1 OTS OSB
1997 Porsche 911 Guards Red
2024 Lexus LBX
Add your E-Type to our World Map: http://forum.etypeuk.com/viewtopic.php?f=1&t=1810
S1 OTS OSB
1997 Porsche 911 Guards Red
2024 Lexus LBX
Add your E-Type to our World Map: http://forum.etypeuk.com/viewtopic.php?f=1&t=1810
| Link: | |
| BBcode: | |
| HTML: | |
| Hide post links |
-
stephen.mather
Topic author - Posts: 31
- Joined: Wed Sep 17, 2014 11:32 am
- Location: Clevedon, Somerset
#9
Thanks to Neil and David for clearing this up.
I think we are on the way with these rubbers.
Steve
I think we are on the way with these rubbers.
Steve
Steve M.
Somerset, UK.
E type S1 3.8 FHC No. 860671
Somerset, UK.
E type S1 3.8 FHC No. 860671
| Link: | |
| BBcode: | |
| HTML: | |
| Hide post links |
-
alanfaille
- Posts: 2
- Joined: Thu Aug 27, 2015 1:19 am
- Location: Chile
#10 bolts and washers joining the bonnet
Hi, can anyone help me indicating if the bolts and oval washers to asemble to bonnet together should be galvanized or painted body colour ? mu car is a 1964 S1, 4,2 coupe.
Alan Faille
Old Car enthousiaste
Old Car enthousiaste
| Link: | |
| BBcode: | |
| HTML: | |
| Hide post links |
#11
Body colour as the bonnet was painted after it was assembled and test fitted to the car.
David Jones
S1 OTS OSB
1997 Porsche 911 Guards Red
2024 Lexus LBX
Add your E-Type to our World Map: http://forum.etypeuk.com/viewtopic.php?f=1&t=1810
S1 OTS OSB
1997 Porsche 911 Guards Red
2024 Lexus LBX
Add your E-Type to our World Map: http://forum.etypeuk.com/viewtopic.php?f=1&t=1810
| Link: | |
| BBcode: | |
| HTML: | |
| Hide post links |


#12 Re: Mudguard rubbers under the bonnet
This seems to be the best post to attach my question, I can't see any pictures of these areas that answer them.
My RH bonnet closing valence, if I can call it that, meaning the vertical panel that drops down to meet and match up with the RH mudguard, doesn't match the latter at all.

I had never noticed this in 20 years ownership, and now that's it's too late to do anything about it (without it becoming a dock-yard job) it's staring me in the face.
My mudguard would have been new 30 years ago, so was the bonnet.
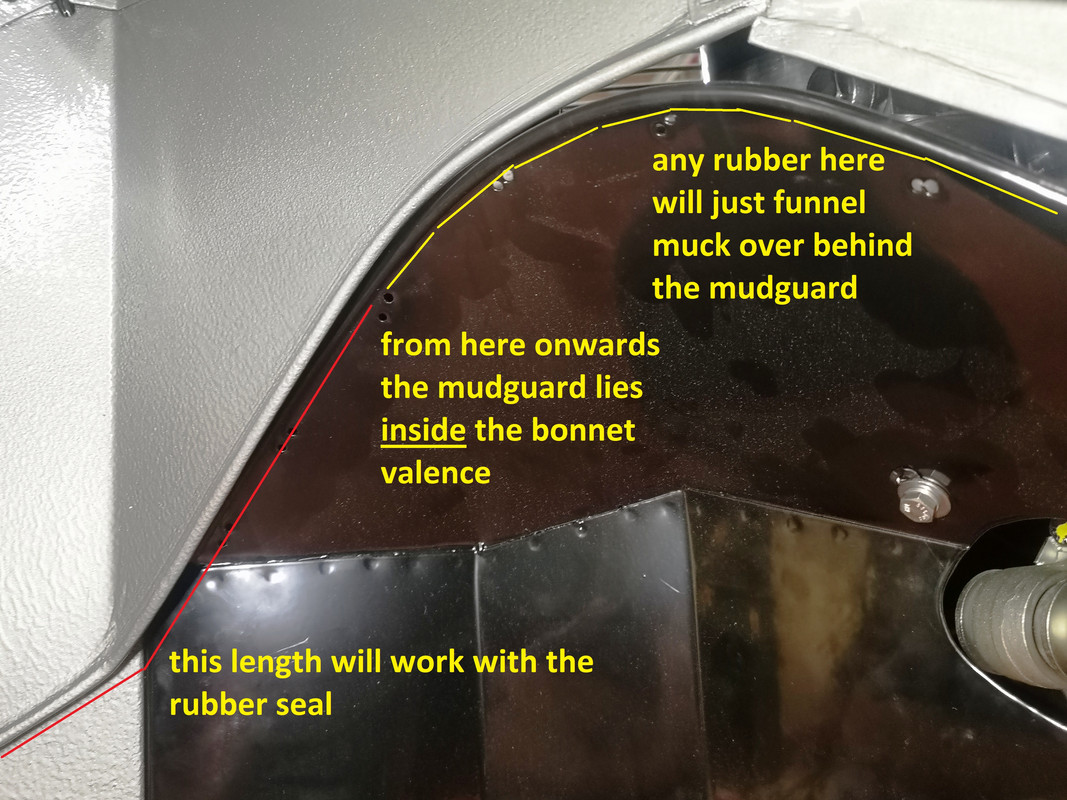
The outermost section, ie the straight portion, and the beginning of the rising curve, will accept the rubber rivetted strip that then gets "chopped" by the closing bonnet.

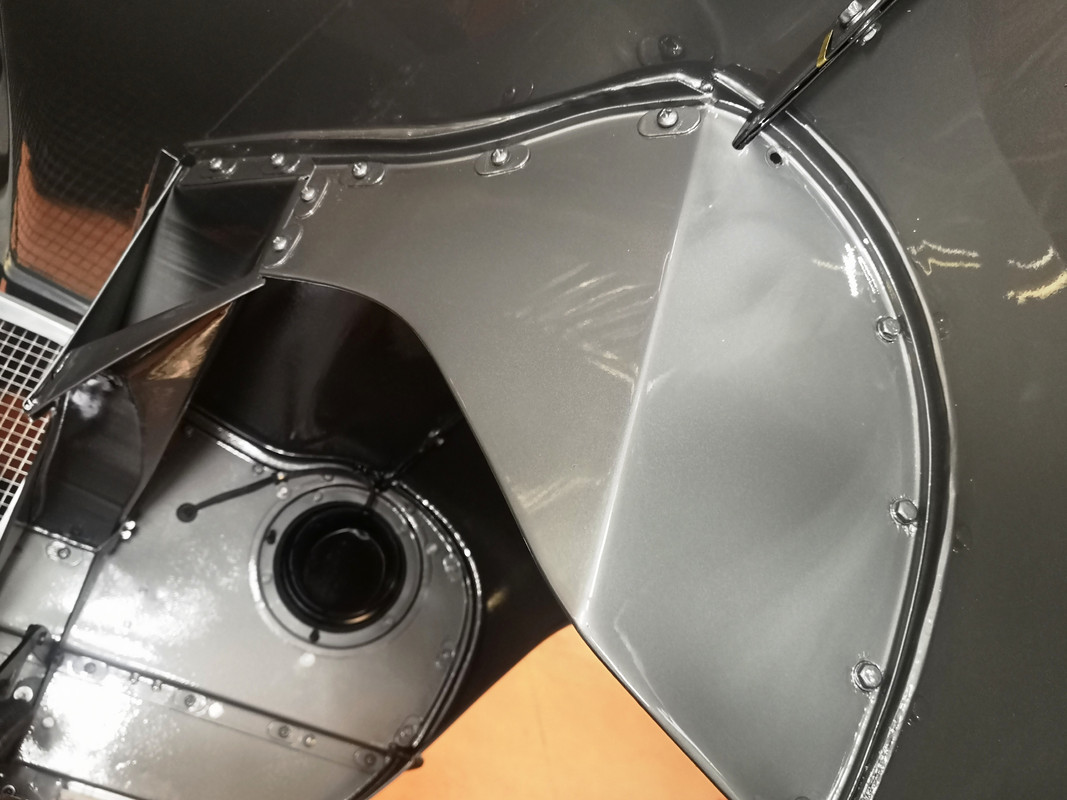
But beyond a certain point the crown of the curve lies inside the bonnet panel, and so not only it doesn"t seal against it, but any rubber edging will actually behave like a funnel to encourage muck to fall behind the mudguard.
There appears to be only one version of this mudguard (BD19522 becoming BD20664), so I don't think I've got the wrong part.
It would actually make more sense for me to add the rubber seal to the bonnet, hanging down over the valence, in this area, if the intention were to keep crap out of the engine bay.
Has anyone else had these sorts of difficulties, please, and/or could show some pictures of what a correctly- meshing bonnet-to-mudguard should look like ?
I could set about modifying (heavily) the shape of the mudguard to espouse the bonnet, shame the former has just been powder-coated, but I'm reluctant to start until I understand where my current parts are all wrong.
My RH bonnet closing valence, if I can call it that, meaning the vertical panel that drops down to meet and match up with the RH mudguard, doesn't match the latter at all.
I had never noticed this in 20 years ownership, and now that's it's too late to do anything about it (without it becoming a dock-yard job) it's staring me in the face.
My mudguard would have been new 30 years ago, so was the bonnet.
The outermost section, ie the straight portion, and the beginning of the rising curve, will accept the rubber rivetted strip that then gets "chopped" by the closing bonnet.
But beyond a certain point the crown of the curve lies inside the bonnet panel, and so not only it doesn"t seal against it, but any rubber edging will actually behave like a funnel to encourage muck to fall behind the mudguard.
There appears to be only one version of this mudguard (BD19522 becoming BD20664), so I don't think I've got the wrong part.
It would actually make more sense for me to add the rubber seal to the bonnet, hanging down over the valence, in this area, if the intention were to keep crap out of the engine bay.
Has anyone else had these sorts of difficulties, please, and/or could show some pictures of what a correctly- meshing bonnet-to-mudguard should look like ?
I could set about modifying (heavily) the shape of the mudguard to espouse the bonnet, shame the former has just been powder-coated, but I'm reluctant to start until I understand where my current parts are all wrong.
Rory
3.8 OTS S1 Opalescent Silver Grey - built May 28th 1962
3.8 OTS S1 Opalescent Silver Grey - built May 28th 1962
| Link: | |
| BBcode: | |
| HTML: | |
| Hide post links |
-
Gfhug
- Posts: 3806
- Joined: Thu Jun 19, 2014 3:08 pm
- Location: Near Andover, Hampshire,in D.O. Blighty

#13 Re: Mudguard rubbers under the bonnet
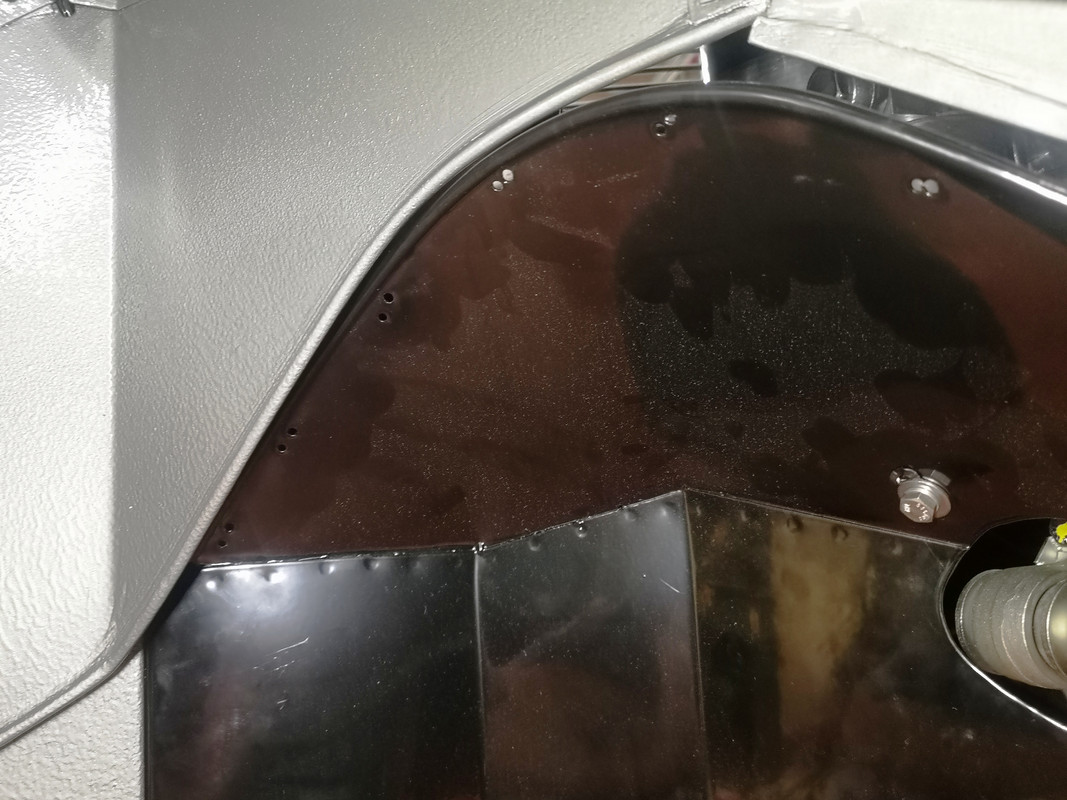
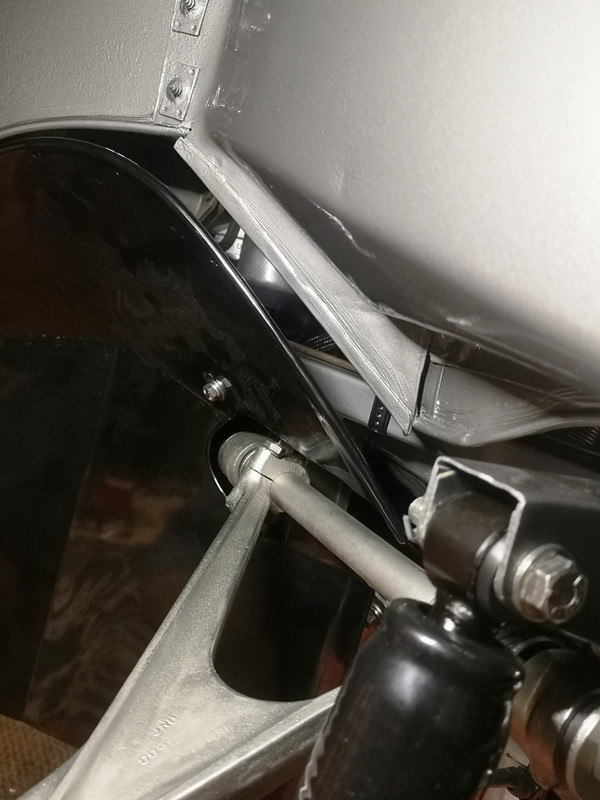
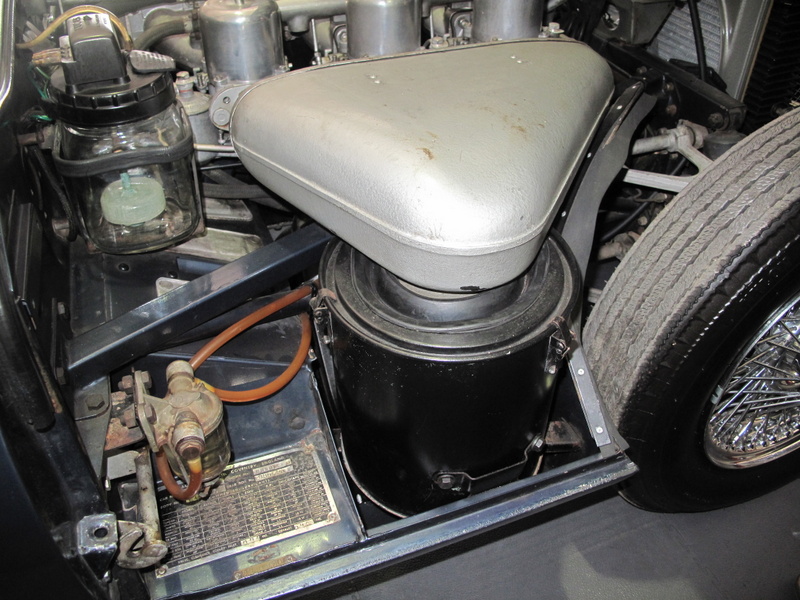
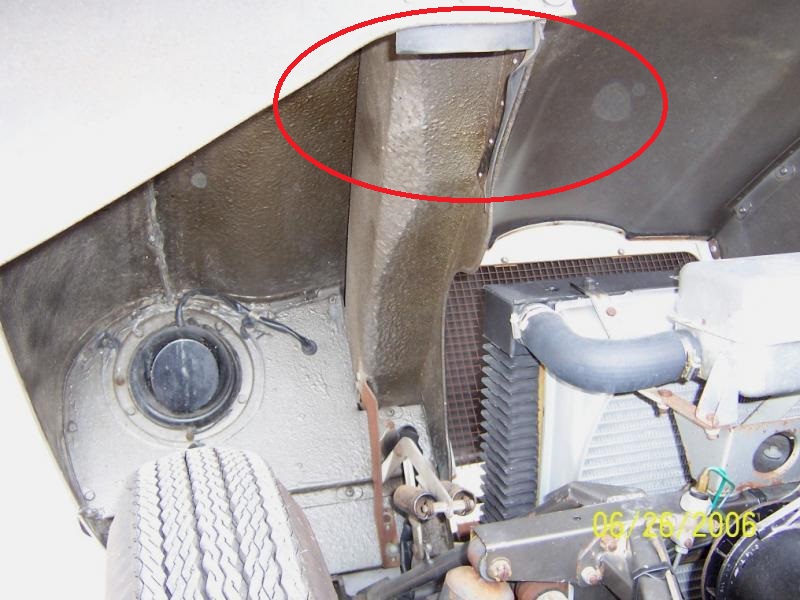
Rory, an image that might help

The gap is minimal such that the rubber strip is almost trapped between bonnet and wing. Rubber attached to wing in two strips as wouldn’t go neatly along the whole length. And pressed down by the bonnet to seal between the two. Your idea of attaching to the bonnet seems like a sensible work around without creating a massive job. Good luck.
Geoff
S2 FHC Light Blue
S2 OTS LHD - RHD full restoration
S2 OTS LHD - RHD full restoration
| Link: | |
| BBcode: | |
| HTML: | |
| Hide post links |
#14 Re: Mudguard rubbers under the bonnet
Thanks Geoff, yours looks different in that the bonnet lowers down ONTO the rubber seal on the straight section, whereas on mine the bonnet appears to be designed to guillotine the rubber lip and fully overlap it.
Still, even on yours, theres an area where the rubber is acting as an encouragement for crap to pass behind it.
I think I have invented a new aspect of our cars for Anoraks to suck their teeth over.
I’m going to take a slitting disc to mine and completely reshape the wired summit so that it falls inside, not outside, the bonnet valence.
Rory
3.8 OTS S1 Opalescent Silver Grey - built May 28th 1962
3.8 OTS S1 Opalescent Silver Grey - built May 28th 1962
| Link: | |
| BBcode: | |
| HTML: | |
| Hide post links |
#15 Re: Mudguard rubbers under the bonnet
Hi Rory,
I don't think there is an issue with the parts themselves, the problem you have has probably been created by the bonnet fitting. That is in endeavoring to get the best panel gap at the back of the bonnet/bulkhead by altering the hinges or removing shims you have closed the gap where the rubber would normally lie, resulting in the guillotine action. Probably similar on the other side.
Your solution of cutting the mudguard looks like the easiest way to overcome this.
good luck
Tony
Tony
69 Series 2 2+2 auto
69 Series 2 2+2 auto
| Link: | |
| BBcode: | |
| HTML: | |
| Hide post links |
-
Gfhug
- Posts: 3806
- Joined: Thu Jun 19, 2014 3:08 pm
- Location: Near Andover, Hampshire,in D.O. Blighty
#16 Re: Mudguard rubbers under the bonnet
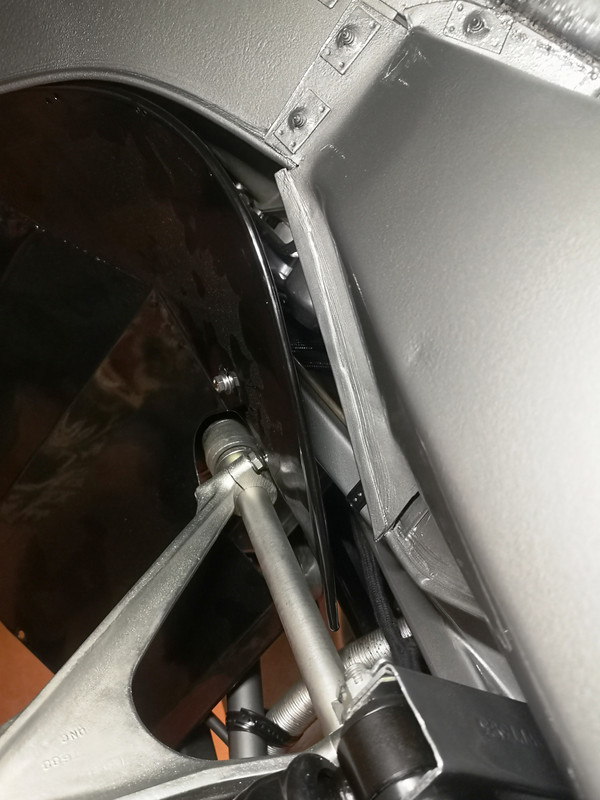
The bonnet just about touches or rests against the rubber all the way, with only the odd crease in the rubber to allowing any crud to go past. I’ve modelled the fitting of the OTS sill end plate to fit in a similar way but haven’t got the curved section in place yet, as like so much it’ll need fettling to fit.
I’d rather hope that others can post photos of theirs to help you.
Geoff
I’d rather hope that others can post photos of theirs to help you.
Geoff
S2 FHC Light Blue
S2 OTS LHD - RHD full restoration
S2 OTS LHD - RHD full restoration
| Link: | |
| BBcode: | |
| HTML: | |
| Hide post links |
#17 Re: Mudguard rubbers under the bonnet
Thanks for the various inputs.
In using the word guillotine, I was not implying that the rubbers were being cut by the bonnet, rather that they were meant to act as a sealing lip which was meant to be kissed and deformed by the bonnet valence as it brushed past.
This is corroborated by the numerous pictures showing the rubbers at the sill ends that have been flattened downwards by the bonnet's overlapping flange.
The bonnet movement "backwards" on my car is probably of the order of between 3mm and 8mm, depending on which car you're taking as a reference, and as such doesn't explain the issues with the RH mudguard, which are of the order of centimeters as regards its lateral alignment.
Since the principle of the RH mudguard rubber seems well-established -
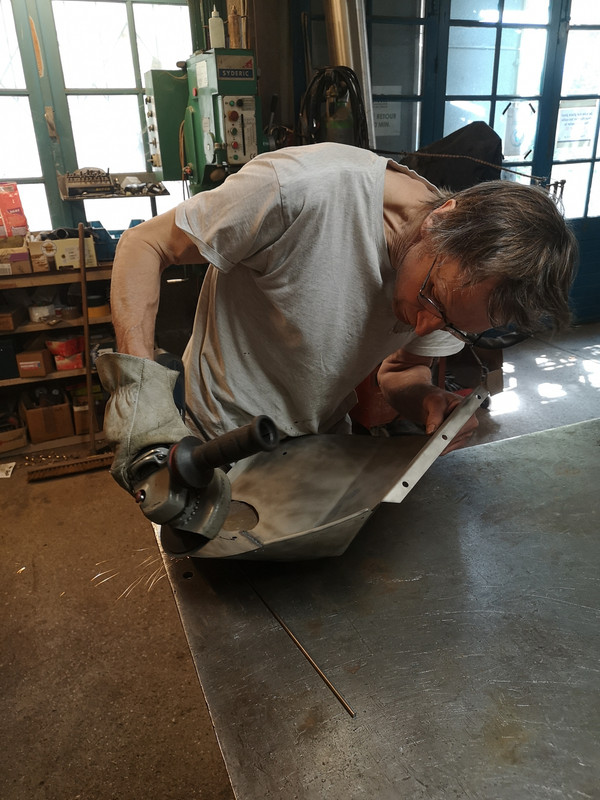
- I decided to make the best of what I had, and started by taking the painful decision to burn off the recently-applied powder-coating - best done outdoors ;-(( - then took the slitting saw to the 'guard.
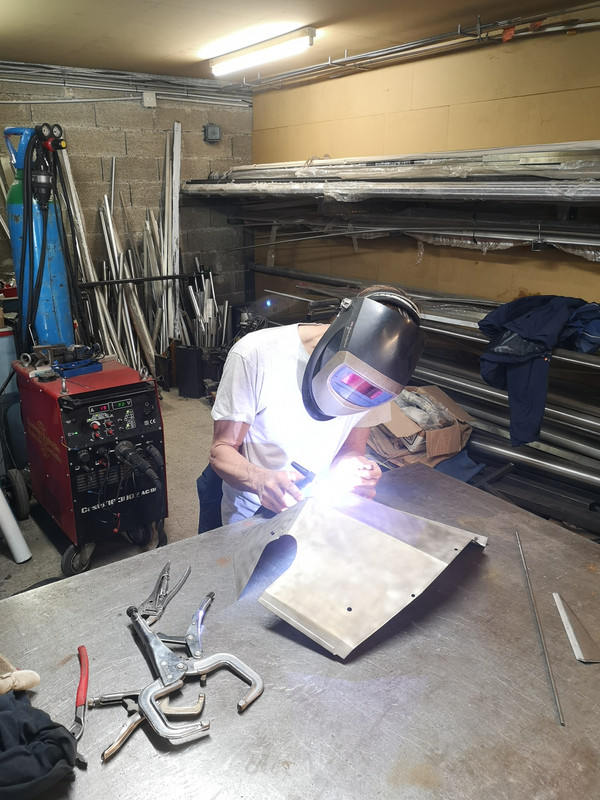
After a few hours at the dock-yard, I passed the cut-and-chopped mess to friend Yvan who TIG-ged it all back together, added my extra panel, and finished it all off with a fake wire-edge made, I'm ashamed to say, of 5mm bar.
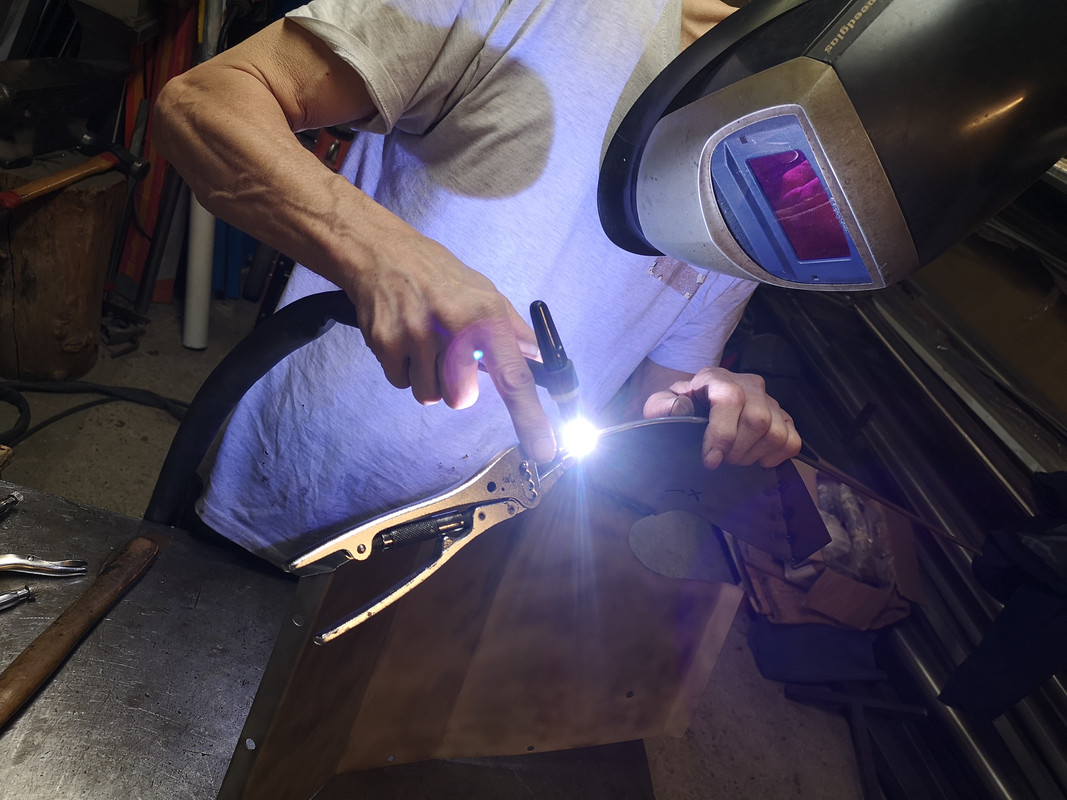
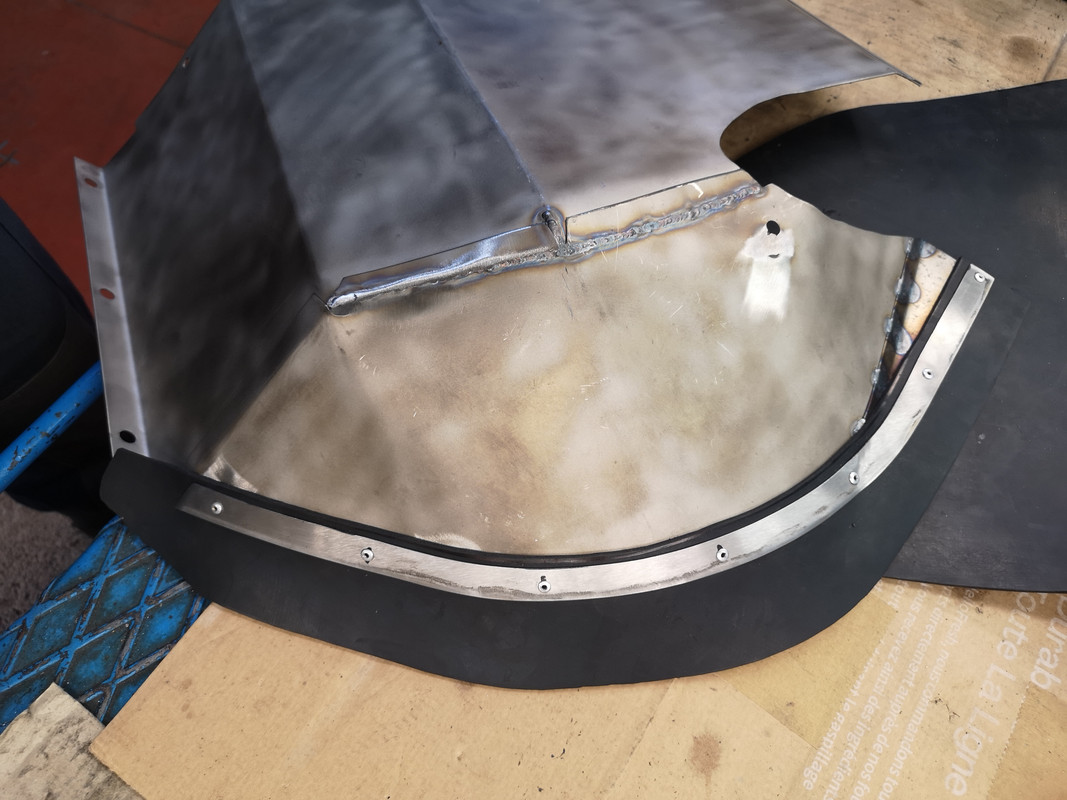
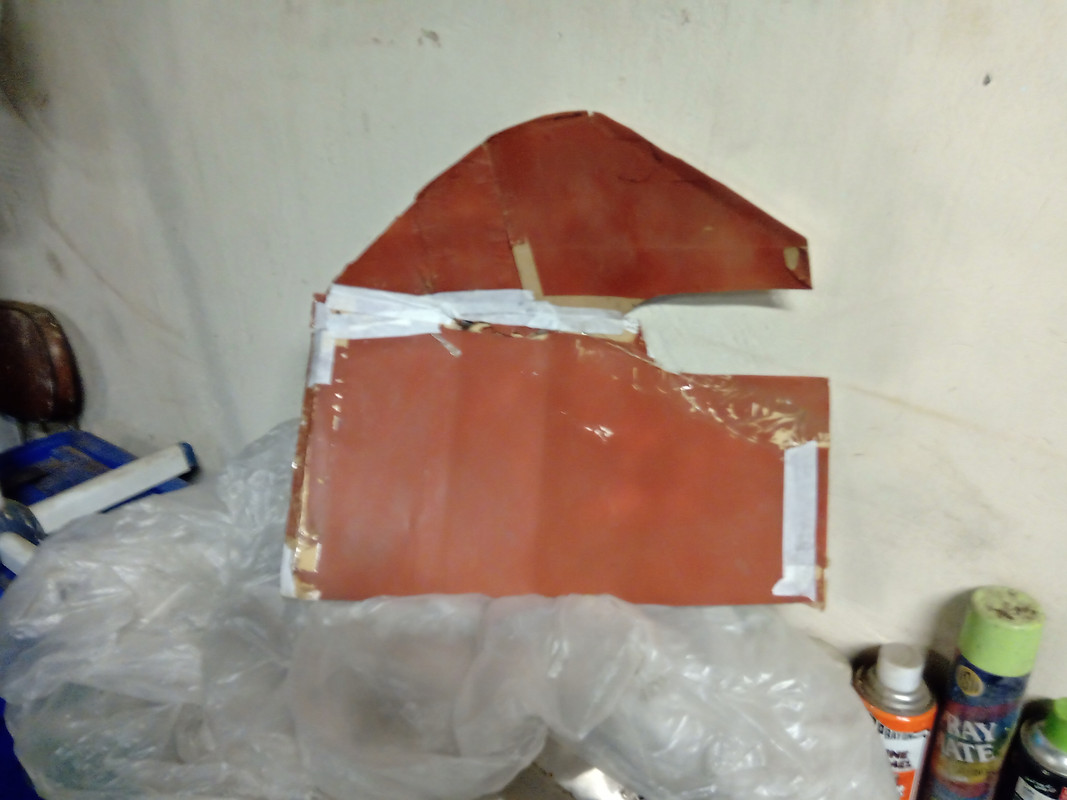
It would have been nice to be able to reattach an EPDM lip using the plated and ready-to-rivet strip seen here, but of course the shape was now all wrong so I had to cut a new one from 1mm sheet.
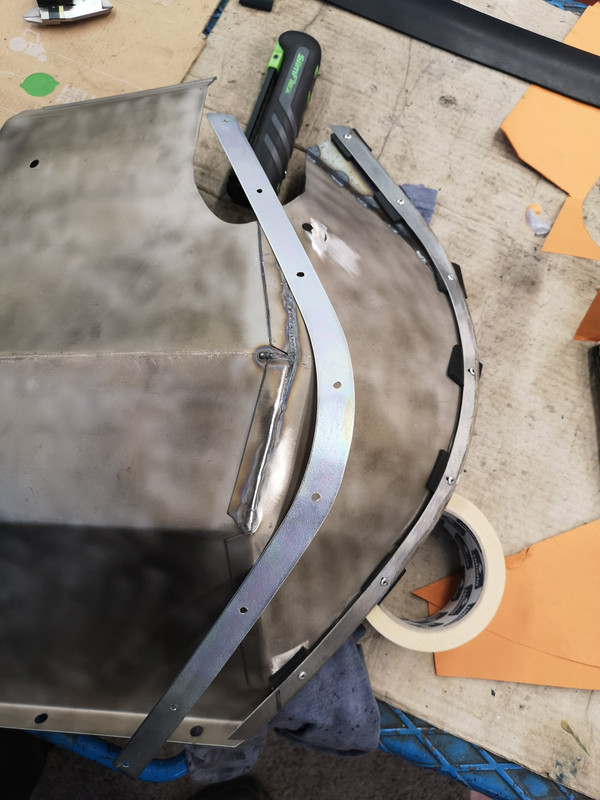
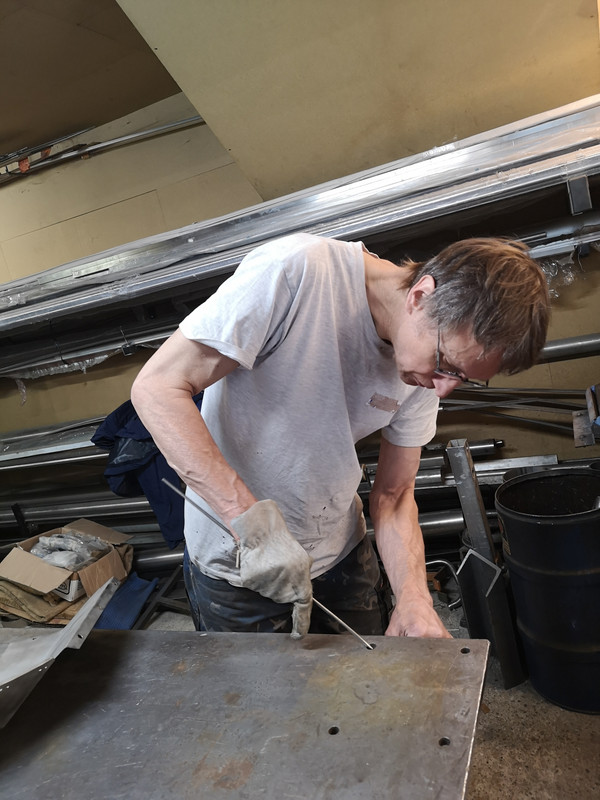
It's worth remembering that the 3mm EPDM puts any pre-drilled holes right out of alignment over the curved length, so adding small sections, drilling as you go, guarantees subsequent alignment.
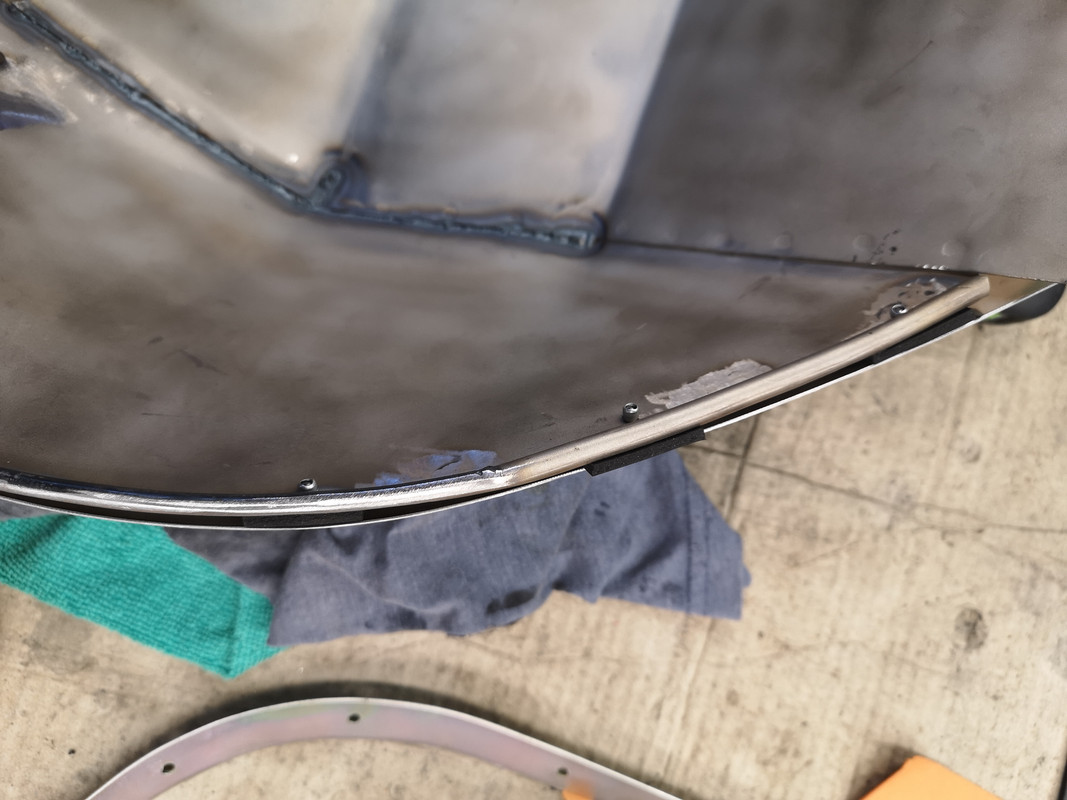
Beginning with an overly-wide band -
- you can then whittle it down once you can see where the gaps lie.
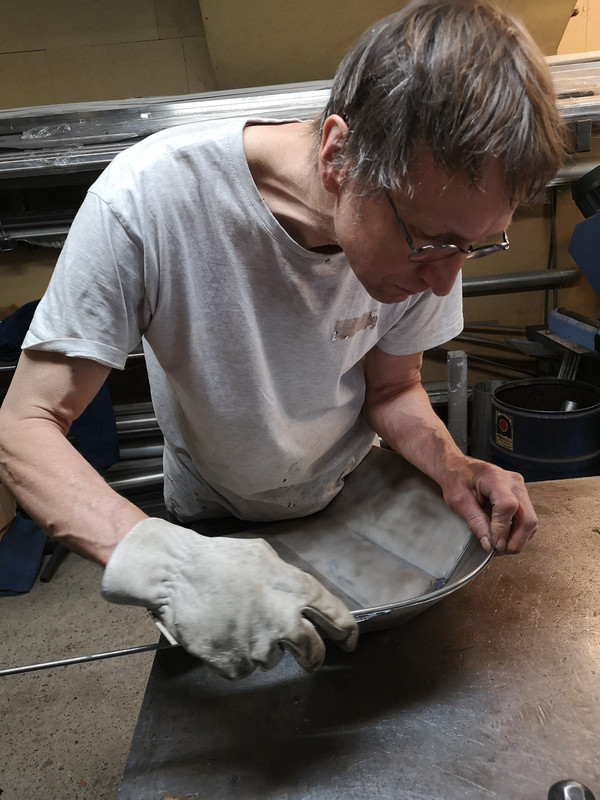
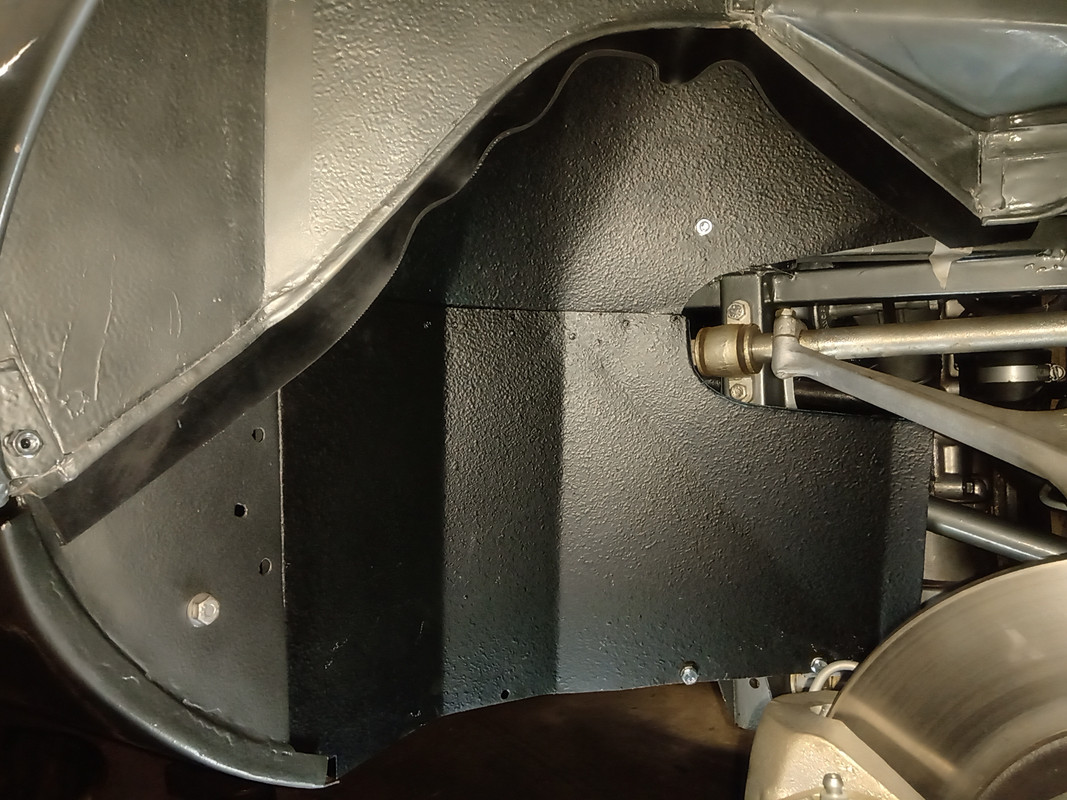
The result was better than I'd hoped -
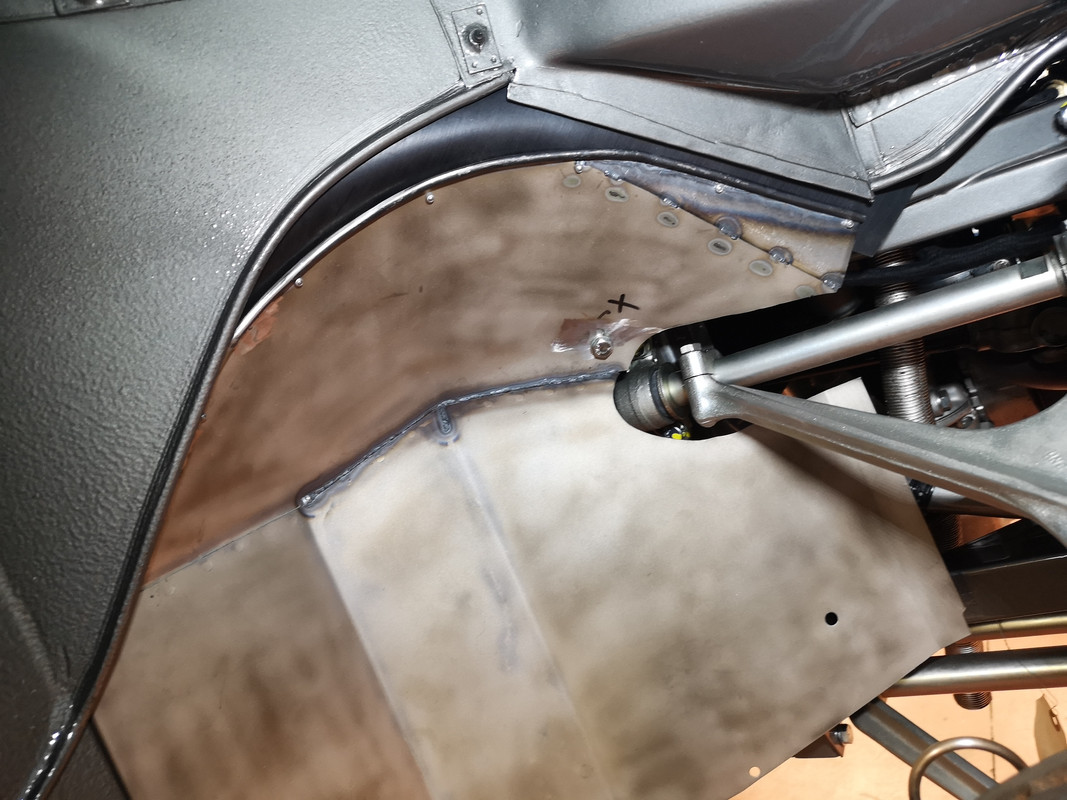
- and with the sill-end portion in place the ensemble suddenly looks more plausible.
It's interesting to note that there are in fact many pictures of Series 1 cars with rubbers fastened to the bonnet on the LHS - tho not all cars seemed to have these ?
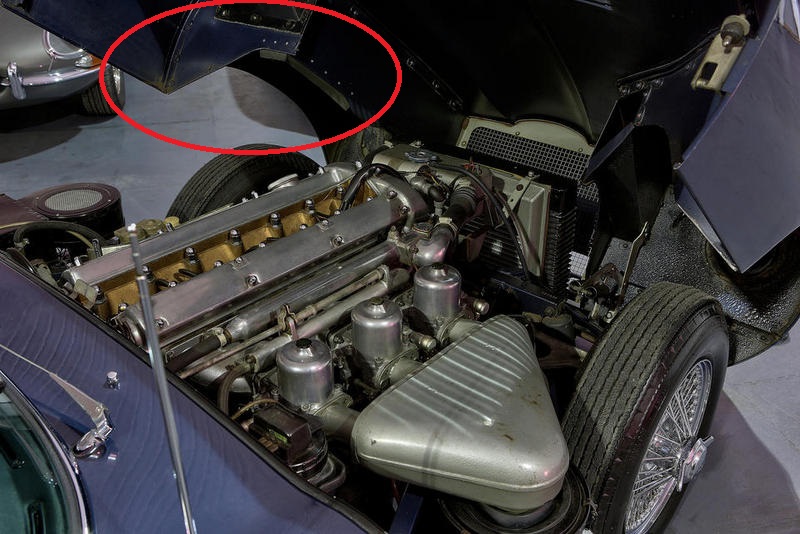
Anyone got any pictures on their cars ? I might have a go at this myself, as the sealing on the LHS is pretty inadequate.
If I can get this new iteration of the RH mudguard powder-coated quickly next week, I can try and forget this seven-steps-backwards moment and press on with more fulfilling stuff.

In using the word guillotine, I was not implying that the rubbers were being cut by the bonnet, rather that they were meant to act as a sealing lip which was meant to be kissed and deformed by the bonnet valence as it brushed past.
This is corroborated by the numerous pictures showing the rubbers at the sill ends that have been flattened downwards by the bonnet's overlapping flange.
The bonnet movement "backwards" on my car is probably of the order of between 3mm and 8mm, depending on which car you're taking as a reference, and as such doesn't explain the issues with the RH mudguard, which are of the order of centimeters as regards its lateral alignment.
Since the principle of the RH mudguard rubber seems well-established -
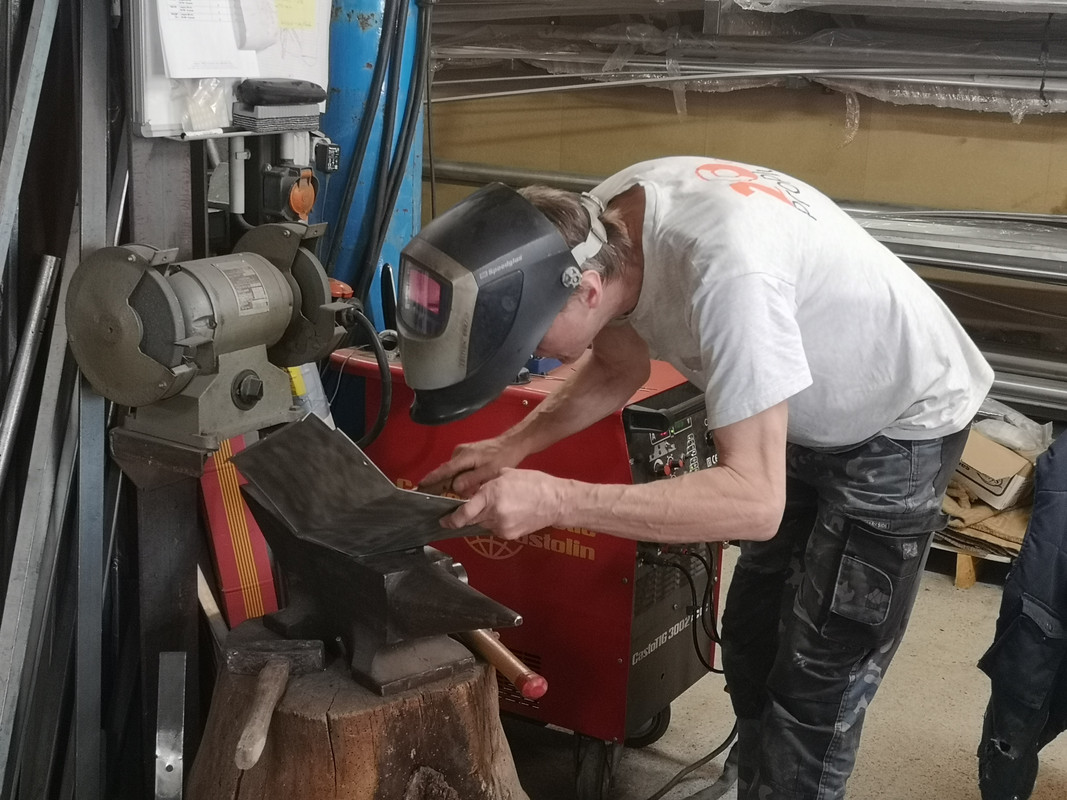
- I decided to make the best of what I had, and started by taking the painful decision to burn off the recently-applied powder-coating - best done outdoors ;-(( - then took the slitting saw to the 'guard.
After a few hours at the dock-yard, I passed the cut-and-chopped mess to friend Yvan who TIG-ged it all back together, added my extra panel, and finished it all off with a fake wire-edge made, I'm ashamed to say, of 5mm bar.
It would have been nice to be able to reattach an EPDM lip using the plated and ready-to-rivet strip seen here, but of course the shape was now all wrong so I had to cut a new one from 1mm sheet.
It's worth remembering that the 3mm EPDM puts any pre-drilled holes right out of alignment over the curved length, so adding small sections, drilling as you go, guarantees subsequent alignment.
Beginning with an overly-wide band -
- you can then whittle it down once you can see where the gaps lie.
The result was better than I'd hoped -
- and with the sill-end portion in place the ensemble suddenly looks more plausible.
It's interesting to note that there are in fact many pictures of Series 1 cars with rubbers fastened to the bonnet on the LHS - tho not all cars seemed to have these ?
Anyone got any pictures on their cars ? I might have a go at this myself, as the sealing on the LHS is pretty inadequate.
If I can get this new iteration of the RH mudguard powder-coated quickly next week, I can try and forget this seven-steps-backwards moment and press on with more fulfilling stuff.
Rory
3.8 OTS S1 Opalescent Silver Grey - built May 28th 1962
3.8 OTS S1 Opalescent Silver Grey - built May 28th 1962
| Link: | |
| BBcode: | |
| HTML: | |
| Hide post links |
-
Gfhug
- Posts: 3806
- Joined: Thu Jun 19, 2014 3:08 pm
- Location: Near Andover, Hampshire,in D.O. Blighty
#18 Re: Mudguard rubbers under the bonnet
Rory, I’m pleased to see you’ve managed a very impressive solution to this problem. And I’m envious of your skill to manufacture the new parts and having an Yvan to tig weld for you.
Good luck with the LH
Geoff
Good luck with the LH
Geoff
S2 FHC Light Blue
S2 OTS LHD - RHD full restoration
S2 OTS LHD - RHD full restoration
| Link: | |
| BBcode: | |
| HTML: | |
| Hide post links |
-
Gfhug
- Posts: 3806
- Joined: Thu Jun 19, 2014 3:08 pm
- Location: Near Andover, Hampshire,in D.O. Blighty
#19 Re: Mudguard rubbers under the bonnet
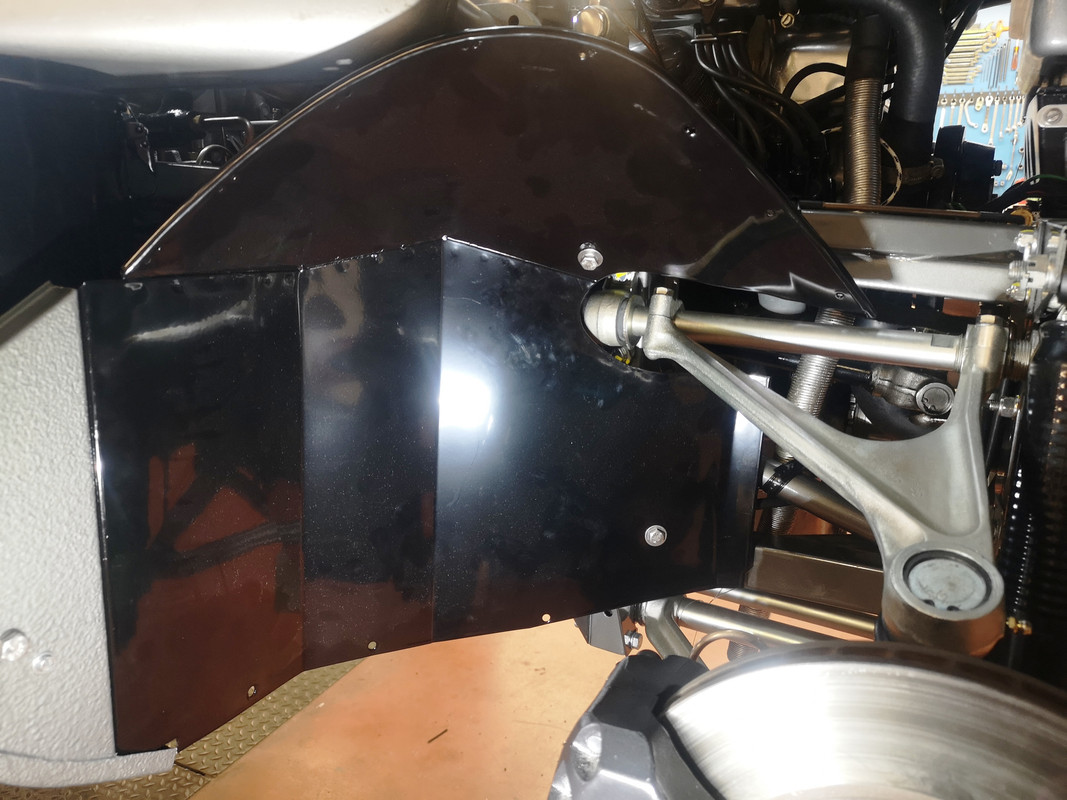
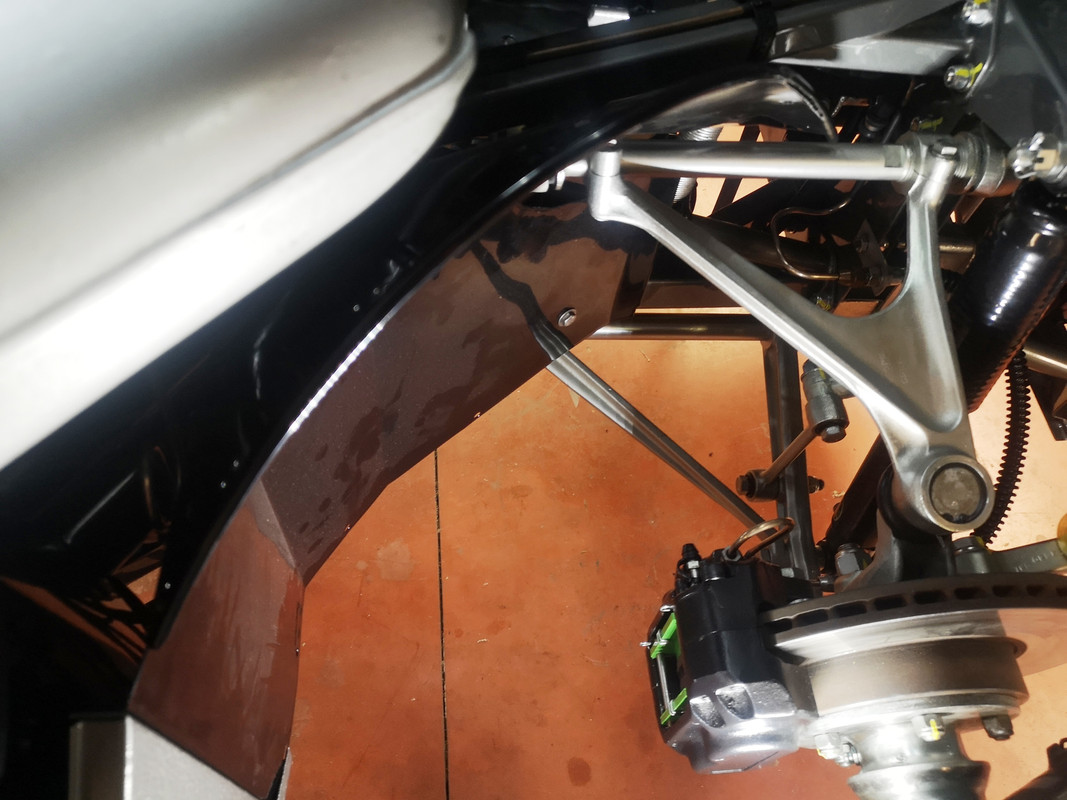
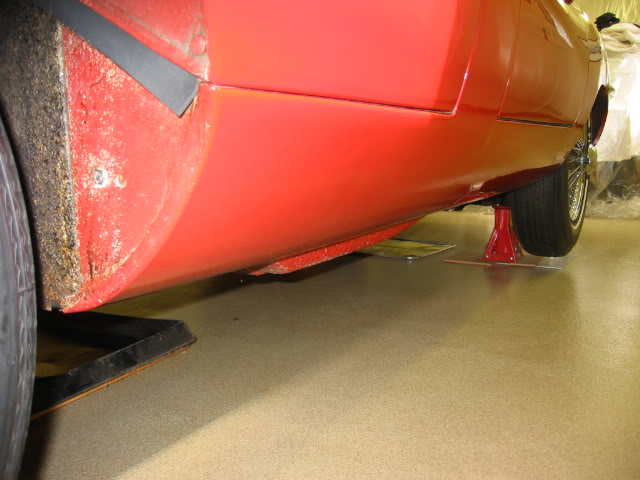
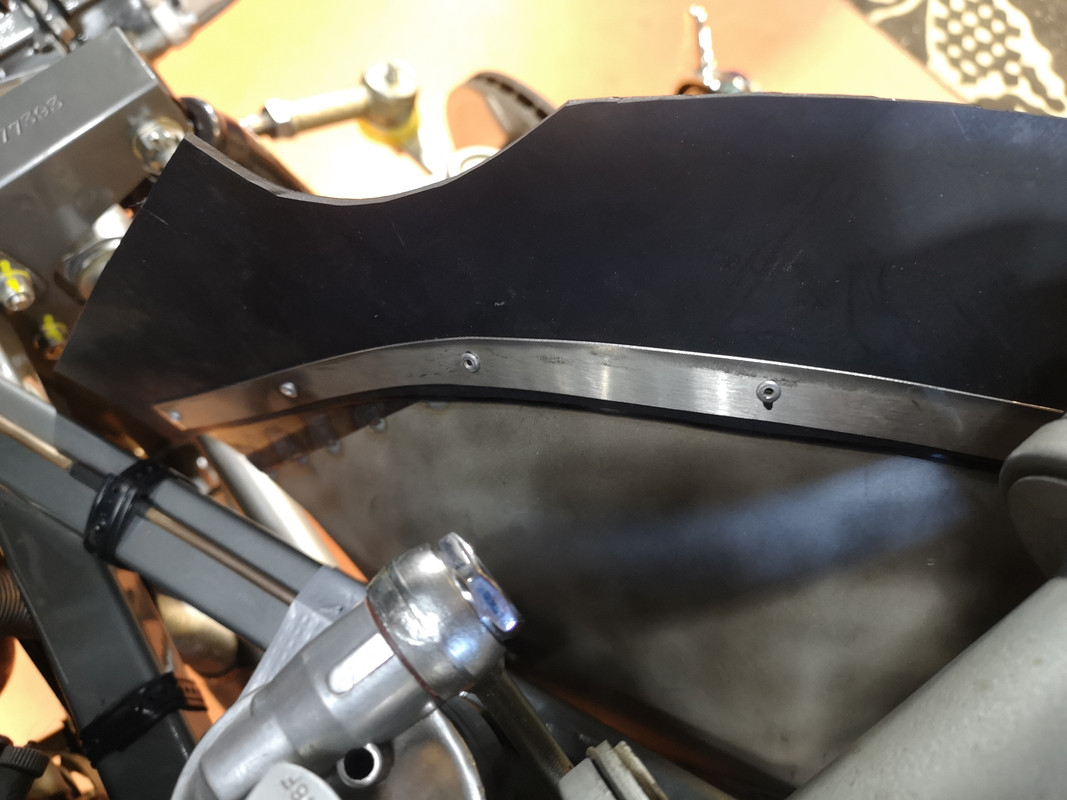
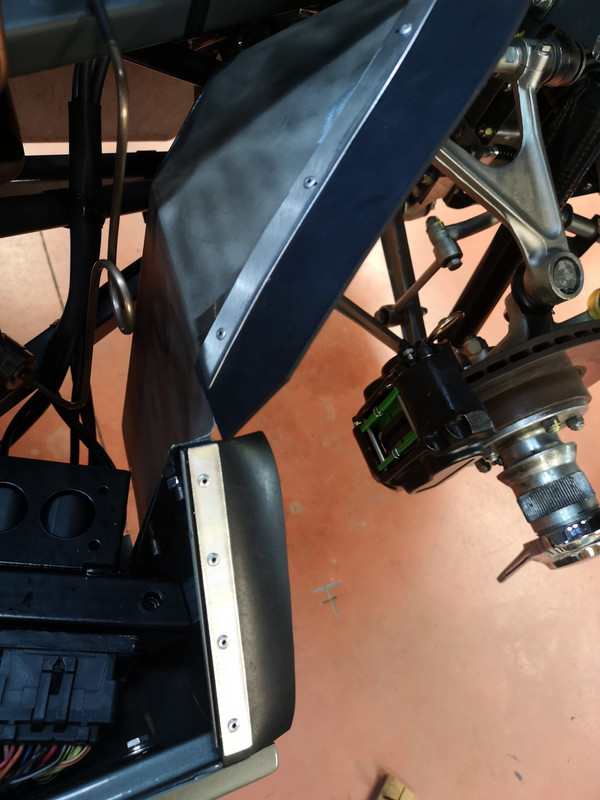
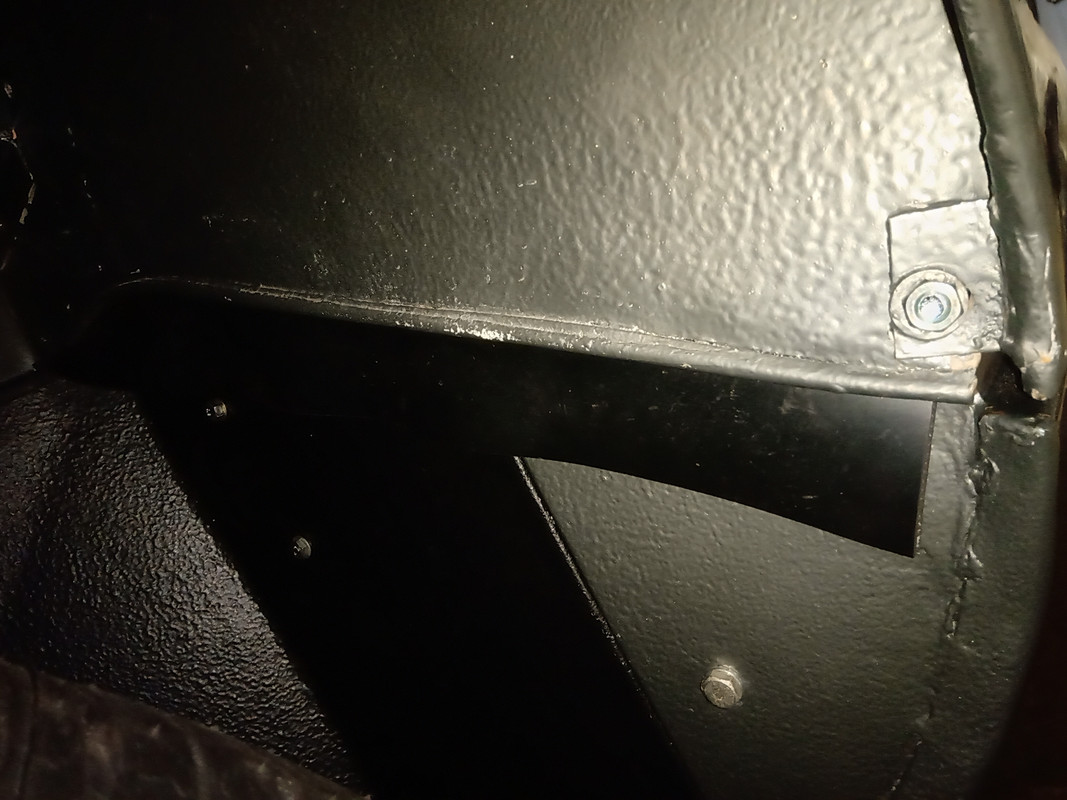
On my S2 the strip is only against the outer part:

Is this different on the S1? Certainly nothing on the bonnet towards the engine frame, though might look at adding something now you’ve brought this to my attention.
Geoff
Is this different on the S1? Certainly nothing on the bonnet towards the engine frame, though might look at adding something now you’ve brought this to my attention.
Geoff
S2 FHC Light Blue
S2 OTS LHD - RHD full restoration
S2 OTS LHD - RHD full restoration
| Link: | |
| BBcode: | |
| HTML: | |
| Hide post links |


#20 Re: Mudguard rubbers under the bonnet
Interesting, the rhs mudshied was missing on mine. I made a cardboard template & traced the bonnet divider curvature onto it. It makes a much sharper top curve than all the pics I've seen & fits well. Now I've just got to figure oit a correct shape for the rubber strip, a straight flat strip wrinkles too much.
Randall Botha
'64 3.8 fhc & '51 Mk 7 (now sold)
'64 3.8 fhc & '51 Mk 7 (now sold)
| Link: | |
| BBcode: | |
| HTML: | |
| Hide post links |