Page 1 of 2
#1 My new project
Posted: Mon Feb 03, 2025 3:58 pm
by No Quarter
#2 Re: My new project
Posted: Mon Feb 03, 2025 4:39 pm
by DWW
Will follow with interest

You do have your work cut out on this one

If you need help tunning at the end of this project, there is a book.....

#3 Re: My new project
Posted: Mon Feb 03, 2025 4:51 pm
by No Quarter
Ha ha, Danny, yes, the tuning part, I'm not too worried about
#4 Re: My new project
Posted: Mon Feb 03, 2025 6:08 pm
by Gfhug
Mikael, how about asking for this topic to be moved to the restoration section? A more appropriate place moderators?
I enjoyed watching progress of your first car and will enjoy reading this one, too. Good luck.
Geoff
#5 Re: My new project
Posted: Mon Feb 03, 2025 6:30 pm
by mgcjag
Easy for Mikael to start a resto thread if he wants to...Steve
#6 Re: My new project
Posted: Thu Feb 06, 2025 11:53 am
by No Quarter
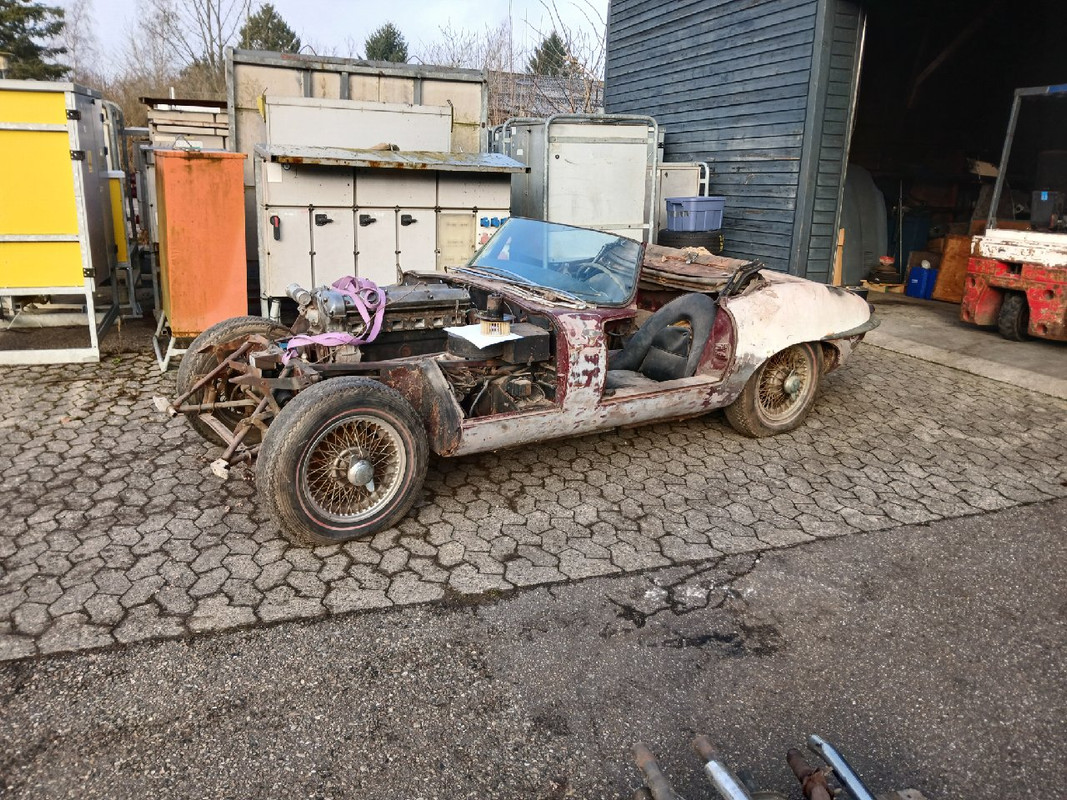
So it's my second E-Type project, but...with regards to dismantling, it's my first, the previous E-Type was bought in boxes, totally disassembled.
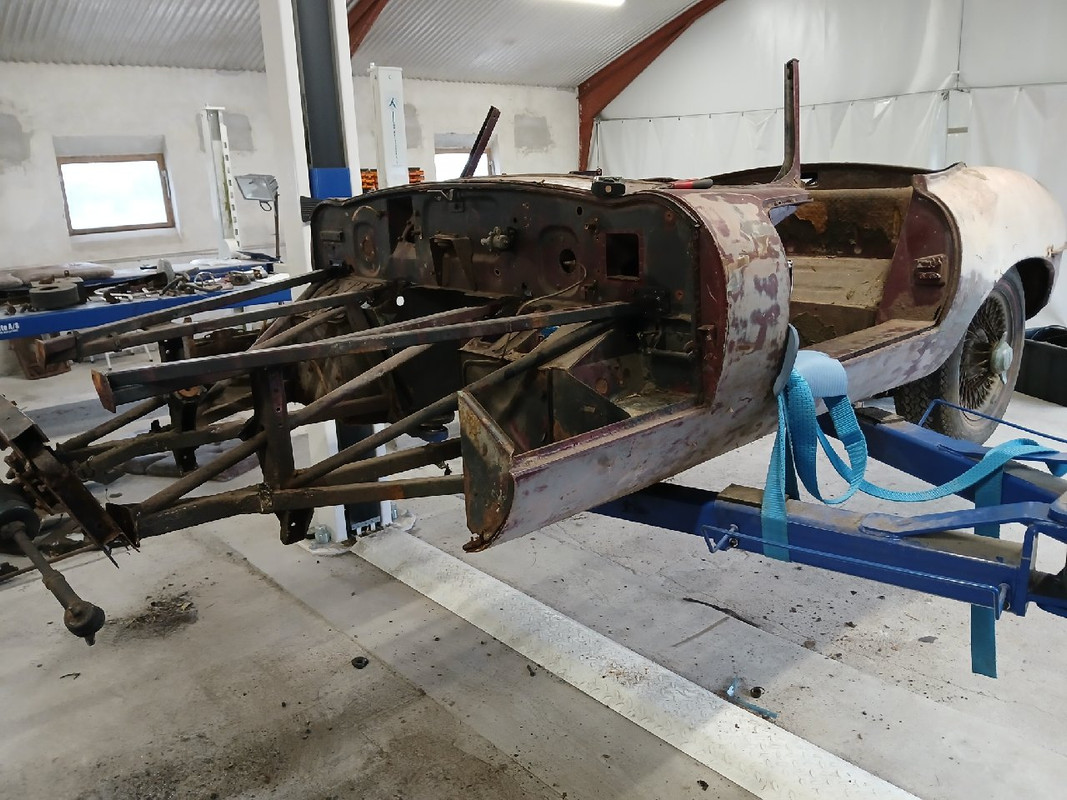
How do I remove the torsion bars. I remember not being able to get them up to the shocks before I got engine in, and now I may have made a mistake, engine is out, so I have no weight in front. I have disconnected the steering rods and the upright, but what next? Shock, is that possible under spring tension? Or the two bolts at the other end? Or?
The thick plate from torsion rear point right to left, is off (missing)
#7 Re: My new project
Posted: Thu Feb 06, 2025 1:00 pm
by mgcjag
The shock will be holding the lower wishbone that the torsion bar is connected to.....so there will be tension in the bars and on the shocks....proceed with caution....either add weight to the engine frame so you can jack under the lower wishbone to relieve tension to shock to disconnect it and then lower the jack or rig up turnbuckles etc....but ensure you know what your doing before you undo anything.....Steve
#8 Re: My new project
Posted: Thu Feb 06, 2025 4:09 pm
by No Quarter
mgcjag wrote: ↑Thu Feb 06, 2025 1:00 pm
but ensure you know what your doing before you undo anything
then I'll never get anything done...
Caution is good here. I've taken all the surrounding stuff of, thinking about how to do it, tired now, so have all evening to think about it. My current thoughts:
1. Cut the shock in two. Yes it will kick down violently, but it's not like a coil spring that can fly 50 meters
2. 1., and add solid metal bar across top of picture frame, tighten with vices, rope down to lower A arms, just to soften the blow. Might then have to cut rope
I'm sure there's a better idea out there. Reinstalling engine, no thanks
Has anybody done what I suggest, and lived?
#9 Re: My new project
Posted: Thu Feb 06, 2025 4:51 pm
by No Quarter
I think I have a good solution. It's on a 2 post lift, and I'll use a strap to ensure that the front end can't lift from the lift so to speak, then I can use a jack to raise lower a-arm a bit and release shock in a controlled fashion...
#10 Re: My new project
Posted: Thu Feb 06, 2025 5:03 pm
by mgcjag

sounds like a plan.....Steve
#11 Re: My new project
Posted: Thu Feb 06, 2025 5:29 pm
by politeperson
Yes Mikael, ratchet straps, I have done it,with the suspension arms supported on trolley jacks on a car that arrived with no engine.
It wasn't that bad,
James
#12 Re: My new project
Posted: Fri Feb 07, 2025 10:04 am
by No Quarter
I got the shocks and lower a-arm and torsion bars off with no drama, after having strapped in the front.
During my first project I manufactured a piece of metal for aligning torsion bars, as per the manual. I checked this project when shocks were off, spot on accurate...
Will work on IRS removal before I take more of the front end...
#13 Re: My new project
Posted: Fri Feb 07, 2025 12:36 pm
by No Quarter
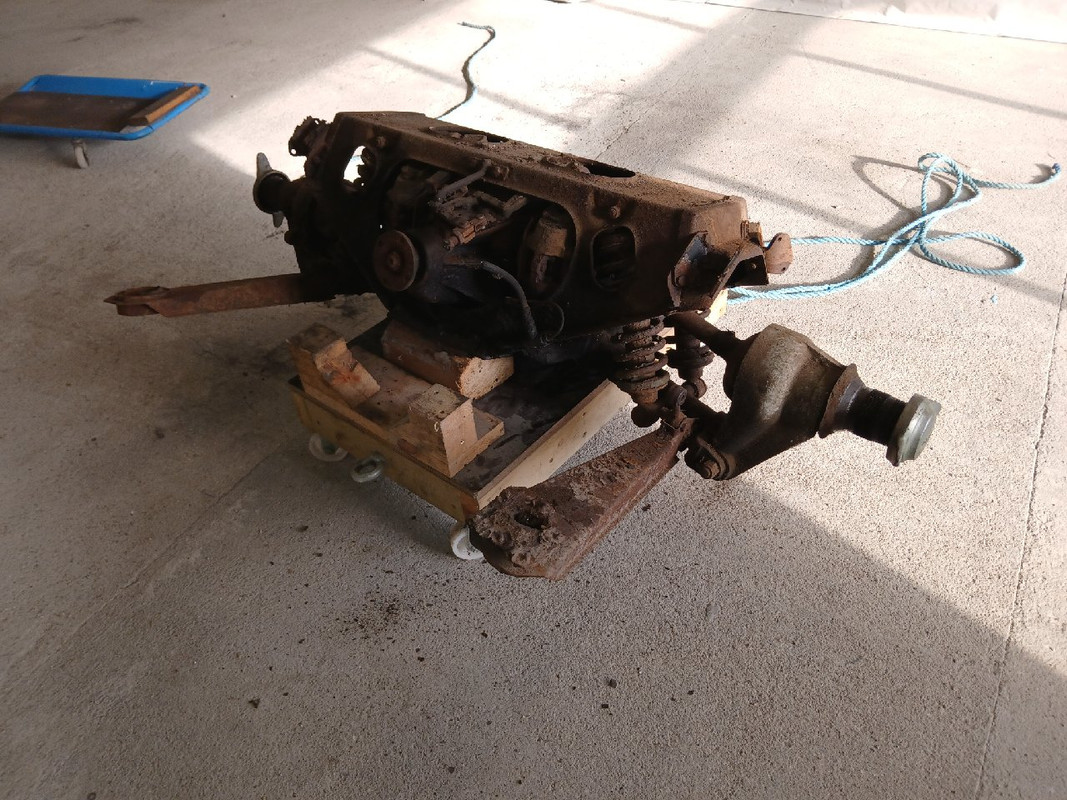
And IRS down...
#14 Re: My new project
Posted: Mon Feb 17, 2025 1:35 pm
by No Quarter
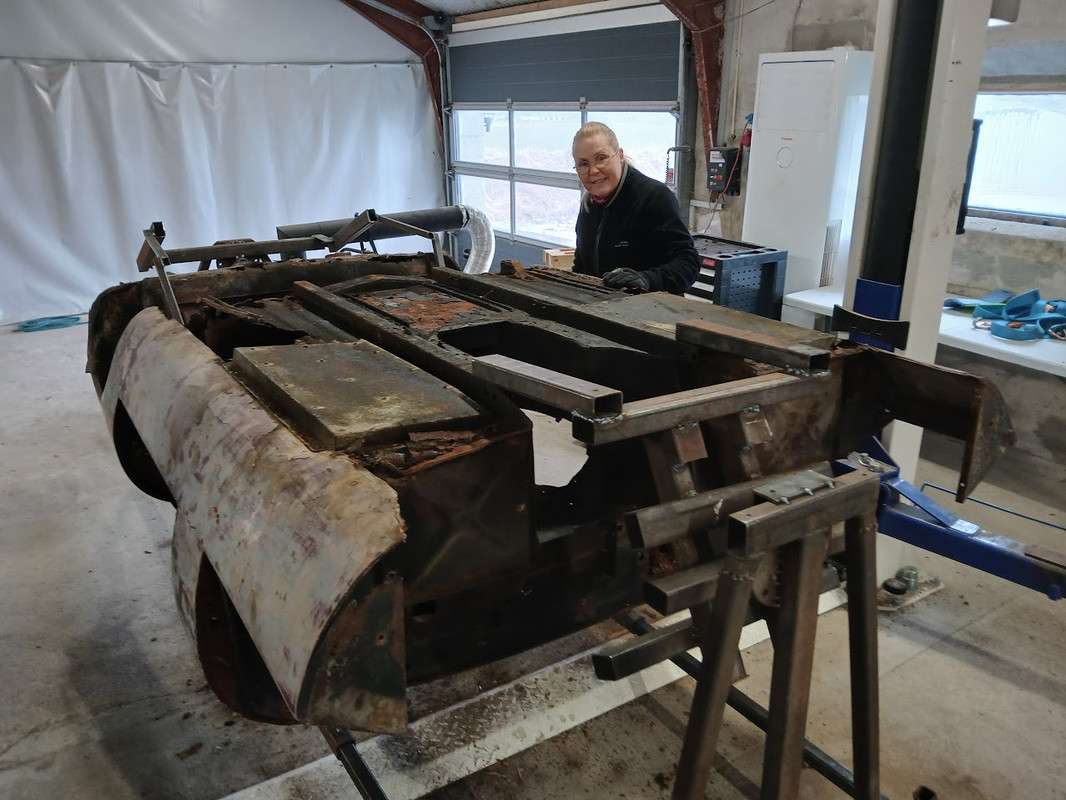
The chassis is now ready for rust work, completely empty. The previous owner of my first project had started a car stand that was compact and allowed 45 degrees down to each side only. I've now extended it and built the connections to the frame, so now it can go 360. And by pure luck, it's perfectly balanced (so my next FHC will be top-heavy

)
The missus is impressed I think...
#15 Re: My new project
Posted: Mon Feb 17, 2025 1:38 pm
by No Quarter
I asked Jaguar Heritage about this project, and VIN, chassis# and engine number are correct.

The gearbox they didn't recognize. It says EB11638 on the top...
Just out of curiosity, is it possible to know which VIN it was originally in, or if it's a repair /replacement gearbox?
#16 Re: My new project
Posted: Mon Feb 17, 2025 3:24 pm
by paydase
Jaguar Heritage will never tell you in which car was originally this box.
Already difficult to find the origin of a replacement engine (you may be lucky by exploring XKEdata) but a gearbox...
#17 Re: My new project
Posted: Mon Feb 17, 2025 3:43 pm
by mgcjag
The gearbox number is stamped on the side of the casing..top rear left side....the top cover should have the same number stamped unless its been changed....Steve
#18 Re: My new project
Posted: Tue Apr 01, 2025 12:32 pm
by No Quarter
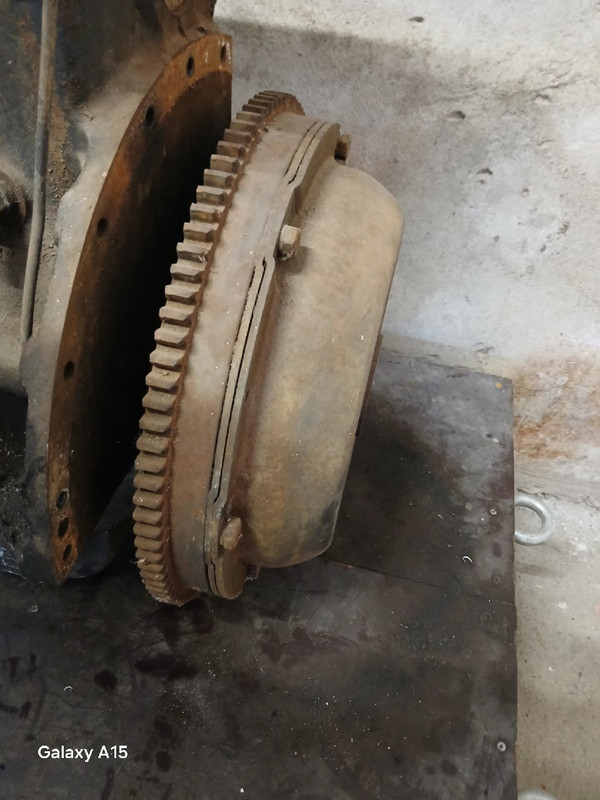
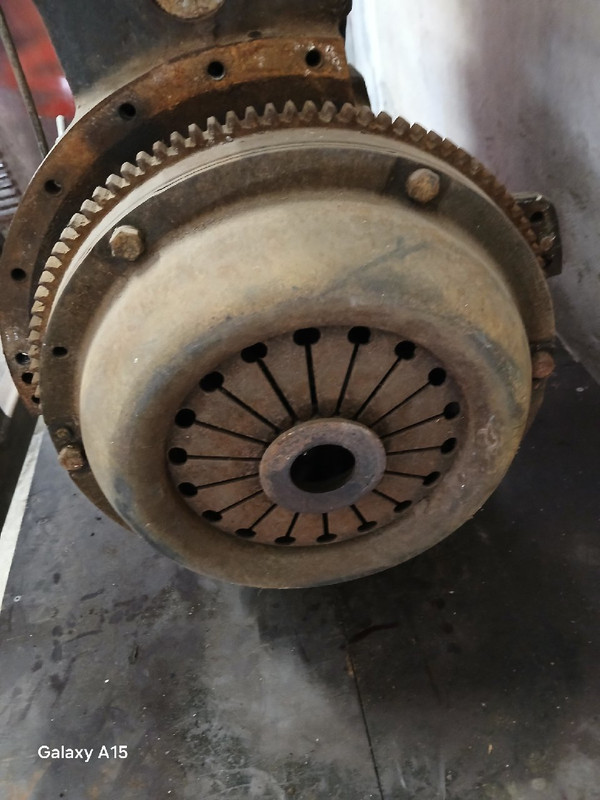
My parts guy tells me this is not an E-Type clutch, you agree? That means complete new clutch (and maybe flywheel?), what was original on 64, spring or diaphram?
#19 Re: My new project
Posted: Tue Apr 01, 2025 4:01 pm
by mgcjag
Your on your 2nd restoration....what does the parts catlogue say?.....Steve
#20 Re: My new project
Posted: Tue Apr 01, 2025 4:05 pm
by No Quarter
The drawings are not good enough for me to conclude either or... And have never seen a diaphram clutch for E-Type before...