


Other then the bentley service manual procedure/steps is there a good movie on how to replace lower and upper ball joints in the front suspension? Is there an easy way.
Do you have to take a brakeline off and refill bleed the system for this procedure?
Or is it possible to leave everything in place support it and then replace the ball joints one by one.
Replacing front suspension ball joints
-
Kingkitesurf
Topic author - Posts: 19
- Joined: Sun Mar 18, 2012 7:37 am
- Location: Netherlands

#1 Replacing front suspension ball joints
Job
1968 E-type 4.2 S1.5 FHC
1968 E-type 4.2 S1.5 FHC
| Link: | |
| BBcode: | |
| HTML: | |
| Hide post links |


#2 Re: Replacing front suspension ball joints
One thing I would recommend is replacing the lower ball joints with modern sealed for life units. The original ball joints [both upper and lower] require shimming which is time consuming. I don't think there is an alternative for the upper ball joint. I wasn't aware of this sealed for life replacement when I rebuilt my front suspension. Angus did them for me when he replaced my clutch.
Andy
1970 S2 FHC
1965 SB Corvette Ragtop
1970 S2 FHC
1965 SB Corvette Ragtop
| Link: | |
| BBcode: | |
| HTML: | |
| Hide post links |
-
 bitsobrits
- Posts: 563
- Joined: Tue Dec 27, 2011 2:09 am
- Location: Omaha, NE area

#3 Re: Replacing front suspension ball joints
The alternative to the upper balljoint is to machine the upper arm to accept one of the press in plastic cup style from SNG Barratt (the insert is from some modern car, I believe), or to buy the ready made control arms from SNG. Not inexpensive, I'm afraid, but once the lower seat area of the stock upper joint wears, you are left with this option or to have the control arm welded up, re-machined, and heat treated. Not sure who is doing the latter these days. I went for the SNG solution and am well pleased.
Last edited by bitsobrits on Wed Sep 08, 2021 10:13 pm, edited 1 time in total.
Steve
'65 S1 4.2 FHC (early)
'65 S1 4.2 FHC (early)
| Link: | |
| BBcode: | |
| HTML: | |
| Hide post links |

#4 Re: Replacing front suspension ball joints
Hi Job.......it is a fairly straight forward job......just follow the service manual.......you do not have to disconnect the brake lines........Plenty of videos on you tube but i would advise reading the manual instructions and asking questions here.....you will need a ball joint seperator....the bottom one is very tight to get the seperator into....beware the torsion bars are under tension.....make sure you know what your doing befor seperating balljoints at the torsion bar tension needs to be released slowely as you lower the hub......Steve
Steve
69 S2 2+2 (sold) ..Realm C type replica, 1960 xk150fhc
69 S2 2+2 (sold) ..Realm C type replica, 1960 xk150fhc
| Link: | |
| BBcode: | |
| HTML: | |
| Hide post links |

#5 Re: Replacing front suspension ball joints
Hello Job,
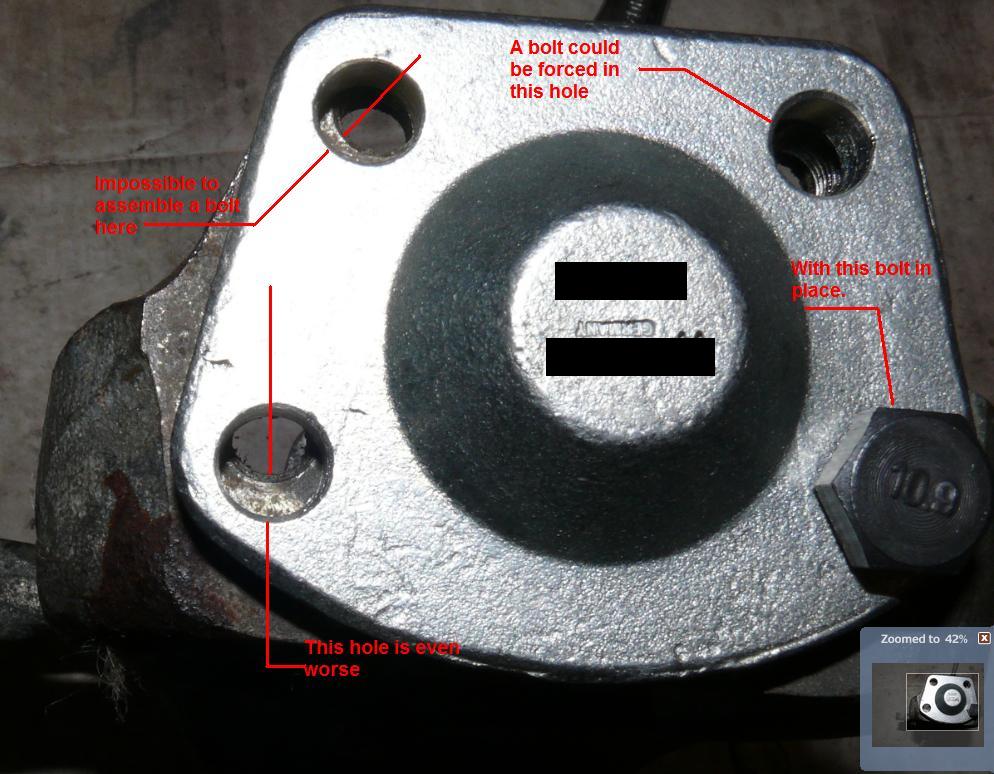
As suggested by others and unless you wanted to retain originality for the lower ball joint, the sealed for life unit is a better proposition. However, there are many manufacturers of these and the only brand to use, in my opinion, is Lamforder. The following picture is of just one defect of an alternate brand sent to me.
With regards to the Top Ball Joint, the Ball Pin Socket is integral with the wishbone and once its worn, the wishbone should be replaced, or repaired (by someone competent to do so). Having the Ball Pin Socket welded, machined and heat-treated is not a simple task, particularly the heat treatment. The material used in the wishbone is a high carbon steel, and therefore, is classed as a through hardening steel. The original specs on the heat-treatment was for a fairly thick, very hard surface case (high 50s RHC) and a tough (not so hard) core. Nitriding and other surface hardening processes will work to achieve the surface hardness, but not the depth specified. Originally, this was achieved via Induction Hardening, but a special shaped heating element is required. I used to do repairs by welding, machining and the correct heat treatment (meeting ALL the specifications) using a correct heating element, but its not a cost effective repair method.
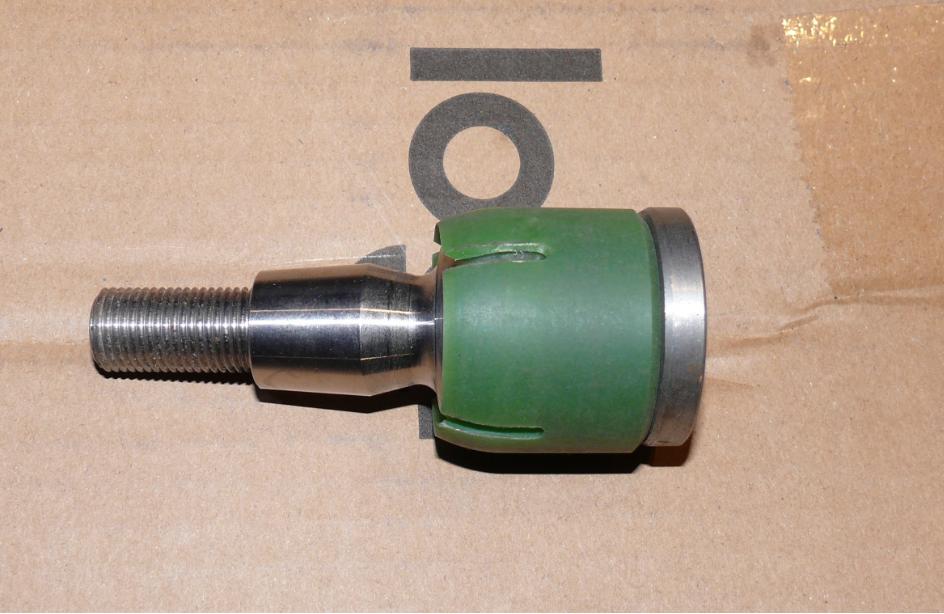
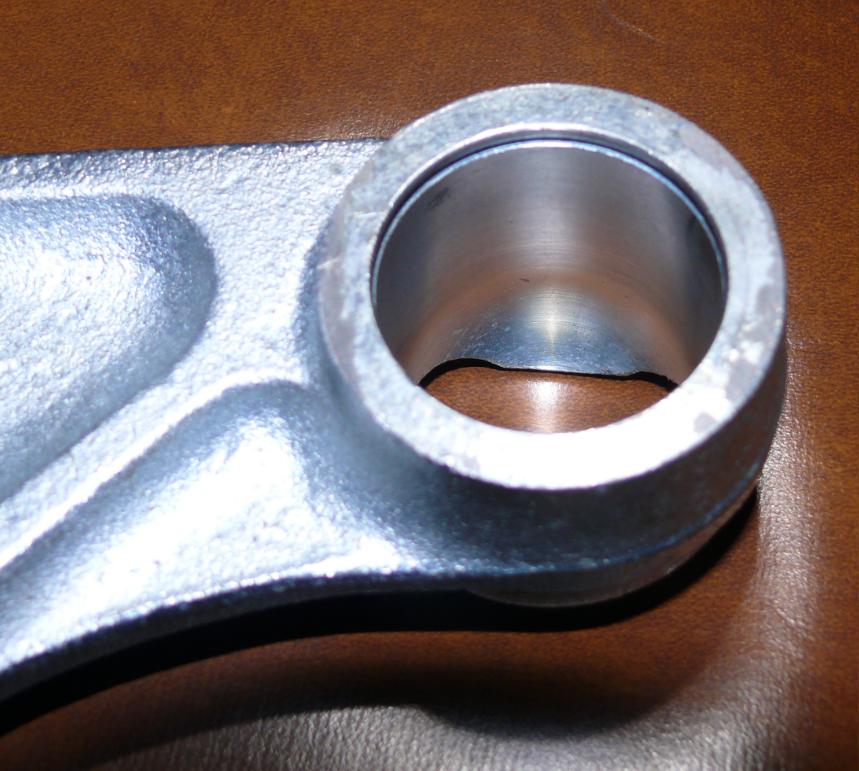
A good method to reclaim worn upper wishbones is via machining and fitting a nylon insert as shown in the following pictures. The last picture showing the method I use to ensure the Dust Gaiter and clip stay in place.
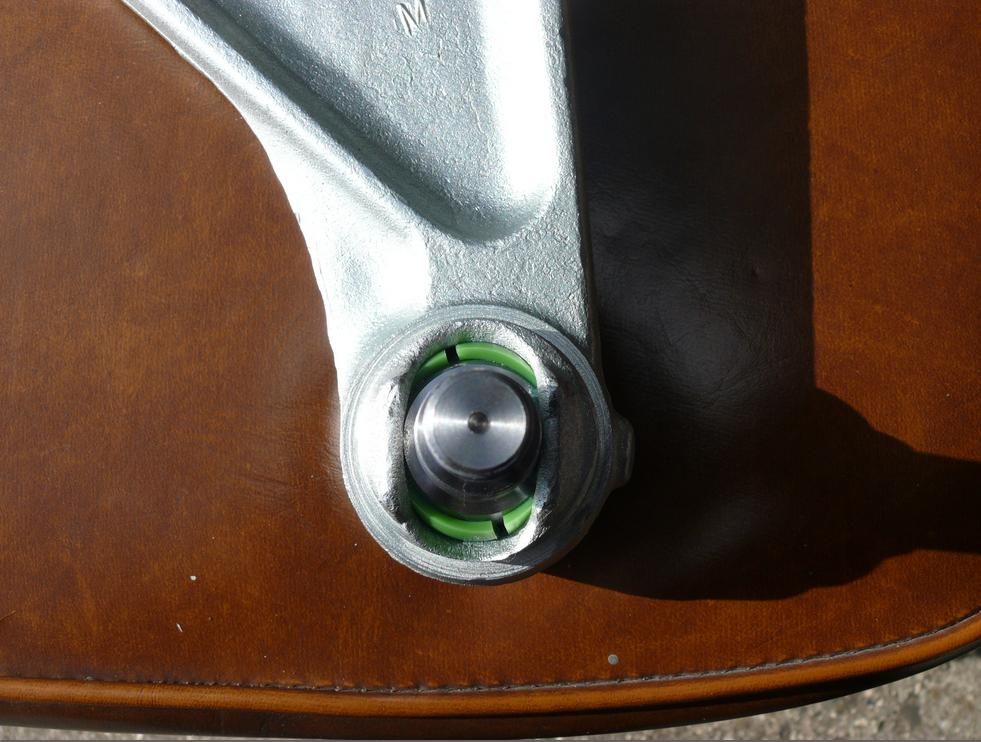
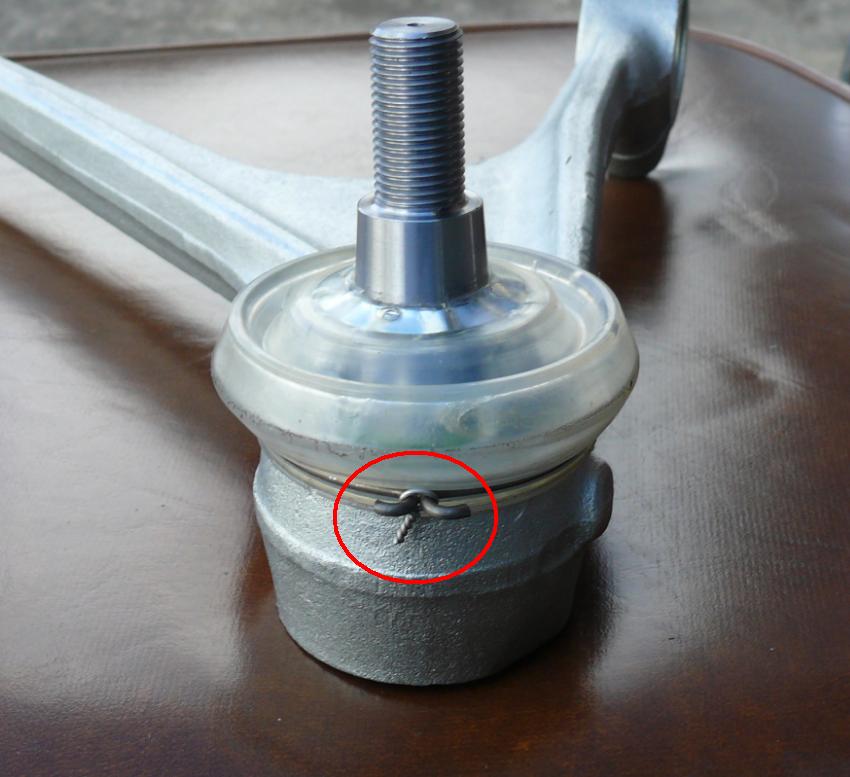
Whichever upper ball joint system you go for, don't fill the Dust Gaiter with grease, as many do. This is to keep dirt and water out, its not a grease reservoir.
Regards,
Bill
As suggested by others and unless you wanted to retain originality for the lower ball joint, the sealed for life unit is a better proposition. However, there are many manufacturers of these and the only brand to use, in my opinion, is Lamforder. The following picture is of just one defect of an alternate brand sent to me.
With regards to the Top Ball Joint, the Ball Pin Socket is integral with the wishbone and once its worn, the wishbone should be replaced, or repaired (by someone competent to do so). Having the Ball Pin Socket welded, machined and heat-treated is not a simple task, particularly the heat treatment. The material used in the wishbone is a high carbon steel, and therefore, is classed as a through hardening steel. The original specs on the heat-treatment was for a fairly thick, very hard surface case (high 50s RHC) and a tough (not so hard) core. Nitriding and other surface hardening processes will work to achieve the surface hardness, but not the depth specified. Originally, this was achieved via Induction Hardening, but a special shaped heating element is required. I used to do repairs by welding, machining and the correct heat treatment (meeting ALL the specifications) using a correct heating element, but its not a cost effective repair method.
A good method to reclaim worn upper wishbones is via machining and fitting a nylon insert as shown in the following pictures. The last picture showing the method I use to ensure the Dust Gaiter and clip stay in place.
Whichever upper ball joint system you go for, don't fill the Dust Gaiter with grease, as many do. This is to keep dirt and water out, its not a grease reservoir.
Regards,
Bill
| Link: | |
| BBcode: | |
| HTML: | |
| Hide post links |