Okay, so I have now done one hinge and this is what I learned.
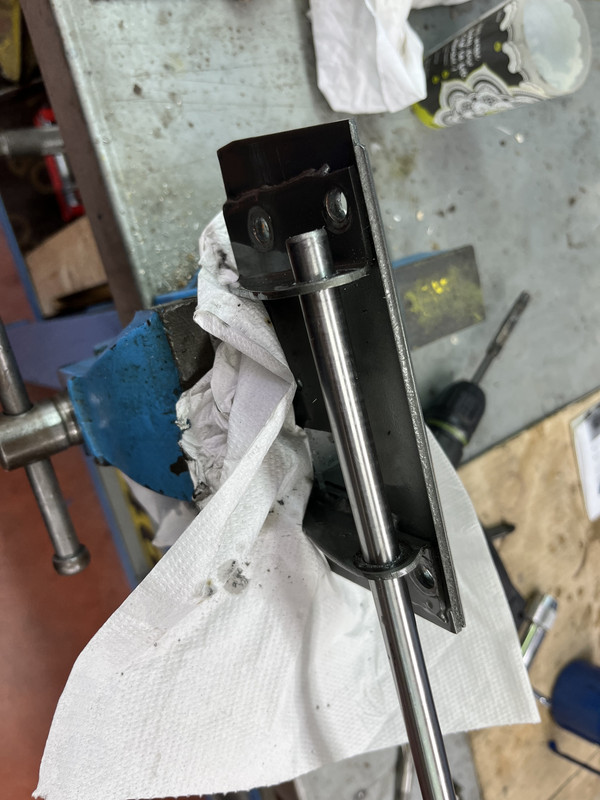
The ground-bar I used, STUB, otherwise known - I read - as 100C6 or AISI 52100, actually welds perfectly
for this application ; the thermal shock might do something to its hardness, although I would hazard that the quench rate will be so low as to be irrelevant.
(It's only called silver-steel because of its appearance).
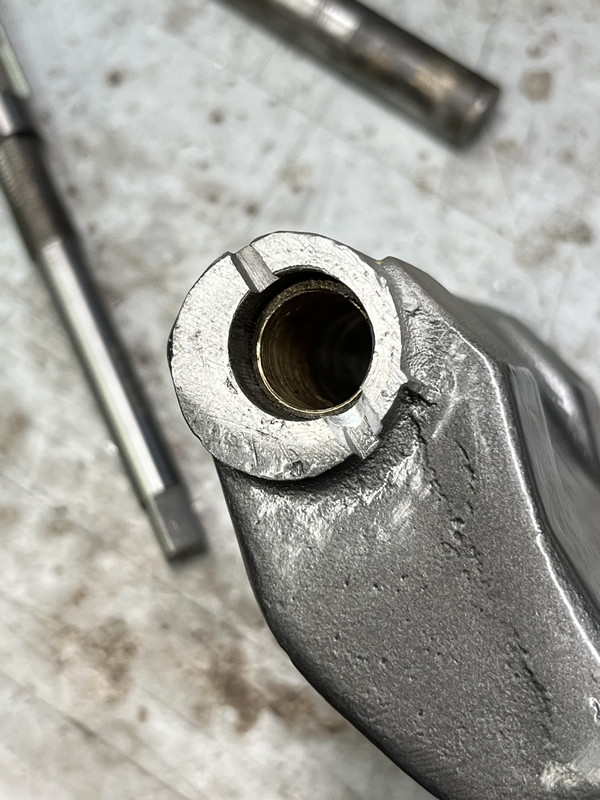
What's nice about it is the ground precision of the 12mm OD, which when used with a machine-reamer gave me a a buttery-perfect adjustment of the pin in the bushes.
I've never read of this elsewhere, but both my doors actually had bronze bushes fitted ; they look 100pc original, and as the only work that was ever done on this car (late eighties) was done by someone who didn't go in for in-depth, genuine detailed restoration ........... he was an accountant ...... I'm inclined to think this might have been the way it was in 1962 ?
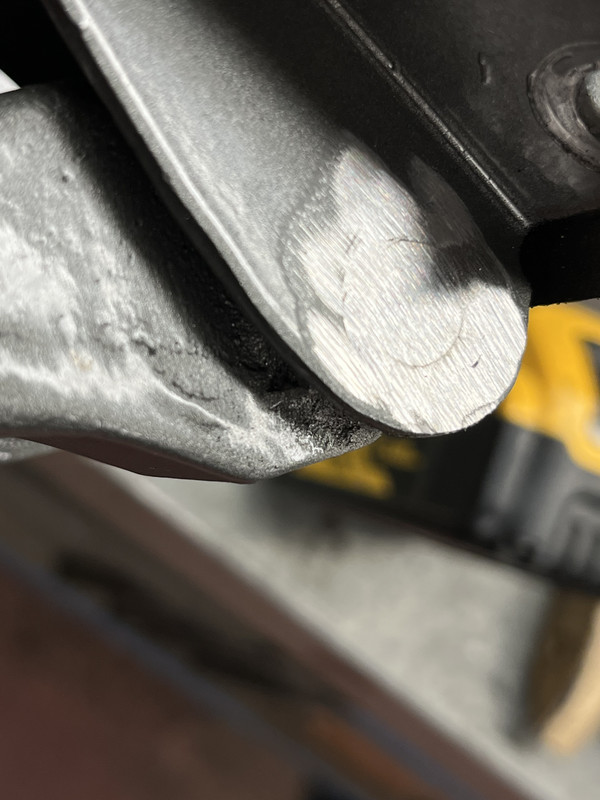
Removing the old welds showed no hint of previous meddling.
The pin even had a flat on it to facilitate the lubrication.
There's a top bush over 1/3 of the height, and a second covering the lower third, both sitting in shouldered 14mm ID recesses such that the centre 1/3 is more like 12mm.
What's nice is this gives a little volume at the top for oil-injection -
- I think it's even worth easing out the groove a little here to make lubrication easier.
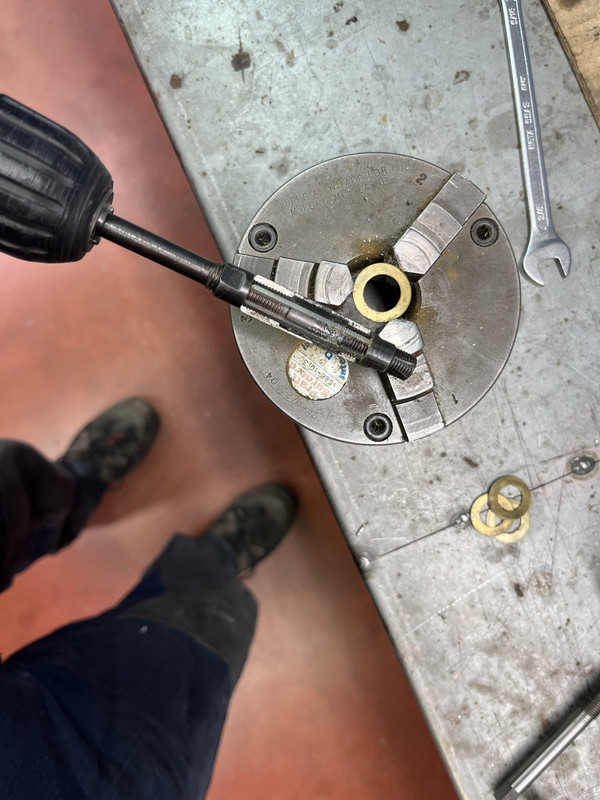
I'm ashamed to say that I used an approach for the reaming that would have got me thrown out of the metalwork class, so make sure nobody is watching if you do this.
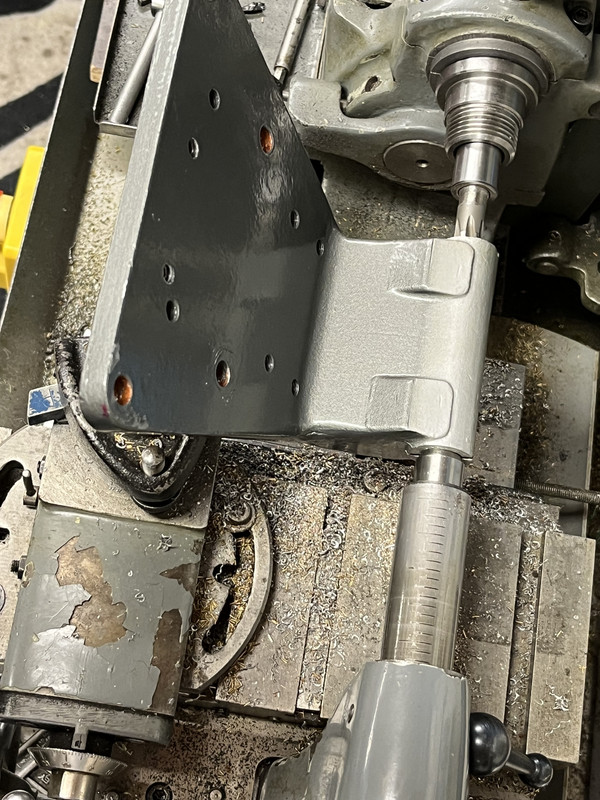
With a Myford 7 in back-gear (slow) and with the clutch set to a really light engagement (slip), I hand-supported the hinge on the reamer and gently fed it through by using the tail-stock as a pusher to centre the whole thing.
Starting with an 11 - 11.5, and then with a 11.5 - 12 adjustable reamer, I went through from the same direction with bigger and bigger passes, machining both bushes with each continuous pass, until I could get the machine-reamer started, at about 11.7.
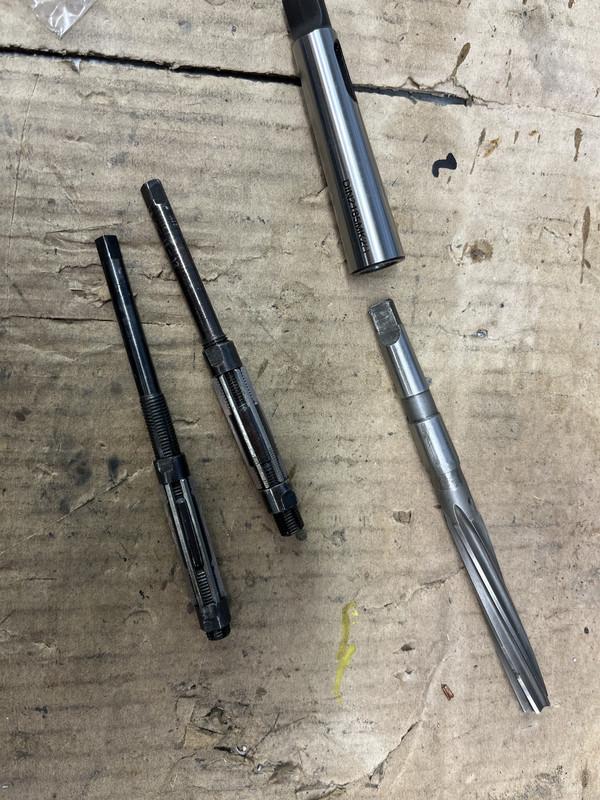
Then, still from the same direction and now using the machine reamer, I was able to traverse both bushes ; actually, it had to be finished off the lathe, and by hand, as I ran out of Morse cone to grip the reamer - plus I had to grind a tad off the fattest bit of the Morse, over about 4mm of length, as it was slightly bigger than 12mm.
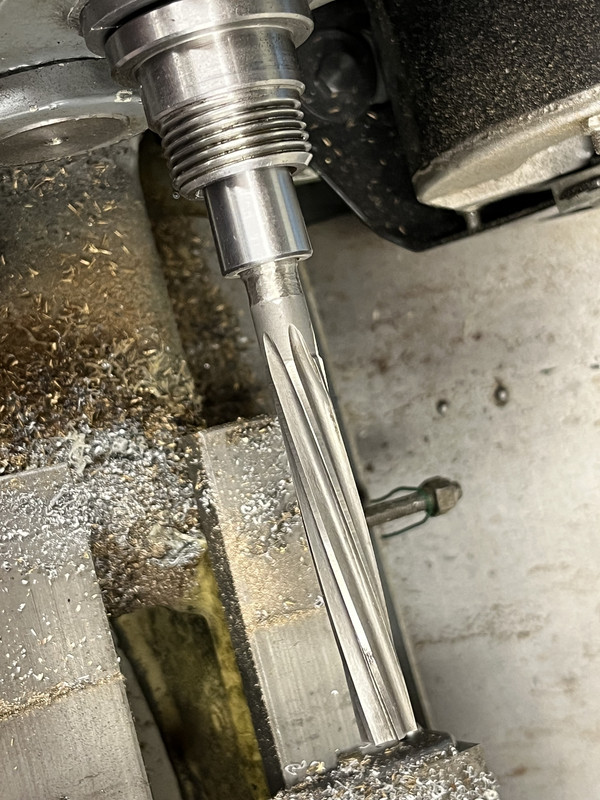
By going through in this way from the same side, I got an absolutely perfect fit and alignment.
I re-read this exposé before I did the job, and have to confess now to finding it some of it total bollocks, leading me to question just how much this guy understands about engineering.
https://newhillgarage.com/2011/09/28/ar ... oor-hinge/
New Hill Garage -
Engineered craftsmanship, performance, and design
Really ?
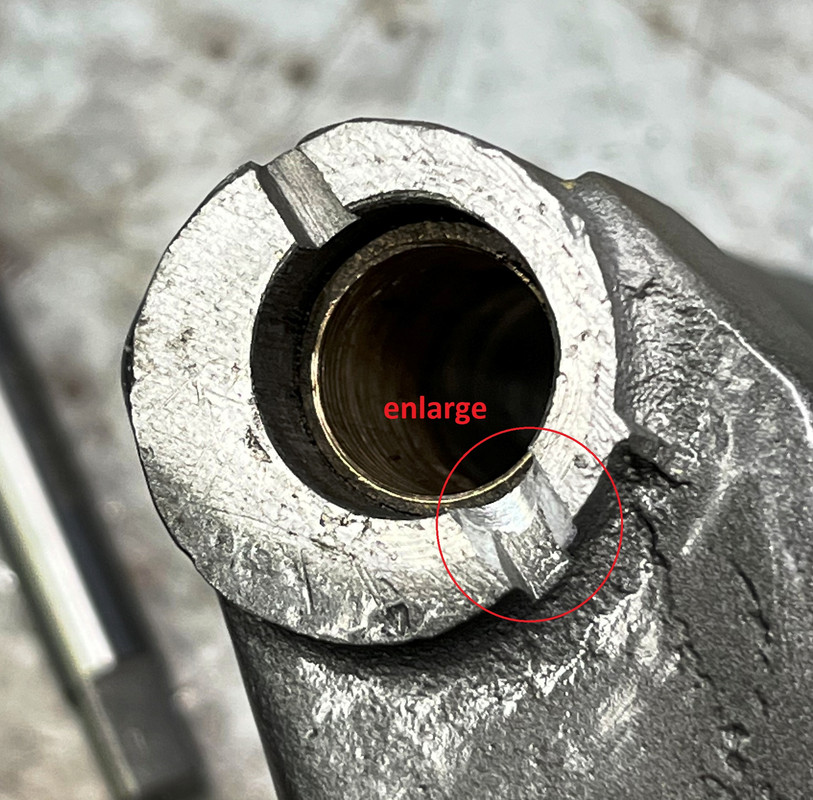
"Use your ½” drill bit to enlarge the two holes in the metal outer hinge. The fit on these is not critical as you are going to weld or glue across any slop you may have.
Wait, did you save those brass washers that fell out when you took the hinge apart? You’ll need to open these up to ½” with a small round file and fit them in the same place you found them. If you have access to a Mig welder, add a little weld at each end to match what they did at the factory. Alternatively, a good dollop of epoxy at each end would also do the trick. And your done !"
The idea that you could
ever use epoxy glue to hold a 1/2" pin in place, when the head is under such shear (and even more so in a sloppy hole) and vibration, and that you can get a snug fit of your pin in a 1/2" hole that you've drilled up from 11mm (since when did doing that through 2mm steel sheet
ever give you a
round 1/2" hole ?) leaves me speechless.

I suggest that you use the same cheap adjustable bladed reamers (Indian junk, but they work) using a small portable drill, incrementally, to ease the steel cheeks out to a snug 12mm, so you have the same quality of fit - it takes 5 minutes longer, for a result that is perfect.
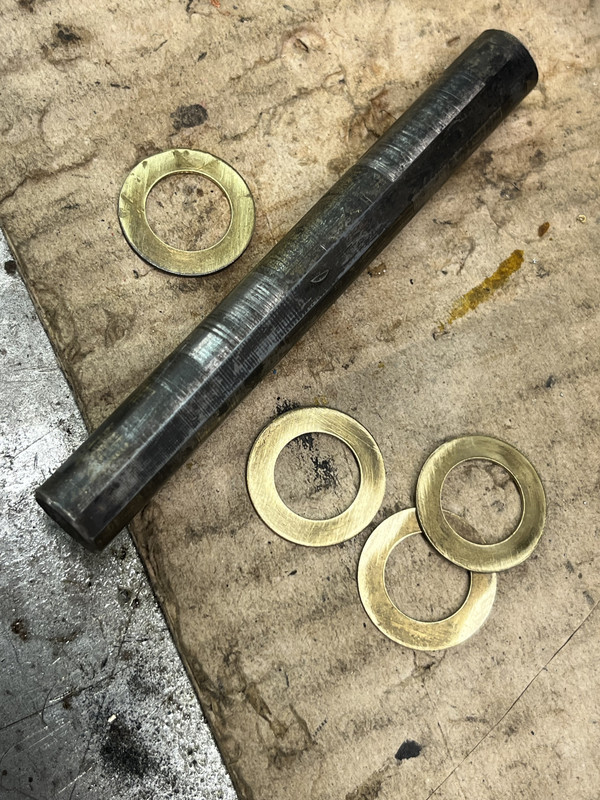
Same for the brass washers - pinched in a chuck on the bench, using the same reamers.
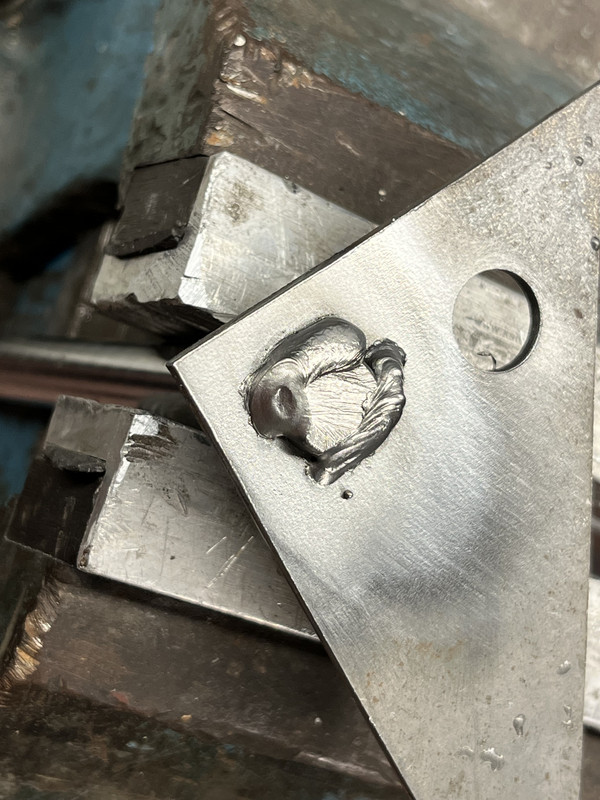
I did a few sample welds between the silver-steel and a 2mm flange to adjust the MIG setting, and then welded it all back together.
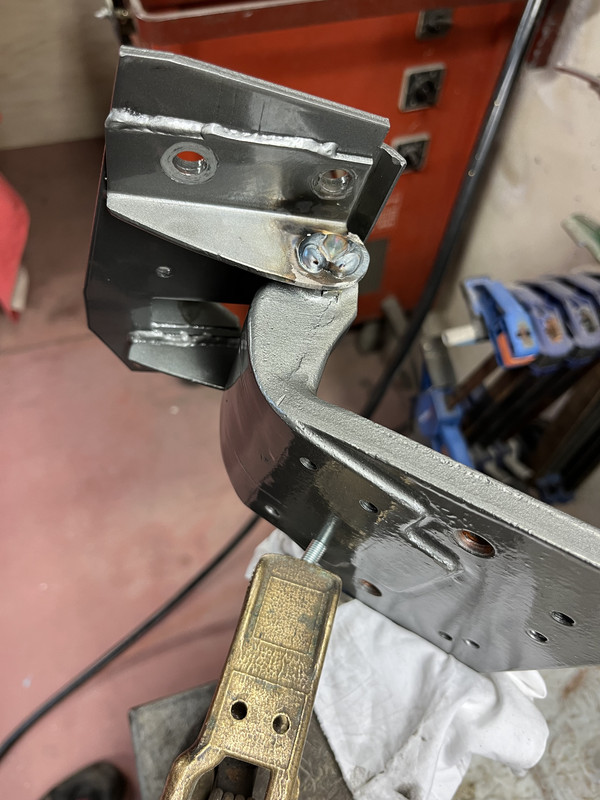
And left it upright overnight, having repeatedly fed as much 140-grade oil into the top of the hinge as it would take.
I think I may have just made a new big-end for the car, but will it take 5.500 rpm ?


