


Can anybody advise me how fit the chrome head lamp trims on my series 1 car. I have bought new trims and rubbers from SNG and can't get all the screw holes to align.
Everything looks the same as the old removed units so whats the knack?
Regards
Pete
1967 2+2
head lamp trims

#2
Pete
I tend to remove mine regularly due to water stains on the bowls. The captive bolts are loose in their mounts so I use a thin screwdriver or scribe to locate the nut through the trim, using light leverage to get the trim hole in line. I then insert the bolt but only tighten a couple of turns before moving on to the next. When they are all in place they can be tightened. Before putting the screws in I suggest you coat them with Copperease as the nuts can rust and make future removal difficult.
I tend to remove mine regularly due to water stains on the bowls. The captive bolts are loose in their mounts so I use a thin screwdriver or scribe to locate the nut through the trim, using light leverage to get the trim hole in line. I then insert the bolt but only tighten a couple of turns before moving on to the next. When they are all in place they can be tightened. Before putting the screws in I suggest you coat them with Copperease as the nuts can rust and make future removal difficult.
David Jones
S1 OTS OSB
1997 Porsche 911 Guards Red
2024 Lexus LBX
Add your E-Type to our World Map: http://forum.etypeuk.com/viewtopic.php?f=1&t=1810
S1 OTS OSB
1997 Porsche 911 Guards Red
2024 Lexus LBX
Add your E-Type to our World Map: http://forum.etypeuk.com/viewtopic.php?f=1&t=1810
| Link: | |
| BBcode: | |
| HTML: | |
| Hide post links |
#3 Re: head lamp trims
Pete,p1vickers wrote:Can anybody advise me how fit the chrome head lamp trims on my series 1 car. I have bought new trims and rubbers from SNG and can't get all the screw holes to align.
Everything looks the same as the old removed units so whats the knack?
Regards
Pete
1967 2+2
They can be a bear to fit even if they are the original trims that came with the car, the thicker repro rubber doesn't help either.
There is some movement in the captive nut-plates so if your holes line up within a mm or two they will fit. The problem often is that without the screw the nuts are not at 90 degrees so it's hard to get the screws started despite their pointed end. If you can get all the nuts located using nails or drill bits then squirt RTV silicone around them - next day the screws should start easily.
If the holes in the trim are outside the holes in the bodywork you will probably need to find some originals and get them re-chromed or re-work the wings to suit what you have. This is probably the most character building task on the car - Oh and the heater pipes - and the screen washers and ............

Dave
1963 OTS
| Link: | |
| BBcode: | |
| HTML: | |
| Hide post links |
-
p1vickers
Topic author
#4
Guys
Thanks for your input , I am still trying and it looks like I am going to have to make new holes in my very expensive new paint work. Believe me the washer piping / fitting a new front screen and trims were a piece of cake compared to this job. Onwards and upwards. I will try again tomorrow.
Regards
Pete
1967 2+2
Thanks for your input , I am still trying and it looks like I am going to have to make new holes in my very expensive new paint work. Believe me the washer piping / fitting a new front screen and trims were a piece of cake compared to this job. Onwards and upwards. I will try again tomorrow.
Regards
Pete
1967 2+2
| Link: | |
| BBcode: | |
| HTML: | |
| Hide post links |
#5
Eeek!p1vickers wrote: Thanks for your input , I am still trying and it looks like I am going to have to make new holes in my very expensive new paint work.
 Try fitting the chromes to the body work without the glass or rubber seals. If all holes line up then try fitting chromes plus rubber (widening holes if required). The tricky bit is doing it with the glass in.
Last edited by Heuer on Wed Aug 19, 2015 5:09 pm, edited 1 time in total.
David Jones
S1 OTS OSB
1997 Porsche 911 Guards Red
2024 Lexus LBX
Add your E-Type to our World Map: http://forum.etypeuk.com/viewtopic.php?f=1&t=1810
S1 OTS OSB
1997 Porsche 911 Guards Red
2024 Lexus LBX
Add your E-Type to our World Map: http://forum.etypeuk.com/viewtopic.php?f=1&t=1810
| Link: | |
| BBcode: | |
| HTML: | |
| Hide post links |
#6
Pete,
Don't start carving up the bodywork yet, David's advice is sound - if what seems impossible with the glass and rubber in place is doable without then it will work. That is the time to stick the nuts in place. You can hack away at the rubber as much as you need later - it'll never be completly weather tight anyway.
With new rubber the 3/4" screws are barely long enough to get them started; I made some 1" ones from s/s that made the job a bit easier. If you want to try that they are 8-32 thread and the dies are available here:
http://www.modelfixings.co.uk/
Dave
Don't start carving up the bodywork yet, David's advice is sound - if what seems impossible with the glass and rubber in place is doable without then it will work. That is the time to stick the nuts in place. You can hack away at the rubber as much as you need later - it'll never be completly weather tight anyway.
With new rubber the 3/4" screws are barely long enough to get them started; I made some 1" ones from s/s that made the job a bit easier. If you want to try that they are 8-32 thread and the dies are available here:
http://www.modelfixings.co.uk/
Dave
1963 OTS
| Link: | |
| BBcode: | |
| HTML: | |
| Hide post links |
-
christopher storey
- Posts: 5698
- Joined: Sun Mar 09, 2008 3:07 pm
- Location: cheshire , england

#7
Interestingly, on my new heritage bonnet the bodyshop specifically asked for my chrome surrounds so that they could alter the nut positions as apparently they are produced in incorrect positions!
| Link: | |
| BBcode: | |
| HTML: | |
| Hide post links |
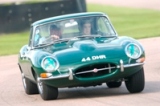
#8 Headlamp Rims
Oh that old chestnut - the headlamp rims !! You would be very lucky to find all the holes in the new rim line up and this is not helped in the installation phase once you manage to fit the rubber to the glass in the right orientation !! One of the golden rules with a new bonnet or new rims is ALWAYS fit them and drill any holes BEFORE painting - if you get that luxury on a rebuild. If not, as pointed out, it's quite a daunting job taking a drill to a painted bonnet - and collecting all the swarf to avoid any rust flecks anywhere.
I too remove my covers to clean out the bowls and as the captive nuts are made out of some form of recycled Lambretta material of cr*p soft alloy, (Mazac ?), the first thing you will find is that these imperial threads strip out quite easily. I bought a strip of mild steel bar of the correct width and tapped these out M5 thread along it's length and cut a whole series of replacement captive nuts and painted them. By carefully bending down the mounting tang of each of the 6 captive nut holders, I mounted these on top of closed foam, (not open foam which holds moisture), pads, (which also have a drilled clearance hole to permit the screw to pass through), which hold the captive nuts in place flush to the bodywork, so they cannot roll over. I now use countersunk M5 stainless steel screws to hold the rim in place and these are fitted in a specific sequence, just loosely at first after aligning the hole with a pointed bradawl. once all loosely fitted thye can be tightened down. This is one of those jobs which sometimes works first time or takes ages, only to find the final screw dislodges a minor crumb of paint which sits annoyingly in the freshly painted bowl, requiring the process to be started all over again!!
The best answer to these sort of jobs is after 10 minutes with no joy - walk away and have a cup of tea and on returning, the job gets done easily. I take great delight at the occasional show I attend for the anoraks to point out the "correct" screws should be crosshead, but I have flat head screws fitted. My usual reply is either not repeatable or just to ask them how often they remove their screws, (often to find they don't have an E type !!) and point out it's my car and I'll do what I like with it !! For the purists amongst you, fear not the original Mazac captive nuts and the original screws are safely bagged up if ever someone wishes to return the car to original - with all the consequential isssues that brings !!
Dave
I too remove my covers to clean out the bowls and as the captive nuts are made out of some form of recycled Lambretta material of cr*p soft alloy, (Mazac ?), the first thing you will find is that these imperial threads strip out quite easily. I bought a strip of mild steel bar of the correct width and tapped these out M5 thread along it's length and cut a whole series of replacement captive nuts and painted them. By carefully bending down the mounting tang of each of the 6 captive nut holders, I mounted these on top of closed foam, (not open foam which holds moisture), pads, (which also have a drilled clearance hole to permit the screw to pass through), which hold the captive nuts in place flush to the bodywork, so they cannot roll over. I now use countersunk M5 stainless steel screws to hold the rim in place and these are fitted in a specific sequence, just loosely at first after aligning the hole with a pointed bradawl. once all loosely fitted thye can be tightened down. This is one of those jobs which sometimes works first time or takes ages, only to find the final screw dislodges a minor crumb of paint which sits annoyingly in the freshly painted bowl, requiring the process to be started all over again!!
The best answer to these sort of jobs is after 10 minutes with no joy - walk away and have a cup of tea and on returning, the job gets done easily. I take great delight at the occasional show I attend for the anoraks to point out the "correct" screws should be crosshead, but I have flat head screws fitted. My usual reply is either not repeatable or just to ask them how often they remove their screws, (often to find they don't have an E type !!) and point out it's my car and I'll do what I like with it !! For the purists amongst you, fear not the original Mazac captive nuts and the original screws are safely bagged up if ever someone wishes to return the car to original - with all the consequential isssues that brings !!
Dave
| Link: | |
| BBcode: | |
| HTML: | |
| Hide post links |
#9 Re: Headlamp Rims
I believe the early 3.8 cars had flat head screws and were changed to pozidrive later. So either are correct depending on the year of manufacture or the vagaries of Jaguar production, service departments and spares availability any time in the car's past. If you really want to annoy the anoraks (and Philip Porter) you can point out 9600 HP originally had flat head screws attaching the surrounds but during restoration they replaced them with pozidrives - tut, tut44DHR wrote:I take great delight at the occasional show I attend for the anoraks to point out the "correct" screws should be crosshead, but I have flat head screws fitted. My usual reply is either not repeatable or just to ask them how often they remove their screws, (often to find they don't have an E type !!) and point out it's my car and I'll do what I like with it !! F
Dave
David Jones
S1 OTS OSB
1997 Porsche 911 Guards Red
2024 Lexus LBX
Add your E-Type to our World Map: http://forum.etypeuk.com/viewtopic.php?f=1&t=1810
S1 OTS OSB
1997 Porsche 911 Guards Red
2024 Lexus LBX
Add your E-Type to our World Map: http://forum.etypeuk.com/viewtopic.php?f=1&t=1810
| Link: | |
| BBcode: | |
| HTML: | |
| Hide post links |
#10 Headlight rims
David, you are indeed correct. Just to close my thread, my car is a very late 1967 4.2 FHC and therefore I believe would have had the cross head screws fitted, hence the anorak's comments on my particular car with my flat head screws !!
regards,
Dave
regards,
Dave
| Link: | |
| BBcode: | |
| HTML: | |
| Hide post links |
-
p1vickers
Topic author
#11
Guys
Thanks for all your collective help with this, if only I knew about it before painting the car things could have been so much easier. I have spent five hours today and I am no farther forward as it seems I have a new SNG n/s wing and the rest of the bonnet manufactured by someone else, so its not even the same from side to side. There are a lot of good suggestions here so I will have another go tomorrow.
Thanks again
Regards
Pete
1967 2+2
Thanks for all your collective help with this, if only I knew about it before painting the car things could have been so much easier. I have spent five hours today and I am no farther forward as it seems I have a new SNG n/s wing and the rest of the bonnet manufactured by someone else, so its not even the same from side to side. There are a lot of good suggestions here so I will have another go tomorrow.
Thanks again
Regards
Pete
1967 2+2
| Link: | |
| BBcode: | |
| HTML: | |
| Hide post links |

#12
Those of us with series 1.5 and 2s have a reason to rejoice I guess?
* Unless of course you back date your car to covered headlights :D
* Unless of course you back date your car to covered headlights :D
| Link: | |
| BBcode: | |
| HTML: | |
| Hide post links |
#13
I bought some longer screws just to line eveything up and then removed them one at a time and replaced them with the correct shorter screw. As you say it's a begger of a jb, but after taking them off at a regular basic to clean the bowls I am getting get quite good at it. As has been stated their is alway a piece of rubber or paint just waiting to drop into the bowl just as you get it fitted. At that stage I pretend if did not happen.
Tony (E typed)
1962 E Type Series 1 Roadster (OTS)
Tony
1962 E Type Series 1 Roadster (OTS)
Tony
| Link: | |
| BBcode: | |
| HTML: | |
| Hide post links |